Not every guy is in a relationship with a woman, but between sweethearts, siblings, parents, and friends and family, almost all of us will be buying something for the women in our lives this holiday. They're special, in a million different ways; here's a solid set of gift ideas that will let them know you care.
Exceptional gifts will leave an impression, but be sure to make it special with a thoughtful note to really make it stand out. I always like to use parchment paper and Seal with a little wax ($20) for a truly unique gift.
I've always been a big fan of the leather roll for personal tools, so it wasn't a big leap to for me to fall in love with this DIY Leather Roll Wallet from Shauna Wightman. It's got room for all your cards and cash, plus it's meant to be able to hold your phone as well.
That phone part might not be a big deal to some of you guys, but I'm a fan of it simply because that sort of case keeps you from incessantly checking your phone. Or at least it's worked that way for me. I currently keep my phone in a Lifeproof case to keep dust from the woodshop out, but before that I used a simple leather sleeve that completely covered the phone and added an extra layer between me and the phone screen. That way I only checked my phone if I really needed to. So I highly recommend it. And this leather roll is sweet.
This post was sponsored by KILZ, a brand that believes in makers and dream-shop builders everywhere. Thanks for supporting the brands that support ManMade.
A few years ago, if you'd asked me which tool I thought was the most important, I'd probably have punted, wavered a bit, and never chose a single item. There are too many cool tools, and too many essential ones I use on every project. But if you'd asked me the same question last month, my answer would have been decidedly clear, and much more informed by a different kind of personal experience:
The most important tool for any project is a place to work on it. And I don't have one.
All of my adult life, I'd lived in rented spaces, most with basements and garages, and I made do with whatever more-or-less temporary solution was available to me. And then, last winter, we bought our first house. And while it had a great space in the basement that we'd earmarked for an eventual workshop, in practice, it had just became a storage room. Sure, my tools were in there, but so were dozens of other boxes of junk and holiday decorations and everything else that didn't really have a home. Of course, a shop was high of my list of priorities, but practically, the project required some serious work. Creating my work space required tearing down walls, some advanced electrical work, a bit of plumbing, and a whole lot of hours. Other spaces in the house had received the first round of attention, so the shop continued to gather piles.
So when our friends at KILZ reached out and said, "We'd love to work with you on a whole room makeover project..." I had just the place in mind. Finally, I had a reason, and a little motivation, to step it up, do the research, bust out the sledgehammer, and build myself a workshop that was built to last.
Why KILZ?
KILZ Drywall PVA Primer/Sealer is an ideal product for priming and sealing new, uncoated drywall like mine, so you can get a uniform, professional-quality finish every time.
It's formulated with strong inter-coat adhesion, meaning your paint will adhere easily to the primer while achieving great coverage.
Unlike similar products on the market, KILZ Drywall PVA Primer/Sealer offers low VOC levels and a low-odor application.
One gallon of KILZ Drywall PVA Primer/Sealer can cover a large space –approximately 300 to 400 square feet – depending on the porosity of your surface.
We're giving away 5 gallons of the KILZ product of your choice to two lucky winners. Scroll down to learn how to enter. Giveaway ends 12/16/16, 11:59 p.m., central time.
Read the full makeover below, and check out the video to see the full transformation:
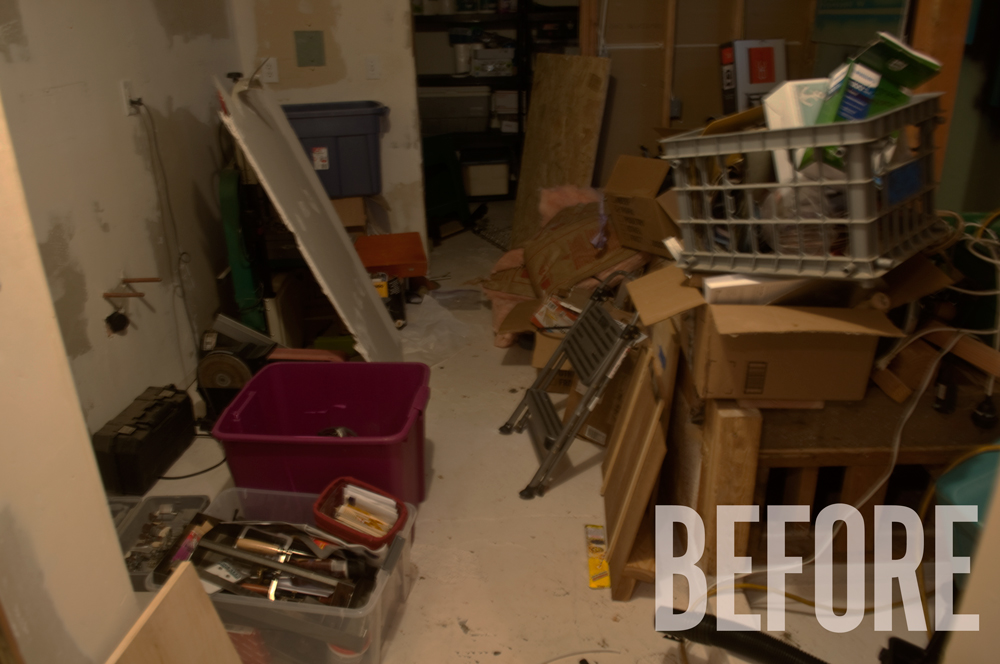
This is how the rooms looked the day we closed on the house. Dark and basement-y.
The Before
When we bought the house, the basement had been partially finished ... that is, they started finishing it, but only got partway through. It's not clear why the work stopped, but all evidence indicates the project was started more than ten years ago, and had sat in the same state since 2006.
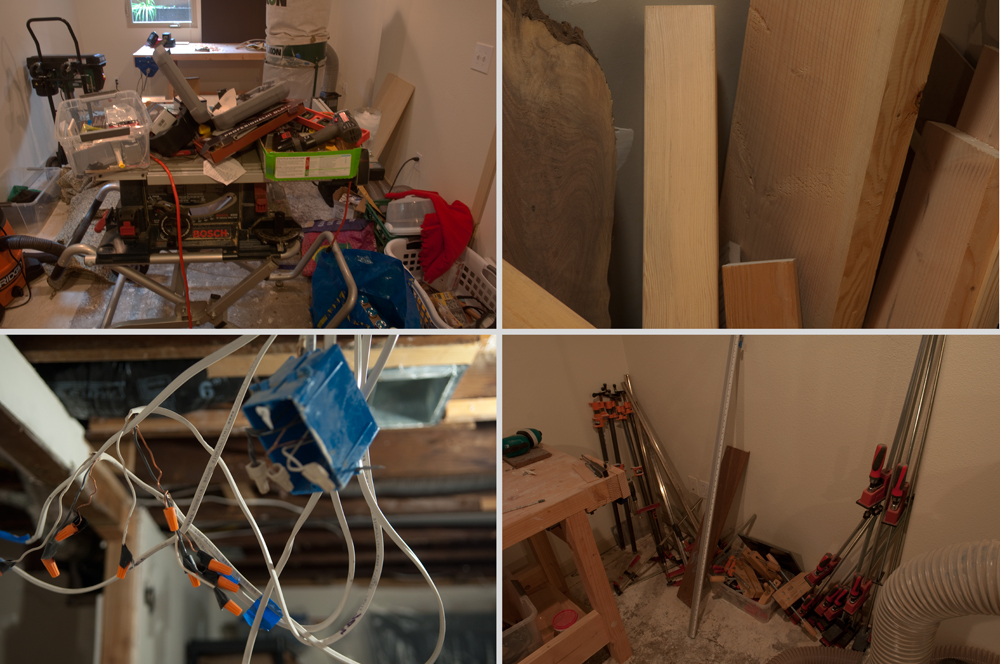
This is how things looked three weeks ago. Namely, chaos.
Naturally, it didn't make sense to "unfinish" the completed side of the basement to build a shop, so the semi-unfinished side was a natural fit. It was right next to the exterior door, allowing easy access to the materials outside. It also had large double doors for moving machinery and projects in and out of the space, and the plumbing was already in place for a shop sink. The open-stud structure allowed for access to do the electrical work needed, and while not huge - around 250 sq ft - it was nice and long, allowing for good infeed and outfeed access for milling lumber.
What the space lacked was light. I attempted to do some light ManMade projects down there in the summer and fall, and simply could NOT get the light I needed to take step-by-steps photos without serious blur. Oh... and half the space had no walls, and the entire thing was missing a ceiling.
The Demo
I removed the carpet in the "bedroom" months ago, so the project began in earnest with taking down a wall in between the intended bathroom and bedroom space. I'm lucky enough to know a structural engineer, so I was able to quickly check in with him and determine that the wall was not load-bearing. One evening and three podcasts later, the wall and accompanying pocket door were gone, and it was time to move on to the bathroom.
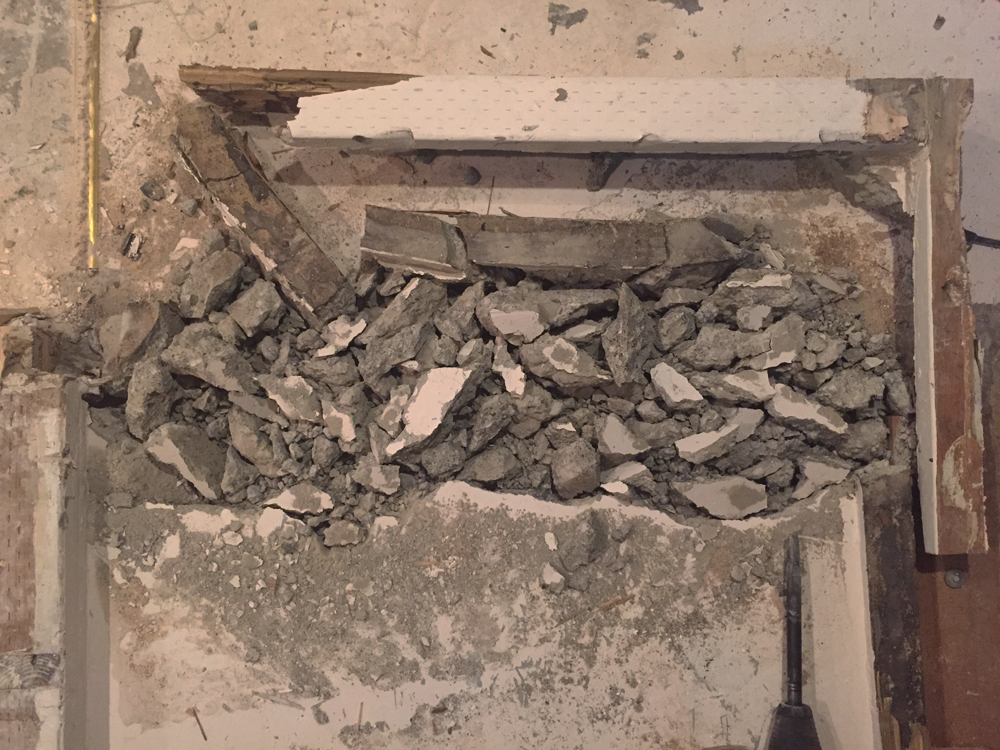
I banged down the shower support and seat, as well as the tub surround. There was so much complicated framing and fiddling that this part - though much physically smaller than the rest of the demo, ended up taking me three times (and twice as many reciprocating saw blades) as long as the rest of the work combined.
Once all the wood was gone, I rented a small jackhammer from a local supplier and busted up the concrete shower basin. This was my first time using one of these, and I gotta admit - it's really satisfying work. After consulting a plumber, I capped off the plumbing and vent stack, and it was time to move on to the electric work.
Powering the Workshop
For five years, I worked out of a basement space with one outlet. One. Every tool and light was connected to a maze of multi-outlet strips and a braid of carefully snaked extension cords. So I knew I needed two key things in my "forever" workshop: lots and lots of outlets, and loads of light.
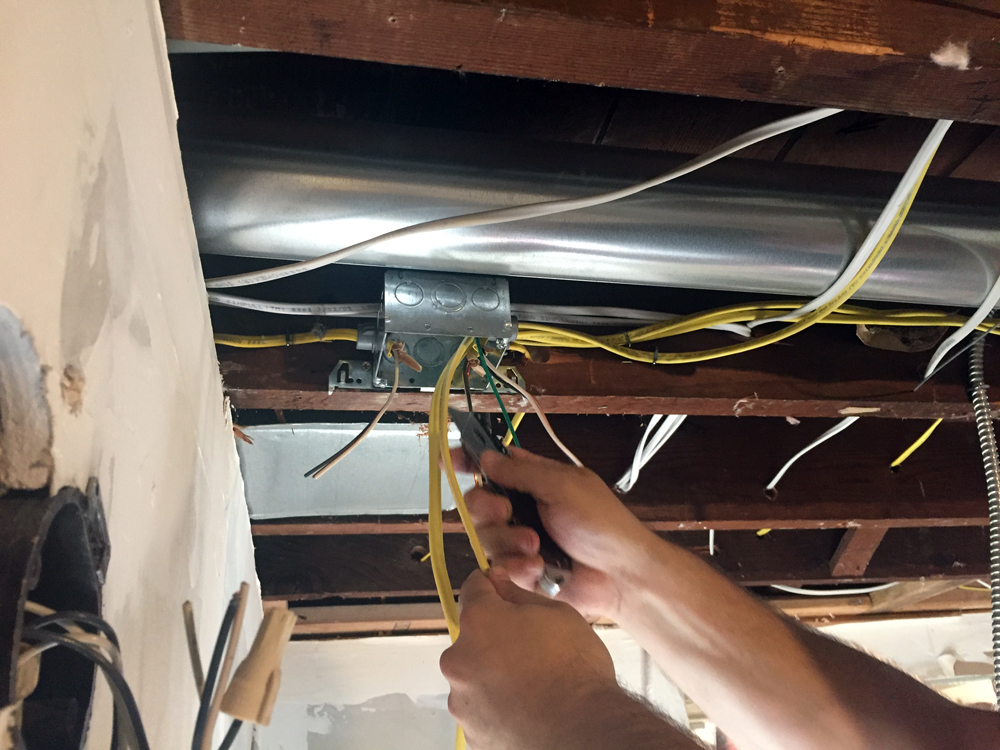
While I'm comfortable with basic home wiring tasks, I decided it was worth hiring an electrician for this project. It required some work at the breaker panel, as well as some creativity with accessing every circuit - and therefore the maximum number of amps - available to the space. The space needed some 220-volt circuits, as well as some creative wiring to make the commercial-style LED lights dimmable. Hiring it out also made the work quicker than I could have done it myself. Pros are used to this kind of creative problem-solving, and can simply identify a solution and move on, whereas I had been scratching my head and Googling solutions for weeks on end.
I was able to save lots of money by doing a full plan of what I wanted and marking the locations for fixtures with painter's tape, identifying all of my needs and writing down the amp requirement of every tool. I worked with an electrician - Cory - who allowed me to help with lots of the tasks alongside him (not the electrical stuff, obviously).
So, I would drill out the joists and help snake wire and create channels while he focused on the important stuff. We were able to get the wiring done in a day, and then one more half day after the drywall went up to finish everything. He let me watch him work and ask questions, so I was able to learn a ton.
I also saved money by purchasing the fixtures myself, and doing the research to get exactly what I needed. I decided to invest in LED shop lights. They're more expensive than fluorescent lights, initially, but last for 60,000 hours (something like 35-years), and cost about $2.00 a year to operate. Plus, they're dimmable, and I put them on three different switches, allowing me to sculpt exactly the kind of light I need.
Making It Feel Like an Actual Room
Okay, here's where the good stuff begins. As much as I like exploring in actual caves, I don't want to do woodworking in one. All the high-quality lighting in the world can't make a hundred-year-old basement feel like anything but, so it was time to add some walls and a ceiling.
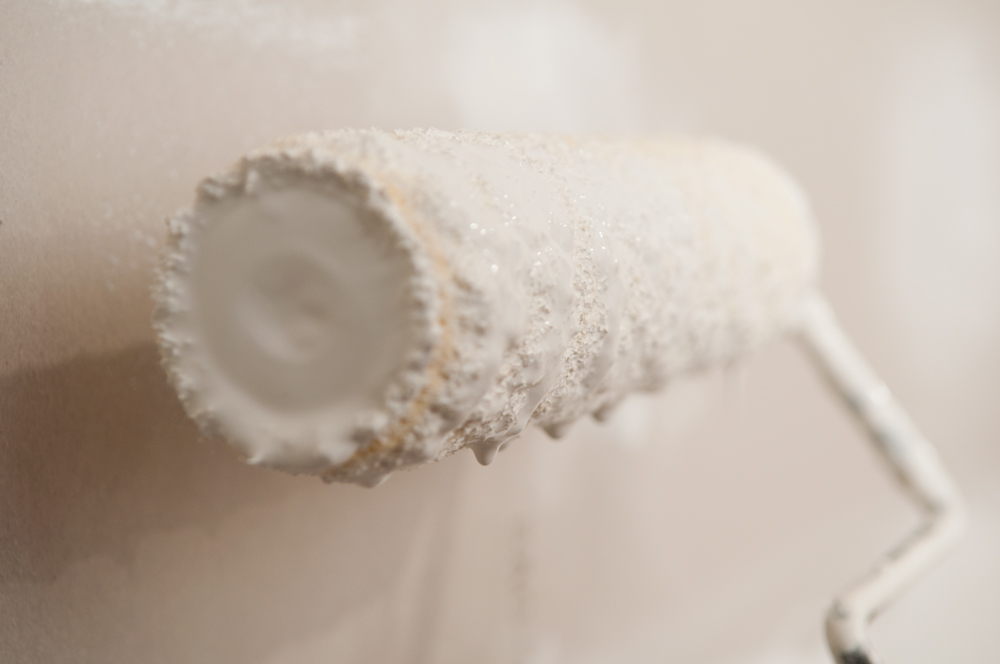
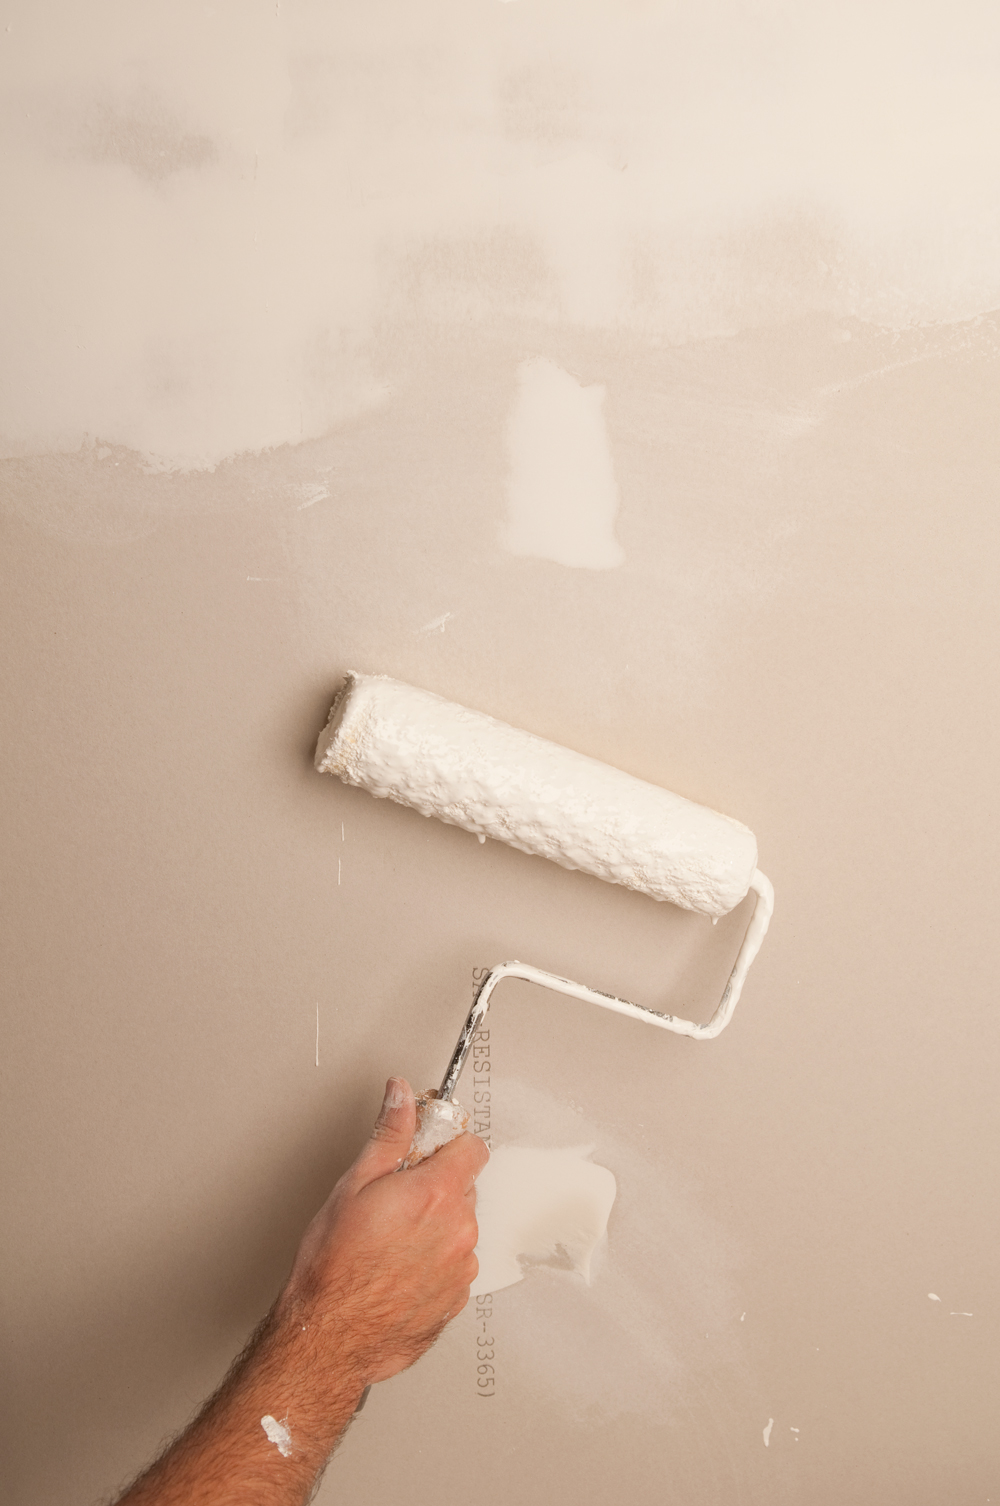
Putting drywall in place, priming it, and painting it with a nice reflective white is just as important as light fixture specifications when it comes to creating a well-lit workplace. Plus, now that it's finished, it feels nothing like being underground. I never think "oh, I'm in a basement". I just feel like I'm in a warm, well lit room that happens to be under my kitchen.
Thankfully, the majority of the framing and studwork had already been done, so once the drywall went up and was mudded, it was time to make bright, white, and pristine. This is where working with KILZ really came in handy. Priming the drywall before painting is an essential step for a variety of reasons:
When working with new drywall, primer helps seal the new surface, reducing the number of coats of paint required to achieve a high-quality look.
Primer provides a mildew-resistant finish, essential for a basement project like this.
KILZ primer helps block and seal odors. Basements are full of musty smells, and they can penetrate even the thickest paint job. The odor-sealing properties of KILZ help provide a barrier so odor molecules can't penetrate the new paint.
See? No brainer. Saves time, saves money, protects your walls, and produces the best surface possible. Thanks, primer!
After the primer coat went on (only one necessary), I added two coats of BEHR Sleek White OR-W15 paint to the walls and ceiling in a satin sheen to best reflect light.
Anything is Better Than Concrete
While I can definitely feel the effects of standing on hard concrete all day, at this age, I can still handle it. But I'm building a workspace for the next 30+ years, and I know as my body ages, that concrete floor is going to get more and more uncomfortable.
So, I bit the bullet and installed a real floor instead of just painting and sealing the poured concrete slab. Practically, this not only protects my joints, but my tools as well. I don't have to worry as much about a chisel rolling off my bench and slamming into concrete, ruining the cutting edge.
Of course, basement flooring is tricky. A concrete basement slab is porous, and water and moisture coming up through the slab. This might not hurt the flooring itself, but you need to make sure you're not creating a space that allows mold and mildew to grow underneath.
You can install plywood, but that requires laying down pressure-treated 2x4 "sleepers" to separate the plywood from the slab, and you lose another 2 1/2 inches of ceiling height. That might not sound like a lot in a living room, but when you're working with long lumber in a basement with low ceilings, every inch is critical.
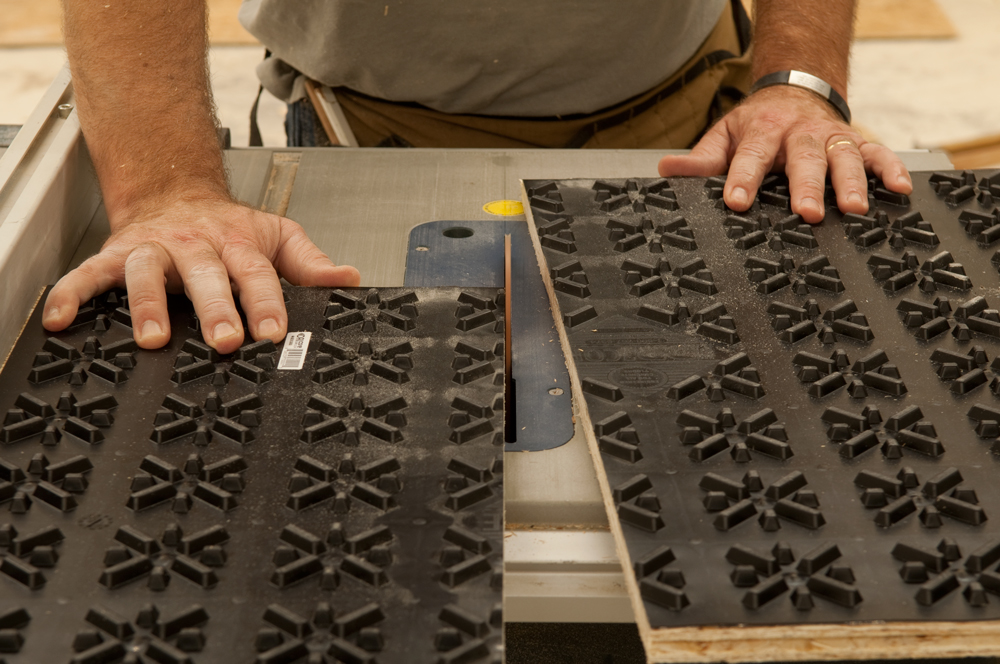
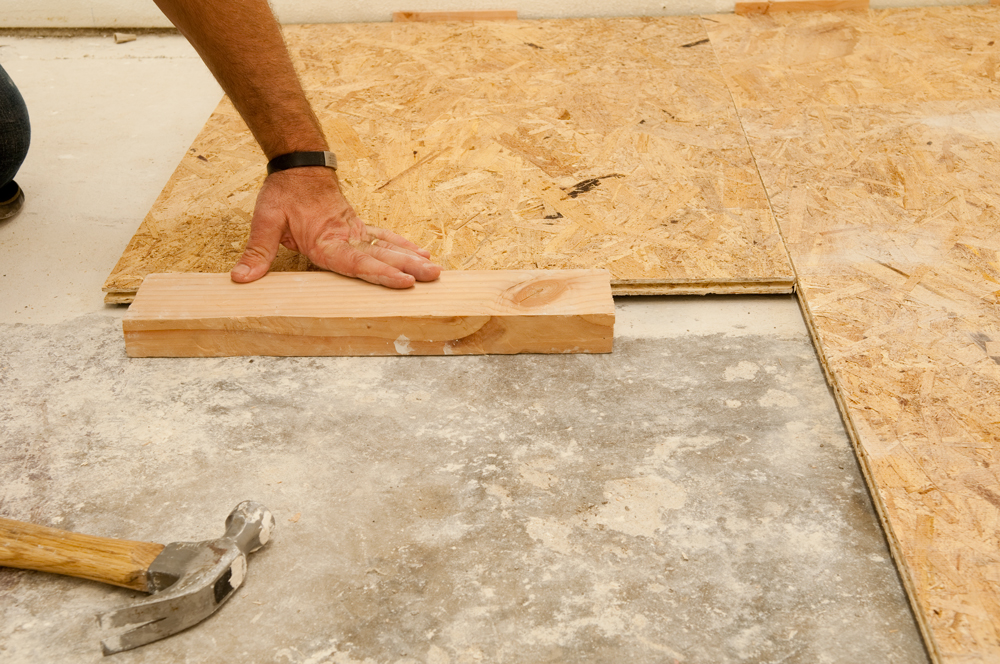
Luckily, I found the perfect product for me - Dricore flooring tiles. They're made for purposes exactly like these, and create a floating subfloor with only 7/8" of added height. They're intended to have carpet or laminate flooring installed on top, but the exposed OSB-style surface is just fine for a workshop. I asked a friend to help me install the floor, and it came together quickly in an afternoon with the tongue-and-groove joinery and no glue required. The hardest part was getting them home from the home improvement store without a truck. (It took two trips).
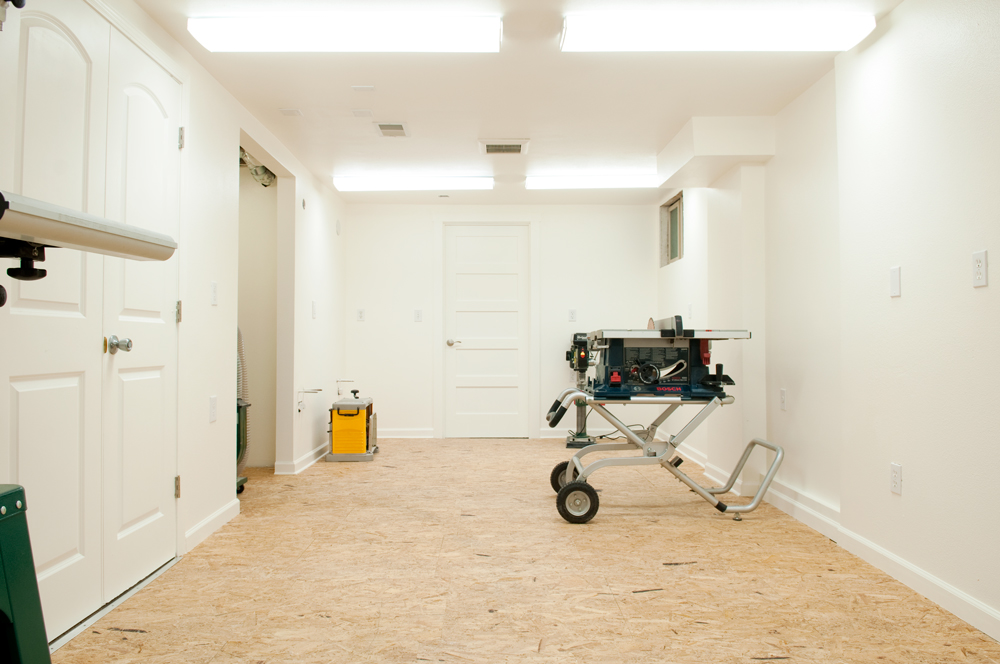
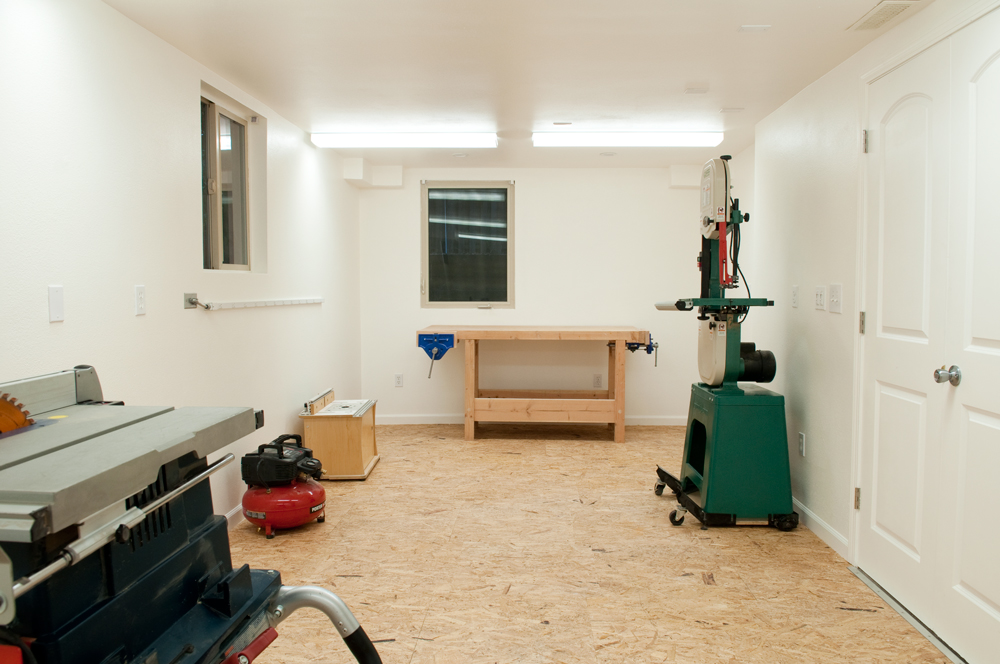
Finish Him It!
With the floor completed, it was time to finish off the space. I added some baseboard molding, installed and trimmed out a new door to protect the adjacent utility closet from saw dust, and completed that list of little tasks that bring a room together: new hinges, light switches, outlet covers, and the like. Once everything was sanded and dry, I brought in the tools.
Now - clearly, there's still a lot of work to do. I need to finish that high window, install a utility sink, close off the plumbing that had been installed for the double sinks, put in some flooring transitions, etc. And most importantly, I need to actually set this place up for woodworking.
First on my list: building stands and work tables to get the tools off the floor, making racks for clamps and shelves and drawers for hand tools, and figuring out a lumber storage solution. That'll take me a few more months to dial in, but the important work is done. I now have a place to work on those things - a bright, well-lit, clean place with walls and doors and a floor. No more excuses, Chris. Time to build your dream shop.
The Giveaway!
Two lucky ManMakers will win 5 gallons of the KILZ product of their choice! Entering is super easy! Just leave a comment on this post telling us about your dream project (or if that's too much work, just say "I want to win!).
Remember, adages and abstract pieces of advice only get you so far. While when designing projects, I try to make the mistakes so that readers don't have to, but nothing is really handmade without some trial and error, repeated steps, and a curse word or two.
Making things is really all about experimentation. And messes.
Follow us on Instagram for more behind-the-scenes glimpses at ManMade and the creative process...and, you know, whatever else I'm up to.
Instructables.com user IDEAforWOOD really earns his title with this unique stainless steel plum wood knife. Plum heartwood is known for its cornucopia of beautiful internal colors and IDEAforWOOD found a way to highlight them all just right by extending the wood grain to cover the majority of the blade in a truly elegant way. Take a look.
This holiday season, I wanted to give my friends and family a customized gift with some personality. So, using nothing but our own photos and a few crafty tools, I came up with this coaster project which is super fun, super inexpensive, plenty easy, and you can dial it in perfectly for each person on your list - just raid their Instagram or social media accounts!
Let's get to it!
DIY Instagram Coasters
Materials:
Wood squares (you can buy them already cut at any craft store or you can cut your own). For this project, I used 4.5" squares.
Your favorite Instagram photos, mirrored and printed with a laser printer. If you need some tips on how to prepare your images, check out this other tutorial by Chris. NOTE: For this project I took my photos directly from instagram using the ink361 site, I basically opened the image Photoshop, adjusted the size, and flipped it (mirrored) to print it.
Mod Podge
Sponge, brushes, and a few rags
Make it:
1. Start by cutting the photos so they fit the squares. Remember, if you need to adjust the size, simply use a photo editing tool. If the image stretches too much, then use the original file from your phone.
2. Apply a thin layer of Mod Podge to the front of the image (printed part) and quickly glue it to the wood square (face down). Try NOT to drag the image or you will tear the paper, rather, just make sure it fits all 4 corners and press down on it from top to bottom. Get rid of any bubbles using a credit card (be gentle!).
3. Let it dry completely. It'll take an hour or so. Then, grab a rag and soak it with water, squeeze it a little, and place it on top of the glued image. Let the image soak a bit of water and then, GENTLY start rubbing away the top layer. Use the rag to make the paper wet, and use your FINGERS to rub away the paper. Don't use your nails!
4. Ta-da! Your photo will start showing. But wait, we're not done yet. You have to keep rubbing away until all the paper is gone, try to get as much of it as possible without destroying the photo (which is a bit tricky! So be patient).
You will - inevitably - rub off some part of the image, but that's ok, it adds to the whole vintage look.
6. Once you're done, let it dry again. After it's dry apply one last coast of Mod Podge over the final image (to seal it in) and let it dry. At this point you can either add some cork on the bottom to prevent scrapes and keep things from sliding around, or you can just leave it as is.
Oh! And here's another idea, you don't necessarily have to use them as coasters, you can also use them as little wall art!
Either way, this project is a super fun way to keep those awesome memories of 2013 alive.
PS. It also makes an awesome office gift!... You're welcome.
I recently read an exceptional book by John Muir, father of our modern wanderlust and grand adventurer in a time where the great outdoors was truly an untamed place. His descriptions of a first look at the Sierras, of the sprawling views of Yosemite, and the way the woods filled his soul like nothing else could. While the wild is a bit more domesticated now with established trails, cell coverage, and guidebooks, it still holds in an important key to the overall sanity of humankind.
There's something incredible about the wide open spaces, the wind through the trees, and the feeling of the first few steps on a trail into the wild. I always find myself a bit more relaxed and a lot more alive by the time I step back into civilization. Why is that? How can a few hours or days surrounded by tall trees bring me back to center? I think you'll have to find that out for yourself, but here are a few of my favorite things about a solid chunk of time in the woods:
I find something new every time. I grew up in the woods, a small town in Northern California surrounded by trees, mountains, and plenty of lakes. I spent afternoons, weekends, and plenty of nights exploring the trails and creeks but after years I still found something new every time. You can always expect it to surprise you, I've looked out on an amazing view of the coastal valley a hundred times and I always walk away with something different stashed away in the memory banks.
It's all alive. I know it sounds a bit simple, but everything out there is alive. The trees, grass, water, even the rocks are growing, shifting, moving. The air is crisp because the trees are making it right there, the water is frigid because it was snow a few days (sometimes hours) ago. That constant growth and movement makes me feel small, and helps to put life back into perspective.
The noises are different. There is a simple rhythm of the woods. The flowing water, wind in the trees, birds; even the silence just seems to fit together out there. Getting away from the constant drum of daily life turns out to be an incredible way to get your own rhythm back on track.
Adventure happens out there. No matter how much you plan, the woods tend to make things interesting. Maybe it's weather, a longer hike than anticipated, forgetting a key piece of gear, or just a bit of bad luck; no matter what there's always a challenge to overcome and an adventure to be had.
It's a good kind of exhausted. I almost always stumble back to life from the woods with a bit of a wilderness hangover. My body is so beyond tired but my mind is alive. That's when I know it was a good trip.
With that in mind, I fully encourage you to take some time to get away for your own adventure in the woods. It's out there and open for you to explore, so start with a few mile hike and work your way up to gaining that summit-top view, you'll come back revived, and ready to take on the world.
Ever thought about how a decade changes everything? A lot has changed, and I'm looking back at how that has made a huge difference in how I define success.
I turned 34 yesterday. Like many 30-something birthdays it came and went with a bit of well-wishing and then was quietly another day. Not to say I didn't enjoy it but it was a different enjoyment, a mature moment where I did what I wanted with the time and then settled back into the thrum of daily life. Of course, I use this yearly event to take a breath and look at how far I've come, and how a bit of life under my belt has changed everything.
I still vividly remember the feeling in my chest. I was a young adult, taking the first grueling steps along the path to something more and I just wanted to hurry up and get "there" to arrive at success, at that moment when I realized what I was here to do with these talents and dreams buried in my chest. I felt like it would be a moment of clarity, when all of the soft, fuzzy edges of life came into focus and the puzzle pieces snapped together. Then, came the crush of real life. It was overwhelming to balance passions, hobbies, and a budding career while getting married and collecting the trappings of life. I began to feel trapped between my dreams and my reality, and the real world felt like it pulled me further away from that hazy goal of "success". At the time, I was like most excitable kids, fully unaware of the work it takes to become something worth being and I wanted it now. I worked hard and spent a lot of my time becoming something I thought I wanted.
At the time, here was my goal list (summarized):
Make money (passive income like rentals, investments, sophisticated investment vehicles)
Buy stuff (big house, new cars, boat, vacation house, computers, tvs, status stuff)
Work less than 20 hours per week
Travel the world
It was actually extremely detailed, very well thought out, and completely clueless. Looking at it now, I can see the optimism, the hope in what was going to happen in the next decade. I was going to be that smiling success on the cover of a magazine and people were going to know me. To my credit, I did work hard, and I accomplished many things on that list.
But my life became a blur. Seriously, I don't know what happened to my 25 through 29 year old self, it all just blends into a big mess of long nights and longer days.
In many ways, that hustle made me who I am and I don't regret it; taking the time to buckle down and make something of yourself is exactly what your 20's are for. I just wish I had taken a bit more time in aiming that barrel before firing off at the goals.
When I turned 30, I realized something important. Stuff won't make you happy, and status won't fulfill your soul. I'm not against nice things, but I am fully against an abundance of things for the wrong reasons. I heard once that you should pick up each of your belongings and ask yourself "does this make me feel happy, does this provide value to my life?" I should have done that with my 20 something list of goals, and I think I would have rewritten the list to something more meaningful. Today, here is my list:
Two sources of income (a few rentals within the next 10 years), and enough to save for tomorrow while living today.
Pay off my stuff (Average nice house, average nice car, quality stuff that lasts).
Work somewhere with flexibility, doing something that challenges me, and where I provide value.
Spend time with my family and explore the world, grow as a human and never stop learning.
Honestly, the list has changed in a way that excites me. It is honed, stripped down, and tapered to acknowledge that life is meant to be lived, not conquered. I want to look back in a decade and have the satisfaction that I lived it well, creating memories and stories that I can be proud of.
The best part of investing in quality leather goods is how well they age. But how your leather ages really depends on how well you treat it. Treat them poorly and they’ll fall apart, but if you’re sure to take care of them and give them a quick clean up about every 6 months, not only will they age beautifully, they’ll also last you a life time.
But before we jump in and talk about the right way to care for your leather goods, it’s important to know a few basic things about leather.
How Leather Is Made - Cliff Notes Style:
This is a condensed version. If you'd like to know more about the types of leather and what to look for, visit my blog: Gold Bark Leather
Leather is made from animal hide, in most cases cow hide, and is an organic material. This means that it’s subject to change based on it’s environment. To prevent change, or in this case decay, the animal hide goes through a complex process and comes out the other side as leather. While each tannery has their own specific process, these processes can be summed up by two categories: Chrome Tanned and Vegetable Tanned. Chrome tanned leather is created with chemicals, while vegetable tanned leather is created with tannins and other plant stuffs, like tree bark.
It’s super important that you know how your leather item has been tanned, because it will dictate what kinds of products you use to maintain your leather. Telling the difference between the two can be a little tricky, but here’s a short list that will help you differentiate.
Chrome Tanned vs. Veg Tanned
Feel. Chrome tanned is thin and stretchy, while veg tanned tends to be more sturdy and less spongy feeling. This isn't a foolproof way because Chrome Tanned Leather products are usually backed by something to make it less thin and less stretchy, which can make it hard to tell.
Price. Chrome tanned leather is much less expensive than vegetable tanned leather. This is because it takes a lot less time to make. If you bought an inexpensive leather item, it may be chrome tanned leather.
Color and Grain. This is the easiest way to tell what kind of leather your item is. Chrome tanned leather has a consistent color throughout. Vegetable Tanned Leather on the other hand, shows the grain of the animal and generally has a depth of color.
Aging. Ideally, you would know how the leather was tanned before you got to this point, but if you’ve had a leather item for awhile and aren’t sure, this is a good way to tell. Vegetable tanned leather is a more organic material than chrome tanned leather, so they age differently. As vegetable tanned leather ages it will get dark and form a patina, get looser, and form to the shape of what it’s around, i.e. your foot if it’s a shoe. Chrome tanned does this too, to some extent, but only slightly.
How to keep your leather goods looking sharp:
If you have veg tanned leather, maintaining your leather items is all about replenishing the waxes and oils that were put into the leather originally. The oils keep the leather soft and prevent it from cracking while the wax keeps the leather water resistant and helps hold the oils in. Chrome tanned leather is a bit different. Oils will actually clog the pores, so you’ll only want to apply wax or some sort of spray that will waterproof it.
If you really want to be on top of keeping your leather goods at peak performance, I suggest reapplying these things once every six months. However, you can also do this whenever you feel like they are getting a bit dirty and losing there luster.
What You Need:
A Soft Bristle Brush. Try to avoid anything that will damage the surface of the leather (hard bristles) or anything that will rub the dirt into the leather (cloth). Also don't let your dog eat the brush... like I did.
Oils and Wax. You can get these products separately, or you can buy them combined. I use Obenauf’s Leather Oil, which contains beeswax. If you have veg tanned leather, this is the kind of stuff you want to use, because it’s natural. Again, if you have Chrome Tanned Leather, do not get something with oils in it, just something that will protect the surface. Shoe wax works well for chrome tanned leather.
An old t-shirt. Any cloth will work for this, but I try to avoid cloth with large fibers (like a towel) that will leave streaks in the drying wax.
Applying Oils and Wax
Step 1: Before applying the oils and wax, you need to make sure the that your leather is clean. All that requires is briskly brushing the dirt off with your soft bristle brush. If you are having trouble with a particular area that may have some dirt worked into the leather, you can lightly wet the area and then brush it clean. Make sure you do not soak the area when you are doing this though.
Step 2: Once your leather is clean and (if you used a bit of water to clean a certain area) dry, it’s time to apply the oils and waxes. If you just have an oil, you’ll apply it the same way I’m about to apply Obenauf’s. If you are using oil and wax, just make sure to apply the oil first, then the wax. Apply a generous amount of whatever you are using to your leather. As you apply it work it in slowly to the leather with your cloth, or dauber if provided, in a circular motion.
Step 3: When the entire item has been covered and you can see parts of the wax start to dry, run the cloth over the leather briskly until the wax starts to shine, making sure not to generate too much heat as you do this because it will actually darken the leather, which is another reason not to use a cloth with large fibers.
And just like that whatever leather item you just cleaned up is ready to go for the next six months… especially if you follow these leather storage tips!
Preventing your Leather Goods from Getting Damaged
Avoid water like the plague
Ok, so if you’re on your way home from work and you get a little rain on your leather as you walk to the car, that’s no big deal. But when leather get’s soaked, bad things happen. First, if your item uses glues in certain areas instead of stitching the glue will start to loosen. Second, when leather dries after being soaked, it holds whatever shape it is in. This makes it very easily to permanently stretch it out. Finally, all that water flushes the oils out (again, this only applies to Veg Tanned Leather) and when there aren’t many oils in the leather, the surface layer will crack. This too is irreversible damage. Using heat to dry out wet leather will also cause it to get too dry and crack, so let your leather items dry out naturally.
Avoid the sun like you would avoid something you mildly dislike, like Chihuahuas.
This applies to storage, not use and isn’t as big of a deal as the previous tip. Leather, and especially if its veg tanned, gets darker the longer it’s exposed to the sun. This is actually something I love about veg tanned leather and am glad to see it happen. The bigger issue is the leather getting to hot if left in the sun long and drying out.
Recap
I’m hoping all this information has got you thinking ‘these leather shoes are going to look mighty fine in a few months’ instead of being overwhelmed and thinking ‘crap, these shoes are doomed.’ Even though I spent a while explaining how to care for your leather the actual process/rules isn’t long.
Spend 5 minutes every 6 months cleaning and reapplying oils/waxes
Avoid excessive amount of water
Store in a dark area
Follow those three rules and you’re guaranteed to have some dang good looking leather items.
I've recently been doing a bunch of woodworking and lamp-making for Luke Hobbs Design here in Los Angeles, so it wasn't long before I found myself looking at what else is out there in the DIY lighting universe. Instructables user darbinovar didn't seem to have too much of a plan when she started in on this industrial-looking copper and leather lamp, but the final result really is beautiful.
I'm not sure I'm sold on the feasibility of the leather lampshade although I guess I'd have to see it more in person. In the meantime it looks fantastic and would be a perfect addition to most desks or bedrooms.
It's well known that what you focus on grows. That's why it's so important to keep the things that inspire us most close at hand. I have a few favorite words that I scatter throughout my office, journals, and walls, but this centralized space is perfect to keep that daily inspiration right where you need it.
I started with some black walnut for this project, small pieces of scrap that I was able to cut down to size. You can use anything in the scrap bin as the parts are pretty small. I also decided to try out CA glue (super glue) to keep the curing time down and minimize the use of clamps on such small pieces. This project was fully completed on the table saw, with a bit of finish work with a sander. A bandsaw or jigsaw would also work great.
Here are the steps I took to make it:
1. Cut The Pieces To Shape - The main square is simple to cut, with the triangle portions being cut at 45 degrees and a bit more complicated. Use a miter gauge to keep the wood supported properly.
2. Glue Up The Pieces - I used thin CA glue (super glue) to attach the pieces together. I have been wanting to try it on a small piece to see longevity and durability, and this was a perfect project for it. The glue held fast and secure enough to work within only a few minutes.
3. Sand and Finish - I sanded the rough joints smooth, then worked through from 120 grit to 400, cleaning with denatured alcohol between grits. Sanding and finish work will depend on the wood and desired finish. I finished it off with mineral oil and a coat of wax to bring out the amazing grain pattern on the walnut.
4. Quotes - I printed out 3x5 card sized papers with a collection of my favorite quotes, they're here if you're interested. But handwritten or printed cards are a perfect size to switch out if you need to switch up the inspiration.
Once I built this, I noticed how well it worked as a cell phone or tablet stand as well, so I might be building a few more of this simple design with a few more pieces of my scrap project wood, putting a simple wire port along the bottom edge to accommodate a charging cable.
This post was sponsored byKILZ, a brand that believes in makers and dream-shop builders everywhere. Thanks for supporting the brands that support ManMade.
Last week I shared a project that I'm really excited about: my makeover of a dark, dingy basement space into a bright, professional workshop. A big part of making that project come together was using the right tools and materials for the job. So I'm equally exited to remind you that we have a great giveaway going on right now!
That's right, thanks to our project sponsor, KILZ, we're giving away five gallons of primer to a lucky ManMade reader. It's easy to enter, you just need to leave a comment on this post (no, not the one you're reading, the one I'm linking to in this link) telling us what you plan to do with your prize, or just saying "I want to win!".
Why is primer so important? Simple, it's the foundation for the rest of the wall finish. Whether it's new drywall, or just painting over an old color, having the right primer makes the rest of the job go more smoothly. It gives the new paint something solid to adhere to, seals porous surfaces, blocks odors, and resists mildew.
Why KILZ?
KILZ Drywall PVA Primer/Sealer is an ideal product for priming and sealing new, uncoated drywall like mine, so you can get a uniform, professional-quality finish every time.
It's formulated with strong inter-coat adhesion, meaning your paint will adhere easily to the primer while achieving great coverage.
Unlike similar products on the market, KILZ Drywall PVA Primer/Sealer offers low VOC levels and a low-odor application.
One gallon of KILZ Drywall PVA Primer/Sealer can cover a large space –approximately 300 to 400 square feet – depending on the porosity of your surface.
So what are you waiting for? Hurry over and get your entry in before December 16, 2016, for a chance to win.
Everyone loves pizza and brick oven pizza is about as good as it gets. The whole point of the brick oven is to bake pizzas between 800 and 1000 degrees giving you that crispy layer of thin char over an airy breaded crust. Much better than the paltry results you can get with a conventional oven that only runs about half that heat.
And look I get it, a brick oven in the backyard seems like commitment, but in reality you can build one and take it down in the same afternoon. Just ask Michael O'Malley of the Machine Project who shows you how it's done. You'll notice that it's mostly stacking firebricks in the right way.
If you hadn't noticed, I'm kinda into quotes as of late. (See my how-to for creating a wooden desktop inspiration holder) For some reason, this season, I'm touched by the power of keeping a few mantras in the front of my mind. It's been helpful as I meet new people, work to improve old relationships, and just get through the daily grind. Here are a few of my favorites this week.
What inspires you? Do you have any favorite quotes that have made an impression on your life?
The story goes like this: I'll wake up early...usually on a Saturday, or perhaps the Monday of a three day weekend. I'll pull on my work jeans — not the trashed, paint-splattered ones; just the wornout pair with the ever growing hole in the right knee I need to patch. I'll tie my workboots, and grab a few quick measurements before I head out the door. I always remember to put the tape measure in my pocket to take it with me. Today is project day.
And I'll get to the home improvement store, and I'll wander the aisles, and I'll realize: I have no idea what I'm doing. I need more information, more measurements, more details. So, I'll desperately look up something on my phone, but the reception in the back of this huge concrete box isn't good enough. Plus, all those content farms have tricked the search engines so that the quality of information that comes up is poor, and so generic that I struggle to trust it.
Plus, maybe I have the basic materials figured out, but what tools do I need? Do I have the right screws, or are all mine too short or have the wrong head type? And - for goodness sakes - do I need another pack of #2 Phillips driver bits? (Thankfully, that one is easy. Yes. The answer is always yes. )
So, when the team behind DIYZ got in touch with us, I was admittedly intrigued. It's an app for your smartphone that's loaded with all sorts of common household projects. You download on your phone (it's free!), and it features three essential components:
step-by-step instructions (many with video help)
a complete tool and material list for every project
the ability to contact a professional in the middle of the project in case you need some additional help
As someone who's worked in the DIY and how-to realm of the internet for nearly ten years now, I've become increasingly hesitant in trusting that I'll find quality, practical information via searching for it. I get hundreds of email pitches a day filled with information written by interns and novices that slapped together and copied from various sources, and are so broad that they're helpful to exactly no one. DIYZ isn't like that; it has legit instructional content with easy-to-follow videos, written by people who know what they're talking about, with the goal of helping you finish your project correctly.
The DIYZ app lives on your phone, and helps you get started with your project. The info is clear, easy to find, and saves you time and headaches, because the knowhow here is legit. If you need some new tools to tackle the process, they're laid out for you here, and if you want to buy them right from the app, you can.
I'm not a beginner DIYer, but I'm not a professional contractor either. I don't know how to do everything, but I'm willing to try anything before I pay for someone else to do it. I want to learn, and the best way to learn is by doing it. It's the best (and sometimes worse) part of being a homeowner.
So, I decided to put DIYZ to the test. I needed to install a door in my new workshop to close it off from a storage closet at the back corner of our basement. Up to this point, I've never attempted a door install. At all. I can install a door knob and take it off the hinges with the best of them, but, to honest, I had absolutely no idea even how a door is constructed. What's a jamb? What's a mullion? Is that a king stud or a jack stud? Where does the latch assembly go? And how do you cover up that gap between the walls and the door? I am, admittedly, a door novice.
Here's the closet opening. It's messy back there, cause I'm in the middle of a project, and it's helping my keep the walkway clean. I'm typically a pretty organized closet guy. Ask anyone. Really. I am.
So I took some quick measurements, bought the (hopefully) right sized door, and fired up the DIYZ app. I navigated to the Windows and Doors section, found exactly what I needed, and watched each of the video steps. Okay - so I need some shims and a bit of hardware. This I can do.
I set the door in place ... well, I tried to. I quickly realized it was too tall for the space (it's a basement with 7' 5" ceilings). So, I trimmed off a bit of the jamb and some of the bottom of the door itself with a circular saw.
Then I set the door in place for real.
I inserted shims all around the door frame, working from the base and then the opposite corner, jumping around to keep things flush, square, plumb, and the door opening and closing smoothly. Once I was set (this admittedly took me about 45 minutes since I was working alone), I set some screws through the door jamb and the shims into the 2x4 frame. The DIYZ app recommended 8D nails, but screws were easier for me since I was working alone, and could set them with one hand while applying pressure with the other.
I checked for level in every single direction four thousand times, and locked it down with a few extra countersunk screws.
Once everything was secure, I cut the shims flush.
Then, I added a handle and trimmed everything out with period-appropriate trim that matches the era and architecture of my house as best I could. I caulked and painted it like a boss ... and holy cow! This actually worked!
Done. Case, and door, closed.
Did I follow the instructions to the letter? No. Did DIYZ account for every little subtlety and issue that came up in the process? No — how could it? But, like a drill and tape measure, the DIYZ was an essential tool in my process, and the thing that gave me the overview I needed, the bravery to try it, and the info that prevented me from getting flustered in the aisles of the home improvement center. And that, to me, is what matters most. Check out DIYZ on the App Store and Google Play.
What's the trickiest project you've tackled recently? Let me know in the comments!
Thanks to DIYZ for sponsoring this post. All opinions are mine alone. And thank you, readers, for supporting the brands that support ManMade.
There are lots of ways to give gifts for the holidays. You can give in a way that simply checks a person off the list; acknowledges that it's expected and therefore here's your Amazon giftcard... (Not recommended.) You can can give gifts that are elaborate, expensive, and make everything that also helped create that pile or wrapping paper look negligible. (Also not recommended.) Or you can source something that person didn't know existed, and legitimately surprise them. (Solid.) You could give them something you know they want, but wouldn't spend the money on for themselves. (Nice one.) Or, for many a practical-minded recipient, you can get them something that solves a need in their life, that comes in handy again and again. Literally, a gift that keeps on giving.
And if that so-named recipient happens to be a ManMade reader-type, we're calling it this year - this is the single. best. gift you can give anyone who likes to work with their hands this holiday season:
"Oh yeah?" you say. How could we name a simple $20 box of steel as the ultimate DIYer Christmas gift? Here's why.
This is the two sets of drill bits I use regularly - a standard twist bit set from the home center and some nicer brad point bits from a woodworking catalog. Notice anything? That's right! All the little bits are gone. And I guarantee that every other bit set that's more than a year old looks exactly the same. Why? Well, two reasons:
1) the smaller bits are the ones that are used most, commonly for drilling pilot holes and installing hardware
2) they're the littlest ones, with the smallest amount of steel, and so they break
And these are precisely the drill bits you need the most when you're in the middle of a project and it's ten o'clock at night on a Saturday and you want to keep working and all the stores are closed.
And here's the thing: they're really nice drill bits. They're sharp, straight, and way better than anything you can get in the home center.
If you have a woodworker or otherwise handy person in your life, I guarantee you this is the gift that will light up their eyes on Christmas morning. But, evenly more importantly, this is the gift that they'll remember three or four years from now when they're working on a huge project, and they have the exact tools they need when they need them. That says love to me.
Pick up a set this week, and they'll be here before Hanukkah or Christmas.
If you're struggling with the idea of handing someone a box of rags for Christmas, we get it. But trust us on this — give it a shot, and see what happens.
I love s'mores. I hate getting sticky.* Which I mention only to point out how much I truly love s'mores since they nearly always get your hands/face/everything sticky. It's the perfect smoky and sweet desert to finish off any night's worth of camping and hiking or simply sitting around the campfire with friends. But here's a suggestion that takes the s'mores game to a whole new level...
It comes via David Coggins (the author of Men and Style) and involves the usual adages about quality ingredients and PATIENCE, but get this: once it's all put together, he grills it. The idea being to give all the ingredients a little more time to coalesce into a new superfood -- the ultimate s'more.
Check out the video below and let us know what you think.
*I don't mind getting sticky when I'm in the shop or cooking or working on something obviously, but I always find it frustrating to get sticky when I'm just hanging out in society and not particularly working with my hands etc. Ok that's all, just clarifying my manhood. Kthxbai.
If you're on the hunt for last-minute DIY gift ideas - it's definitely not too late to take a whack at these gorgeous wooden rings. They look great and the good news is you can make them without the need for a lathe, drill press or bandsaw!
There are lots of places on the internet that'll teach you how to make wooden jewelry but most of them require a specific set of tools. This video tutorial (with accompanying Instructable guide) shows you a streamlined way to do it using only standard tools you're likely to have already. The only tool that most woodworkers probably don't have lying around is a ring mandrel, which you can purchase on Amazon for around$15 (and you'd need to buy one to make rings anyway).
I'm genuinely surprised by both the simplicity and the final results that I highly recommend giving this a try. Check out the video below:
I am such a sucker for antique stores, obscure markets, and garage sales. I love pouring old and odd things -- the weirder, the better. I've bought pocket-sized trinkets all over America, many of which neither I nor the store clerk was able to figure out what they were. But this one really beats them all...
Lida Xing is a paleontologist with the China University of Geosciences. She and her team were in an amber market in Myitkyina where vendors sell bits of amber that they've shaved down for jewelry from the local mine, when they came across this:
That's a feathered dinosaur tail. A FEATHERED DINOSAUR TAIL. The vendors hadn't realized what it was (they'd already shaped parts of the amber to make it more appealing to prospective jewlers) and Xing and her team acquired it for further study. It's a whole fascinating breakthrough in paleontology and it definitely beats my best finds by a long shot.
I'd love to know what some of your favorite antiquing or junk-store-shopping finds have been. Anybody got anything to rival a feather dinosaur tail?
Ahh... egg nog, you creamy holiday treat. Sure the ugly sweaters and mistletoe are hallmark traditions during this festive season, but no holiday get-together is truly complete without a glass of something spiced in hand. This year, ditch the store-bought syrupy stuff, and make your own with just a few ingredients you already have in your kitchen.
Why You Should Make Your Own
I've never been a fan of store-bought egg nog. It's super sweet, a bit too creamy and gooey, and just made me feel like I needed a nap. In fact, I didn't think I liked egg nog at all until someone asked me very, very nicely to take a sip of his latest batch.
The problem with the carton is the slew of preservatives and extra ingredients (read: sugar) that just mix into a holiday slurry no one should be downing. You also never taste much of the spices that go so well with Christmas, thanks to that thick, pre-made consistency. So, I set off to make a version I'd want to drink. If you're like me, then you can appreciate this less sweet, less creamy version of the spirited nog that will have everyone asking for another glass.
Traditionally, Egg Nog was made up to a few months in advance and left in a cool dark area to age well before the seasonal celebrations. That's because eggs and milk were plentiful during the summer months, and a bit more scarce when the weather turned cold. This drink helped to carry that seasonal bounty well into the winter, and produced a well balanced, super creamy drink that warmed from the inside out on the cold nights. Thanks to modern trappings, there's no reason to worry about preserving eggs and milk for months on end, they're ready year round. Ready to be nogged.
Let's Talk Raw Eggs
It's a good idea to use pasteurized eggs to limit the chance of Christmas cheer turning into a case of holiday food poisoning. Honestly, it's a limited risk, but one that's easy to avoid. Also, bringing the egg mixture up to about 160° F for about seven helps the further fend off bacteria.
Fresh egg nog will stay good for up to 3 days in the refrigerator, and up to a few weeks if spiked with rum right from the start. That's because the alcohol content acts as a natural preservative.
The Recipe (4-6 servings)
4 cups whole milk
6 eggs (pasteurized)
1/2 cup sugar
1/8 tsp salt
3 cloves
1 tsp vanilla
1/2 tsp ground cinnamon
small pinch ground anise
1/2 tsp ground nutmeg, plus more for serving
1 1/2 cup dark rum or bourbon
In a saucepan, combine 2 cups milk, sugar, salt, the eggs. Wisk together until well incorporated. Heat up the mix slowly to about 160-175 degrees, about 15 minutes. Don't boil the mix or the eggs may start to get lumpy.
Once the mix is up to temperature, incorporate in the vanilla, cinnamon, anise and nutmeg, stirring well to mix fully.
Strain the mixture through a medium strainer to get out any egg chunks and the cloves.
Transfer the finished drink to a large container and add the rest of the milk, stirring well to incorporate. Chill for at least 2 hours to allow the ingredients to combine well.
The final drink can be mixed with coffee, pancakes, and of course rum or bourbon. For a spiked 'nog, combine two parts egg nog with one part spirit.
Fresh egg nog will stay good for up to 3 days in the refrigerator, and up to a few weeks if spiked with rum right from the start. Expect the proteins in the eggs to thicken over time and become more of a smooth consistency as the days go by. Of course, I've never had it stay that long in my house.
That's about it.
Alternative: For a light, creamier texture separate out the egg whites and whisk well until peaks are formed in the bowl. Fold the egg whites into the drink when transferring into the large containers in step 4.


 Of course, basement flooring is tricky. A concrete basement slab is porous, and water and moisture coming up through the slab. This might not hurt the flooring itself, but you need to make sure you're not creating a space that allows mold and mildew to grow underneath.
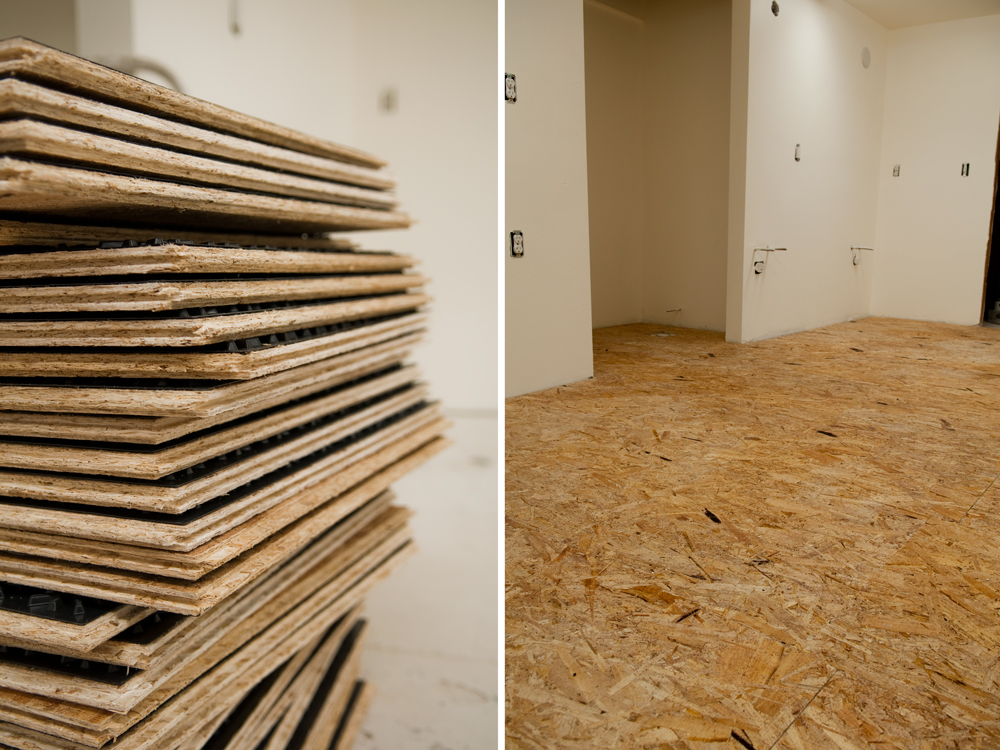 Luckily, I found the perfect product for me - Dricore flooring tiles. They're made for purposes exactly like these, and create a floating subfloor with only 7/8" of added height. They're intended to have carpet or laminate flooring installed on top, but the exposed OSB-style surface is just fine for a workshop. I asked a friend to help me install the floor, and it came together quickly in an afternoon with the tongue-and-groove joinery and no glue required. The hardest part was getting them home from the home improvement store without a truck. (It took two trips).


 Chrome Tanned vs. Veg Tanned


