Giving gifts? It's the best, right? Not cheap plastic things, and certainly not gift cards. But thoughtful custom - and most of the time handmade gifts - that I know someone will enjoy for years to come. Take a look at our list of 50 gifts for men here, and gifts for women here.
Of course, the gift has to be wrapped in something special as well. So, why would I want to use lame paper gift tags from the discount store after all that work? Here is a simple project to make some name tags that are as thoughtful as the gift.
For this project, I started with a few of my pieces of scrap resawn wood. It is thin, well figured, and I have plenty of it around. Look around for some thin table-saw cut-offs, or make some yourself on the bandsaw. Using this small scrap wood gives me hope that there are plenty of other uses for those small project cutoffs I just can't bring myself to toss out.
Steps:
Once I had my stock, I traced out the shape I needed on a piece of shop paper as a template.
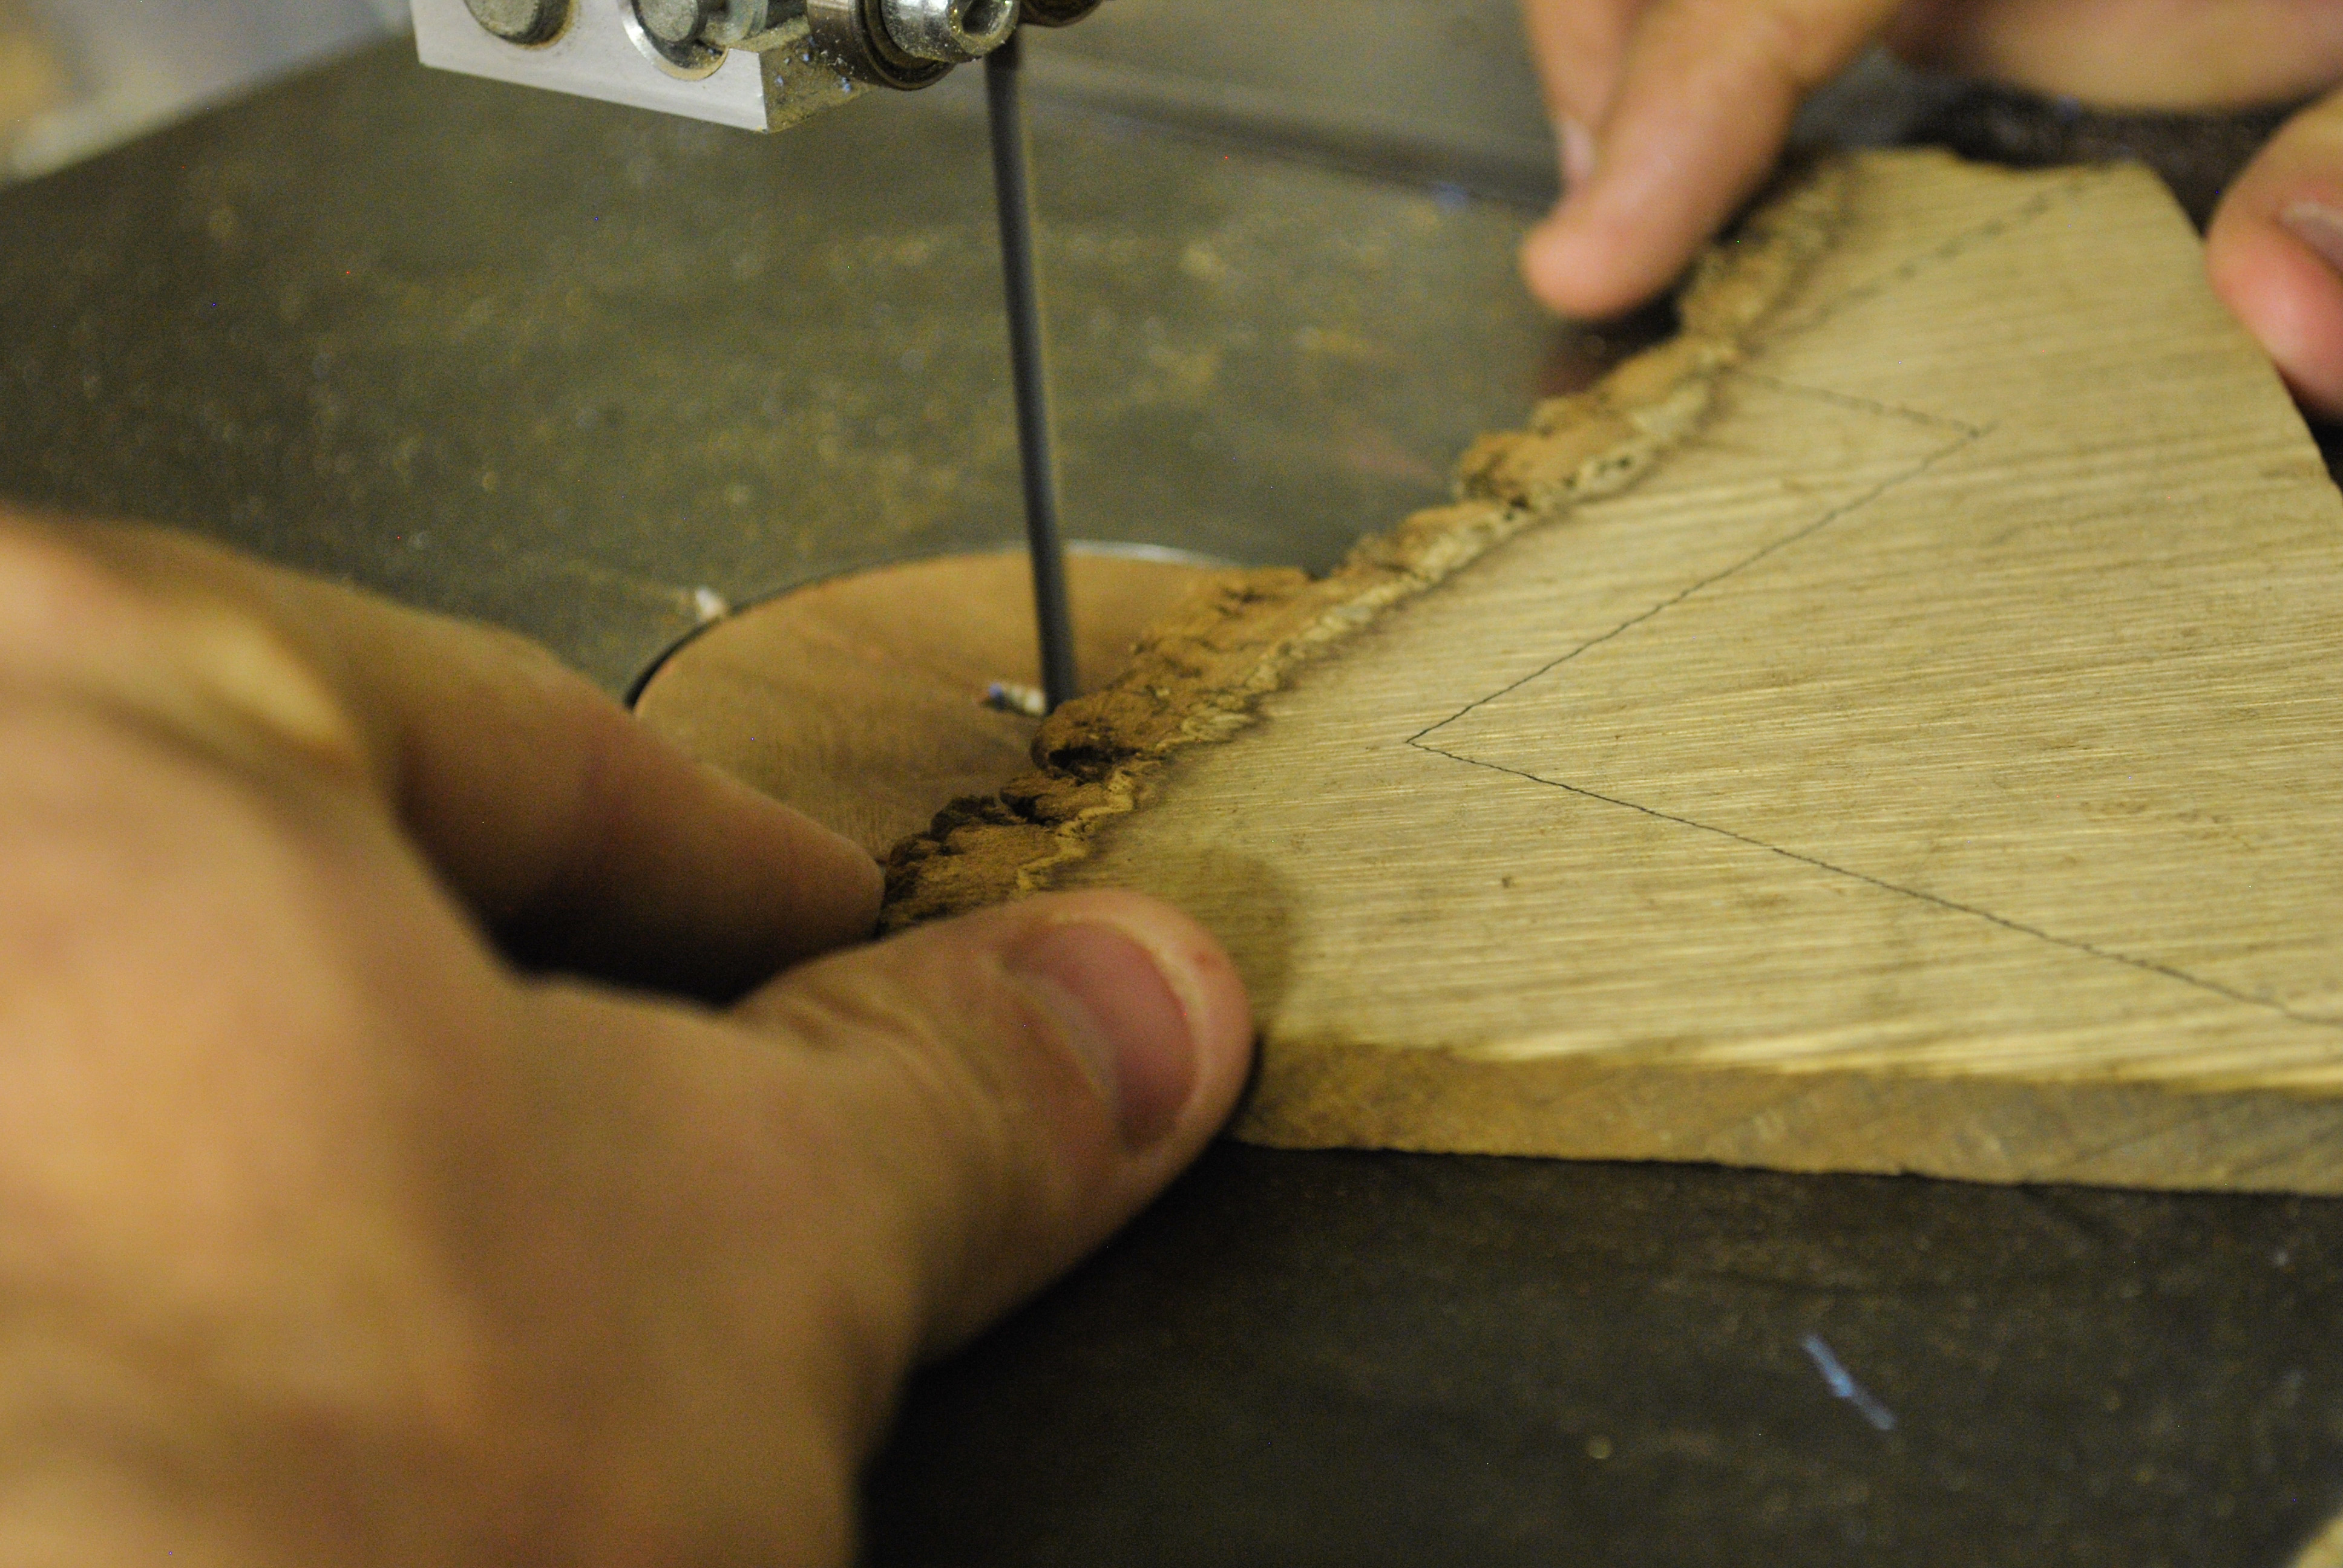
With the template, I was able to find the best way to cut the tags to maximize the materials. I traced first with a pencil, then darkened the lines with a felt pen. I cut out the pieces on my scroll saw, but a band saw, jig saw, or coping saw would work just fine.
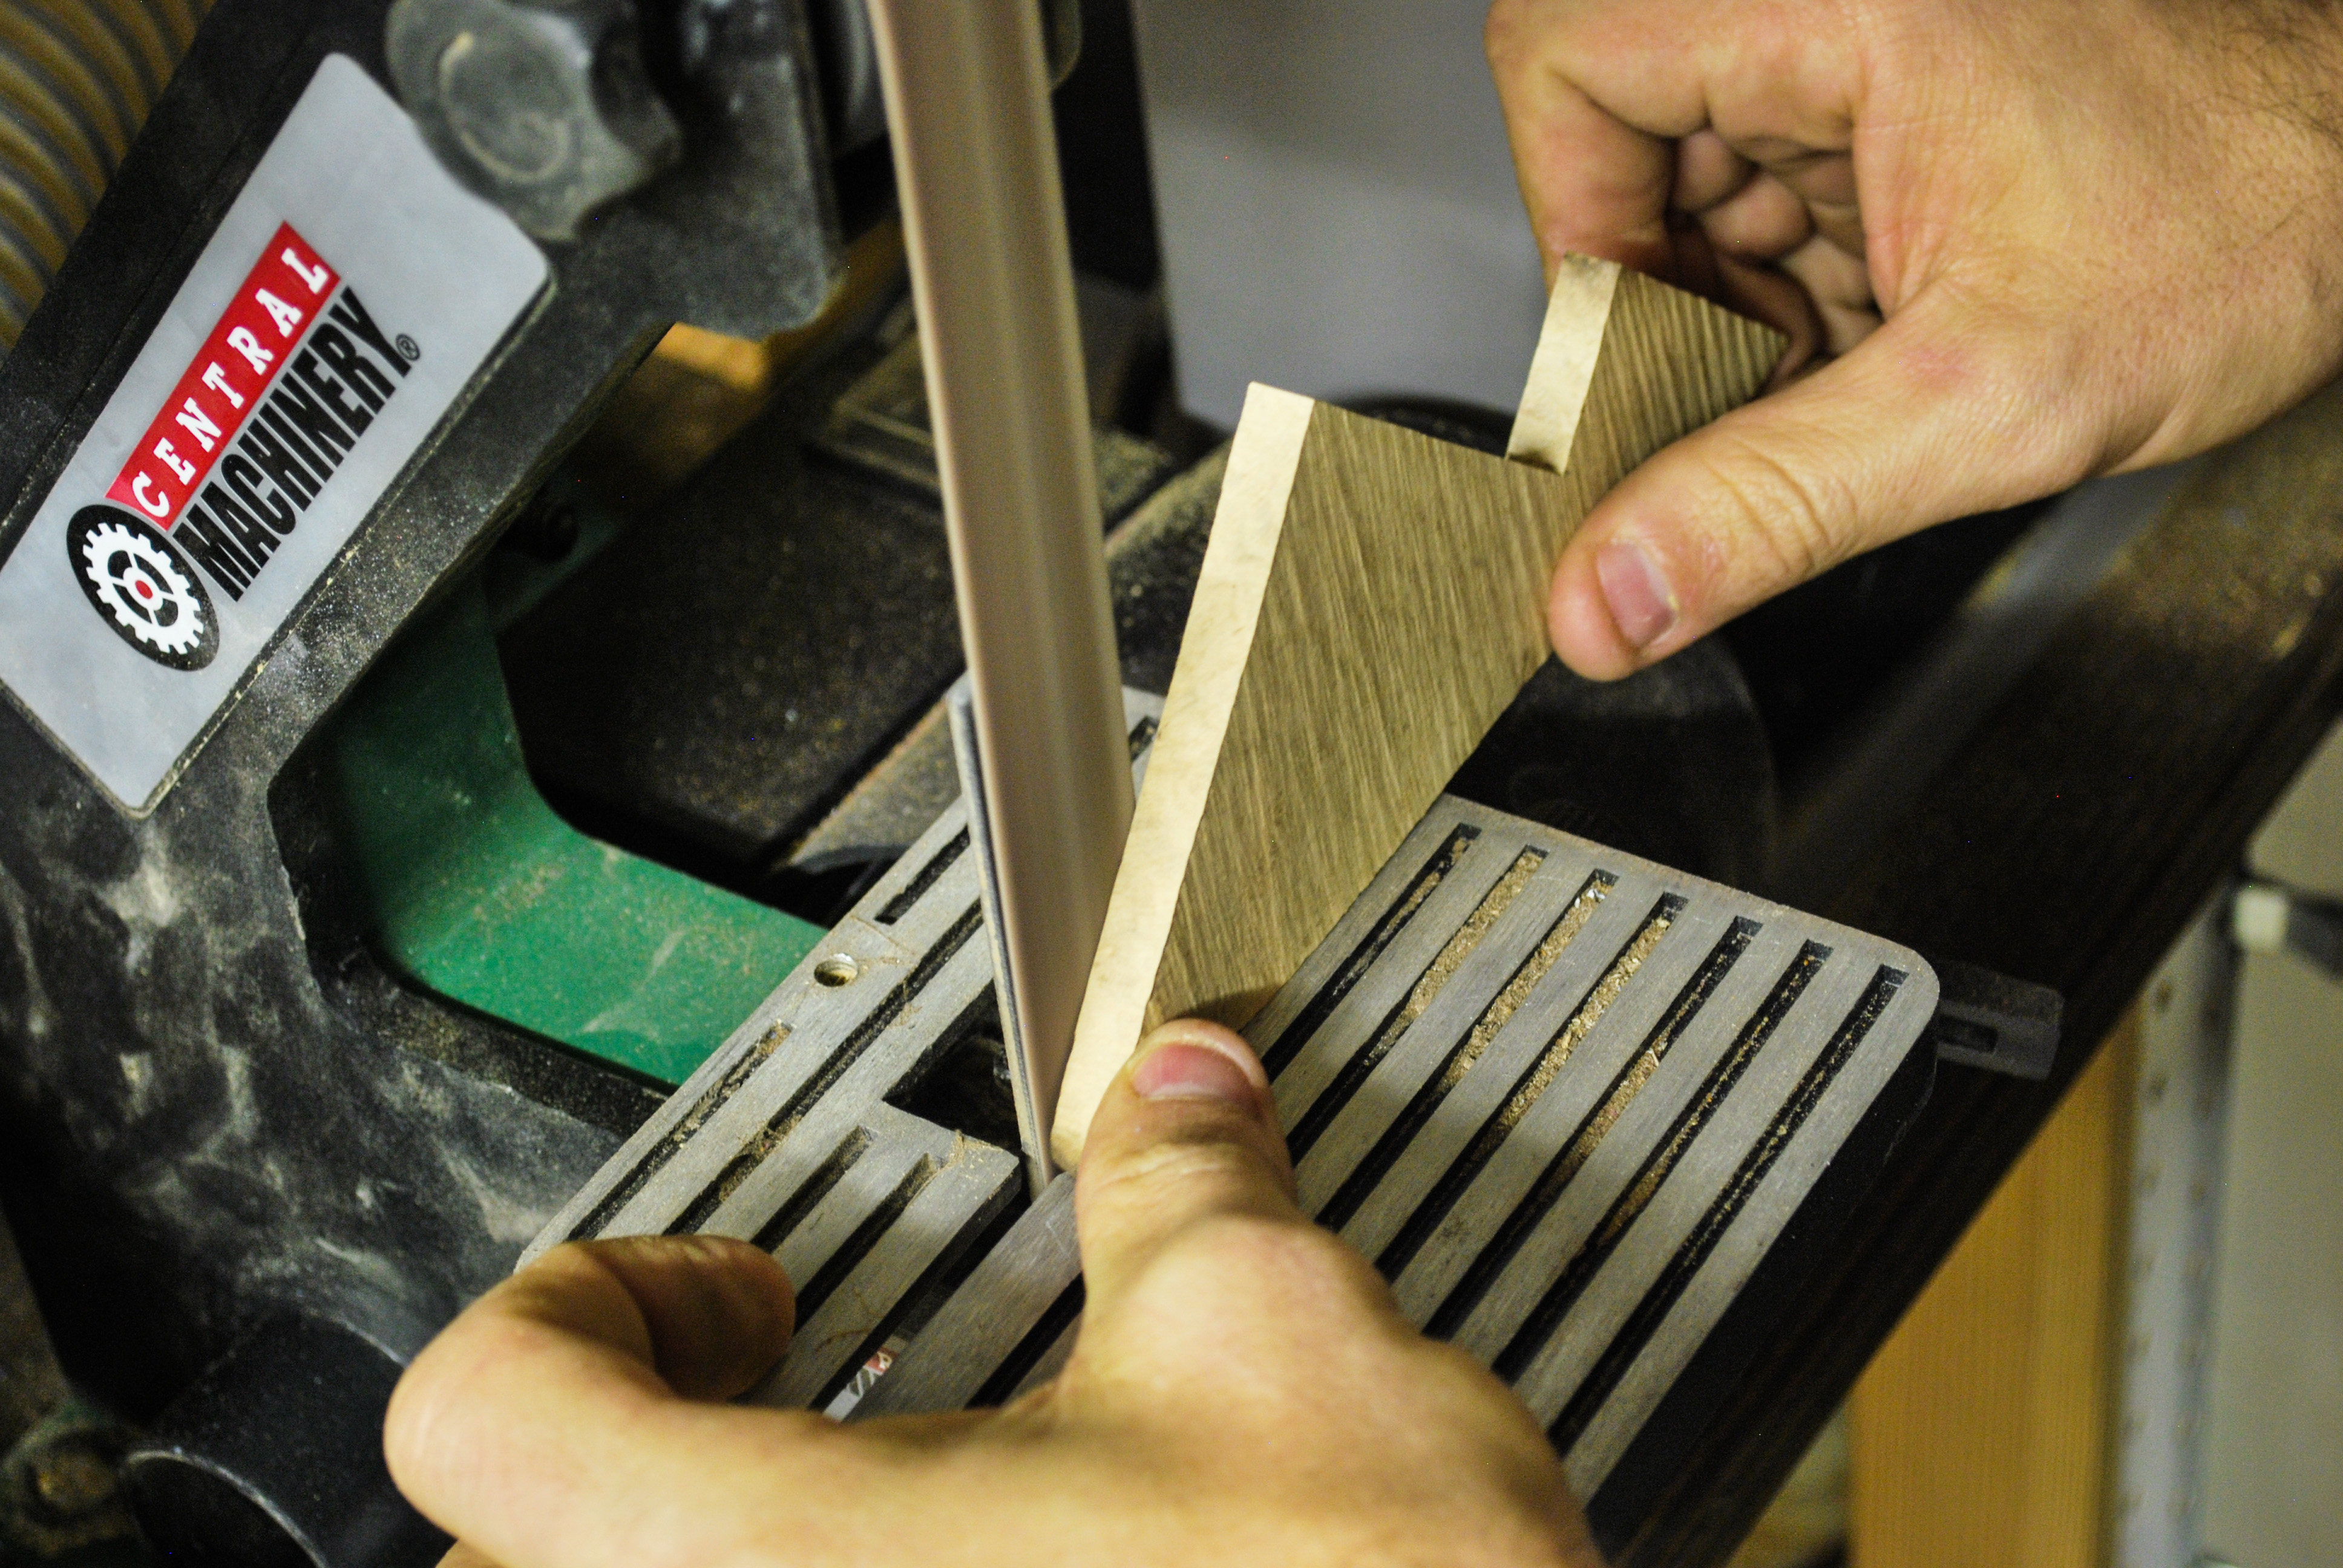
After cutting, I stacked them up and went over to my 1" belt sander to true them all up together. A few seconds is all it took to make 4 identical (mostly) tags.
A quick coat of finish wax made them look great and brought out the grain.
Lastly, drill a center hole large enough for a string and you're ready to tie them on. Write a name on it with a permanent marker or white pen for an added flair.
I turned out about four of these tags in less than fifteen minutes using the scrap in my shop, so now there's no excuse to top that thoughtful gift with anything less than a custom tag!
Want another DIY hardcore gift tag project? Check out this brushed metal project from ManMade holidays past.
I have gone on record, in this publication and elsewhere, about why the hot toddy is the perfect cocktail to be sipping in December. It's warm. It's spiced. And at least according to folk wisdom, it's good for what ails 'ya (like that nasty wintertime sore throat). But, to be honest, until last Tuesday evening, I didn't actually like a hot toddy.
They were fine, but not delicious, and not really an improvement over a simple glass of neat whiskey. (You could make a hot toddy with rum, brandy, or tequila, but why would you?)
Hot toddys (toddies?) always disappointed: never quite hot enough to truly enjoy, and somewhat ... harsh. There was something I didn't like about adding lemon juice to a healthy glug of bourbon, then heating the whole thing up. It seemed to bring out all the rough, grain-y flavors, and hide the tastier warm and spicy barrel-aged notes that make whiskey, well, whiskey. But then something amazing and unexpected happened:
One evening earlier this week, I was working late, feeling chilly and festive, so I thought I'd make something hot to sip. I avoid caffeine after noon, so coffee was out. And I had already finished my daily ration of herbal tea. It was after 5:00pm, so I thought: alright, I'll try a hot toddy. Again.
But, because I still had some work to do, I didn't want to get carried away with the, uh, holiday spirit. So, I whipped one up, and cut the bourbon in half ... and that's when I heard angels sweetly singing o'er the plain.
So, though I have never done such a thing in my life, my recommendation is this: if you want to make a delicious hot toddy, cut back the alcohol.
The effect: it tastes better. And because it tastes simpler and more delicious, you can drink it faster. And because you can drink it faster, it stays hot. And this is the point of a toddy. Neat whiskey in a Glencairn glass is for sipping on for hours. A hot toddy is for holding in your hands, enjoying for five minutes, and then cuddling up with the effects of its warmth for the next half hour. Then you reboil the water, and have another. Which you can do, because it's only half a drink.
The only side effect to this method is that you drink more water, which is never bad for you, especially when enjoying spirits. And perhaps a few more calories from the extra honey, but hey - it's the holidays.
So, instead of having two strong hot toddies, have four weak ones. This is my new method, involving one mug, one lemon, and four ounces of bourbon (the equivalent of two regular sized cocktails). Except it's actually delicious, and keeps the good mood going all night long without too much comfort and joy.
The Ultimate (Half-Strength) Hot Toddy Recipe
INGREDIENTS:
Boiling water. Not hot tap water, not microwaved water. Boiling. Hot. Water.
4 oz Bourbon, Scotch, or Irish Whiskey, divided
1 lemon
Four squirts of honey. What size? I dunno ... a squirt. Try a bit, then add more to taste.
(Optional) Baking spices like cloves, allspice, cinnamon, or nutmeg
Garnish: None. This is an at home, weeknight cocktail. The spices are enough fuss.
TECHNIQUE:
1. Boil plenty of water with a kettle or saucepan on the stove. Fill a ceramic mug with boiling water and let it preheat for 4-5 minutes while you get out the rest of the ingredients. If you don't have an electric kettle, I can't imagine a more useful kitchen item to add to your holiday wishlist. This is the one I use. $50 very well spent.
2. Take one lemon, and cut it in half. Hopefully, yours is a little fresher than this shriveled specimen I found in my fruit bowl. (It was snowing out and too blustery to ride my bike to the grocery store.)
3. If you want 'em, get out some spices. I think they're worth it, but I keep these kind of things around for cooking all the time, so they're easy to grab. My recipe: 1" piece of cinnamon stick, one whole allspice berry, two whole cloves. Grated nutmeg would also be awesome.
4. Measure out a mere ounce of bourbon or other whiskey. No need for single malt or top shelf stuff here. Use your everyday mixing whiskey. Other item for your wish list: Oxo Stainless Measuring Jigger. Get five of these.
5. With your mug heated up, dump the water back in the kettle or saucepan. If necessary, bring it back to a boil. Then add the whiskey and spices to the mug, and squeeze in some lemon. Not the whole half piece; just, uh, half of the half. Which you and I and everyone over the age of nine know is a quarter, but that sounds complicated. Point is: one half lemon equals two toddies.
6. Squirt in some honey. Like one and a half seconds worth. Say "Jingle bells, jingle bells," then stop. Don't measure this with teaspoons and stuff. Honey is sticky, and a pain in the butt to wash out of measuring spoons.
7. Fill up your mug with hot water, and stir to combine the honey with the liquid, since it will settle to the bottom.
Okay, that's it. Drink it while it's hot, go wrap some presents or play a fingerstyle rendition of "Silent Night" on the guitar, then come back and make another one. Use the same mug, the same spices, and just add the rest of the lemon, etc. Done in this rhythm, you'll have had the equivalent two drinks, but actually four delicious, hot ones. And only two dishes to wash.
At this point in the season, the big gifts have already been decided. And if you're on your game, they're boxed, wrapped, and under the tree. But this week is all about the little bits: the practical things, the accessories, and the stocking stuffers. If you or someone on your list is a maker, DIYer, woodworker, tinkerer, or just a general creative type who likes to build and fix things, here's our list of quality stocking stuffers that are just as good as whatever's in that huge box with the bow on it.
And! To make things as easy as possible, we've only selected items that are available from Amazon, and most of 'em qualify for free two-day Prime shipping, so they'll be here in plenty of time. Happy holidays.
5. Maldon Sea Salt Flakes: $5.00There are two types of cooks out there. Those who believe in transformative power of Maldon salt, and those who haven't tried it yet.
8. Painter's Pyramids (10-pack): $5.29 Add coats of finish, stain, or paint to all six sides of a project without having to wait for the opposite to dry. No DIYer doesn't want more of these.
10. Rema Bicycle Tire Patch Kit: $5.00 No one should have to take a bike (or your kid's) into a shop because of a flat tire. It's a dead simple repair, and this is everything you need to make it happen.
11. Shinto Saw Rasp: $16.00 Removes wood quickly. Doesn't cost $100. Contains a coarse and a "fine" side, so it's kinda two tools in one.
12. Tovolo Perfect Cube (2-pack): $11.00Class up your cocktails with some seriously sharp-looking ice. Melts slower, and makes your homemade drinks as elegant as those from your favorite bar.
As the adage about trash and treasure goes, this dude literally found this rust-covered meat cleaver in the trash and decided to restore it to what I'm sure is more than its former glory. If you look in these up-close "before" photos you'll see that the rust is so thick it looks almost like soft moss. Not so by the end...
You'll need at least some vinegar or a grinder/sander to get to work on the blade and taking care of the handle itself is easy enough. Take a look at the gorgeous finished product below, read up on the full Instructable, and enjoy the entire process video too!
This is the week. This is when we get to take a break, surround ourselves with friends and family, and eat plenty of great food. There really isn't much about this season I don't look forward to, and that's partly because I've learned to take a few steps to make sure it's a time we'll file away as a great memory for years to come.
1. Get plenty of sleep. Sure, there's a lot of traveling, staying in strange places, and people you haven't been around for a while. But staying up late is a prime way to make a fun time into a hazy slog. Carve out time to get to bed at a reasonable hour, and fit in a nap if you can. I promise that extra hour of shut-eye is going to make it worth your time. Bring along some earplugs to make it easier.
2. Play some (reindeer) games. The best times I've had at holiday parties have been around the game table. There's something great about the conversation and laughs that happen when everyone has something keeping them occupied while they connect. Shoot for quick games that are easy to learn like this, this and this.
3. Plan an adventure: Wherever you are, there's something fun to do. Take a bit of time to look around and find something interesting that you can fit into a few hours. If you're traveling, always make sure to take the detour. A bit of time out of the car can really make a trip more relaxing.
4. Avoid the hot issues. Maybe. Sure, it's a great time to catch up with the people you haven't seen for a while, but there are a few things that should probably be left unsaid. 2016 was a very curious year, but perhaps the holiday season is the time to remember the other side also legitimately believed they were doing the right thing. Statistically half the room is going to argue with whatever you have to say. Just sip that eggnog and focus on hobbies, career, memories, and everything else you'll likely see eye to eye on.
Or, just go for it. Christmas comes but once a year.
5. Plan a few holiday spirits. Eggnog and hot toddies are the key to making the nights a bit more enjoyable. Here's a recipe to make your own ahead of time so you can mix and enjoy, and a few others for the adventurous.
6. Always bring something home. Not just gifts. I always try to bring something small back to remember my trip. Whether it's a stone, trinket, or postcard; there should be something you carry with you to anchor those great times to. If visiting family, try to snag some photos or ask your parents to part with a small heirloom.
Now you have a few more things on your holiday list to plan, but with these in mind the trip should be a bit more memorable. So go ahead and make the most out of this most excellent time of year!
Solar Power is now the world's cheapest energy thanks to investments by developing nations, so there's no reason you can't take a little advantage of some of that power while you're on the go. Instructables user darbinovar originally wanted just a good tool roll with a power bank she could use for charging her everyday accessories, but eventually figured out she might be able to recharge her power bank in a more efficient manner. And here it is...
I've been trying to up my host game lately, especially in the drinks department. Solid glassware, proper bar tools, and better presentation go a long way towards concocting a quality experience. That's why I was excited to come up with a great gift project for those that want to ditch the cheap plastic in their classy mixed drinks. These simple straws are hefty enough to really stand out as a stocking stuffer, or on their own as a solid holiday gift.
Mark the tubes. I used a similarly sized plastic straw for a guide, and marked the tube for each cut.
Make the cuts. I cut the tube into 5 7" straws. The steel was fast to cut with a hacksaw, but for cleaner cuts, you could use a grinder with cutting wheel, metal blade on a bandsaw, or even a dremel tool with a metal attachment. Whatever your method, wear a set of safety glasses to protect against any metal shards.
Clean up. Taping all the rough-cut straws together ensured that they would all end up the same length. I used a sanding belt to clean up the rough cuts and make the length uniform.
Soften edges. Once the straws were to final length and squared off, I used some 240 grit sandpaper to soften out the edges. I didn't want to use rougher grit as that would introduce deeper scratches that would need to be polished out, so I took a bit longer with the 240 to make sure both ends felt smooth enough for a great drinking experience.
Polish up. The last step was a quick polish with a simple compound to get the printed information off and smooth the surface. I did it by hand with just a little polish and a clean rag for each straw.
Clean and enjoy. A quick cleaning and they straws were ready to enjoy. I really like the feel and heft that these little straws add to those special drinks you're proud to mix up in your home bar.
There's still time to make these before the holiday, so get on it today and give a gift they'll love this season!
He's back, ladies and gentlemen. Last year he treated us to a comforting glass of Lagavulin Single-Malt Scotch next to a roaring yule log for 45 minutes. This year it's an hour of scotch-sipping outside a distillery in Scotland all leading up to an epic(ally subdued) New Year's Eve countdown...
There's a New Year's Eve countdown timer in the upper left-hand corner and you'll notice the party on the patio behind Offerman slowly builds to a roarin' good time. For Offerman though it's all pleasant eyes and slow sips of whiskey until the very end.
Consider adding it to your New Year's Eve party this year.
Every holiday season, sites like ManMade spend all kinds of effort doing our best to help you find meaningful, quality gifts that you'll be proud to give someone. Or, at least, that you can add to your wishlist and let those in your life know you'd love to unwrap yourself.
But once the gift guides are published, we never seem to revisit those things until the following year. So, today, during this week after Christmas, I thought I'd ask — Did you get anything cool for Christmas? Or give something that particularly excites you that we should all know about?
In particular, we're interested in those things that touch on the kind of stuff we talk about on ManMade all year - tools, gear, style, everyday carry, design, art, etc. I'll start.
The single coolest (and most useful) gift I got this year is this lovely Trusco tool box. I'd read about and longed for one of these for years, but had never actually had my hands on one. When I saw the brand's logo peak out from under the wrapping paper, I'm pretty sure I legitimately squealed. My wife, who'd invested plenty of her budget this year on this, asked me if I knew why this thing was so special, or whether I just thought it was another thing you can get at the home improvement store. Yes, sweetheart, I know. And you're the best for knowing the respect I'd have for it.
If you're not familiar, these Japanese steel boxes are marvels of thoughtful design. (They're even in the MOMA.) They were originally manufactured in the 1940s, but weren't sold in the USA until a few years ago. Now, thanks to the maker movement, they're more widely available, and just as simple, functioning, and a pleasure to use. I'd even pack my lunch in it.
I'm also really digging my brand new Starrett combination square from my mom. I've been using a nice-enough Pinnacle square for eight or nine years now (itself an upgrade from my original aluminum home center model), but it's easy to see why spending just a bit more gets you the tool of your dreams. It's heavy and sturdier, and yet somehow easier and lighter to wield. They give you scientific-grade measurements, and I'm excited to be able to leave the Pinnacle in the garage for around the house stuff, and make sure the Starrett stays in the shop.
Also, my mom actually read an old ManMade article and gifted me a very fine Pendelton "motor robe" blanket with the sweet leather carrier. Pendleton is based here in Portland, so she can't help but visit the local shops every time she visits. She did a little add-on Stanley flask and stainless steel shot glasses in a little case for a very fine, very stylish picnic set that I'll be happy to employ.
How about you? Did you get any cool new toys, tools, or classic gear that ManMade readers would be excited about? Post yours in the comments below.
On this day a year ago, we shared this post on ManMade. We're bumping it to the top again to see if there's anything you tried this year that really impacted your life. Share your thoughts in the comments, please.
A new year brings new opportunities to continue to grow. You don't have to tackle every item. Just pick five that resonate with you, and see what good you can do.
1. Stop texting and driving. Once and for all. No communication is worth the potential consequences.
2. Give up one social media channel. We vote Twitter.
3. Wake up 30 minutes earlier every day. Use that time to begin your day with something you're proud of.
4. Quit drinking during the weekdays. Alcohol shouldn't be a means to get through the week; it's a way to celebrate it coming to an end.
5. Learn to meditate. Nobody regrets doing this. And anyone who knows how always wishes they could do it more.
6. Send one physical letter or postcard a month. Instant replies are overrated.
7. Get a new plant. And don't kill it.
8. Drink more water. Every day.
9. Work at it until you can do a hundred pushups. Then work to do a hundred more.
10. Start a project or commitment that scares you. This is when you learn most.
11. Learn one parlor trick, and use it only when the time is right. Juggling, sleight-of-hand, mind reading trick... They're not always impressive, but always worth knowing.
12. Get rid of your CDs.Finally. iTunes match is only $25/year
13. Don't buy anything for a month. See what you're not missing.
14. Take a walk during the workday. Moving changes your brain. In the best way possible.
15. Think about the coolest thing your uncle ever did for you. Do that for your nieces and nephews.
16. Read your local alternative weekly every week. Your city is probably amazing. Find out why.
17. Quit doing that one thing where spouse or roommate is constantly requesting change. There's a reason they're asking.
18. Find a new place to volunteer. Then actually talk to the community where you're interacting.
19. When your family asks how your day at work went, tell them the good things that happened. Don't start off the conversation by complaining. Be honest, but don't be a drag. If you need to process something from work, that can happen after the initial "welcome home"
20. Go see more live music. It will energize you. It always does.
21. Play more games. Board games. Catch. Crossword puzzles. Pickup kickball. Cross-town scavenger hunts. Be okay with not winning.
22. Find balance and health in your sex life. Whatever your current situation. If you don't know what that means right now, it's worth thinking about more.
23. Take a class. Do the homework. Learn the skills. Interact with the others who registered.
24. Do a clothing closet purge. Toss out anything that doesn't make you feel like yourself.
25. Finally try to understand jazz. Or classic Broadway musicals. Or Opera. Or why Adele can sell so many records.
26. If you know you messed up, say you're sorry. Apologizing doesn't mean that you lost the argument. It means you're an adult.
27. Compliment people. Every day. Looking for the good things and work well done is a nice way to view the world.
28. Set up a monthly schedule to maintain your investment goods. Condition your boots. Clean and lubricate your bike chain. Scrub your cookware until its shiny. If you do things on the regular, then they're always ready to go.
29. Stop drinking soda. You really won't miss it.
30. Say "Yes" to something you wouldn't normally say "Yes" to. See what happens.
31. Say "No" to something you wouldn't normally say "No" to. See what happens.
32. Quit checking your email first thing in the morning. No one wins when you do this. Certainly not your inner peace.
33. If you want to be happy, the key is practicing humility and gratitude. There, you will find joy in what you have, not what you want.
34. Pick a band or musician that you know you're supposed to love but never resonated with you. Listen to them exclusively for three days. Find out what you're missing. I'll see you in a week, Pink Floyd.
35. Contribute the max amount to your Roth IRA. If you don't have one yet, this is the year to open one. Give your 65-year-old self a little help.
36. Ask someone else more about who they are. Find out what your colleague's wife's name is, or which neighborhood the guy from the coffee shop lives in. Remember those details, and use them to make real connections.
37. Remember, leadership doesn't make others into followers. It transforms them, too, into people who will change the world.
38. Always have two books on your nightstand. One fiction, one non.
39. Become a pocket knife guy. Man, those things are useful.
40. Reach out to that one guy from high school or college whom you've been wondering how he's doing. Actually find out.
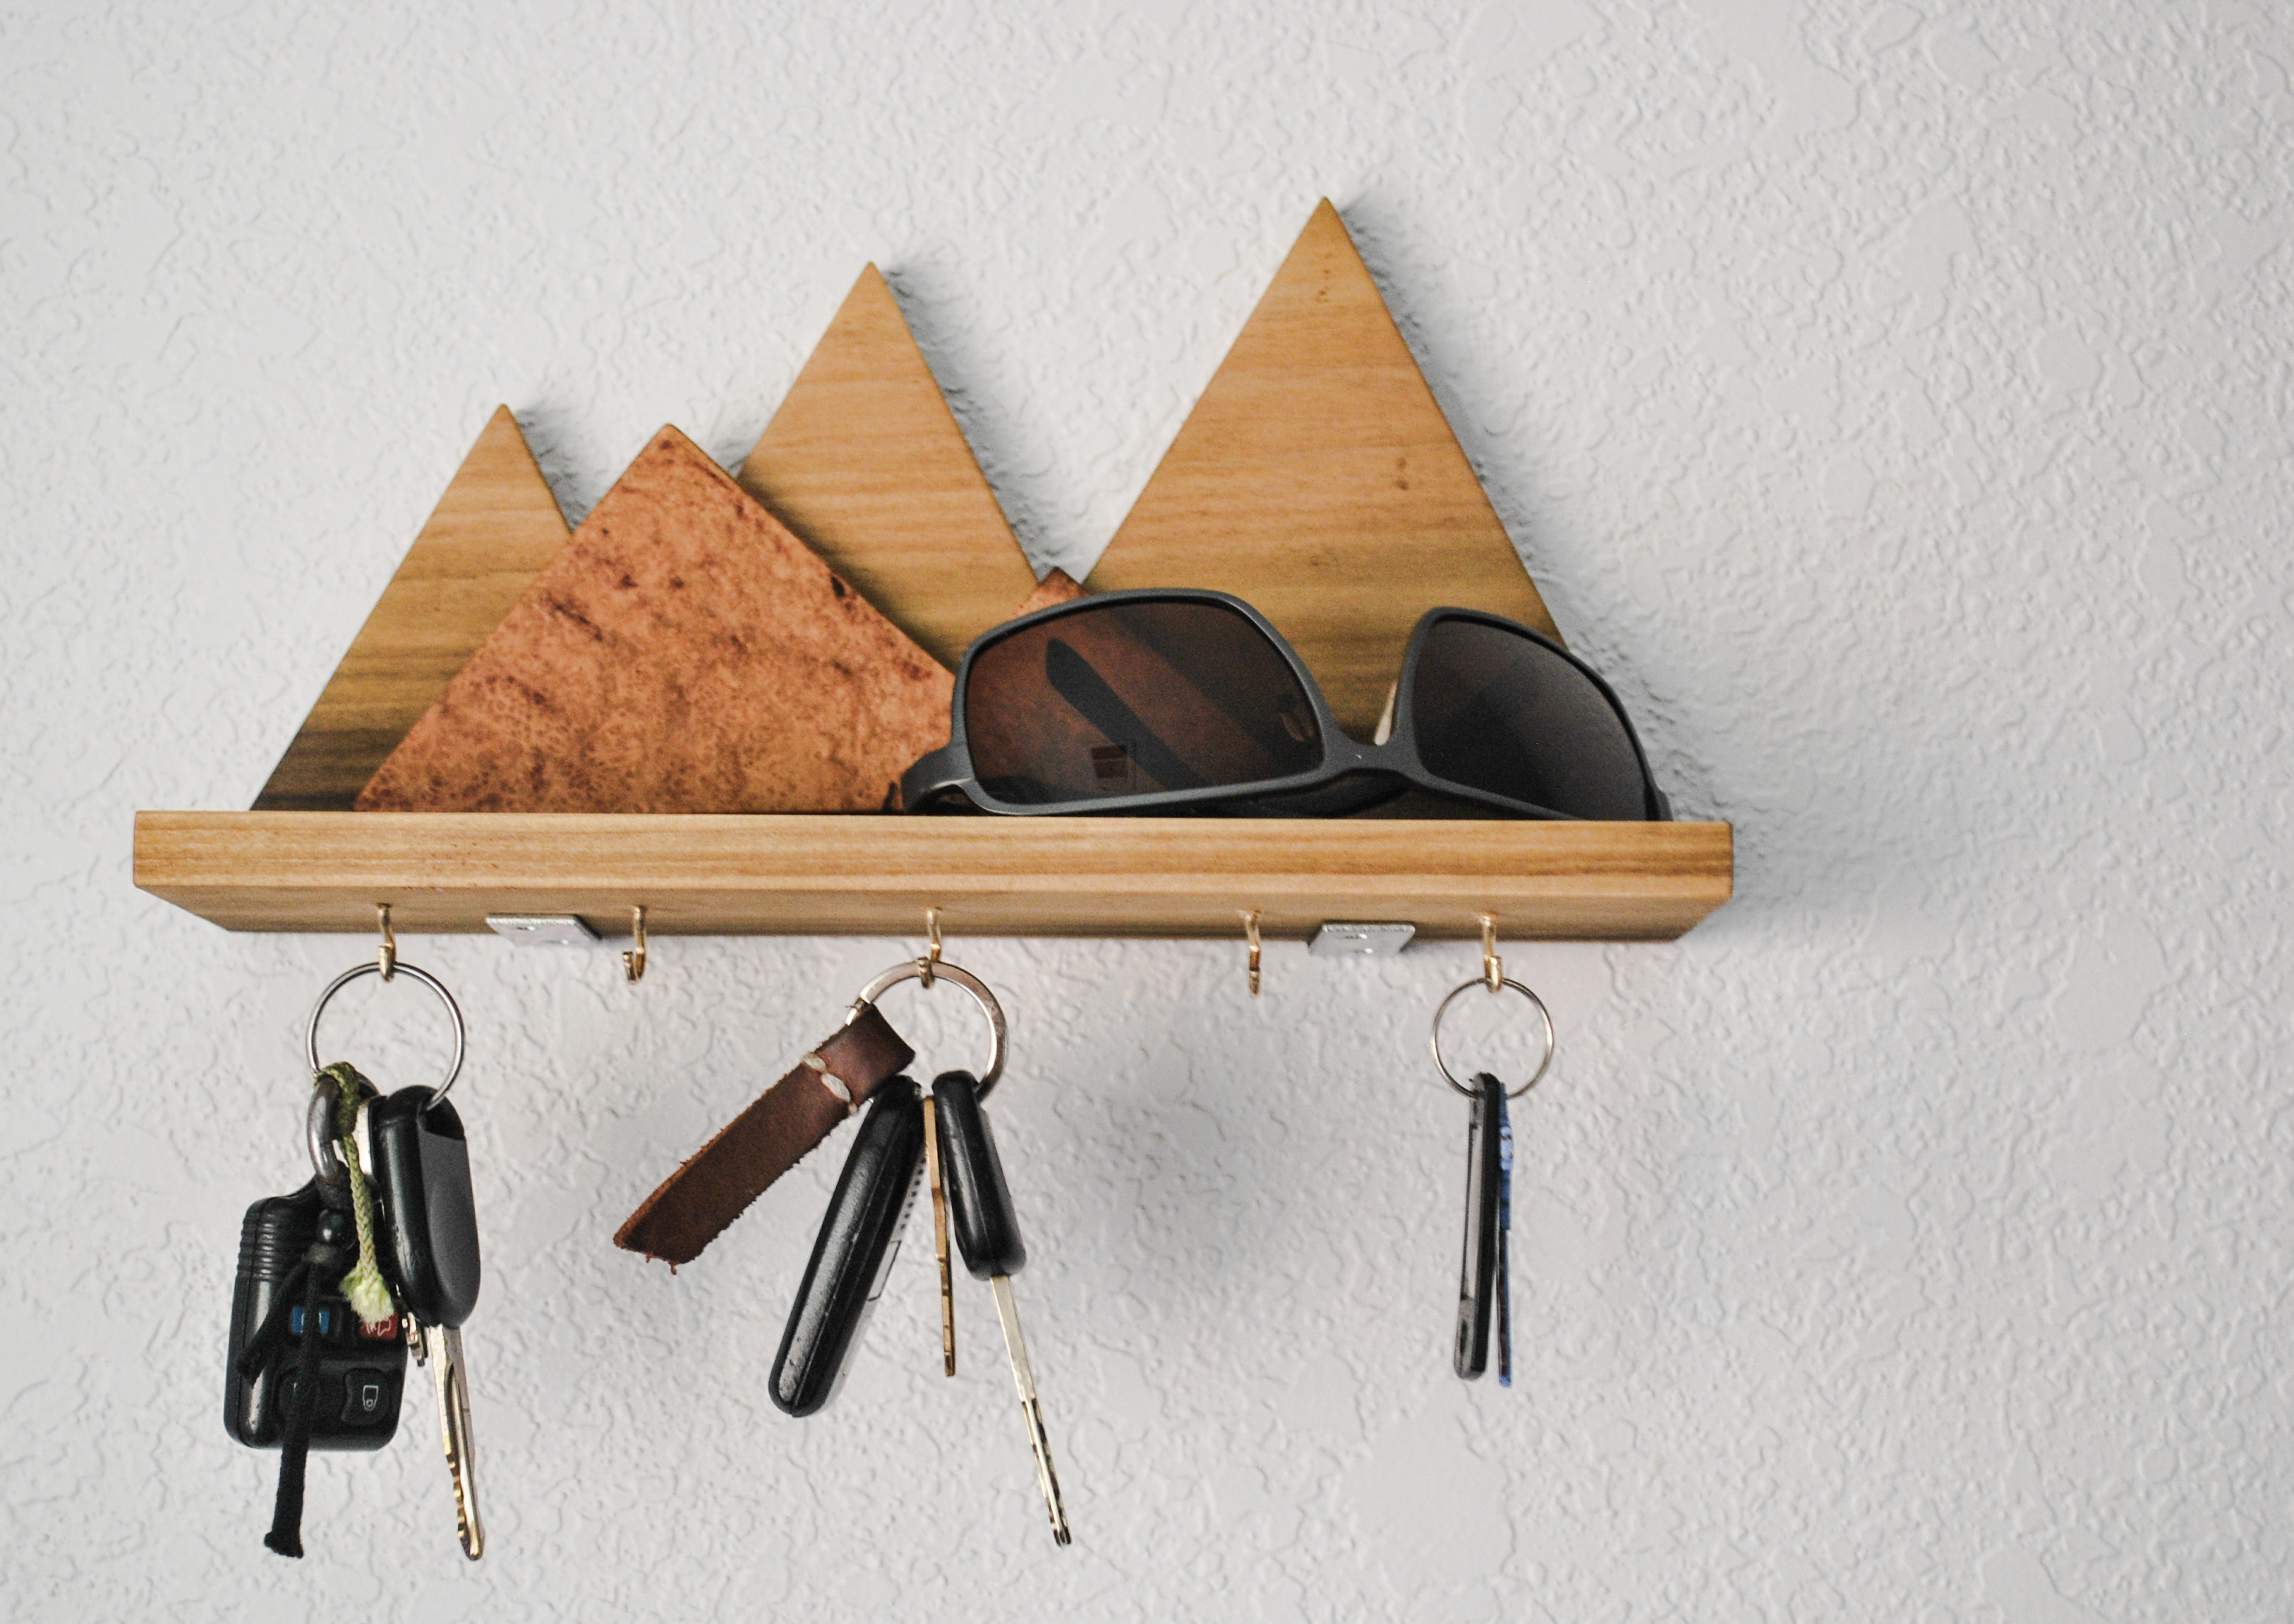
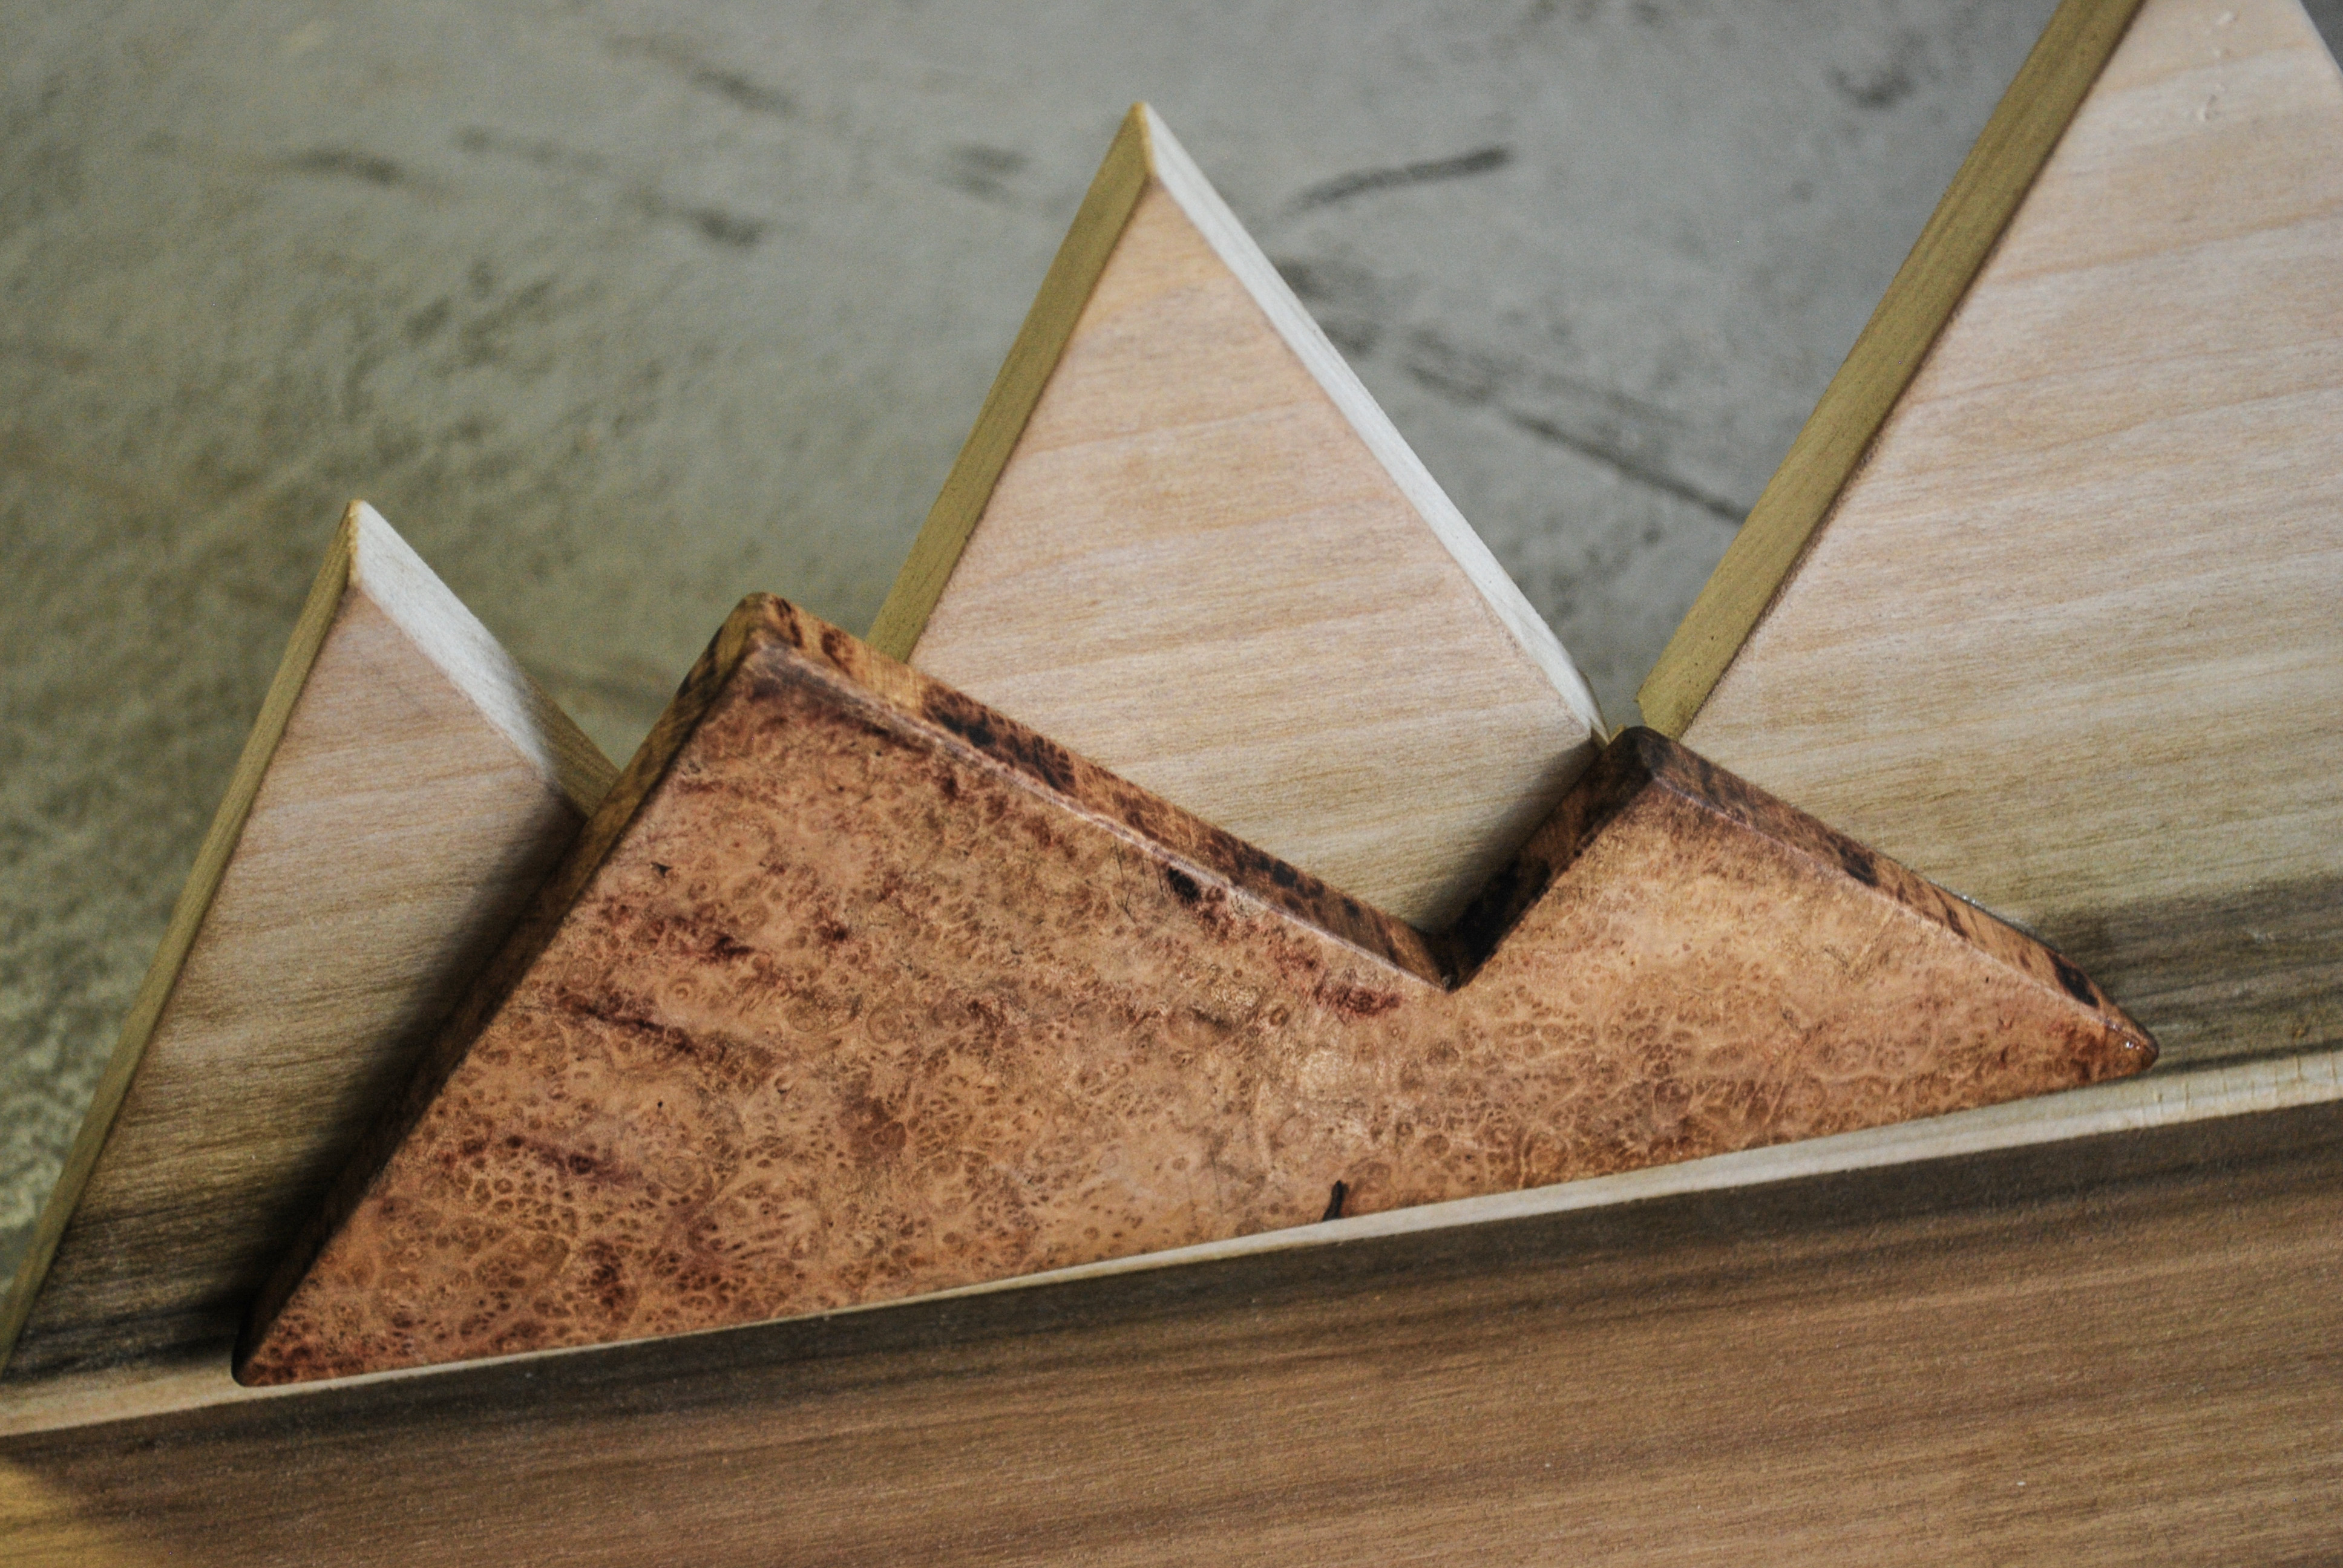
Anyone who has grown up near in the mountains knows what it means to see the ridgeline. Being tucked in nearby some exciting geological features has a comfort and appeal, and, of course, great views. It's safe, secure, constant. The mountains invite adventure, and simplicity. To honor my own local Cascade range, I built this simple key rack that takes a bit of that wild adventure and brings it home.
I used a few scrap boards from past projects for this piece: some poplar, and an amazingly figured accent piece that I added as an eye-catching contrast to the consistent grain.
Tools I Used:
Table Saw
Band Saw
Belt Sander
Sanding blocks or scrapers
But seriously, you could do this whole thing with a coping saw and sandpaper.
Materials:
Two roughly 4"x6"x 1/2" thick boards (poplar was used for this project)
Contrasting Accent wood
Wood Glue
Mounting Brackets
Cup hooks
The Steps:
1. Rough Cuts - I first cut the two boards to size, making sure they were both exactly the same length.
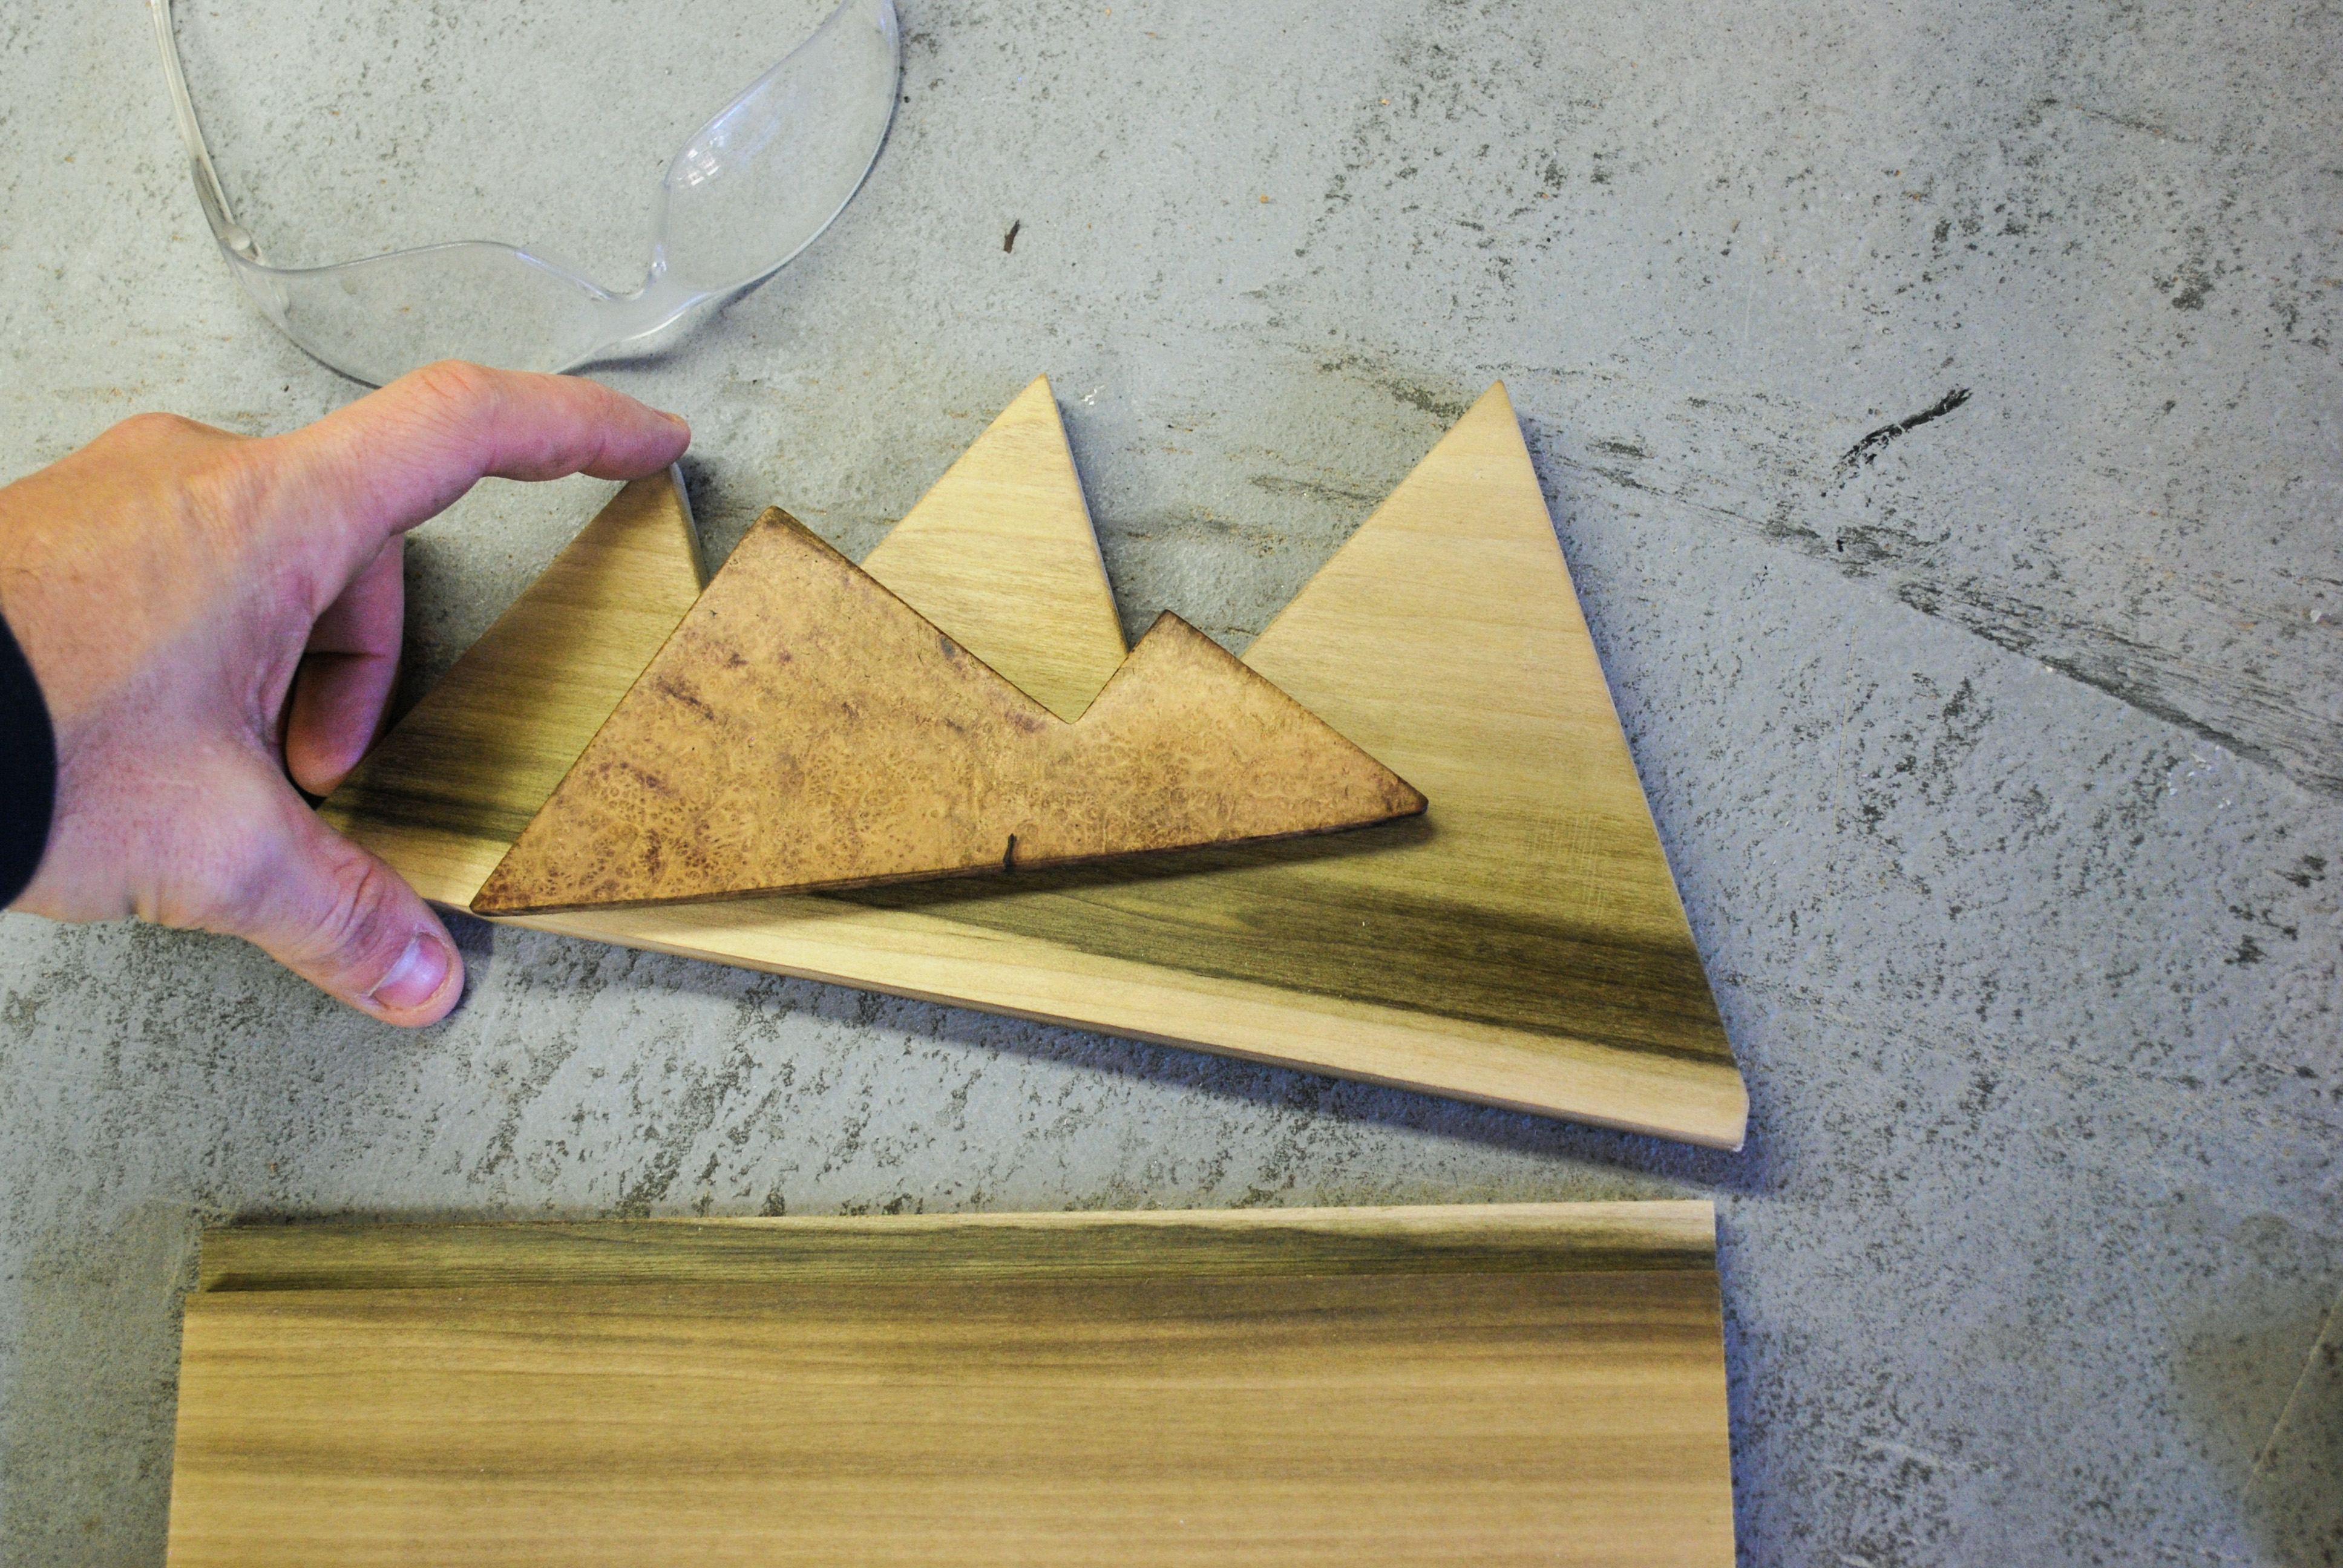
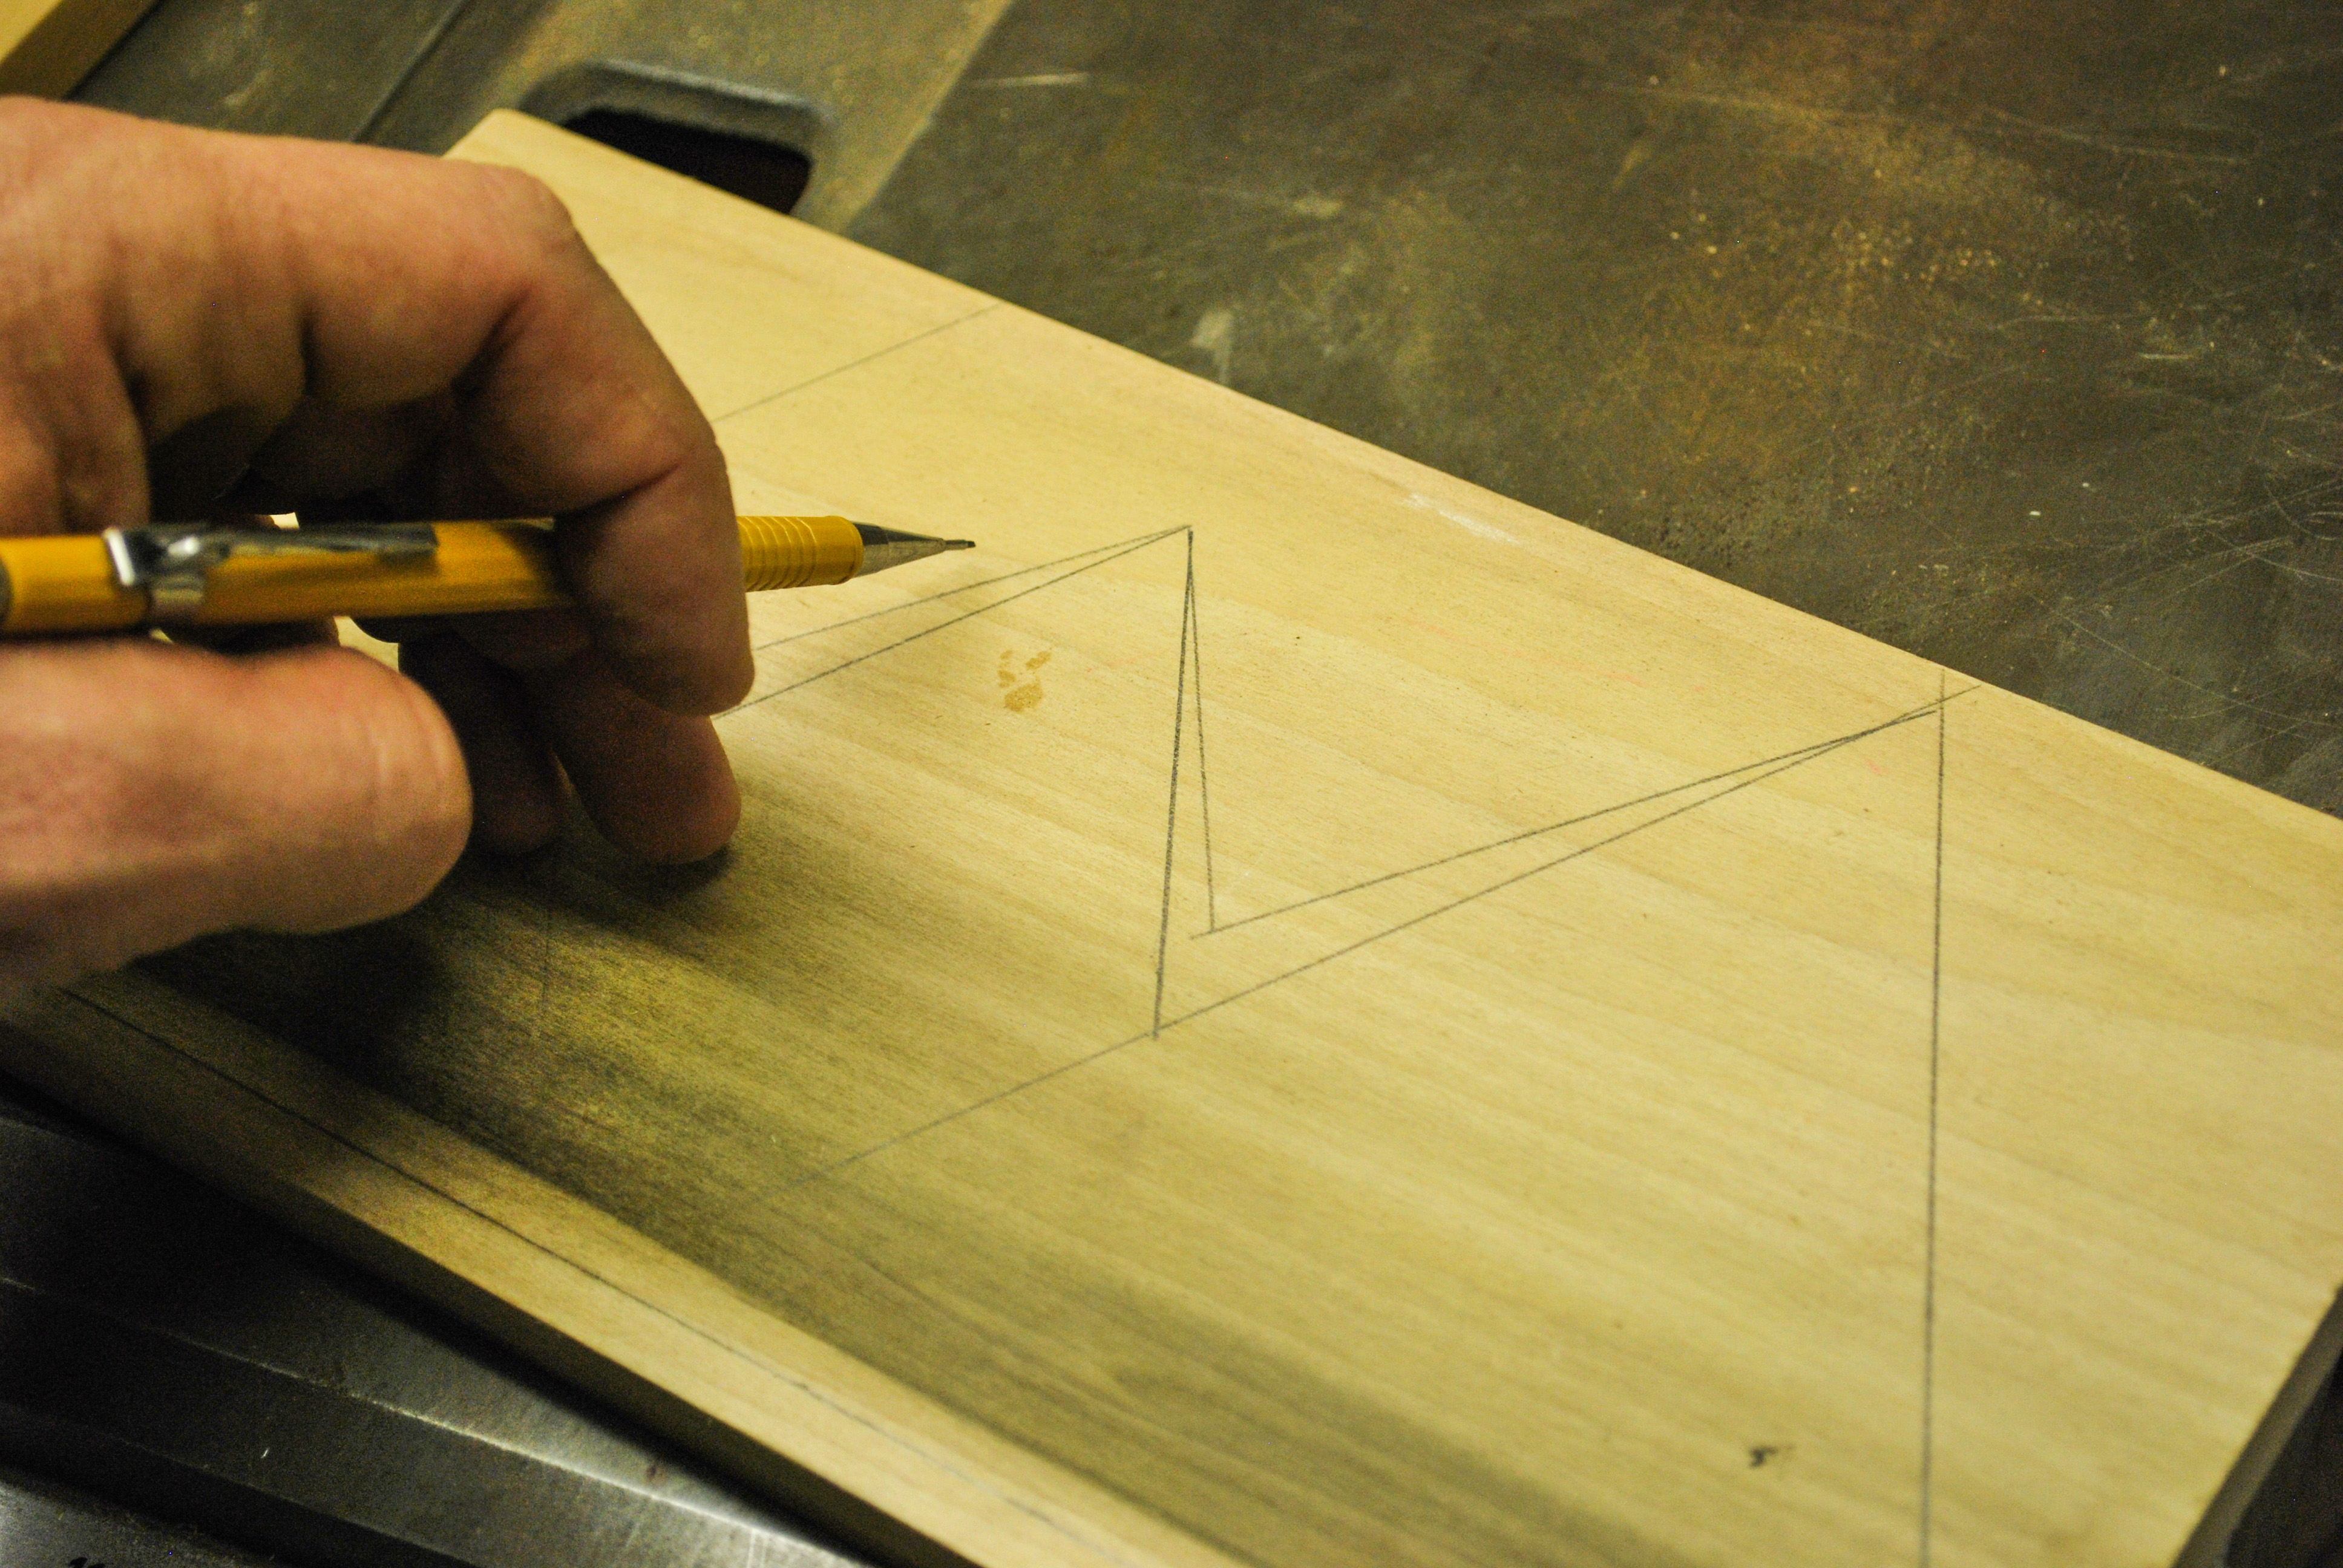
2. Layout The Outline - This is up to personal preference, but I kept the angles on the mountains the same for a more cohesive outline. This also meant I only had to set up my miter gauge once. I used a ruler and pencil to mark the cuts. The accent wood I used was a small piece, so I marked similar shapes, but had to adjust a bit to get the most out of the figured wood.
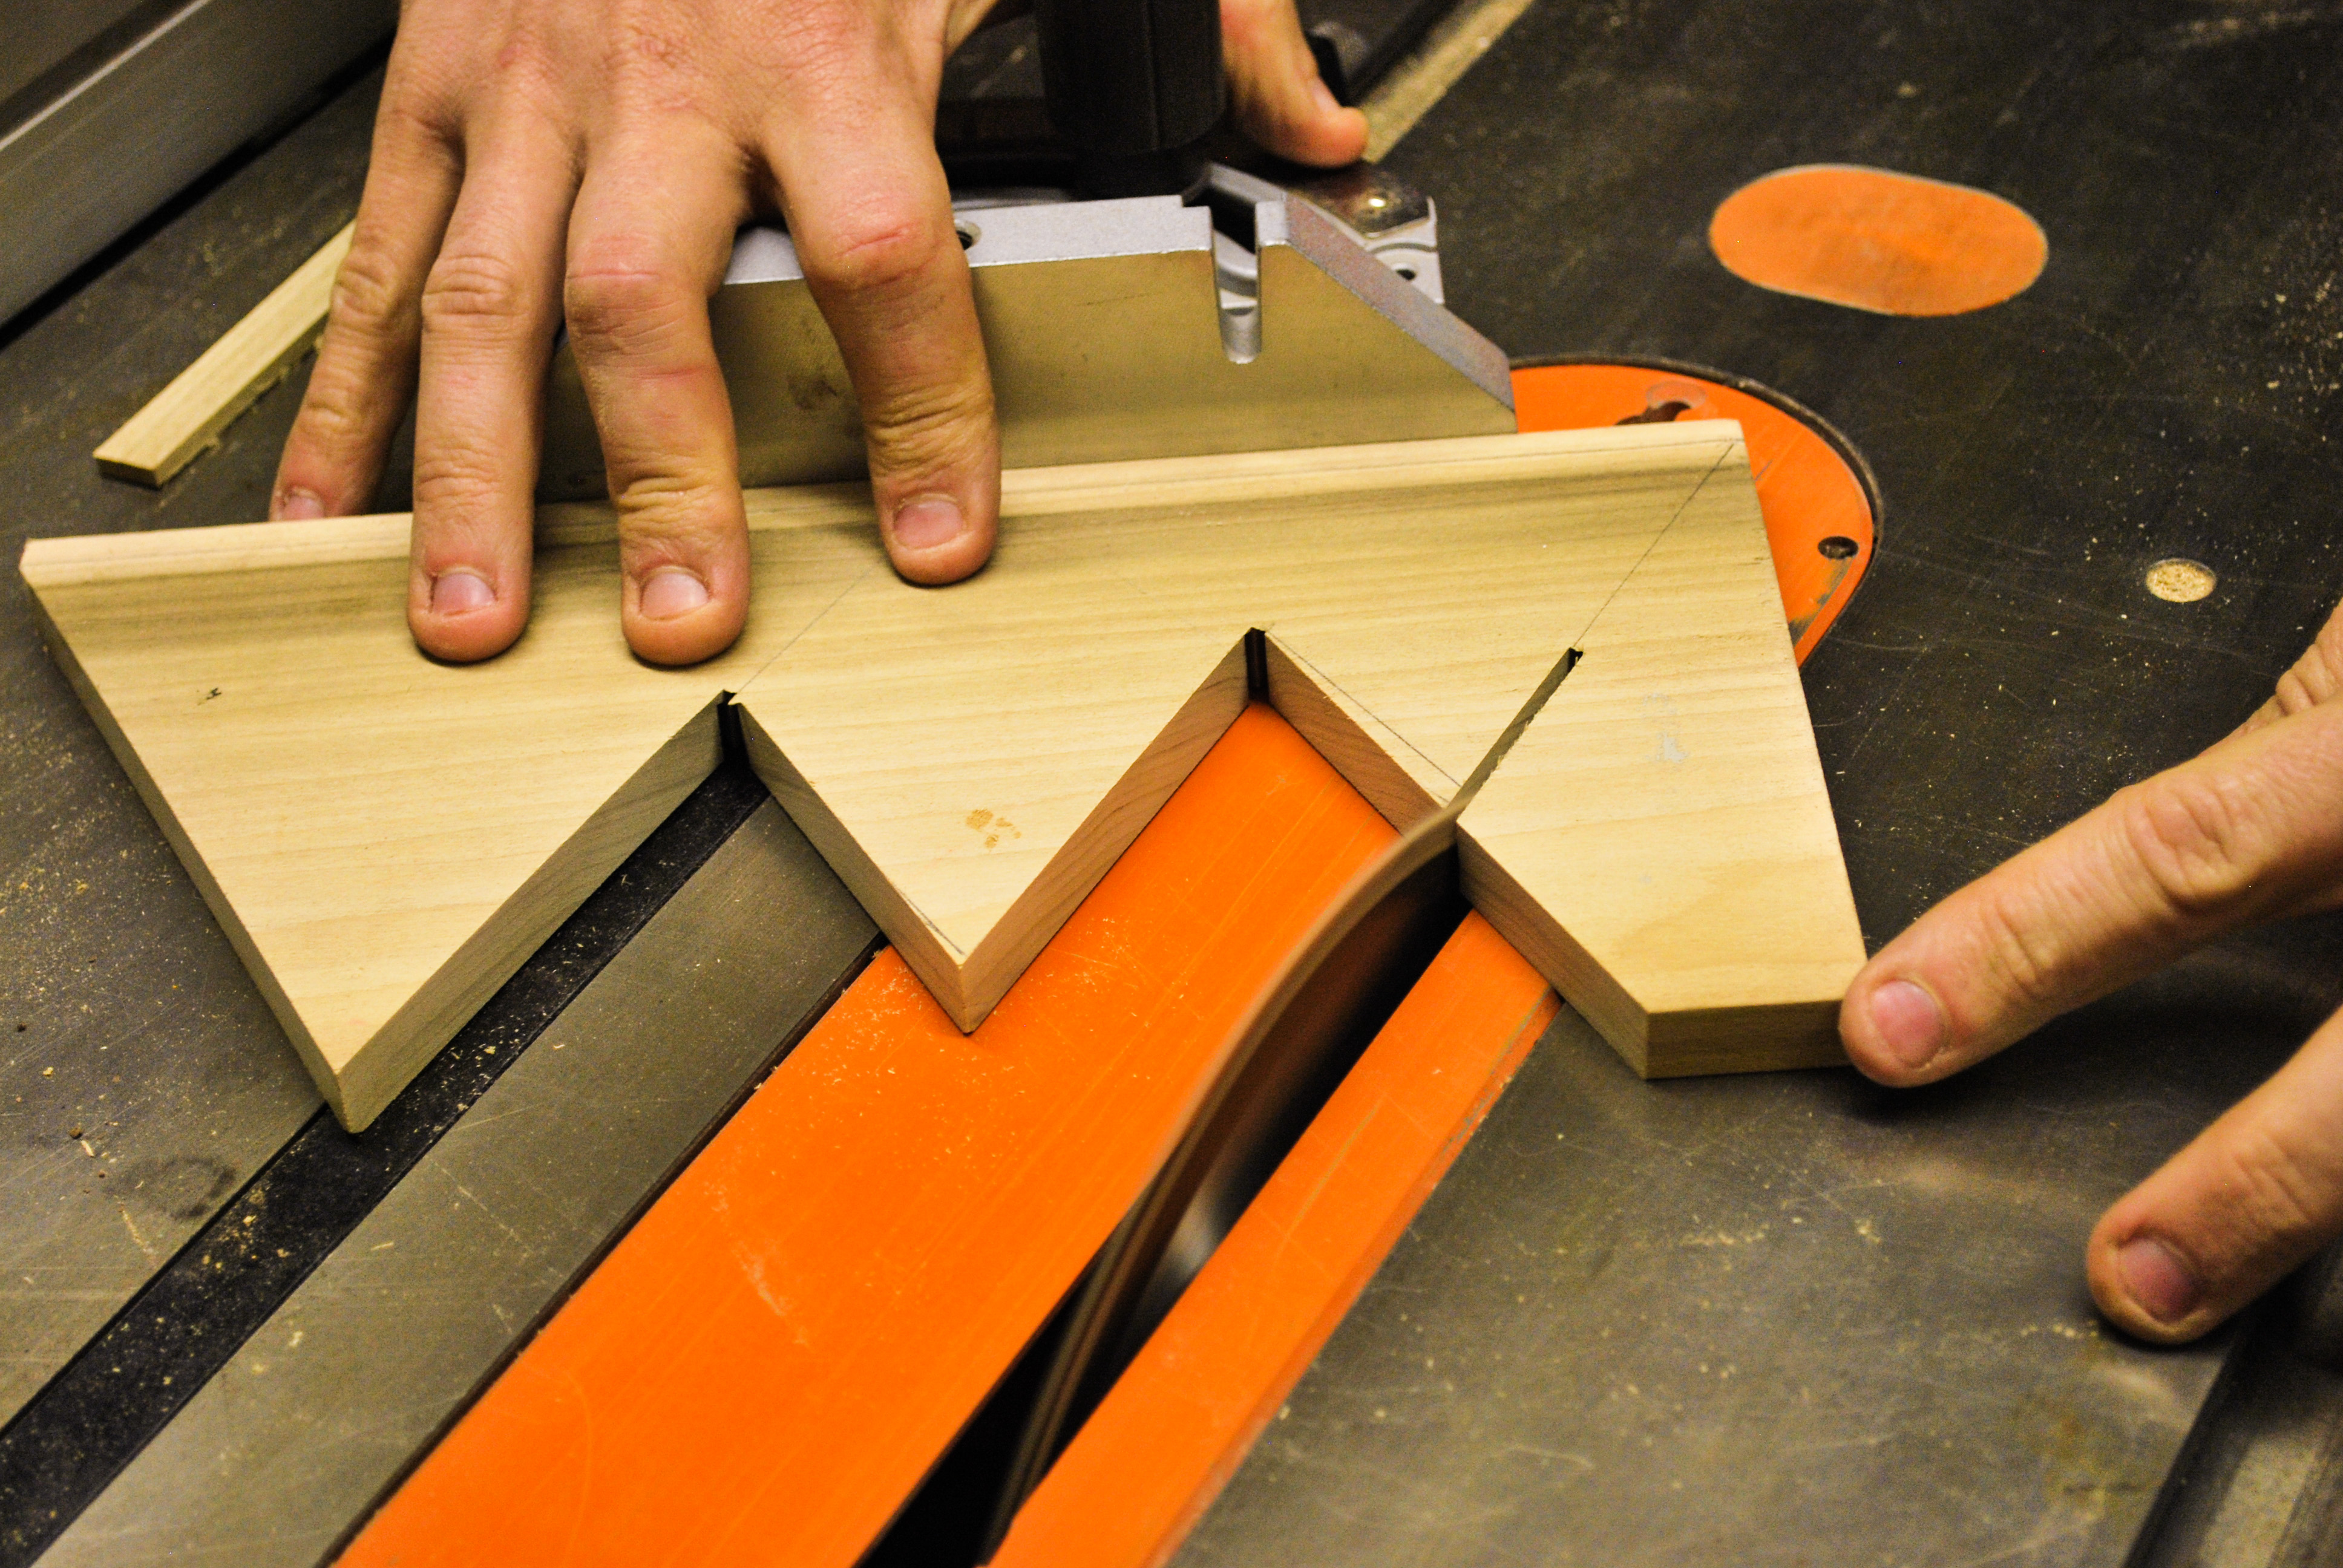
3. Make the cuts - Using the table saw or band saw, cut out the outline and then sand up to the line to get a nice clean look. I also cut a simple rabbet in the back of the shelf for some stability and added gluing surface.
4. Sand Everything - All the parts can be sanded well while they are separate. I sanded with 120 to 400 grit sandpaper with the grain for a smooth finish.
5. Assemble the Pieces - This small piece can be glued together with standard wood glue, but I used CA glue for a faster hold time. I glued and clamped for about an hour before getting back to finishing work.
6. Finish and add hooks - I finished the piece with a few good layers of mineral oil for a clean, natural look. I then added the hooks underneath for keys. Some final sanding with 400 grit sandpaper brought out the sheen and really made the grain stand out.
Now you can have a great reminder of the mountains every time you need to grab those keys for a day outside. It's simple, but still helps me to remember there's a big world out there, and plenty of places to explore.
There's lots of scientific research on why setting goals on January 1 never really works out, and by March or April, we've all backslided into our old habits. Often, it's because goals aren't specific enough, or we haven't found the best way to track the work we've done. Or, perhaps we don't actually believe we can achieve that new version of ourselves for the long term.
But, I've started to think about these sorts of commitments in a new way to some success, and I thought I'd share it in case it might be helpful to you. The reason I've always struggled with resolutions around a new season is that they "feel" like I've added something to my already-full plate. In the era of endless amounts of streaming music, new "prestige" television shows to catch up on, incoming emails, and neverendingly updated social media feeds, we already feel so busy. Like our time is booked for way too long in the future. Adding a new personal commitment on top of that just doesn't feel sustainable, even though we want it to be.
So, because we're finite people in an infinite world, build that into your resolutions. If you're going to add something or do more, find something you'll take away or do less. Name where the time and energy are going to come from. Don't just say "I want to eat healthier." Try "I want to eat more protein, and fewer starches." Instead of "Stop drinking so much caffeine," go for "Less coffee. More herbal tea."
Here are a few more ways this could work:
Wake up 30 minutes earlier; no technology after 9:00pm
Exercise 45 minutes a day; stop using smartphone after work unless someone calls
More fiction, less Facebook
Save more in Roth IRA; cancel my Amazon Prime subscription
More sex, less Netflix
Wash dishes as I dirty them, so no more whole sink-scrubbing before bed
More quality time with friends, less time grumbling about my co-workers or annoying family members
Add three new podcasts that will teach me something new; get rid of three old ones that are basically just the same episode over and over
Less reading about my hobbies in books and online forums, more actually doing my hobbies
The resources to do something different have to come from somewhere. So, our job is to name where we'll get them, usually by letting something else go. This isn't two different goals: going to bed earlier and waking up earlier are the same hope; they work in tandem to make sure you get enough rest and spend the right time doing things you care about. By naming a positive and a negative at the same time, you both raise a question and answer it at the same time.
This might not pay of all your debt or guarantee you'll get down to your pre-college weight, but it is a digestible, tangible way to remind yourself come February about the things you care about. Give it a shot.
What are some other formulations that might help you follow through on your lifestyle changes? Post your thoughts in the comments below.
"Diamonds may be a girl's best friend, but that's because a wooden mallet just won't fit on a ring." Or so claims James Wright of WoodByWright in his video tutorial on how to create this joiner's mallet out of firewood. It's a wonderful afternoon project but I'll let you be the judge on how much the lady in your life may love it compared to a diamond...
I love to connect with others to hear about the gems they've mined out of life lately. But, sharing ideas and experiences isn't always easy, especially when we don't agree. When we all meet at the collective table, whether it's a family get-together or coffee with friends, some disagreement is inevitable. But just because they're missing something or making a logical leap doesn't mean you have to fight. Here are a few tips to remember the next time a conversation steers down that road.
1. Start with what you agree on - This is a great way to remember that for the most part we all have a huge amount of things we agree on. Getting on common ground make the minor points a lot easier to keep in perspective.
2. Listen to understand - It may be hard, but the person in front of you has a point; likely a valid one in their mind. So, dismissing their idea or understanding without seeking to know their point of view is a surefire way to lose right from the start. I try to make sure I'm not just waiting until they stop talking to make my own point.
3. Don't throw out vague facts to support your point - It's extremely annoying when someone paints a scenario or draws up vague facts to drive their point home. Be sure to speak in know facts, not the grey talking points pushed on your favorite fringe new network.
4. Practice active listening - It's always easier to get on the same page when you provide feedback to make sure you heard them right. It's amazing how many times I repeat back the last point and I heard it completely wrong.
5. Get some perspective - Yeah, it's a cliche, but putting yourself in someone else's shoes is a really useful way to figure out where they're coming from. Start with "If I was coming from their point of view . . ." A bit of perspective can really make the discussion level out.
6. Don't make conclusions based on emotions - It's easy to let the conversation get personal, especially when emotions start to flare up. Don't throw out the person because of their statements or their position, always try to look past the argument at the person back there somewhere.
7. Never value winning the argument more than winning the relationship - With that in mind, never let the need to win overpower the need to keep a relationship alive. Friendships are too valuable to throw out arguing over politics, money, or anything else for that matter.
8. Apologize fast - Now if you do happen to go too far, own it and apologize fast. There's nothing wrong with admitting fast when you crossed the line. Remember, you can be right, but be fully wrong in how you handled the disagreement. Stay classy and own it.
9. Hug it out - Once things have deëscalated, it's important to "de-role" and remind yourselves that you were acting as adversaries for a moment, but the bond you have is real and strong enough to sustain misunderstanding.
Now that you see a different perspective on how I approach disagreements, do you have any pointers on how you do it right? Let us know!
There's something to be said for the all-in project. The weekend filling, head-scratching, multiple-trips-to-the-store, major build project that ends up so satisfying, and useful, once it's complete. But there's also something to be said for the straightforward, quick and simple project that can be started and finished after you get home from work. For those times when you don't always have the capability, or bandwidth, to take on something huge, but that creative spirit just keeps telling you to make stuff... make stuff...
This leather key chain project from our buddy Evan at Mr. Lentz is a perfect example of an accessible and functional project that doesn't require any major problem solving, or a big budget. Sure, it requires a few specific leatherworking pecific tools and little general know-how, but it could also be a perfect way to learn basic stitching and edge prep. Evan whipped up a very helpful video that clocks in at 23:00 (with no fancy cuts or sped up footage), proving that you really can do something awesome in under half an hour.
It's a new year, and for the next twelve months, I'm committed to trying to make every object in my life something of true value. Call it a Kondo-inspired "sparking joy" if you like , but this year, I want to cut out the garbage and keep only what's quality. I want everything I touch and use in my life to be beautiful, lasting, and made with integrity. This starts with my morning routine, from the my coffee routine and the mug I drink it in, and goes all day through the book I read during the last few minutes before bed.
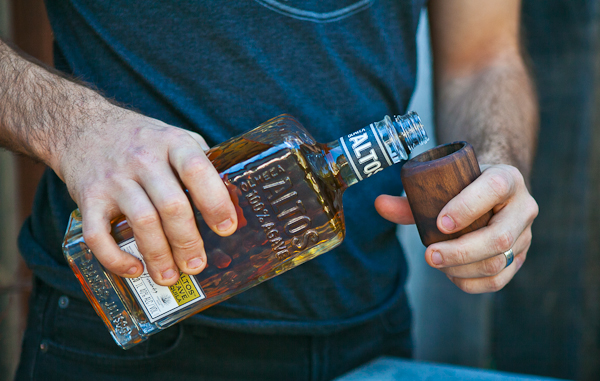
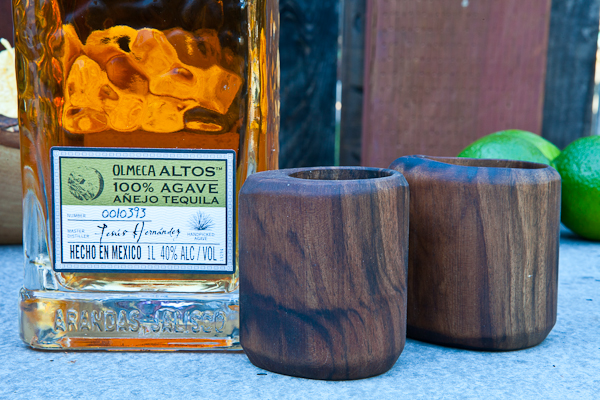
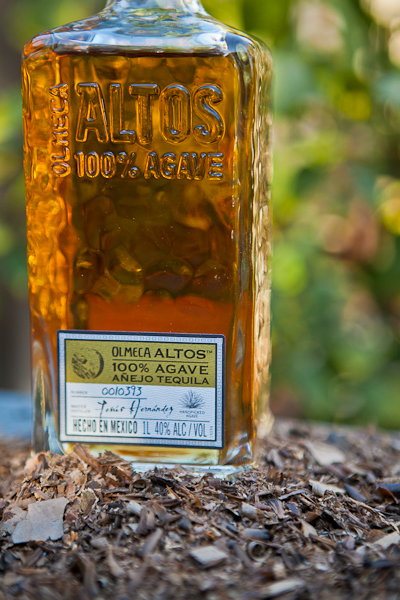
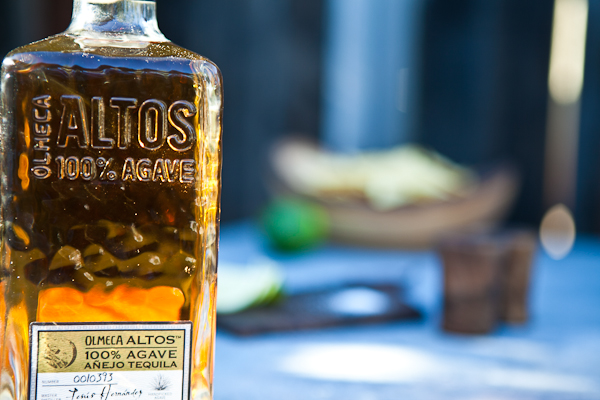
When our friends at Olmeca Altos Tequila invited me to find a way to make the spirit of the New Year last all year long, I knew it was a perfect opportunity to put my new commitment into practice. Altos tequila is already high quality and great-tasting; it's grown in the heart of Los Altos, the highlands region 7,000 feet above sea level in the western part of Jalisco.
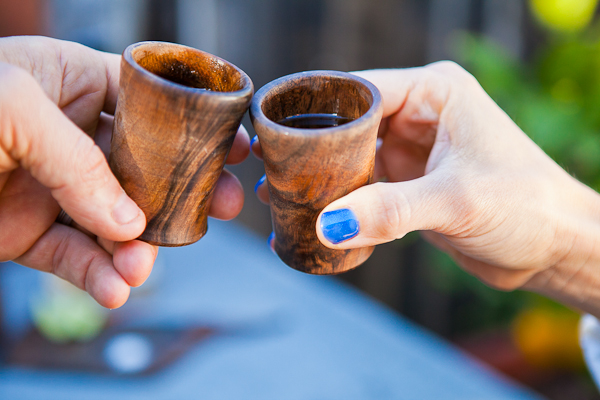
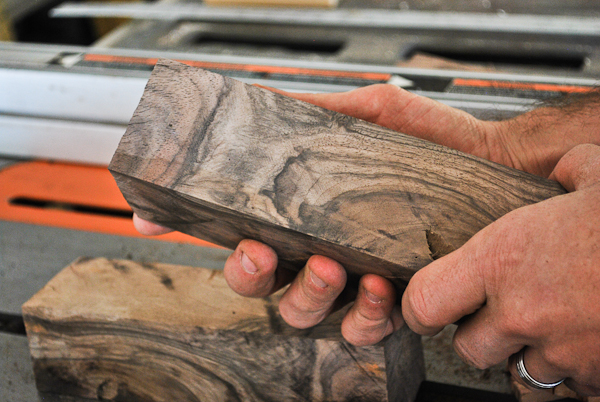
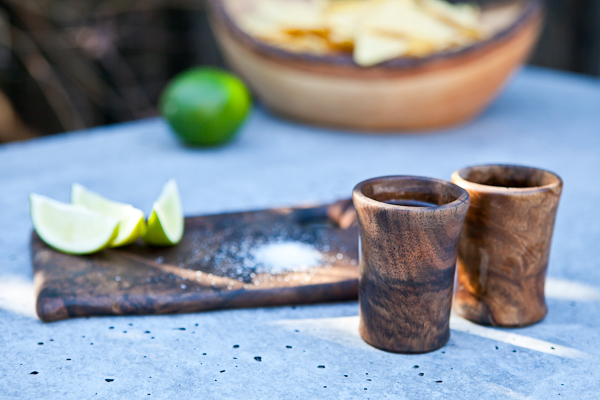
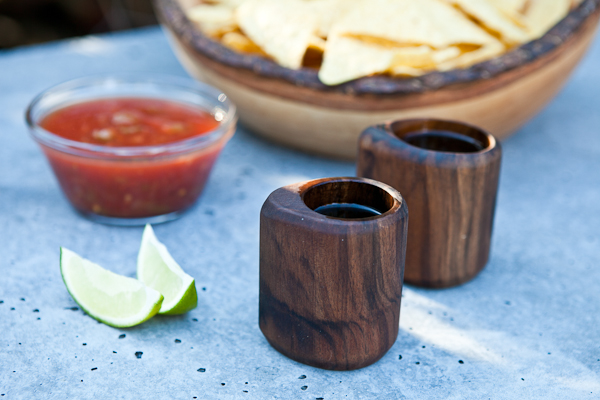
So I figured the only way to improve on it was to "up" the glass in which I enjoy it. Since I've had a few blocks of highly-figured walnut seasoning in my garage shop for months, this was the perfect chance to bring them all together for my first woodworking project of 2017: wooden shot glasses.
Olmeca Altos is one of the only tequila brands in the world that still uses the ancient Tahona wheel as part of the process to crush their hand-picked, roasted agave. Altos Añejo tequila is aged in oak barrels and has a well-balanced and rounded aroma, with a presence of sweet, cooked agave that is enhanced by notes of dried fruit and almonds. Like all aged tequilas, it's best enjoyed neat ... perfect for a handmade wooden glass.
The Project:
Materials:
Suitable Wood (Hard, solid wood with no knots or cracking) squared up to rough size
Table Saw
Drill Press
Bandsaw
Lathe (advanced option)
Router Table (round-over option)
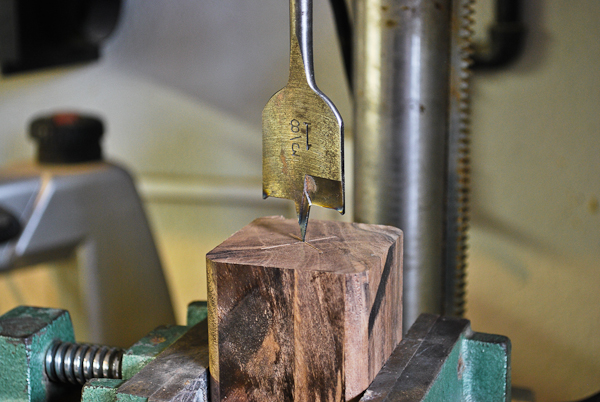
1.5" Fortsner Bit
Sand paper
Mineral Oil or Shellac finish
The Steps (Simple Version):
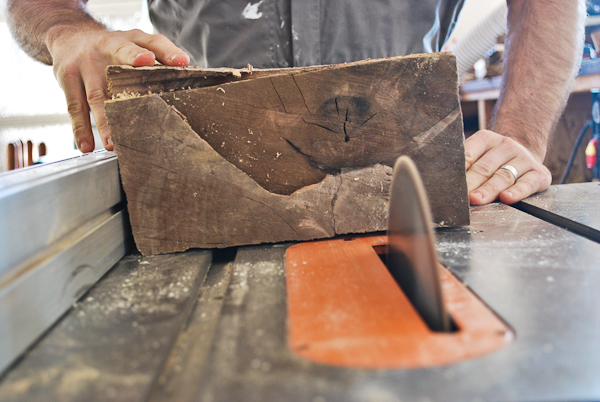
1. Square up your stock- If your lumber didn't come ready to work, mill the wood to a consistent thickness and give it straight, square edges.
2. Cut to length - I wanted about 3" tall glasses, so I added a 1/4" to the size to account for machining and made the cuts.
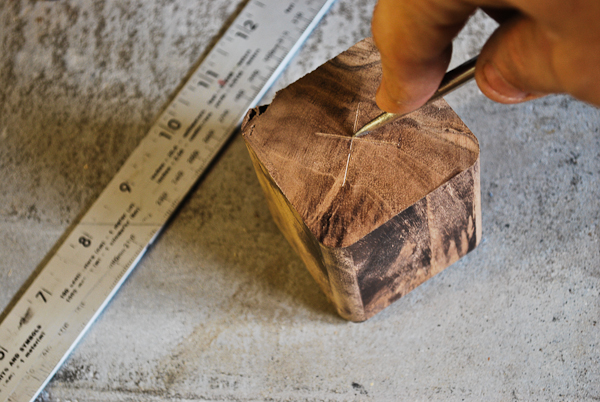
3. Mark the center point - Layout of the pieces is important. Finding the exact center on the squared up piece will ensure the center is drilled out properly.
4. Round over the edges (optional) - I chose to round the edges with a roundover bit and my router. You can just taper with sandpaper or a block plane if you want a more squared-off feel.
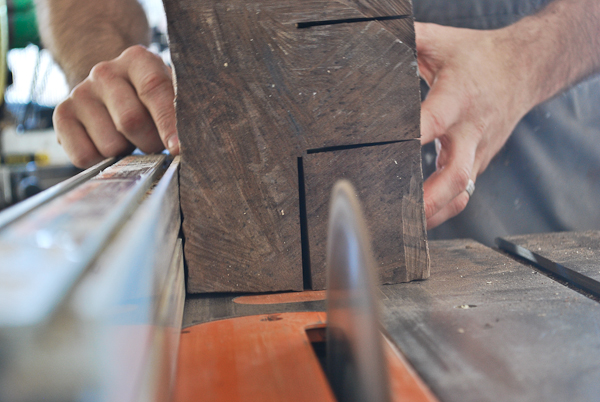
5. Drill out centers - Hold the piece square with a clamp or vise and drill out the center of the cup. Be sure to mark the depth properly to avoid drilling too deep.
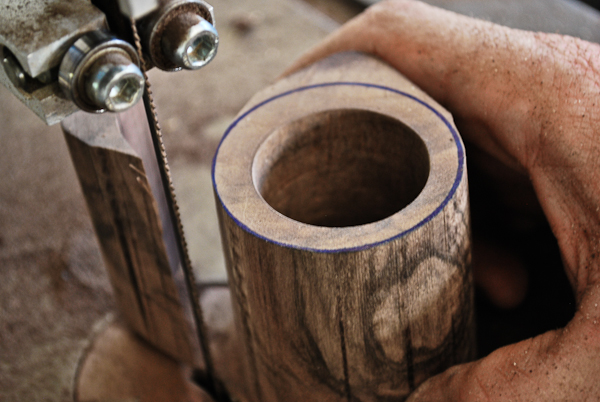
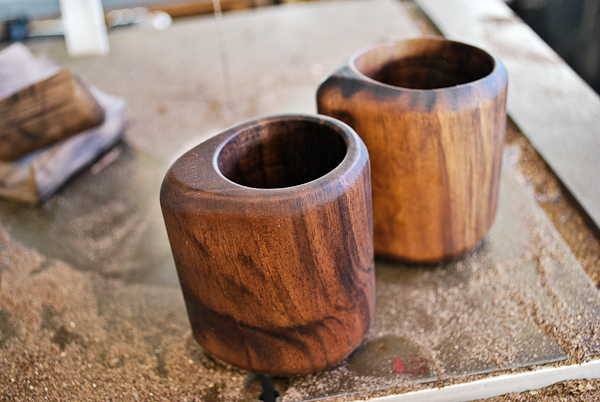
6. Cut to final shape - Once the center hole was drilled, I cut off three of the sides for a clean, easy to hold shape. Feel free to get creative here. As long as your cup is properly drilled, you can make the outer edges look any way you please.
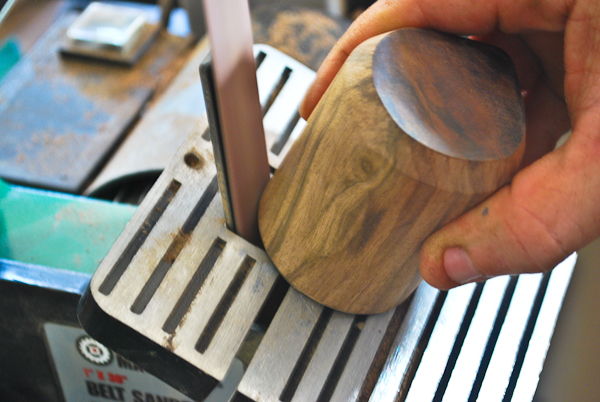
7. Final Clean Up - Now it's time to sand smooth to your preferred finish. I used a belt sander for the edges then hand sanded the whole thing up to 600 grit, sanding carefully with the grain to make sure the finish is polished up nicely.
8. Finish - Since the cup will be used for drinking, it's important to choose an easily maintained, food-safe finish like mineral oil, or something that will cure up completely so nothing will leach into your drink.
Boom! Sit back and enjoy. Unless....
The Steps (advanced version):
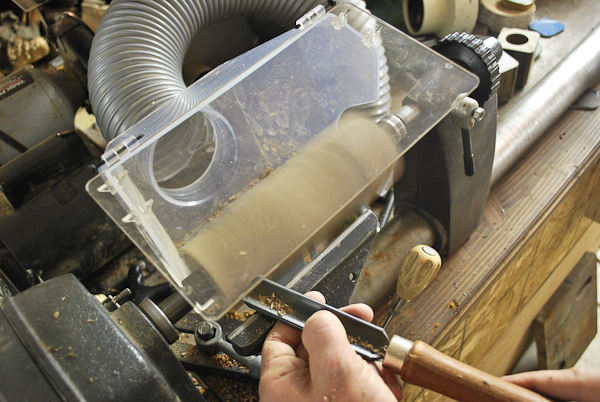
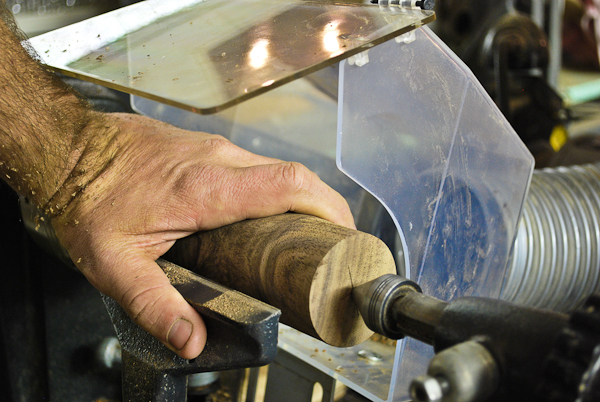
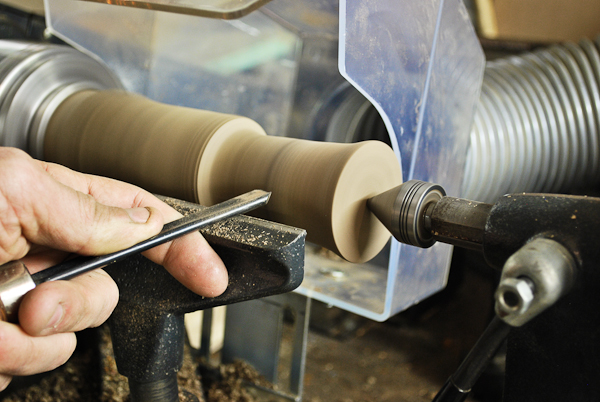
If you happen to have a lathe in your shop, this advanced option is also a great way to go. I squared up the pieces, but kept them long so that the lathe chuck could grip the piece well. This took a bit of rough cutting with my stock center to make the tenon small enough to grip with my chuck.
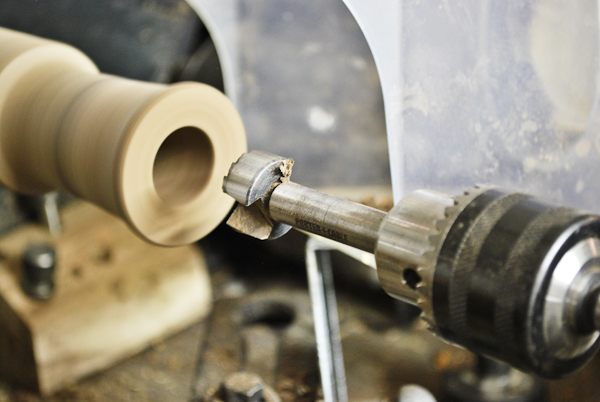
Once mounted, I roughed out the shape and size, then I used a lathe chuck to drill out the center of the pieces.
The clean up happened with a bowl gouge.
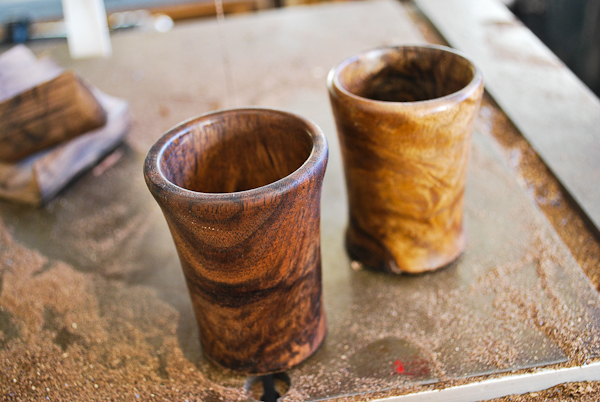
Once the final shape and cutting was complete, I finished it off with sanding up to 1000 grit, then polishing and a final triple coat of mineral oil.
The wood is porous, so be sure to keep the glasses clean and finish often with mineral oil to maintain a good layer of protection.
Once the power tools are off, bust out the Altos Añejo for a well-deserved sip.
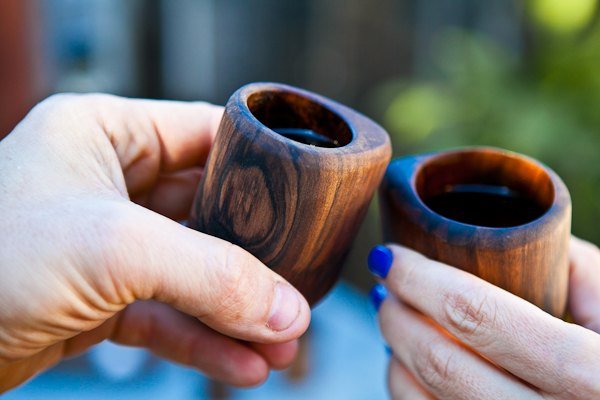
I gotta admit: I really like drinking out of these. They're lightweight, but thick, and they make for a very satisfying sipping experience. Much better than the coarse bought-off-the-counter-at-the-liquor-store glasses I was using before.
I'm quite happy with both sets of these, and think they're a mighty fine way to begin the new year. Try making some this week, and snap a pic to share with us in comments below.
This post was sponsored by Olmeca Altos 100% Agave Tequila. Thank you for supporting the brands that support ManMade.
In the summer, it's easy to get those deep, blackened and charred flavors in your weeknight meals. During grill season, you simply head outside, and cook your meal over an open flame.
And then comes January, where the produce is poor, and everything lacks that certain zing that the warm sun and fire-seared foods provide. Over the past few years, I've seen difference chefs experiment with ash and charred X and Y to bring in those slightly bitter and deeply satisfying flavors of open fire cooking. So, it got me thinking... where can I get some ash that I'd actually want to eat?
The answer is: there's a whole bag of it on my back porch. Not leftover in the grill (though that might work), but in solid form: charcoal.
Of course, if you're gonna put charcoal directly in your mouth, you gotta make sure it's the right kind. So, skip the chemical-laden compressed briquettes and opt for 100% hardwood lump charcoal, and make it organic if you can find it. This is nothing but hardwoods like oak, hickory, and mesquite that are burned in the absence of oxygen.
You could just sprinkle it directly on your food, but mixed with salt and some other seasonings, it makes a great way to add some of the grilled flavor to even the blandest of wintertime meals. Here's how to do it.
1. Measure out the salt and add to a mixing bowl. Zest the lemon with the Microplane, and add the garlic powder, sugar, and chile flakes. Stir to combine.
The acidity in the lemon and sugar help to balance the bitterness of the charcoal, and the garlic gives it a rounded, savory flavor. If you wanted to add some fresh herbs like rosemary or thyme here or a bit of ground cumin or coriander, I certainly wouldn't kick you out of the kitchen.
2. Grate 1-2 teaspoons of hardwood lump charcoal into the mix. Start with one teaspoon (about 8-10 scrapes), stir and taste. Add more as necessary to get a nice balance. Stir thoroughly to combine.
Store in an airtight container. The high sodium content will dry out the lemon zest and prevent any little creepies from growing into the mix. You can keep this indefinitely, I'd imagine, though it'll start to lose its punch after six-eight weeks. If you're concerned, you can store it in the fridge.
Use it as you would any salt: on meat or fish, vegetable dishes, a piece of toast, or as a finishing salt for pasta, potatoes, or rice. The flavor is nicely bitter, and works well with anything that you'd normally grill. I added some to leftover pizza for lunch, and it made it taste much closer to something that came out of a wood burning oven. It's good stuff.
In the era of advanced smart phone filters, it's not difficult to make your images look like something more than a snapshot. But, more often than not, these images don't look textural or vintage or interesting, they just look... filtered. It's not a je ne se quoi, it's an I know exactly se quoi — it's also my favorite Instagram filter.
So, I'm digging this video from Canadian photographer Peter McKinnon. In it, he shares some cool ways to add depth and texture to your images using things you probably already have on you: your smartphone, a pocket knife, chapstick, leather belt, etc. The tips are gear more towards a DSLR than a phone camera, but the effects are pretty cool. Some work best for video/moving images and some for stills, but these are actually things you might try when you want to create something special.
There are plenty of times when a small wooden board is all you need to set out or serve something when entertaining. And it's even better when they look awesome and make whatever you're sharing look that much tastier. If you have a few scraps of wood lying around after a project, this is exactly what you should do with them.
While a solid, thick cutting board is still an essential part of a well-equipped kitchen, these planks are just a handy way to tackle fast cutting jobs. What I really like about these small cutting boards is the ability to grab fast for small jobs while cooking, or tossing them out with a few different finger food choices when friends come over. Putting a simple hole and leather strap makes it easy to stash them in plain sight. Here are the steps I took.
The wood - For this type of cutting board, harder woods that have a more closed grain like walnut or maple. This holds up better while cutting, and won't absorb food and liquid as easily. You can square up the pieces, or stick with a natural, live-edge look. Your stock should be at least 1/2" thick to keep them from warping with repeated use and washing. Avoid edge checking (cracks) if possible, or stabilize with CA or wood glue.
The prep - I drilled a 1/2" hole near the top corner for a thumb hole, and also to attach a strap for hanging it. I rounded over the hole and outer edges with a round-over bit on my trim router for a smooth feel.
This is where the rough edge shows it's glory to give a pleasantly uneven and interesting look to the board. It looks like a tree, not lumber. A bit of sanding got the edge smooth and seamless.
Sanding - Because I was using re-sawn wood, the surface of my boards was a bit rough. This took a lot of sanding to get to a smooth, even face. I used a combination of belt sander, random-orbit sander, and plenty of hand work with a sanding block.
I worked up from 100 to 400 grit for an even surface that looked great, and guaranteed no dust in the food.
Finish work - I sewed on a small strip of leather for a handle and hanging point. This came from a sheet of un-tanned leather that I cut and treated with leather preservative.
I punched a few holes and sewed it on to the cutting board.
The stitch was simply a horizontal loop, but it kept with the simple design.
I used non-toxic mineral oil for the finish on this. It doesn't stay on as long, but it's safe for food. This natural finish really made the grain pop on the figured wood.
A few final notes:
- Avoid cutting garlic or onions, or meats on wood cutting boards, stick to a plastic (HDPE) material for those tasks.
There's something to be said for the all-in project. The weekend filling, head-scratching, multiple-trips-to-the-store, major build project that ends up so satisfying, and useful, once it's complete. But there's also something to be said for the straightforward, quick and simple project that can be started and finished after you get home from work. For those times when you don't always have the capability, or bandwidth, to take on something huge, but that creative spirit just keeps telling you to make stuff... make stuff...
This leather key chain project from our buddy Evan at Mr. Lentz is a perfect example of an accessible and functional project that doesn't require any major problem solving, or a big budget. Sure, it requires a few specific leatherworking pecific tools and little general know-how, but it could also be a perfect way to learn basic stitching and edge prep. Evan whipped up a very helpful video that clocks in at 23:00 (with no fancy cuts or sped up footage), proving that you really can do something awesome in under half an hour.