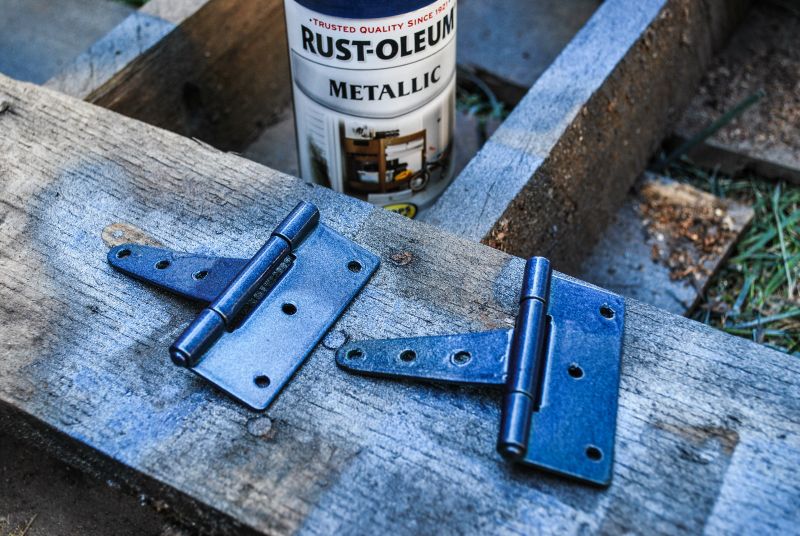
Quantcast
Channel: Man Made DIY Recent Posts
Viewing all 2425 articles
Browse latest View live

Weekend Project: Make a Wooden Chair from One Board (for $8!)

$
0
0

At its core, a chair is simply a seat with a back. And while they often have legs and arms and complex joinery for strength, sometimes, a little physics can accomplish the same thing.    

Instructable member More Cowbell shares his simple plans for making a minimalist, stow-able chair from one 8' long, 12" wide pine board. It  s basic design allows it to be disassembled and stored flat in standby mode under the bed or in a closet for parties, barbecues, or camping trips. 

The technique involves cutting a large mortise - or, as More Cowbell dubs it, a slot A for tab 1, - to insert the seat, creating rigidity and a comfortable sitting angle. The wood costs less than $10 each, and can easily be sanded, stained, or painted. 

Get the full how-to and measured drawing at Instructables: One Board Minimalist Chair


Try This: How to Make Your Own Red Wine Vinegar

$
0
0

Make your own Vinegar

Right now, you can find more tutorials on how to use vinegar to clean your toilet than you can find to use vinegar with a delicious dinner. This is a travesty for such an amazing and delicious liquid! Unlike most condiments, vinegar is one that you can make yourself and will taste better than anything you can buy in a store. I guarantee it! Here is a simple tutorial on turning leftover wine into homemade vinegar.   

Vinegar is a versatile condiment. When reduced it can become a sweet sticky sauce for chicken and pork. It adds a depth of flavor and bite to soups and marinades. Think of wine vinegars like a concentrated version of your favorite vintage. If you recipe calls for wine, sub it with vinegar and see how amazing the flavor can be! 

Making your own vinegar is a great way to give some use to wine leftover from your latest dinner party. You will find that any kind of wine, whether cheap or very expensive, will make a vinegar better than anything you buy in a store.

Here's what you'll need:

  • 1 bottle of red wine - I used 1.5 L of Cabernet Sauvignon 
  • 1 Growler or large crock -You want something with a lot of surface area at the top
  • 1 piece of cheese cloth or paper towel with a rubber band
  • 1 bottle of unpasturized vinegar - I used Braggs apple cider vinegar. It still has the mother starter in it.
  • funnel
  • measuring cup

Vinegar is made by allowing an active culture, called "the mother," to feed on the natural alcohol in the wine which, in turn, adds a significant amount of acid to the vinegar. Adding Braggs apple cider vinegar–which has a mother in it already–to your wine shorten the time it takes to make your condiment.

Start by thoroughly cleaning your growler, funnel, measuring cups and other things that may touch your wine. This will help prevent any unwanted bacteria from forming in your vinegar. Once you've done that, fill your growler 2/3 full of wine. For my growler, that was about 4 cups. Make your own Vinegar

Next, fill the rest of your growler with the apple cider vinegar. About 2 cups for my batch. Be careful to stop filling up your growler before it reaches the neck of the bottle. You want a lot of surface area for the oxygen to penetrate the vinegar and keep the cultures working.

Cover your growler with cheesecloth and secure with a rubber band. This will keep out the fruit flies and other pesky insects from getting into your vinegar.

Make your own Vinegar

Next, grab a sticker label and write what kind of wine you have in the growler and the date you created it. This will help keep you organized when you have 20 bottles of vinegar brewing in your basement. 

Make your own Vinegar

Once you've labeled your bottle, place your vinegar in a dark place to sit for several months. Mine is sitting in the closet next to my water heater. The ambient heat will actually help the fermenting process. I've found that when I've followed this recipe, the wine will turn into a decent, useable vinegar in about a month. You can let it sit for as long as you like, the longer it sits, the more it intensifies in flavor.

Whenever you have a leftover bottle of red wine, you can add it to your vinegar growler. It will feed the mother and add complexities over time. 

Make your own Vinegar

Whenever you're ready to use some of your vinegar, pour it through a coffee filter to remove any sediment. I like to bottle my vinegar in leftover liquor bottles with cork stoppers. Just like wine, the cork stopper will allow the vinegar to continue to age and breathe in my pantry. 

Go Beyond Wine Vinegar
You can also apply this to any beverage containing alcohol or sugar. Fruit juices, beers, ciders and liquors can be turned into vinegar. Imagine a craft beer malt vinegar or a bourbon vinegar. The possibilities are endless! 

I'm still new to vinegar making, I'd love to hear your experiences. Have you made any wild and unique ones?


Make This: Old License Plate, New Box

$
0
0

created at: 06/16/2015

Vintage pieces are always fun to work with. Aside from looking great, they tell a story through dents, scratches, and a style that once was. Here's a quick tutorial on how to turn a vintage license plate into a great snack box for the mancave.   Working with metal has always been a bit intimidating to me. I'm comfortable with wood, leather, and other materials, but metal is just another medium that takes some time to master. Here's a great introduction project to start working with metal, using only a set of metal snips and a block of wood.Forming a license plate box

The project creates a cool box that's already painted and can be shown off proudly with about an hour of work.Metal Boxes

Take a look at the step-by-step tutorial at the Cavender Diary 

Make This: Protect Your Computer with an Easy DIY Leather Laptop Sleeve

$
0
0

Trace & Cut Out

If you getting a ton of use out of the cord taco you made with the last blog post, my guess is that your probably going to get even more use out of this DIY leatherworking project.

As always, if you don't feel skilled enough to pull off any of the steps below, you can check out this beginners guide to get you going

Story Time: 

I — admittedly — was in the habit of just grabbing my computer and carrying it around. Its home was wherever I left it...unprotected. Stupid, I know. I’m pretty careful with my stuff, especially when it costs as much as a laptop, but even if you can control you're behavior, you can’t always predict what other people are going to do. 

Enter my co-worker. We had just started working together and my wife and I had him over for dinner to get to know him a little better. At some point during the night he somehow managed to spill his entire glass of water on my laptop, which I thought I had placed enough out of the way. Don’t worry, we are now good friends. All that to say, a leather laptop sleeve would’ve more than likely saved the day, my computer, and my files that weren’t backed up (again, a bit stupid, I know…).

And since I have the know how, and you should too, I decided it was time to break my non-sleeve habits and make a leather laptop sleeve. I also back up my files now.

What you need:

  • 5oz leather (preferably waterproof, but many leathers are at least water resistant).
  • 2oz leather scrap
  • Leathercraft glue
  • Snaps and setter, hammer
  • General leatherworking  tools, such as:
    • needle and thread
    • ruler
    • diamond chisels or punch
    • leather knife and/or rotary cutter
    • scratch awl
    • sandpaper (220 grits and 400-600 grit)
    • beeswax
    • dividers

Step

First, let's figure out the correct measurements so that your laptop case fits your laptop.

I made mine for a 13’ Mac Book Pro (which measure roughly: 12.25 x 8.5 x .5 when closed) and I will list my dimensions below, but if you’re not using the exact same lap top as I am, best bet is to measure and come up with your own dimensions.

Length:length of your laptop + height of your laptop + 1/2" (for stitching) + 1" (for wiggle room)

Width:2.333" x width of your laptop2 x height of your laptop + 1/4" (for stitching)

So for my laptop I cut out a square measuring, 14.25 x 22.125 (I rounded this up just a tad for easy marking).

**If you are using an unfinished piece of leather, you will need to dye and finish that leather before the next step. You can find a guide for that here.**

Step

Now it's time to cut out the leather. This step may not seem like a difficult step, after all, you're just cutting out a square. But don't be fooled. Mistakes made at this point will haunt you for the rest of your project. Make sure to get clean cuts made with precise measurements.

To make sure your measurements are on point, I always suggest tracing your project onto the leather with a scratch awl and ruler.

After you've traced out your square, come back with a ruler and leatherworking knife to cut it out. It pays to have a nice solid ruler that isn't going to slide around when you cut. Also make sure your knife is sharpened and ready to go. Sharp knives mean less drag and less drag means easier and cleaner cuts.

Step

Before gluing the project together, it's important to attach the hardware. To the attach the hardware, start by punching out the holes for it. You'll need to punch out four different holes. Two on the flaps for the female part of the two snaps. Then two holes on the front side of the sleeve for the male sides of the two snaps.

Start by punching the holes for the flap. To do this, measure 4.5" in from either side and then 2" down from the top of the flap. This is where the two holes will need to go.

Then flip the project around. This other end of the project is where the holes for the male pieces will need to go. For this holes measure 4.5" in from either side and then and 1.5" down from the bottom edge.

Once you've marked these holes with an awl, punch them out with a leather hole punch and hammer.

Once these holes are punched, I went back to trace a circle around the holes on the sleeve itself, not the holes on the flap. I used a washer to do this. This circle will later serve as a stitching guide, when you'll need to stitch a thin piece of leather on the backside of the sleeve to prevent the hardware from scratching your laptop.  

Now it's time to install the snaps. As mentioned previously, each snap has four different pieces. A front and backside for the male piece and a front and back side for the female piece. First install the snaps on the flap. These pieces will be female piece and the domed cap. The domed cap will need to be on the front side of the leather and the female piece on the backside of the leather. Set the domed cap into the domed anvil. After place the hole in the leather over the dome and then set the female piece on top. With the rivet setter and hammer, hammer the snap together.

Once you've riveted both holes on the flap this way, it's time to attach the male pieces to the sleeve. Place the post piece through the hole and then set the male piece on this post on the other side of the leather. The male piece should be sitting on the top side of the leather. With the two pieces set on top of each other with the leather in between, rivet them into place using a rivet setter and hammer.

Step

Your snaps are ready to go, but now you need to make sure they aren't scratching your laptop. To do this, you'll need to stitch a thin piece of leather to the backside of the sleeve.

Using a slightly larger washer than the washer you used to trace the stitching line in step 3, trace 2 circles onto a piece of 2oz leather scrap.

Cutting out a circle can be tricky, so use this guide to make sure that you're able to cut a nice rounded out circle. After cutting two circles out, glue them to the back of your snap. This will be back side of the male piece of the rivet. 

After the glue has dried, flip the project back over and find the circle stitching lines you created earlier. Now, using a two pronged chisel and a hammer, create stitching holes around both marked circles.

Now it's time to stitch those circles into place to ensure they don't go anywhere. Stitching itself is a little tricky to teach through text. So check out this video to learn how to saddle stitch leather.

Once you've finished the stitching line, be sure to backstitch. To backstitch, simply stitch in the opposite direction once you've got the the end of your stitching line, for two or three holes. Then, trim the thread, burn the end, and tuck that lose end into the stitching hole.


Step

It's time to glue the project together. Gluing is something you'll want to give a good amount of attention to as well. It will make burnishing much easier later on.

You'll be putting the glue along the edges where your stitching will go. Start by sanding those areas lightly with the 220 grit sandpaper. This step is especially important if you're working with a waxier leather that will prevent the glue from adhering. 

When sanding make sure to only sand where the glue will go. This will be on the underside of the leather from the edge to where your stitching lines will go (1/4in from the edge).

Once you've abraded those areas, apply a small amount of glue with a paint brush (or whatever you have on hand). Seriously though, don't add too much. Over doing the glue here will create a mess.

After gluing both sides, fold the leather over and line up the edges. Once it's lined up perfectly, you need to apply a lot of pressure while the glue dries. There's a number of ways to accomplish this, but the best way I've found is to use binder clips. And, depending on how firm your leather is, these can actually damage the surface of the leather, so make sure to put some sort of padding between the binder clips and the leather. An old rag or t-shirt will work.

As you attach the binder clips, if any glue squeezes out, make sure to wipe it off so you don't have to sand it off later.

Step

Unless you want a very square looking laptop case (no judgement here) you'll want to round out the corners at this point. I tend to side with rounded corners, simply because they wear better.

Using a washer as a guide, trace out the rounded corners with an awl. You can use any size washer on the flap corners, but make sure to use a smaller washer on the bottom of the case (I.e. 1" diameter). If you make too big if a curve it will make it so your laptop doesn't fit.

Once traced, it's time to cut it out. There's a few ways to cut out a rounded corners well. One requires a lot of skill, but is quick. The other takes a little bit of effort (and sanding) but is much easier to pull off. You can check out the methods here. Whichever method you use, make sure the leather on the bottom corners are perfectly flat when you go to cut them out.

After you cut the bottom corners you may notice the edges start to separate. Apply a little glue and clamp them down before you move on to stitching.

Step

To create your stitching holes, take out your divider and set the distance to 1/4in. I'm using 5oz leather but if you chose to use something a bit thicker, you may need to set your stitching in a little bit further. Then trace along the edges that you glued on the front side of the project. This will make a line from the start of the curve at the bottom of the sleeve to where the flap begins on both sides of the sleeve.

Once these lines have been marked, use the diamond chisels to make the stitching holes. When punching out the holes, make sure that the chisel is perfectly perpendicular to the leather. If it is not kept at 90° the stitching on the back side of the project will turn out ugly.

Finally, when you get to the curves, work your way around them with a two pronged chisel.

Step

Now it's time to stitch. It's better to start your stitching at the top instead of the bottom near the curve. The most pull from use will be at the top corners and it's always best to finish stitching lines where there will be little to no pull.

Stitching itself is a little tricky to teach through text. So check out this video to learn how to saddle stitch leather.

Once you've finished the stitching line, be sure to backstitch. To backstitch, simply stitch in the opposite direction once you've got the the end of your stitching line, for two or three holes. Then, trim the thread, burn the end, and tuck that lose end into the stitching hole.

Step

All you need to do now is burnish the edges.

Edges need to be sanded prior to burnishing. It smooths out the edges and also removes a lot of the lose fibers, which will give your edges a better finished look once you've completed the burnishing process.

To do this, hit the edges with 220 grit sand paper. This grit is really just for smoothing out rough areas, like the corners. Once your edges start to look even, you can stop. After that, hit it with 600 grit sand paper. This grit is less about shaping the edges and more about eliminating loose fibers. Stop once your edges feel smooth to the touch.

After sanding, you can start the burnishing process. Most leather workers have their own take on the burnishing process, and I've written a basic one here.

To start, lightly wet one edge with water. Then, using a canvas cloth, briskly rub the edge. You'll know you're done when the edge darkens, has a shiny surface, and starts to make a tacky sound. With one edge done, finish the other three remembering to lightly wet each edge before hitting with the canvas cloth. Finally, apply a small amount of beeswax to all the edges and work it with the canvas cloth.

And now you're all done. Rest easy knowing you can store and transport your laptop in style. And that malicious co-workers won't ruin it... at least not from a water spill.


Make This: Zen-Inspired Succulent Desktop Garden

$
0
0

I spend a lot of time at a desk. Many of us do. It's a space where we learn, create, work, and play. I'm not saying all that sitting is a good thing, but if it has to happen then make the space as clean and relaxing as you can. Here is a quick project to add a bit of green, texture, and peace to you space.    A project like this can turn out different for everyone, because we all collect different pieces to make it our own. I'm a fan of dark, rich colors so I opted for darker pieces, and clean, simple container. We can use wood, plastic, glass or metal depending on the materials available, and vary the size to match your space. I used a simple wooden box that I found, keep it shallow for a clean look.

Materials

1. Container - Go for something wide and not too tall. If it's not watertight, seal it up with a bead of silicone. Check your local craft store.

2. Sand - I went down to a local beach  on my favorite river and grabbed a bag full. I sifted it through a small screen to make it uniform. It's not as pure and pristine as white sand, but I like having a reminder of my adventures with me on my desk.

3. Interesting natural texture pieces - I opted for a cool black rock, it's interesting, organic, and easy to find. Try driftwood, river stones, shells, etc.

4. Succulent - Adding some green to the piece is a great way to make it interesting. I always try to go for succulents because they're durable, and I need that.

The Steps

1. The container should be durable so make sure to seal with a bit of silicone. This is the time to finish the outside with a durable layer of poly too. I added a few small dividers to keep everything separated and in place.

2. Plant the succulent. Give it enough room in a corner to make it stand out, and also to make watering it easier.

3. Fill the container with sand. Be sure to leave a bit of room at the top so the sand won't overflow.

4. Add a bit of character with rocks or other decorative pieces.

Add a simple rake to maintain the container, and you've got another great piece on the desk to make it a little better place to spend the day.

I made the rake from a small piece of figured olive, a cedar handle and some pointed bamboo skewers for the prongs. You don't have to go all out on this, just get creative and make it fit the character of your box.


How to Roll Your Shirt Sleeves Like You Know What You're Doing

$
0
0

I am a committed non-cuff-buttoner. I'll do it when I wear a jacket or a sweater atop a shirt, but if it's just me an a button down (oh, and pants), then my sleeves are rolled up 99% of the time. It makes for a less formal look, sure, but really it's practical. I'm a doer, and my hands are constantly doing stuff, and keeping my sleeves out of the way means they won't end up in the garden soil, dishwasher, bike grease, spinning table saw blades, or whatever else I'm digging into that day.     And while, from a practical perspective, at least, there isn't a wrong way to roll up your sleeves, you do have options, depending on what you're after. Do you want a just-flipped-up-my-cuffs-to-get-to-work look, or a military-like precision and crispness?

Ties.com blog, The Gentlemanual, offers five standard ways to get your cuffs up. Personally, I guess I do a combo of the "J. Crew" and "The Marine" in that I don't just fold up layer after layer, but pull the cuff to the elbow, and then cinch with a final fold, though without the reveal of the cuff on top. 

It's a obviously thing, sure, but little details matter in both practicality and style, so worth a look. Check out all five at Ties.com — How to Roll Your Sleeves: 5 Foolproof Ways 


Like this post? Please share it with your friends on Pinterest.


How to Build a Canoe in 72 Hours

$
0
0

This project began, as it were, with a "crazy idea" - the possibility of canoe travel without taking a canoe with you. Of building one upon arriving in a new place or country, paddling it, then leaving it there upon departure. 

And...?  It worked.    

Dr. Joe, an avid canoe-ist from Coos Bay, OR, says of his project, 

The idea of building a canoe in a short period of time seemed to open up the possibility of building the boat in a foreign country with local materials and leaving the boat when the vacation was over. I needed advice and went online to find a country, a boat to build and the skills and tools to create this project. I was overwhelmed by the information and support. There were some skeptics, my friend Pete said, “Obtaining materials in a foreign land on a set time..I would suggest not bringing a watch but, instead, a calendar.”

Matt from Jem Watercraft suggested I build a prototype and, “beat the hell out of it,” to see if it would be up to my expectations. Then he offered to draft any designs I wanted for this crazy idea. I accepted his offer and had the plans drafted in both metric and inches. I thought since I might be building this outside of the U.S.A. I might as well use metric. I loved it try dividing 14' 7 19/32" by 11 in your head. (Stubborn Americans is all I can say.)

The trick here is assembling the boat plywood panels with a butt joint, using drywall tape and epoxy putty, which is, as Joe claims, "stronger than the wood."

The whole piece is a good read, a meditation on practicality in addition to the tutorials. Dr. Joe is a good writer, and a good canoe maker, and it provides lots to think about. 

Two Canoes and a Crazy Idea[Instructables.com]


A Clever, Elegant Cocktail Presentation Trick: How to Make an Ice Wedge Glass (for Free!)

$
0
0

A few weekends ago, my wife and I went out for a special dinner to celebrate our fifth wedding anniversary. (Hi sweetheart!) We opted to enjoy a few beers with our meal, but the table next to us had ordered cocktails. They each showed up with the glass half full of color - slanted, and with the liquid on the top. Initially, I thought it was simply a triangular shaped glass, where the bottom angle was simply solid, but as I looked closer, I realized, in fact, it was a frozen wedge of solid ice, attached to the glass so it maintained the effect. 

I asked the server how it was done, and she told me the bartender had a bunch of little rubber molds that fit the glass, and the whole thing goes into the freezer. She said they were cool, but only fit the certain glass they came with; so only a certain number of cocktail recipes are served in them, and they run out each night.

A few days later, I looked it up to see if I could pick up one or two. I found the product - it's a glass with a custom silicone insert that freezes the ice at a perfect 45° angle, cutting right down the center. They cost about $20 each, and are kinda cool.

But - they're also unnecessary. Because you can achieve the same effect without spending a dime, using any rocks glass you already have. Here's how to do it.        

Step One: Fill your glass halfway with water. If you're a perfectionist like me, you can figure out that your glasses are 12 oz., and measure out exactly 6 oz. into each glass. This is entirely unnecessary, and doesn't affect the final results one tiny bit.


Step Two: Place your glass in a container that will help you support it at an angle. You could probably just prop it up against something in your freezer, especially if your shelves are wired and can support it from the bottom. Since I was making several at once, I opted for a muffin tin that would allow me to put in/take out with minimal spilling, and dial in the angle.


Step Three: Put everything in the freezer. Futz with the glasses until they're angled so that just a little bit of water spills through front. That will make a nice, even 45° angle. Try not to move them after this point, or it will create air bubbles in your glass, and beverage will get stuck in the sides, undrinkable. 


Step Four: Leave to chill until frozen solid. This will probably take about six hours; I left mine in overnight. 

Boom. You're done! Leave in the freezer until happy hour. They can come out of the container and sit upright if desired. 

There you go, a DIY whiskey wedge without spending any money. 


Why is this cool?  

Larger chunks of ice slow the dilution rate of the drink. You've probably seen those large 2" ice cube trays, or even the ice sphere molds, that chill your drink without watering it down, and keeping it flavorful. This works on the same principle, except the ice is even bigger, and...frankly, it looks cool. 


What kind of drinks does this work best with?

Personally, I'm a neat whiskey guy, but if you like your Bourbon or Scotch on the rocks, this is certainly a great application that will keep it cool with getting watery. If you want a little water to open it up, you can just add a drop from the tap.

For cocktails, this would work best for anything that doesn't rely on a planned amount of dilution to bring everything together. So namely, anything that's shaken or stirred, where mixing with the ice creates proper proportions. Specifically, this is a great one for drinks that might typically be enjoyed "up", but you want to stay super cold (like a Negroni, Gimlet, Boulevardier), or if you don't want to deal with the hassle of a martini glass. I'd use them on a margarita or anything summer-y; and, perhaps real affionados might call it crass, I'd drink a gin martini out of one of these in a heartbeat.  I always want those to be colder so I can sip slower, and this is a great way to do it without watering it down. 


I haven't tried it with drinks that involve muddling and need to be built in the glass, like a mojito or Old Fashioned, but I most certainly will.


Definitely, this is mostly presentation. But what a presentation it is. Flavor-wise, I'm sure you can't really tell the difference between this and a big ice ball or extra large cube. But, this way, your nose doesn't bump into it while sipping. And now that the weather is heating up, it's most certainly time to keep your cocktails nice and cold. 

Cheers. 


Like this post? Please help us pass along the fun to others by sharing it on Pinterest: 


Clever Cocktail Presentation Trick: How to Make an Ice Wedge Glass (for Free!)

$
0
0

A few weekends ago, my wife and I went out for a special dinner to celebrate our fifth wedding anniversary. (Hi sweetheart!) We opted to enjoy a few beers with our meal, but the table next to us had ordered cocktails. They each showed up with the glass half full of color - slanted, and with the liquid on the top. Initially, I thought it was simply a triangular shaped glass, where the bottom angle was simply solid, but as I looked closer, I realized, in fact, it was a frozen wedge of solid ice, attached to the glass so it maintained the effect. 

I asked the server how it was done, and she told me the bartender had a bunch of little rubber molds that fit the glass, and the whole thing goes into the freezer. She said they were cool, but only fit the certain glass they came with; so only a certain number of cocktail recipes are served in them, and they run out each night.

A few days later, I looked it up to see if I could pick up one or two. I found the product - it's a glass with a custom silicone insert that freezes the ice at a perfect 45° angle, cutting right down the center. They cost about $20 each, and are kinda cool.

But - they're also unnecessary. Because you can achieve the same effect without spending a dime, using any rocks glass you already have. Here's how to do it.        

Step One: Fill your glass halfway with water. If you're a perfectionist like me, you can figure out that your glasses are 12 oz., and measure out exactly 6 oz. into each glass. This is entirely unnecessary, and doesn't affect the final results one tiny bit.


Step Two: Place your glass in a container that will help you support it at an angle. You could probably just prop it up against something in your freezer, especially if your shelves are wired and can support it from the bottom. Since I was making several at once, I opted for a muffin tin that would allow me to put in/take out with minimal spilling, and dial in the angle.


Step Three: Put everything in the freezer. Futz with the glasses until they're angled so that just a little bit of water spills through front. That will make a nice, even 45° angle. Try not to move them after this point, or it will create air bubbles in your glass, and beverage will get stuck in the sides, undrinkable. 


Step Four: Leave to chill until frozen solid. This will probably take about six hours; I left mine in overnight. 

Boom. You're done! Leave in the freezer until happy hour. They can come out of the container and sit upright if desired. 

There you go, a DIY whiskey wedge without spending any money. 


Why is this cool?  

Larger chunks of ice slow the dilution rate of the drink. You've probably seen those large 2" ice cube trays, or even the ice sphere molds, that chill your drink without watering it down, and keeping it flavorful. This works on the same principle, except the ice is even bigger, and...frankly, it looks cool. 


What kind of drinks does this work best with?

Personally, I'm a neat whiskey guy, but if you like your Bourbon or Scotch on the rocks, this is certainly a great application that will keep it cool with getting watery. If you want a little water to open it up, you can just add a drop from the tap.

For cocktails, this would work best for anything that doesn't rely on a planned amount of dilution to bring everything together. So namely, anything that's shaken or stirred, where mixing with the ice creates proper proportions. Specifically, this is a great one for drinks that might typically be enjoyed "up", but you want to stay super cold (like a Negroni, Gimlet, Boulevardier), or if you don't want to deal with the hassle of a martini glass. I'd use them on a margarita or anything summer-y; and, perhaps real affionados might call it crass, I'd drink a gin martini out of one of these in a heartbeat.  I always want those to be colder so I can sip slower, and this is a great way to do it without watering it down. 


I haven't tried it with drinks that involve muddling and need to be built in the glass, like a mojito or Old Fashioned, but I most certainly will.


Definitely, this is mostly presentation. But what a presentation it is. Flavor-wise, I'm sure you can't really tell the difference between this and a big ice ball or extra large cube. But, this way, your nose doesn't bump into it while sipping. And now that the weather is heating up, it's most certainly time to keep your cocktails nice and cold. 

Cheers. 


Like this post? Please help us pass along the fun to others by sharing it on Pinterest: 


This is How You Should Tune Up Your Lawnmower for Spring

$
0
0

simple lawn mower maintenance for handy guys

Everyone knows the dreaded crankless yank of a neglected lawn-mower cord. You reach down for the handle, brace your legs, and pull the cord with all your might, only to be rewarded with a coughing, sputtering engine, or worse, one that won't crank at all. Add in a thrown-out lower back, and you could be forgiven for never wanting to go near a lawn mower again. 

But it doesn't have to be that way! You could join ranks of men and women whose mowers start on the first pull! People whose backs remain un-thrown-out, and whose lawns are oft-trimmed, instead of weeks-overdue. Here are some simple steps you should take every spring to maintain your lawn mower in good working order:


To make sure we gave you the best advice, we partnered with  Briggs & Stratton, the largest producer of gasoline engines for outdoor power equipment. Founded in 1908 in Milwaukee, WI, Briggs & Stratton knows that a well-maintained engine can last as long as your yard needs it to. 


drain lawn mower oil - kit

Assemble the oil removal kit. 

Change the Oil in Your Lawn Mower's Engine

Lubrication is essential to all engines, and keeping fresh oil in your lawn mower will prevent moving parts from seizing up. Motor oil also contains rust inhibitors that can protect the engine from corrosion, so many experts recommend changing the oil at the end of the mowing season, just before putting the machine away for the winter. But if you're like me, you probably haven't done this routine maintenance is a long time ... so right now is the best time to do it. 

check oil level

Old, dirty oil, and not enough of it. 

1) Start by checking the oil level and quality. Find the oil fill cap, remove and clean the dipstick, then insert it again (screw it all the way back down). Now pull it out and see how far up the stick the oil line goes. Look at the color of the oil residue on the stick. If it's dark and opaque, it means the oil is old, dirty, and pretty much useless. 


pump out old engine oil

2) Drain all the old oil. First, if possible (i.e. if the mower starts), run the engine for a few minutes. Draining the oil from a warm engine will also get out some of the floating particles that might otherwise settle to the bottom of the oil tank. Now stop the engine and disconnect the spark plug lead. 

The best way to get the oil out is using an oil removal kit, like this one from Briggs & Stratton, which is a simple hand-pump that gets the oil out of the motor without having to awkwardly tip the heavy machine on its side.  


Then, assemble the oil removal kit and insert the hose into the oil tank. After emptying the tank, refill it with fresh oil according to the specifications for your lawn mower model (most small-engine mowers take 10W-30 oil for varying temps, and SAE 30 in warm climates). Replace the oil cap, making sure not to over-tighten.  


remove spark plug with a socket wrench

Check and Replace the Spark Plugs

Most manufacturers recommend changing your spark plugs every 100 hours of operation. A fresh spark plug will improve fuel economy and give you more reliable starts. 

1) Disconnect the spark plug lead, and remove the old spark plug using a spark plug socket (or a socket wrench). Clean any light debris or deposits on the plug with a wire brush. If the plug is too dirty to clean, or if the porcelain is cracked, it's time to replace it.


2) If replacing, check the gap on the new spark plug using a spark plug gauge (gap gauge).  Your engine probably requires a 0.030" gap, but check your manufacturer's specifications to be sure. 


3) Replace the plug, hand-tightening to around 15 ft. lbs (not too tight, or you'll never get it off the next time).

Sharpen or Replace the Blade

A dull lawn mower blade will rip and shred the grass, and often push it over instead of cutting through it. It's an ineffective way to mow your lawn, puts more stress on your engine, and can damage the health of your turf. Fortunately, removing the blade for sharpening or replacement is easy.

1) Disconnect the spark plug lead. Now tip the lawn mower to the side until the handle is on the ground – do this with a partner – and secure the lawn mower so you can be sure it won't fall down on you. Use a socket wrench to loosen the nut that holds the blade in place, and then remove it. 

2) Sharpen the blade yourself using an angle-grinder, or bring it to your local hardware store or lawn care center and ask them to do it (most places offer this service). 


Change the Air Filter

After the oil, the air filter is probably the most important maintenance item on this checklist. It's crazy-easy to change, and because of the nature of lawn mowing, it gets incredibly dirty and clogged very quickly. 

Most lawn mower air filters can be replaced easily by pulling off the filter housing and swapping in a fresh one. Check your manufacturer's directions to see how your model works, or learn more by following this guide.


Cleaning the undercarriage will prevent jams

Clean the Undercarriage

How often do you look underneath your lawn mower? If you're smart, not very. But while you're going about your daily life, the undercarriage is getting more and more clogged up with old, desiccated grass clippings. Eventually, there's so much crud down there that it actually impedes the movement of the blade. 

So do yourself a favor, while you have the mower tipped up to remove the blade (and the spark plug lead detached so there's no chance of the thing starting while you're under there), use a wire brush to clean off the excess deposits. You don't have to get it sparkling (it's a yard tool, after all); just get the worst offenders.


Check the Pull Cord

This one's simple: you don't want a frayed and failing starting cord to snap on you in mid pull, sending you hurtling backward into the bushes like a noob. Take a second to inspect the cord, especially where it enters the engine housing, to make sure it's in good shape. If it's not, replacement is  pretty straightforward


Check out this video for some more lawn mower maintenance tips:

Troubleshooting

Lawn mowers, unlike car engines, haven't gotten all that much more complicated than they were thirty or forty years ago. So they're pretty easy to maintain, diagnose, and troubleshoot. Here are a few common problems:

  • Starter cord won't budge. Often, this means the engine flywheel brake is on: make sure you have the release bar on the mower handle pulled all the way down. Another cause could be excessive debris build-up in the mower bed. 
  • Cord pulls, but engine won't crank. First, check if you have gas in the thing. Seriously. It's an easy thing to forget. Old gas can also cause this, so if the gas in the tank is from last season, you may need to drain it and start fresh. Other possible causes: clogged carburetor, dirty air or oil filter, or a bad spark plug.
  • Holy smokes! Got a smoke signal coming out of your lawn mower? Could just be because some oil spilled onto the exhaust muffler. Not a big deal as long as it burns off pretty quickly and the mower seems to be running ok. Light-colored smoke could be a more serious symptom, and one you might need to have a mechanic check out. 


Lawn mower troubleshooting tips for spring and fall.


For more small engine maintenance tips, head to Briggs & Stratton's website, or follow them on Facebook,  Twitter, or Instagram


This post is sponsored by Briggs & Stratton, the world’s largest producer of gasoline engines for outdoor power equipment. Thanks for supporting the brands that make ManMade possible. 


Five Tequila Cocktails You've Probably Never Tried Before (But You Totally SHOULD!)

$
0
0

Unlike some other spirits, tequila is inextricably linked to one particular cocktail: the margarita. And, to be fair, with good reason. The margarita is a great drink, especially when it's made right, with quality ingredients. But sometimes you want to enjoy your amazing agave flavor in a variety of contexts. So we teamed up Olmeca Altos to share five delicious tequila cocktails you can make for Cinco de Mayo (or any celebration!) that aren't margaritas. I think you're going to love these. Just don't drink all five at once.     

Here we go:


The Better Paloma

Tequila paloma cocktail recipe

While most in the US think of the margarita as the default tequila cocktail, in Mexico, when not sipped neat, the most popular way to enjoy a great-tasting tequila is in the Paloma cocktail. Typically, these are made with silver tequila and a grapefruit soda like the Mexican version of Squirt or Jarritos Toronja. Here, we're using all fresh ingredients to create the same flavor combo, but with a brighter, more enjoyable sipping experience.     

Serves 2

  • 4 oz fresh grapefruit juice
  • 1.5 oz fresh lime juice
  • 1 oz simple syrup
  • 4 oz Olmeca Altos Plata Tequila
  • Sparkling mineral water or club soda (we like Jarritos Mineragua, in the Latin aisle of the grocery store)
  • Garnish: grapefruit slice, salted glass

Rim medium glasses with lime juice and dip in coarse salt. Fill glasses with ice. Add the grapefruit juice, lime juice, simple syrup, and tequila to a cocktail shaker. Shake hard over ice, then strain into the salted glass. Top with sparkling water, and add garnish. 

Paloma cocktail

Paloma cocktail


Kanga Rhu

Kanga Rhu - Tequila cocktail

Aside from fresh peas, nothing says spring to me more than the flavor of rhubarb. This cocktail gets its characteristic flavor from rhubarb bitters, where three dashes is more than enough to share its signature aroma and taste. Balance with pleasantly bitter and sweet Aperol and plenty of fresh lime, this is one to sip all season long. 

Serves 1

  • 1 oz Olmeca Altos Plata Tequila
  • 1 oz fresh lime juice
  • 1 oz Aperol
  • 2 + 1 dashes Fee Brothers Rhubarb bitters 
  • Garnish: large swath of orange peel

Shake the tequila, lime juice, Aperol, and two dashes of bitters with ice. Strain into an iced rocks glass. Add one more dash of bitters to the finished cocktail and garnish with orange. 

Kanga Rhu - Tequila cocktail

Kanga Rhu - Tequila cocktail


Haute Sauce

Haute Sauce grapefruit and jalapeno tequila cocktail

Tequila is one of the greatest gifts to the world, but Mexico's use of chiles in their cuisine is another that we're super grateful for. Here, the jalapeño and fresh green pepper highlight the grassy, vegetal flavors of a Highlands tequila like Olmeca Altos. (Altos refers to the high elevation where the agave are grown). 

This is a big drink, with lots of volume, but it's deliciously balanced.  Just make sure to use a big glass, and go slow on sipping. 

Serves 1

  • 3 oz Olmeca Altos Plata tequila
  • 2 oz fresh grapefruit juice
  • 1 oz lime juice
  • 1 oz jalapeño simple syrup*
  • 2 slices bell pepper
  • Garnish: jalapeño slices

Muddle the bell pepper with the simple syrup and lime juice in the shaker base. Add ice, tequila, and grapefruit. Shake hard, then strain into an iced rocks glass. (The bell pepper stays in the shaker). Garnish with fresh jalapeño. 
 

Jalapeño Simple Syrup

  • 1 cup sugar
  • 1 cup water
  • 1 jalapeño chile, sliced into rings

Heat all ingredients in a saucepan until sugar is completely dissolved. Remove from heat. Allow the jalapeño to steep at least twenty minutes, or more if you like it spicier. Store in the refrigerator for up to one week. 

Haute Sauce grapefruit and jalapeno tequila cocktail

Haute Sauce grapefruit and jalapeno tequila cocktail


Put Up Your Cukes

Cucumber, mind and tequila cocktail

Bright, fresh, and not too sweet - the cucumber and mint flavors highlight the mineral flavors that come from the volcanic soil in which the agave are grown. 

Because it requires a bit of prep (juicing cucumbers), this one works best for a crowd. It's easily doubled or tripled. Try it anytime your grilling or eating outside. 

Serves 4

  • 8 oz Olmeca Altos Plata tequila
  • 4 oz lime juice
  • 4 oz cucumber juice*
  • 2 oz simple syrup
  • 10-12 mint leaves, plus more for garnish

Muddle mint leaves with simple syrup in bottom of pitcher. Add ice, tequila, lime, and cucumber juice, then stir to combine. Chill in refrigerator for at least one hour. Serve by pouring over crushed ice and garnishing with extra mint. 

Cucumber Juice
Peel two English cucumbers. Cut in half lengthwise, and scoop out the seeds. Cut into 2 inch pieces, then puree in a food processor. Strain out pulp through a fine mesh sieve. 

Cucumber, mind and tequila cocktail

Cucumber, mind and tequila cocktail


Drinko de Mayo

Grapefruit and campari tequila cocktail

And lastly, a straight up tasty cocktail that's pleasantly bitter and great to enjoy with salty snacks or appetizers. 

Serves 1

  • 2 oz Olmeca Altos Plata tequila
  • ½ oz Campari 
  • ½ oz fresh grapefruit juice
  • ½ oz fresh lime juice
  • ½ oz simple syrup

Shake all ingredients with ice. Strain and serve up in a rocks or martini glass (or in our case, a small mason jar!).


campari and grapefruit tequila cocktail

Looking for some snacks to go with your new favorite tequila cocktail? Check out our guides:

​​​​​​

This post is sponsored by Olmeca Altos Tequila, but all opinions are mine alone. Thanks for supporting the brands that support ManMade. 


Fact: A $5 Can of Spray Paint is the Best DIY Value Out There. Here's How to Get it Right.

$
0
0

A few weeks ago, I was looking through my spray paint arsenal, and I took stock of my collection. It occurred to me how much I really use those little rattle-cans in the shop. I picked up a few this weekend, and gave a few things around the house a quick upgrade. Take a look.    Paint goes on clean and easy when you use a spray can, but here are a few tips to keep it simple:

First, always think safety - spray in a well vented area and wear a mask and eye protection to keep all those micro particles out of your lungs. This is non-negotiable. 

Secondly, Prep on the front end makes it a lot easier once you start laying on paint. Secure small pieces, and lay large pieces on a solid backing. I use a lot of scrap cardboard or a simple pallet to keep the over-spray from making a mess.  Set yourself up somewhere where wind won't blow any debris on the wet paint. 

Third - for the best finish, prep the materials - Paint bonds best to a rough surface, so use a bit of sanding (perhaps 100 or 150 grit) on smooth areas. Also, tape off any areas you don't want paint on, because it gets everywhere.

Now, spray it on - The key with spraying paint on smoothly, is with a controlled, back and forth motion. Keep the tip about 6-8" from the material, and opt for many thin coats with about 15 minutes of drying time between them. You won't want to do this once you see all the color start to show, but it's essential. Go from multiple angles to get even coverage on detailed pieces.

Let it dry - Once you have it fully covered how you like, it's important to let it really dry. The thing about spray paint is that the drying process is actually the chemicals off-gassing, then curing into a hard surface. It's really important to let the curing complete before you really handle it much. If you find a hair or bug on the surface, grab a set of tweezers to pull it off.

Take it from me - don't use those fingers.

Take a look at how good this small playhouse window went from faded and boring to clean and protected in about 5 minutes:

So, grab a few cans for about $5 each and start upgrading everything you can find. I'm a fan of the hammered texture, sandy texture, and metallic colors from Rustoleum. They hide small blemishes in the material and add a nice bit of character to the pieces.


How to: Make Your Own Shiplap

$
0
0

I've had a corner of my yard that has been a bit of an eyesore. It used to hide my pool pump, but the cheap stapled grid fell apart in the sun. I wanted to put something up there that would hold up well, and also contain a bit of the pump sound. Of course, it had to look great too. Take a look at what I came up with.    I understand why we see that grid material around the house. It's cheap, and looks ok...in a pinch. But, after a few years, it becomes flimsy, dull, and just plain boring. I prefer something that has some heft, some style, and looks (and is) made it to last. That's why I replaced the broken divider with something a bit more classy.

I've been working on a small garden shed for another corner of the property, and with siding the next step, I started to test out my process. I'm a fan of lapped siding, for it's secure fit, and for the ability to keep moisture out, but the layered look needed a bit of curve. That's why I added a curved bevel on one side to give some definition to the surface. Since I had the wood, it was a perfect time to replace the pool pump surround. The posts were still good, so prep work was simply removing the old wood and a bit of sanding on the top. 

The Process

I made the siding from simple 6' cedar fence boards. First, the rough-cut lumber was cheap at about $2.50 per board, and cedar is naturally resistant to rot so it will last longer than our native pine around here. Go for dry, straight boards with as few knots as possible.

I set up the router table with the curved bevel I use for cabinet doors. It's a spendy bit, and with a 1/2" shank you need a table to make this cut. I love my set, it's been useful for so many projects like the cabinet doors I made here. If you don't want this look, you can just use a straight bit as below. 


With that bit, it was easy to make the curved bevel. Once I did that, I flipped it all and cut a simple lap with a straight bit on the opposite edge.

Looking for the right tools to try this project? Here are some of our go-tos:

ManMade Recommended:


The beauty of a lapped joint is how seamlessly it all fits together, with a strong joint that nests each piece onto the next. I also like that the angled bevel sheds any water down and away from the inside. Not as important on this project, but it will be great when I use it on the shed.

On fences and other outdoor wood I know will be in the weather, I do a yearly layer of oil-based protection to keep it looking good as long as possible. 

Have any shop tips on making interesting siding for your home projects? Let me know, I'm always looking for new ideas. While you're here, have you seen our post on how we re-used the fence boards for a new/old revamp?  Take a look at our ratty fence upgrade here.


We Will Never Get Tired of Watching These Hand-Lettering Videos

$
0
0

Penmanship

Oh my, the art of writing. Handwritten notes are always the classiest way to correspond, but here are a few people that take it up a notch with some of the most amazing hand drawn type you'll ever see.   Jake Weidmann,  the "master penman" explains the art and science of penmanship. 

Seb Lester's Best Hand Drawn Lettering - Interesting penmanship doesn't come easy. But here are some amazing pieces by Seb Lester compacted into easy-to-follow clips.

Take a look at that funky pen and his other favorite tools here.

Seb Lester's Famous Logos by Hand - The skill and control it takes to make these logos reflects hours of practice and then a few more hours along the way. What are you doing with your time?

Now everything else may look a bit more like chicken scratch compared to these videos, so grab a pen and see what you can do with a bit of practice.

How to: Make Your Own Iced Coffee Soda

$
0
0

coffee soda

Now that the days are warming up the thought of a hot latte with milk and cinnamon sure adds a drop of sweat to my brow. It's usually this time of year, I swap my typical addiction to hot coffee to sweet, syrupy iced coffee. I just can't get enough of the stuff!

Recently I had a fantastic, refreshing spin on iced coffee when a local shop added a splash of sparkling water and orange peel. If that shop was any closer to me, they'd put me out of a home with this drink! 

In order to save time and money I tinkered around with my own recipe and thought I'd share it with you!

It starts with a batch of homemade cold brew coffee. I made mine in a growler, you can use a mason jar or a cold brewing system if you have one.

cold brew coffee

Here's what you'll need

  • 6 ounces of coffee
  • 5 Cups of filtered water
  • a growler or large glass container
  • paper coffee filter
  • filter holder
  • funnel

The process couldn't be easier. Set your coffee grinder to coarse and grind all 5 ounces of coffee. 

plate of ground coffee with spoonwith a funnel spoon all the grounds into the growler.

spooning coffee into a growler


Next, add filtered water.

pouring filtered water into a funnelOnce you've added all the ingredients to your growler, put the lid on, give it a light shake and let sit out for at least 12 hours.

filtering coffee into a carafe


Once your coffee has been brewing for at least 12 hours, you need to filter out the grounds. I used my Chemex system to pour the water and separate out the grounds. You can certainly use any other clever method to separate the grounds and coffee.

At this point, you can use this concentrated brew to mix up several glasses of iced coffee and milk, add it to ice cream, mixed drinks and more. 

But for now we're going to make a tasty cold brew soda with a hint of orange zest!

What you'll need

  • A bottle of sparkling water
  • Your fresh batch of cold brew concentrate 
  • an orange
  • a veggie peeler
  • a tumbler glass
  • Ice

sparkling water and coffee

Now it's time to make the soda! Pour yourself a serving of concentrated cold brew coffee, about half a cup, into a short glass. Your ratios here will be determined on your preference.

pouring soda into coffee

I added about 1/4 a cup of sparkling water. Mountain Valley is my absolute favorite—if it's possible to have a favorite water—I find this brand is less bitter. 

peeling an orange with an orange peeler

Using a vegetable peeler, peel a nice long piece of orange zest. You'll be adding it to the soda.

squeezing an orange peel

For the final touch, squeeze the peel above your drink, rub the rim and drop it into the mix, like you're making an old fashioned. That's it! The tastiest summer drink this side of lemonade!


5 Traits Of A Life Well Spent

$
0
0

A few days ago, I listened to a eulogy for someone I didn't know. He was a friend of a friend, and passed away much too young. But it was clear from the message at his service that in his short life, he made an amazing impact on those around him. He was dealt a truly short hand in life, with serious obstacles, but through the words of others, his story made me, someone he never met, experience amazement and ultimate respect. His short, hard life was thoughtful, impactful, and a direct challenge to me to spend my time well. Here are my thoughts on how I plan to be remembered.   Now, I'm not about to say that these are the only indications of a life well lived. But, they resonate and drive me to seek the adventure this life has for me. I would love to hear what else you would add to your list.

1. People remember how I made them feel. 

There's nothing better than thinking of someone and automatically smiling. I have so many memories of friends and family that bring up feelings of fun, peace, and a bit of mischief. There's something special about living a bit of your life along with someone else, and leaving an impression that can be felt for years to come. I don't remember specifics about the (many) bonfire chats or the (incredible) moonlight hikes, but I can still feel the effects of a moment spent with someone I liked.

2. I left a story and plenty of memories.

For years, I've lived by the mantra of saying yes. I've never regretted an adventure that began with a nervous yes, and the memories that follow a "hell yes" are always epic. I've found that the first step to a good story is almost always that yes, so I tend to collect stories and memories wherever I go. Be OK, and a bit reckless in your yes, because we all deserve a bit of adventure in our lives.

3. I challenged others to be better.

I was just talking with my wife about a few people who took the time to call out what they saw in me, and their profound effect on my life. Decades later, I still hear their voice when I get discouraged or am facing a hard decision. I'm not sure they would even remember their comments, but they challenged me to be better and I'm better for it. Be that person for those you have in your life. If you see something great, call it out. You have no idea how much difference a positive dose of truth can make the difference in the course of someone's life.

4. I was everything I could be with the gifts I had.

I want to be known as a guy who thoroughly used up the gifts I was born with, and was fearless in discovering more. I think for most of us reading this, I'm preaching to the choir. We're makers, so something inside drives us to learn more, be more, and of course make more.

5. I was known for loving what I did.

Let's be honest, I can't work for over 2000 hours a year doing something that doesn't inspire, challenge, and grow me without feeling like I fell short of what life was all about. I've said in the past that I don't encourage quitting your job today to pursue your passion because that's a bit reckless, and frankly irresponsible. HOWEVER, I fully advocate setting a goal to jump off that train of sadness at the nearest exit, which is coming up fast. Seriously, if you don't love what you're doing you need to make a change now, because this world needs the best of us, and you're at your best when you do what you love.

So, let's not wait until this ride is over to think about how we're doing on the way. If anything on this list inspires you to do something more, please let me know.

Bedroom Inspiration: 3 Ideas to Create a Statement Headboard

$
0
0

Credit: ST Interior Design [http://www.tollgard.co.uk/]

Need to spice things up in the bedroom? (not like that). Adding a statement headboard to your space can help you revamp the look in your bedroom by making it look "full" without having to invest tons in other furniture pieces. Take a look!

Credit: One Happy Mess [http://www.onehappymess.com/2013/04/great-idea-for-your-bedroom.html]

1: Skyline made with washi tape: Quick and easy! Trace your favorite skyline on the wall (you could use a projector if you have one handy) and use black washi tape to finish the look. Bored of the same skyline? Take it down and trace a new one! You can also add a bit of color by selecting a tape with a bright pattern or colour.

Credit: Ds Builder [http://www.flickr.com/photos/3ccmidwest/5957748181/]

2: A huge canvas. If you feel inspired to create a painting, get a huge canvas and create a unique piece that will add tons of character to your bedroom. Like waking up in a private gallery! If your Picasso skills aren't that great, check out this DIY on Styled by Emily Henderson where you can create a statement headboard with just a few strokes.

Credit: Design Every Day [http://www.designeverydayblog.com/diy-book-headboard/]

3: Old books. Yowza! This looks amazing, doesn't it? According to Design Every Day you only need a bunch of old books and some wood. Imagine going to bed surrounded by literature? I bet you'll wake up more inspired than ever! And hey, if you want to get creative you could also use magazines or comics.

Give your bedroom and update with any of these ideas and you'll surely wake up to a brighter day!


How to: DIY X-Style Trestle Table

$
0
0

Here's the problem many intermediate-level woodworkers face: you want to take on a big project, a truly ambitious one. Say, a dining table that will be the centerpiece of your home and can fit eight to ten people. And you do the research, figure out some techniques, and their a little bit of a stretch and you'll be trying them for the first time in the middle of a big project. And then you start shopping for the wood, realize how much it's going to cost, and all of a sudden, that next-level project doesn't seem like the best place to test out some new joinery.     The solution? You need to build a table with some more affordable lumber instead. Say, this trestle table from YouTuber John Malecki. 

John's using all reclaimed material here, but it's the same dimensions as standard construction lumber from the home center. The top is simple and straightforward with some breadboard ends, and the trestle base gives lots of visual interest. 

John attaches the x-shaped supports using a slip tenon created by a Festool Domino (an awesome, but pricey, specialized tool), but you could use traditional mortise-and-tenon joinery, or create your own rounded mortises with a drill and chisel. 

It's a solid project with a cool vibe, and if you already have the tools, could be built very inexpensively while you hone your craft.

Watch the video and get the step-by-step instructions here: Reclaimed X Style Trestle Table | How to


Weekend Project: How to Make a Ring from a Quarter

$
0
0

The coin ring is an internet DIY classic. I remember seeing an old video (on Makezine, perhaps?) on creating a nickle ring way back in the early days of the DIY and craft blogosphere. Like, 2006.

But, most tutorials simply harvest the coin as raw material, banging it and beating it until it looks like any piece of cool-colored metal. These pieces by Nicholas Heckaman, however, fully embrace the ring's origin, showing off that recognizable texture and type, giving the ring plenty of personality.      

My Modern Met has a full feature of Heckaman's process, and he's happy to share his techniques. A hole is drilled in the ring, and then it's heated with a simple blow torch so it's easy to work with.


It's then hammered out on a steel ring mandrel (about $10-15), and heat-hammer-repeat until the ring forms its final shape. After that, the whole thing is polished to reveal the detail from the original quarter. 


Cool, right? 

Here's a tutorial at Instructables that achieves similar results, so you can check the process: Double Sided Coin Ring

But, really, the technique here is available to all. I'm sure the key to great results is just practice, practice, practice. Very cool work, Nicholas. 

Visit The Ring Tree on Etsy to see all of Nicholas' work, and then check out Designer Drills Holes into Quarters, Turns Them into Rings on MyModernMet for more details into the process. 


Seriously, This is the Best Way to Close a Paint Can

$
0
0

created at: 05/16/2016

It's a problem we can all relate to. Anyone who has ever opened a paint, finish, or stain can knows the problem: if you don't use it all, you have to close it again. Hammers provide too much direct force, and can bend the lid, the lip, or the can itself. A rubber mallet is better, but you could shoot paint or finish out at you, and you'll cover the mallet in the material, which could get transferred to another project. Plus, if you're like me, the mallet always seems to be in another room.

So...    

created at: 05/16/2016

Step on it. Seriously. According to finishing master Bob Flexner, it's definitely the best way to go. And this guy has opened and closed a lot of cans. The  firm but soft sole of your shoe plus your body weight makes a great combination of relatively indirect force to snap things up nicely without mess.

Just line up the lid, and place one foot on the can. Stand on one leg, and you'll feel it set. Turn your foot (or the can) ninety degrees, and step on it one more time to seal it in the other two directions. Done and done. 

created at: 05/16/2016

Just make sure you check your sole or walk around in the grass or on a drop cloth just to make sure you don't track any product around. 

See more at Flexner on Finishing blog at PopularWoodworking.com

Viewing all 2425 articles
Browse latest View live


Latest Images