
This post is in partnership with Murphy-Goode Winery.
I don't think any gift you can purchase can ever really capture the way you feel about your dad. It's just too complex a relationship; the feelings run too deep. But you can buy something that shows you know him, know what his interests are, and took the time to get him a gift you thought would matter to him. That's what we're here to help with. This guide contains all the stuff we'd want to get (or give) for Father's Day, with items for every budget and price range. Whether you're buying for your own parent, your spouse or partner, or making a wish list for yourself, we think it'll make your job a little easier this year, and hope everyone ends up with something they treasure.

Want to go deeper? Check out our Complete Guide to Understanding Wine, or our list of 30 Things Every Man Should Own by the Time He's 30.
Let's get started the same way most guys start their day ... with coffee!

1. A Truly Great Coffee Mug - $30-50: A mug is a textbook Father's Day gift. Our vote? Skip out on the "World's Greatest Dad" or Sunday funnies characters and get something thrown by a real ceramicist. There is amazing pottery coming out of cities all over the US right now. Find dad one that will evoke deep envy from everyone in the office break room. (Pictured: Mazama Large Mug, $42)

2. Wood Handled Carpenter's Axe - Around $60: If you try to get an axe at your local home center, you'll find nothing but plastic and fiberglass handles with dull, poor-quality steel heads. This carpenter's style axe is modeled after the classic Hudson Bay design. It's not designed for felling huge trees, but works well for woodworking tasks like splitting, riving, as well as small forestry work such as trimming limbs, branches, and cross cutting. Makes a great first high-quality tool.
More interested in chopping logs into usable firewood or felling trees with speed? Check out the Splitting Maul and Multipurpose Axe from the same series.
Bonus!
Here's a bonus item you can add to your list. It's a DIY Gift Kit you can give to your dad (or husband, or friend, etc.), that we came up with exclusively for you! Learn how to make these elegant leather coasters, or better yet, give someone a kit with all the materials they need to create the project themselves. All the details and the full how-to are over at the Murphy-Goode blog.

Click here to find out how to give someone the gift of this awesome DIY project!

3. Timex Weekender Chronograph Slip-Thru Strap Watch - $40-45: The watch is a standard dad gift, but high end pieces often cost a bit much for your average Dad's Day budget. Instead, go with a model designed not for the boardroom, but, as the name suggests, the off-hours. The Weekender Chronograph features classic styling with easily interchangeable bands to match a variety of looks. That's a whole buncha' watch for around $40.

4. The Godfather Collection: The Coppola Restoration on Blu Ray - From $25: There are only a handful of films that - no matter what you're doing - you're compelled to stop and watch when they're on television. The Godfather trilogy tops that list, but now that you own it, you don't have to wait for the broadcast. Part III aside, it's truly some of the all-time greatest American filmmaking. Plus - the extras on this thing are outstanding.

5. Really Nice Meat & Cheese Board - Starting at $30: Good charcuterie deserves good presentation. High-quality apps and snacks simply look better on a big slab of walnut than they do on a dinner plate. This piece gets you rich wood grain and a renewable, sandable surface without breaking the bank.

6. Good Clean Fun by Nick Offerman - $20: Equal parts creativity manifesto, humorous essays, and woodworking how-to, Offerman's latest book leaves you laughing, inspired, and ready to make something.

7. Hay Bullet Pen - Under $8: Carry a piece of modern Scandinavian design with you wherever you go. Sleek and weighted just right, this thing is in the MoMA, so you know they got something right. Thankfully, its price won't make you too scared to actually use it.

8. Low-angle block plane - $165: When you're ready to move up from hammer, nails, and 2x4s to finer work, your first hand tool should be a low-angle block plane. With a sharp blade, this thing will trim end grain, smooth surfaces, clean up machining marks, and help create a beautiful finish on your final project. The made in the US model from Lie-Nielsen is worth the price, and will last for generations.

9. A bunch of iPhone cables - Starting at $6.00: A gift that no one would probably buy for themselves, but every single person will delight in opening. These magical talismen work like gold currency around a house or office shared with others. Get enough to keep one in every room, and a few secret options just in case.

10. Tartine Bread by Chad Robertson - $22-25: A complete (and we mean complete) guide from the man considered the be the best bread maker in the country. Learn to turn out crackling crusts full of color that give way to bread so flavorful you won't believe it's just flour, salt, water, and yeast.

11. The Ultimate Grilling Supplies Kit: Around this time of year, fancy boxes full of very large grilling tools with seemingly classy wood handles pop up to entice Father's Day gift buyers as an easy, all-in-one option. And, inevitably, they suck. Instead, assemble your own grilling kit using well-reviewed and time-tested utensils, no juice-spilling fork need apply.
- OXO Good Grips 16-Inch Locking Tongs
- Weber 6620 Original Spatula
- Lavatools PT12 Javelin Digital Instant Read Meat Thermometer
- Weber 6494 12-Inch 3-Sided Grill Brush
- Rapidfire Chimney Charcoal Starter

12. Yarai Mixing Glass ($33) and Barspoon ($25): Cocktails containing all spirits - like a martini, Negroni, Gibson, Boulevardier - are best stirred with ice to maintain a clear, cold, heavy texture. The Japanese-style Yarai is the key to ice-cold perfection.

13. Leather Moleskin Notebook Cover - from $25: This is the best of both worlds. The high-quality and style points of a leather-bound notebook, with the flexibility of replaceable inserts to keep it useful for years. Handmade from Horween Leather tanned in Chicago.

14. The Murphy-Goode Wine Club - Nothing's better than a gift that keeps on giving. Receive quarterly shipments of both your favorites and something new to try, all at a 20% discount. Membership features to-your-door delivery and special club member offers you simply can't access any other way.

15. Bob Dylan: All the Songs - the Story Behind Every Track by Philippe Margotin and Jean-Michel Guesdon - Around $34: The authoritative guide to every single piece by one of America's greatest songwriters. Keep it open while playing the albums, and it enhances every listening experience.

16. Classic Cash Money Clip - from $9.99: Next time you go out on the town, leave the pocket pillow at home and throw a few essential cards and bills in this simple stainless money clip. Fits beautifully in a jacket pocket, and is affordable enough that you can be both a wallet and a money clip guy, whichever the occasion calls for.

17. Narex Chisel Set - Around $40: Kept sharp, a quality set of chisels can go a long way and open up possibilities for projects in the workshop or around the house. The Narex line from Czechoslovakia offer the perfect balance between performance and value, and, when well cared for, will hold an edge beautifully and tackle anything you throw at them.

18. Wilderness Survival by Gregory J. Davenport - $18-20: A no-nonsense guide to staying alive in the woods, period. Clear, concise, solidly illustrated, Davenport explains the "why" along with the "how," so you can actually remember this stuff when the time comes.

19. Aeropress Coffee & Espresso Maker (About $30) and Stainless Filter ($8-12): Giving a gift to a coffee guy? If dad is ready to move on from the automatic drip machine and has already mastered the French Press, help him step up his game with the ingeniously designed Aeropress. This piece of innovation uses air pressure to create exceedingly smooth and flavorful coffee, and it's the closest you can get to a rich espresso crema at home without spending hundreds or thousands of dollars. We like the washable stainless filter for ease, and together, they create the perfect travel coffee option.

20. Orbit Basic Turntable - $179: If you're looking for a splurge-level gift he just won't buy for himself, our vote is cast for this stylish turntable. In the era of streaming apps and having any song you want available in an instant, buying actual physical albums allows music to be special again.

21. Style and the Man by Alan Flusser - Around $7:This quote from Ralph Lauren tells you everything you need to know. “Alan Flusser is one of the most knowledgeable experts on men’s fashion, and has created the ultimate reference for everything you need to know about good taste, great style, and where to find it throughout the world.” Done.

22. Eighteen Bottle Stackable Wine Rack - Starting at $30: We don't know when the wine rack got so complicated. Wine racks are not decor, they're a tool for organizing. They only need to do one thing: store wine on its side so the cork stays saturated and won't spoil the wine. This simple rack holds up to 18 bottles, which is exactly enough. And if it's not, they stack or attach side-to-side to easily expand your collection.
What's on my wine rack? Here are a few of my faves from Murphy-Goode right now:

23. 50-Piece Mini HSS Drill Bit Set - About $20: Look in any multi-piece drill bit set, and you'll likely notice one thing: all the smallest sizes are missing. These are the ones we use most, and they break, disappear, and become worn out. This box gives you ten of each of the smallest sizes so you have what you need, when you need it.

24. Charcuterie: The Craft of Salting, Smoking, and Curing by Michael Ruhlman and Brian Polcyn - Around $25: A truly complete guide to all things meatcraft. Ruhlman and Polcyn look at centuries of traditions, and come up with legitimate and accessible techniques to making them at home. If you've ever wondered what to do with a certain cut, this book will tell you.

25. Yuma Woven Tie - $20: There is no more iconic Father's Day gift than a tie. Which, if you do it right, is fine by us. Lately, we're digging the tie that gets its subtle character not from pattern, but texture. The complex weave brings tons of contrast and visual interest, and will look great with darn near anything.

26. Norwegian Wood: Chopping, Stacking, and Drying Wood the Scandinavian Way by Lars Mytting - Around $18: If you're wondering whether you can fill an entire book with engaging ideas about firewood, the answer is a resounding yes. In fact, this is one of our favorite items on the list. There is serious history and tradition here, and the workmanship is undeniable. Seriously, give this one a shot.

27. Merkur Classic Straight Safety Razor - Starting at $20: If you or the dad in your life is still using the cartridge razor — seriously, it's time to move on. The classic safety razor is miles more affordable, provides a better, more controlled shaving experience, and, frankly, looks way better sitting on your vanity. Only drawback - you can't take it through airport security, but it's worth it the other eleven and half months of the year.

28. DKnight MagicBox II Bluetooth 4.0 Portable Wireless speaker - About $30: We're not calling it a "beater" speaker, but sometimes, you need a model that isn't designed to sit on a shelf and fill your entire home with high-fidelity sound. Instead, it's a rugged option that moves easily among rooms, can be tossed in the car for a camping or beach trip, and can stand up to falling on the floor. Get the black so fingerprints full of grease and dirt won't show and you can bring along the tunes wherever your projects or adventures take you.

29. Wine Aerator - $10-12: It's a scientific fact: wine tastes better as it interacts with the air. It might sound a little pinky-in-the-air, but reds really do need to "breathe" in order to show their full potential. The easiest way is to incorporate oxygen right as it comes out of the bottle with a simple aerator. Ten dollars very well spent.
 30. Cabin Porn: Inspiration for Your Quiet Place Somewhere by Zach Klein - Around $23: The title is a little regrettable, but the images here are simply stunning. When you're stuck inside and need to imagine yourself someplace else, this will do it.

31. Real Old Fashioned Fly Swatter - $8: When did finding a fly swatter that actually works become so complicated? This model from Garrett Wade harkens back to the glory days of summer, before plastic handles and terrible design. Built to last, and licensed to swat.

32. Classic Coleman Cooler - From $60: There are coolers, and there is the Coleman cooler. Nothing says guy on a weekend camping trip like one of these. Bonus: makes a mighty fine impromptu seat for roasting food on sticks over a fire. Accept no substitutes.

33. Calvin and Hobbes Complete Collection - Around $60: Hands down, undeniably and without question, the best comic strip of all time. Features four full-color volumes in a display case, this best-selling edition includes all Calvin and Hobbes cartoons that ever appeared in syndication.

34. Dozuki Japanese pull saw - Starting at $28: An extremely elegant and useful tool at an incredible price. Handsaws go where machines can't, and can cut precision joinery like dovetails. The thin kerf makes it easier to move through wood, and feature an easily replaceable blade for when the teeth wear out.

35. Wall-Mounted Bottle Opener - $5 and up: Perhaps not super strong as a standalone gift, but it makes a nice little bonus or part of a set. Why? Cause these things are crazy useful. They stay put, and that way, you always know where your bottle opener is. Always. Go for a stainless-steel model so it can be mounted outside.

36. The Artful Wooden Spoon by Joshua Vogel - Around $18: Equal parts coffee table art book and practical how-to guide, this book expresses the elegance of what a felled tree can become. Essential reading for anyone interested in working with wood.

37. Readywares Wax Utility Apron - Starting at $33: If you, or your dad, are the kind of guys who read a site like ManMade, you're the kind of guy who makes messes. A standard all-purpose apron works for grilling, carpentry, leather working, bike maintenance, woodworking, cooking, cocktail mixing, painting, blacksmithing, or whatever task you take on. Heavy duty waxed canvas and brass hardware means it will stand up to the task.

38. Leatherman Rev - About $30: No tool can do everything, but for something that can fit in your pocket, a Leatherman gets pretty close. We love the Rev for it's balance - the tools are big enough to be useful, but the whole thing folds down and remains light enough to carry every day. It's fourteen tools include: needle nose pliers, regular pliers, hard-wire cutters, wire cutters, wire stripper, 420HC knife, package opener, ruler (1.5 in | 3.8 cm), can opener, bottle opener, wood/metal file, Phillips screwdriver, medium screwdriver, and small screwdriver.

39. Meat: Everything You Need to Know by Pat LaFrieda - Around $25: Literally, everything you need to know. The country's most famous butcher dives deep into creating recipes that showcase the value and potential of the cut, including beef, pork, poultry, lamb, and veal. Sharpen your knives, and go.

40. Stainless Steel Measuring Jigger - About $7: So long, old-school fill-to-the-top cocktail measuring tools. With its simple pour spout, easy-to-read (and not spill) gradations, there's no better way to measure your portions accurately.

42. Spoon Carving Knives - Morakniv 162 and 120: Carving a wooden spoon or kitchen utensil is about as satisfying a woodworking project as there is. It's practical, open to all kinds of design choices, and clean enough that you can do it while sitting on the sofa. The best part, you only need two simple knives to get started: the straight carving, or sloyd, knife for the outer shape, and the hook for the middle. The Mora series are high-quality, affordable, and the standard place to start.
I hope you found something on this list you think your dad (spouse, brother, grandpa, etc.) will love. Still, I know there are probably a hundred other great gift ideas I didn't think of. What the most amazing, impressive, unique, or thoughtful gift you've ever given or received? What's the World's Best Gift for the World's Best Dad? Let me know in the comments (and who knows ... maybe we'll update our list!).
Happy Father's Day, guys!

This post is sponsored by Murphy-Goode, but all opinions are mine alone. We like working with them because they care about the same things we do: bringing people together over great food and good wine. Thanks for supporting the brands that make ManMade possible.


/http://assets.manmadediy.com/photos/30993/best-fathers-days-gifts-apronoriginal.jpg)


 Rare is the craftsperson who couldn't use just a littlemore workspace. Maybe not more square footage (though I'd certainly take some), but perhaps more work surfaces to spread out projects, or some more storage to keep track of all the bits and pieces that come along with any technique.
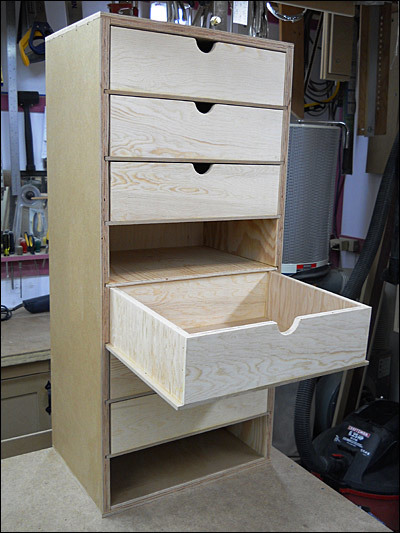
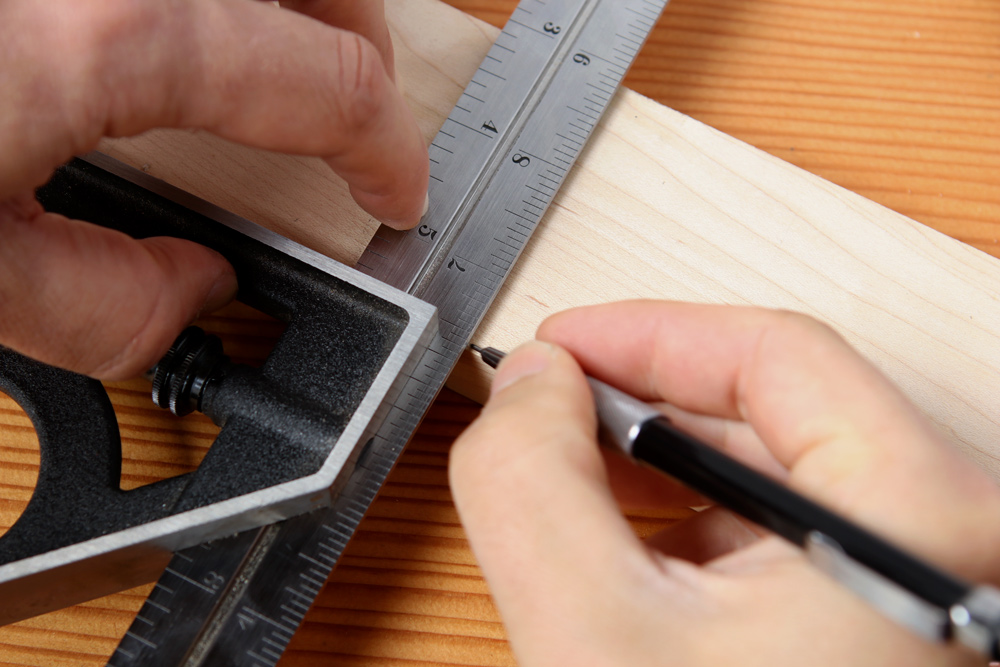


 The best thing is: this takes absolutely no more time than doing it the square-first way. It's just a bit of muscle memory and retraining your brain to get it in the habit.


