Quantcast
Channel: Man Made DIY Recent Posts
Viewing all 2425 articles
Browse latest View live

How to Make the World's Easiest Clamp Rack

$
0
0

A functioning clamp rack. Every shop's gotta have one. "But, wait!" You say. "Isn't the easiest way to hold clamps just some 2x4s bolted to the walls, and maybe some holes and plumbing pipe inserted to hang the clamps on?" Yeah, perhaps. But, while that works if you have a ton of space, it's not the most efficient way to store clamps in a small shop. And I think of that as more of a "clamp hanging spot" than a proper organization system. Plus, if you already know about that trick, you certainly don't need me to give you a how-to. 

Instead, I present this design: infinitely adaptable to any scale, and able to hold almost any type of clamp. You can build the whole thing with some scrap plywood, a jigsaw, and drill, and make one - no matter the size - in well under an hour.     

First, Determine Your Measurements 

To begin, you need to figure out three things: slot size, slot spacing, and slot length.

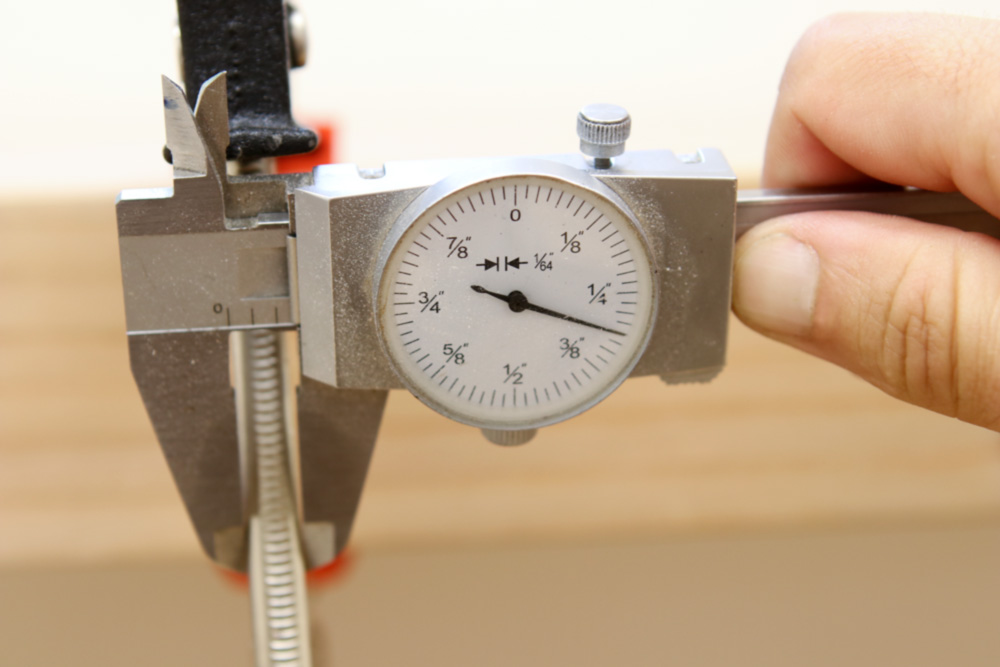
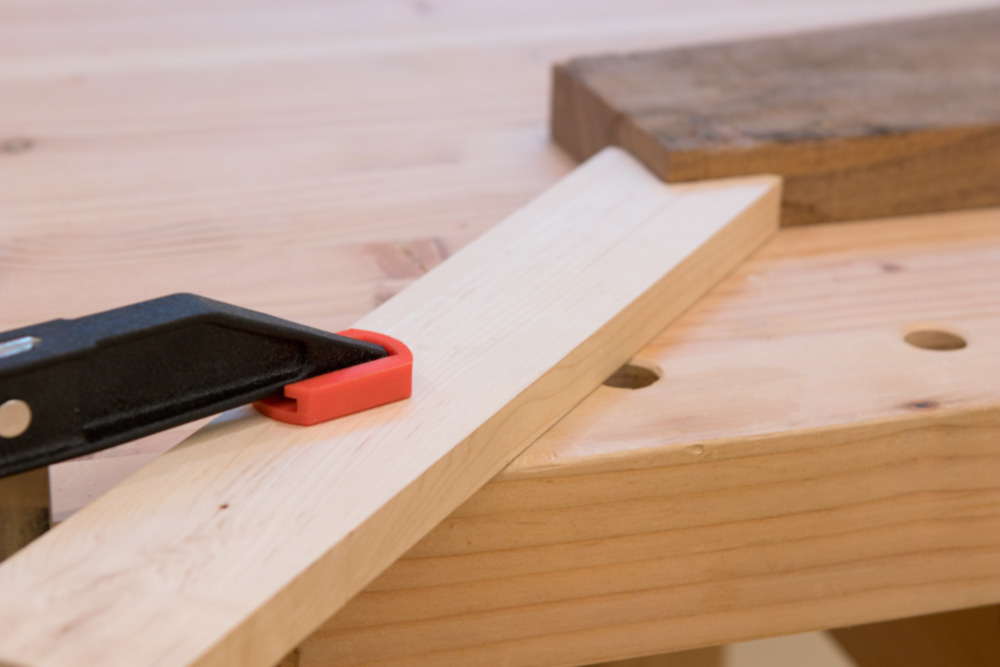
First, determine the thickness of the bar (or pipe) of your clamps. Add a bit of wiggle room and make it a nice easy number. Here, my Bessey clamp bars are 5/16" thick, so I'll choose 3/8" for my slot size. Let's call this Measurement A.


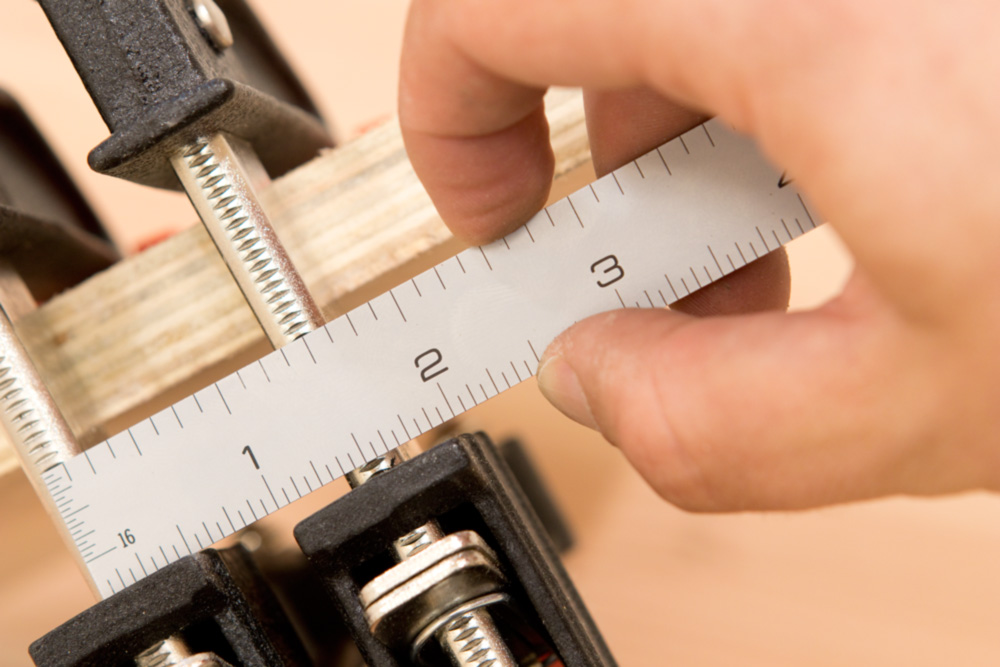
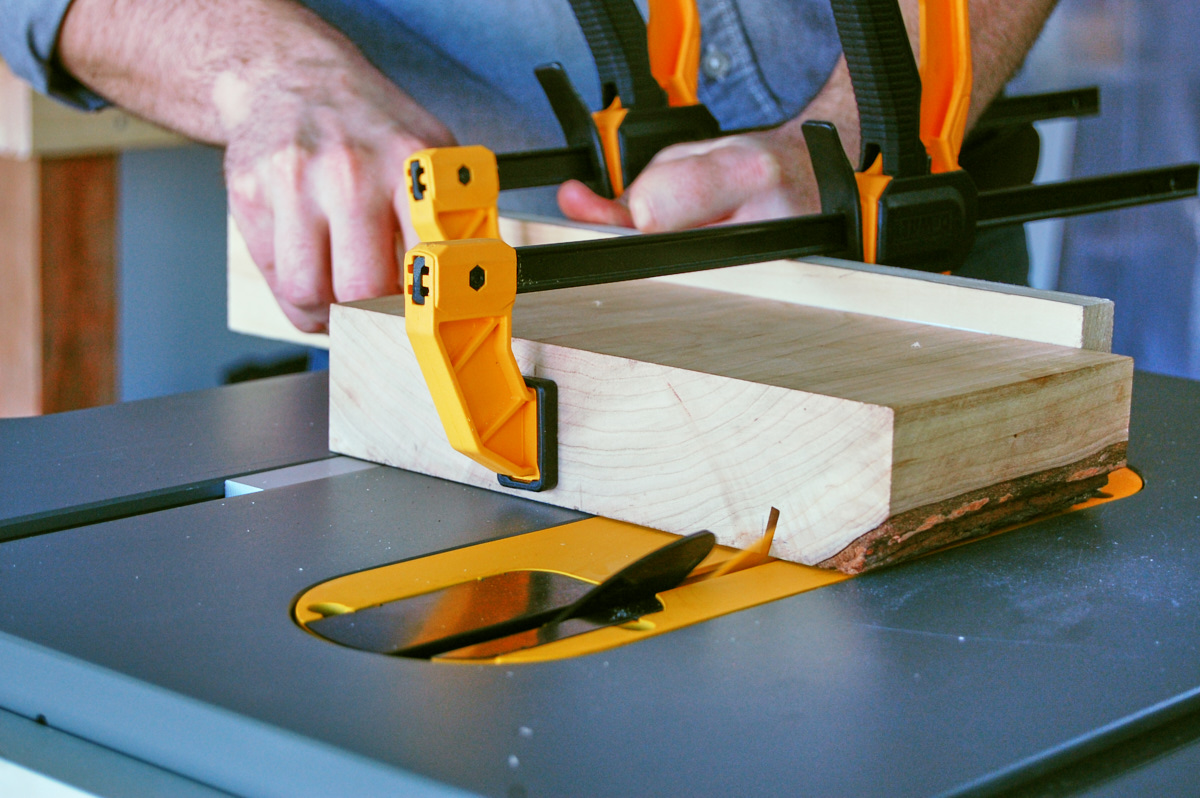
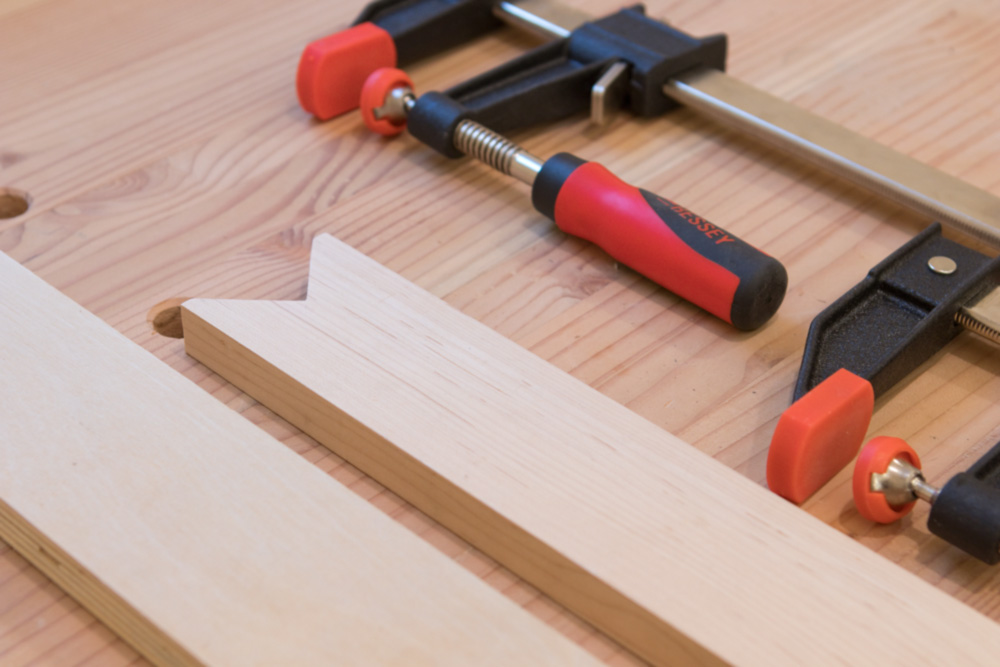
Next, attach two clamps side by side to a piece of scrap. Place them as close as you'd like them to be in your rack, and measure the distance between the CENTERS of the two bars. If you're using multiple styles and sizes of clamps, make sure you choose two of your biggest. This is Measurement B.

Here, we're right on 1 1/2".


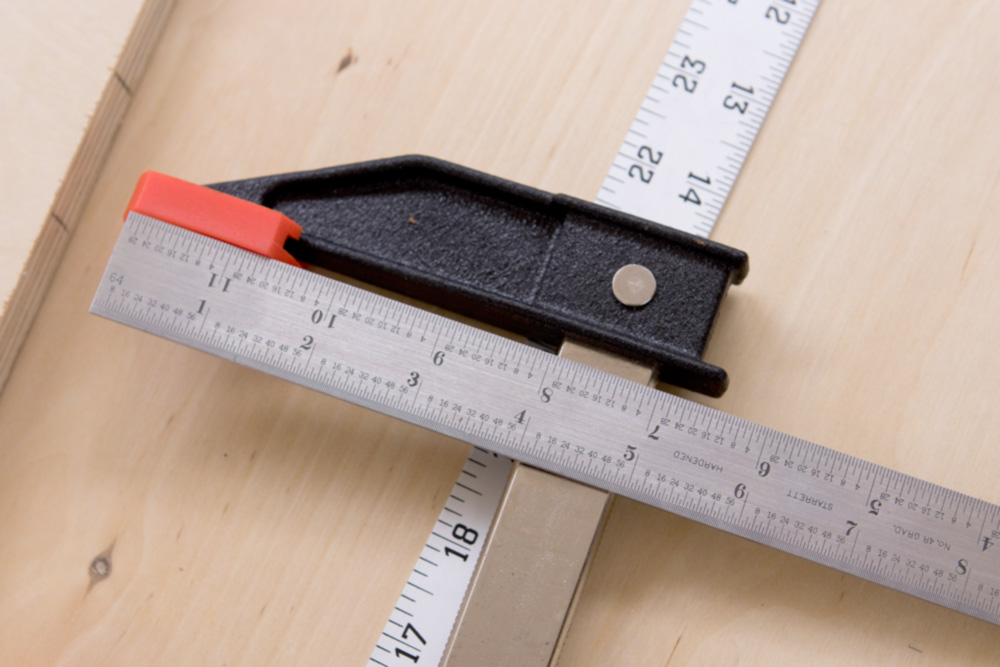
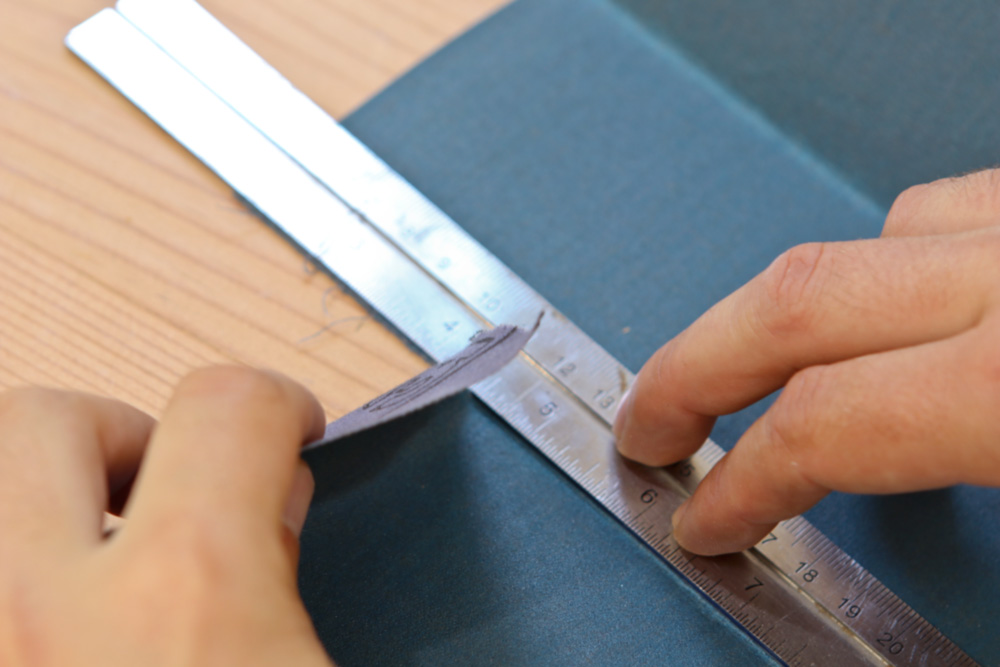
Lastly, measure the distance between the front of the clamp and the back of the bar (and clamp head). This is Measurement C.


Lay out the slots

Begin with an oversize piece of 3/4 plywood. Plywood is important here because the grain of the plys run in opposite directions, so it's strong across both its length and its width, and won't snap along a grain line with the thin tongues cut between the slots. (It's also means its dimensionally stable, and won't expand and contract as the weather changes. No stuck clamps!)


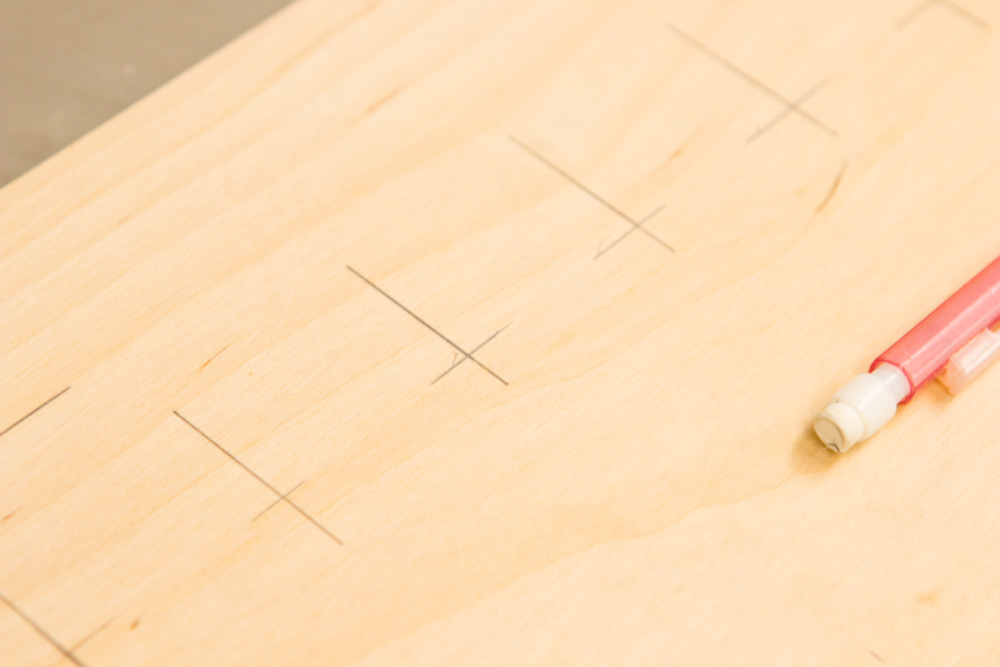
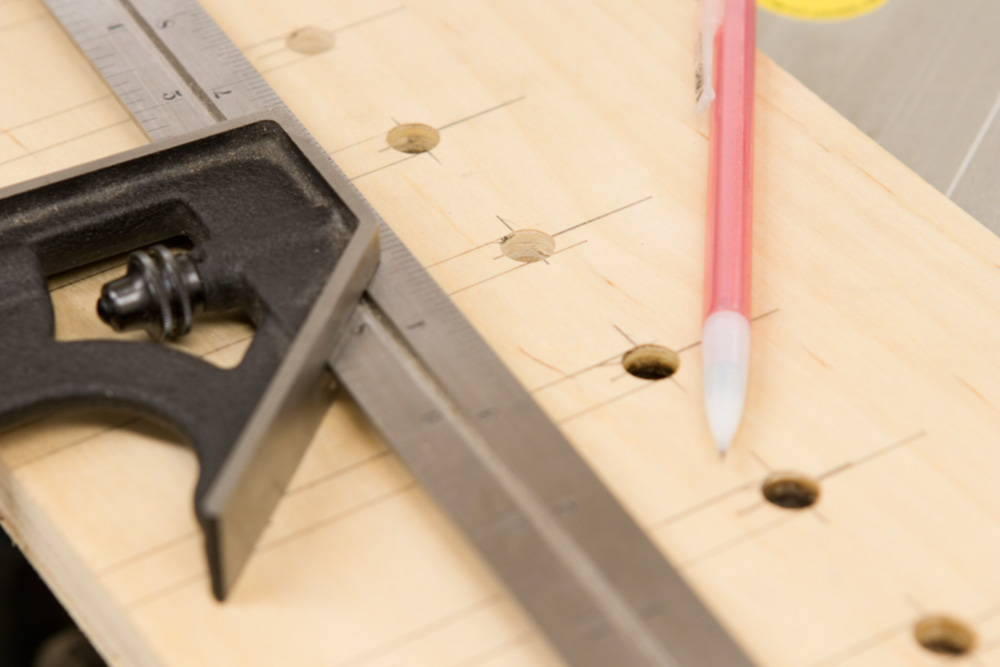
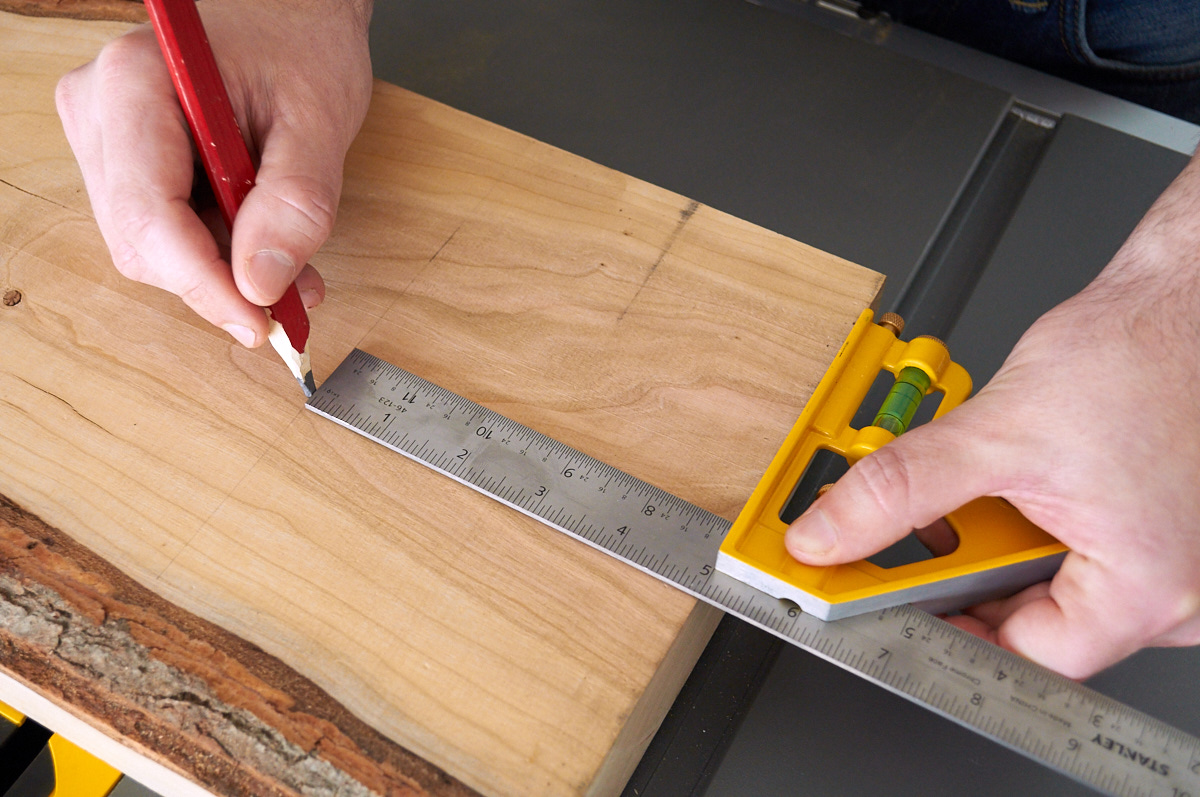
Make sure you have a nice, square edge across the front and the left side. Make a mark 2" from the left side. Then repeat, spacing the marks according to Measurement B above. You'll want as many marks as clamps you hope to store.

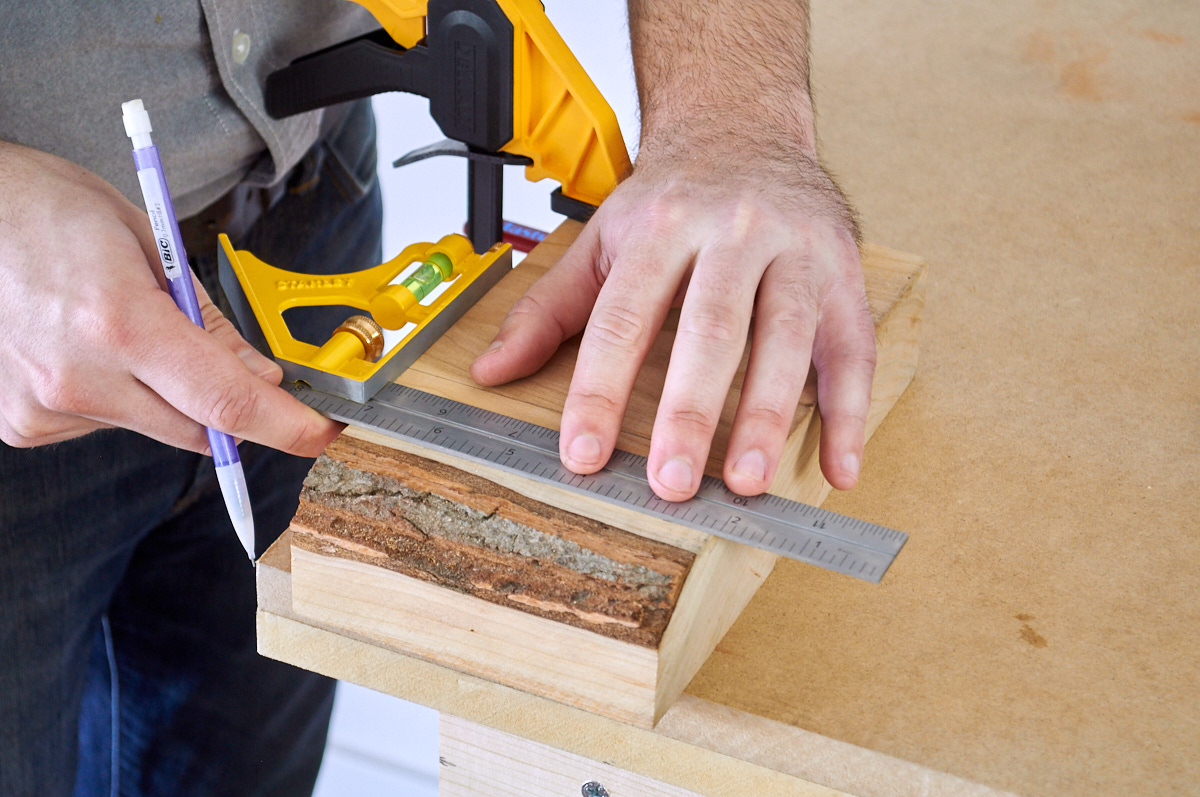
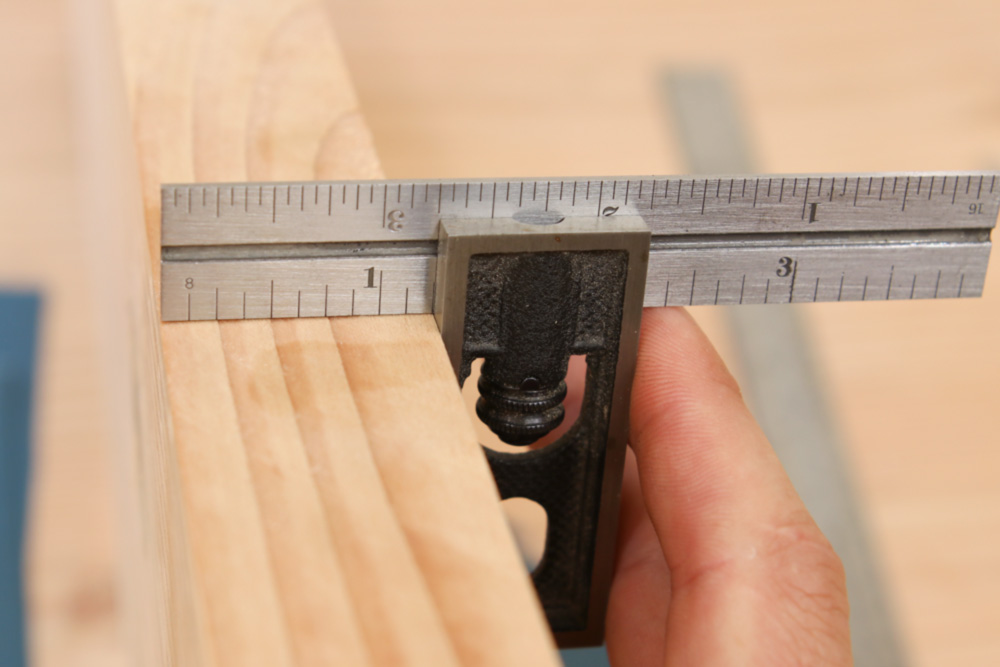
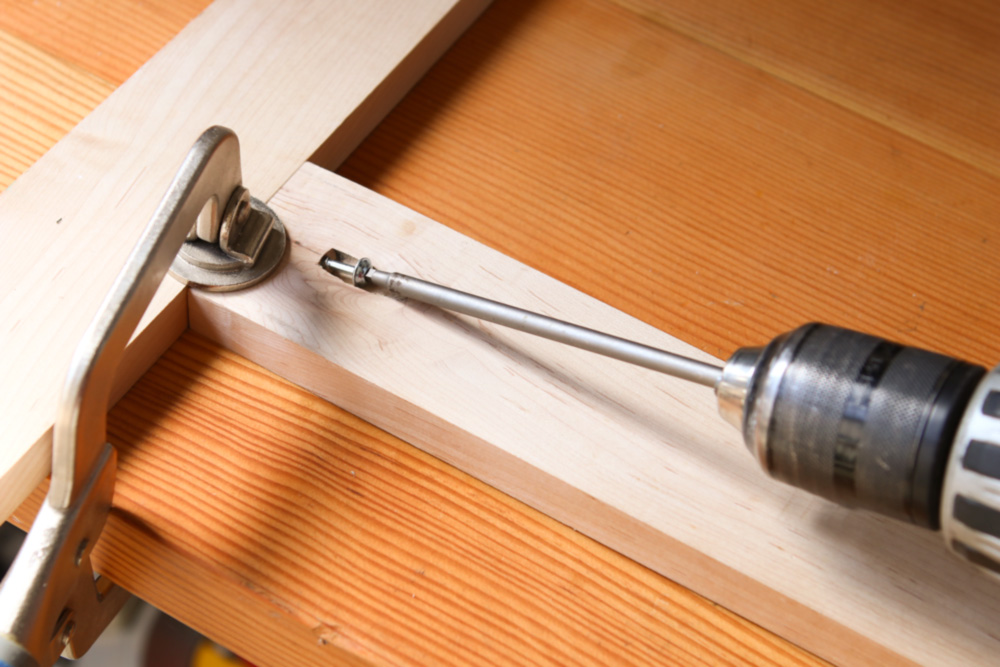
Then, set a combo square to Measurement C, the distance of the front the clamp to the back of its bar. This creates a single point where you'll drill your hole to start the slot. 

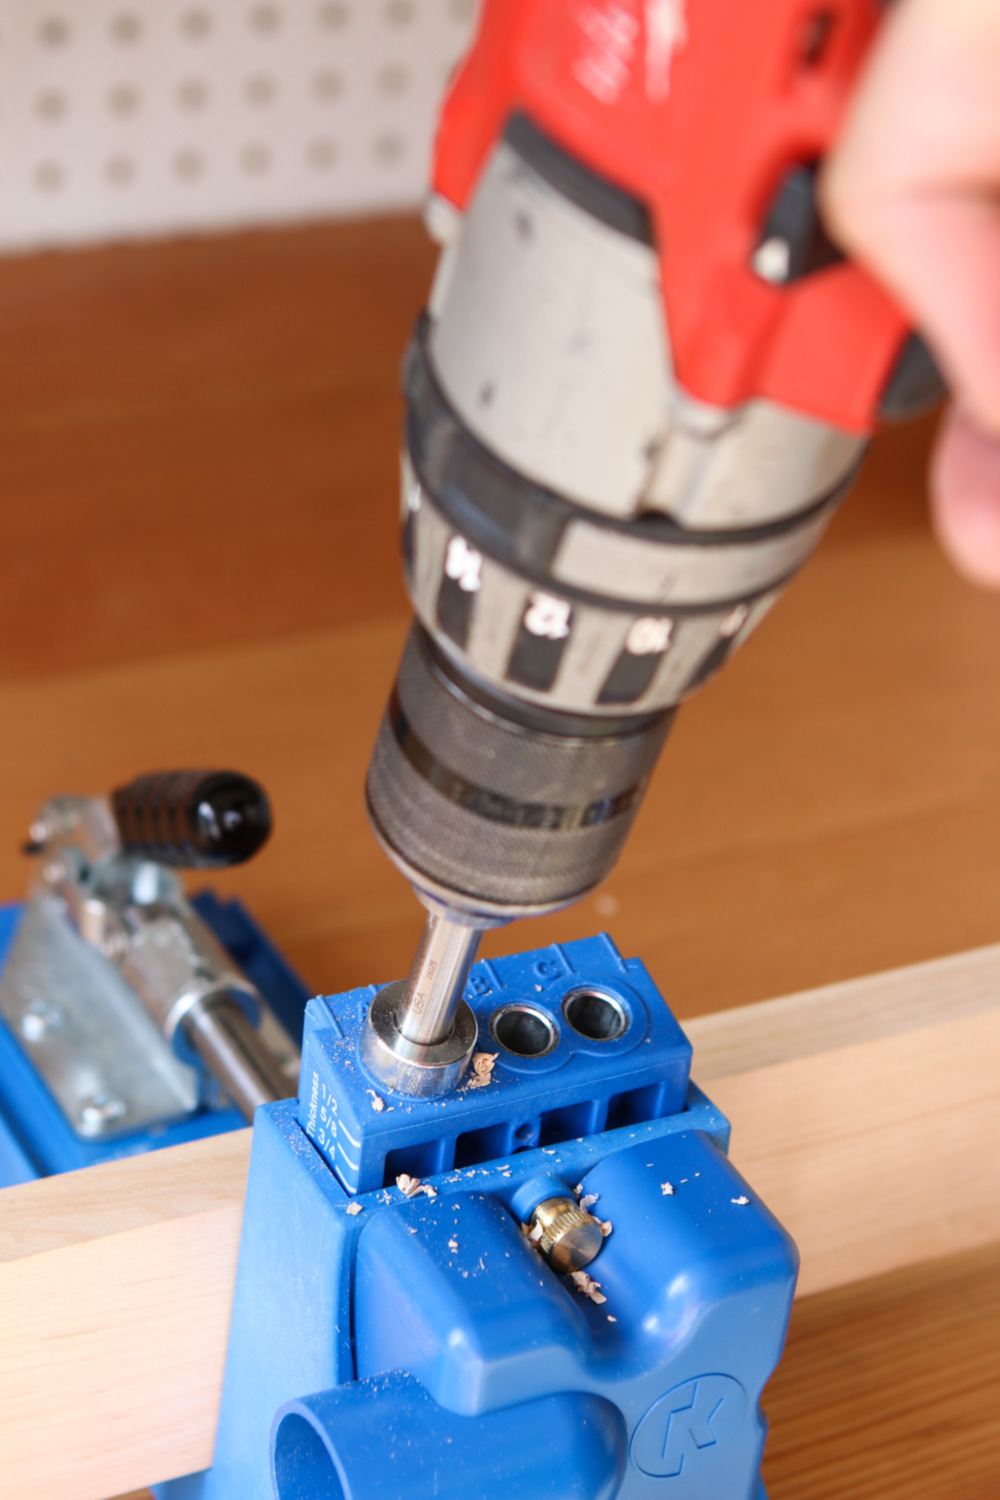
Drill and Cut the Slots

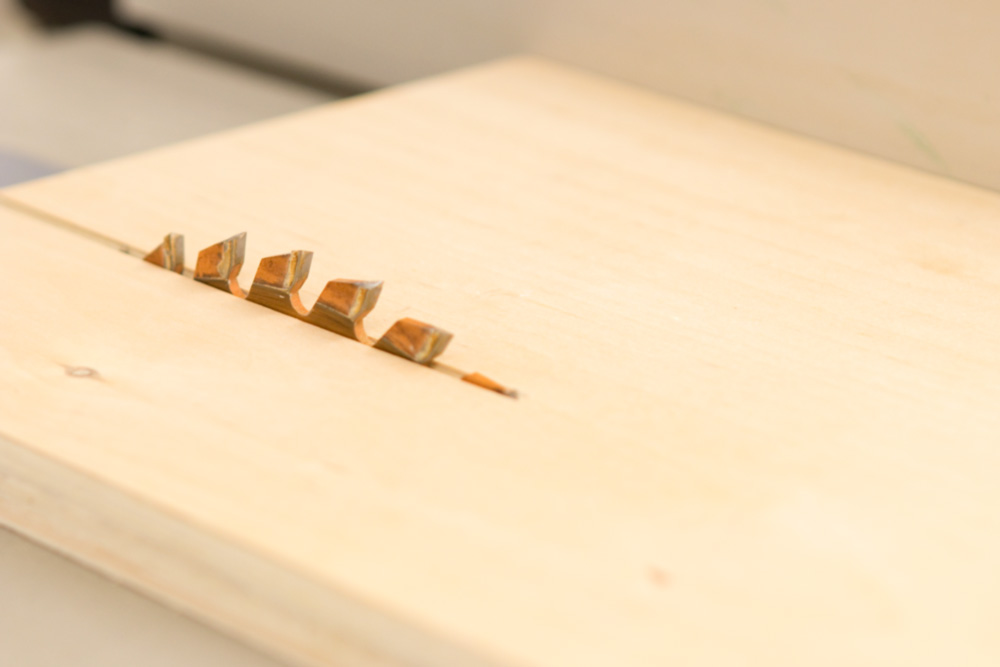
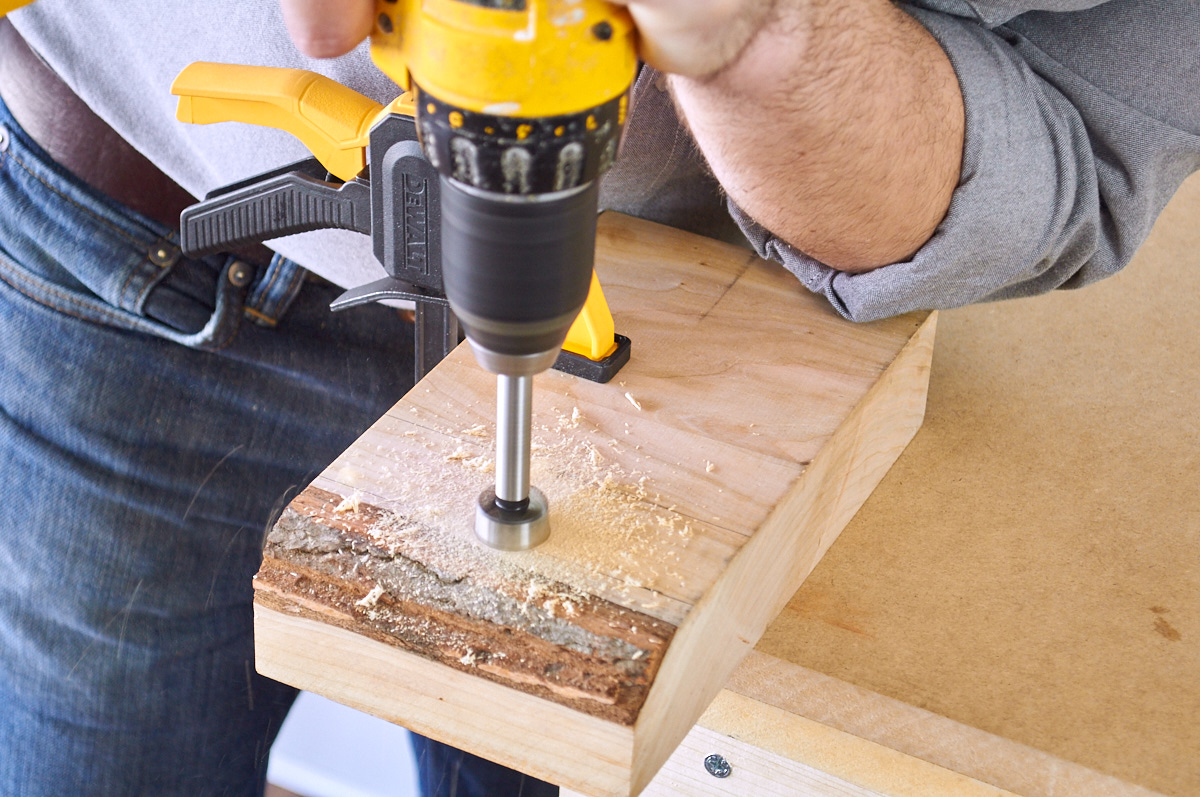
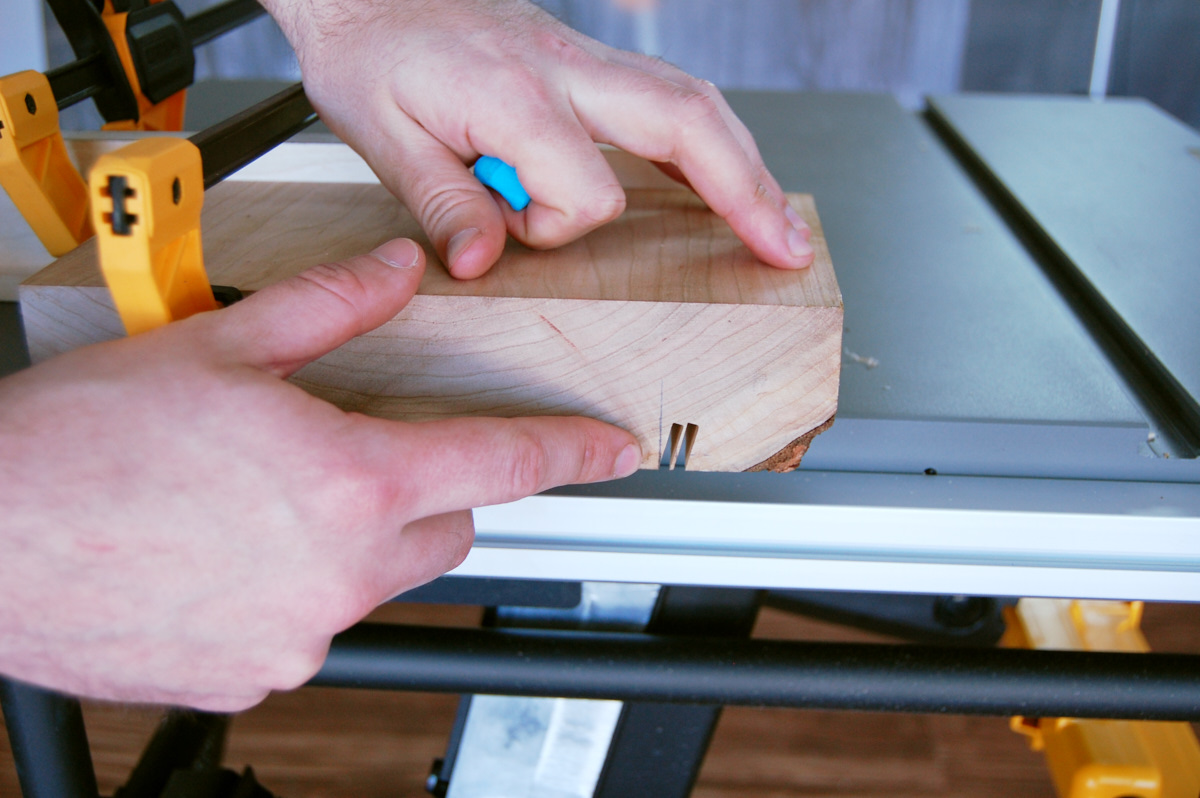
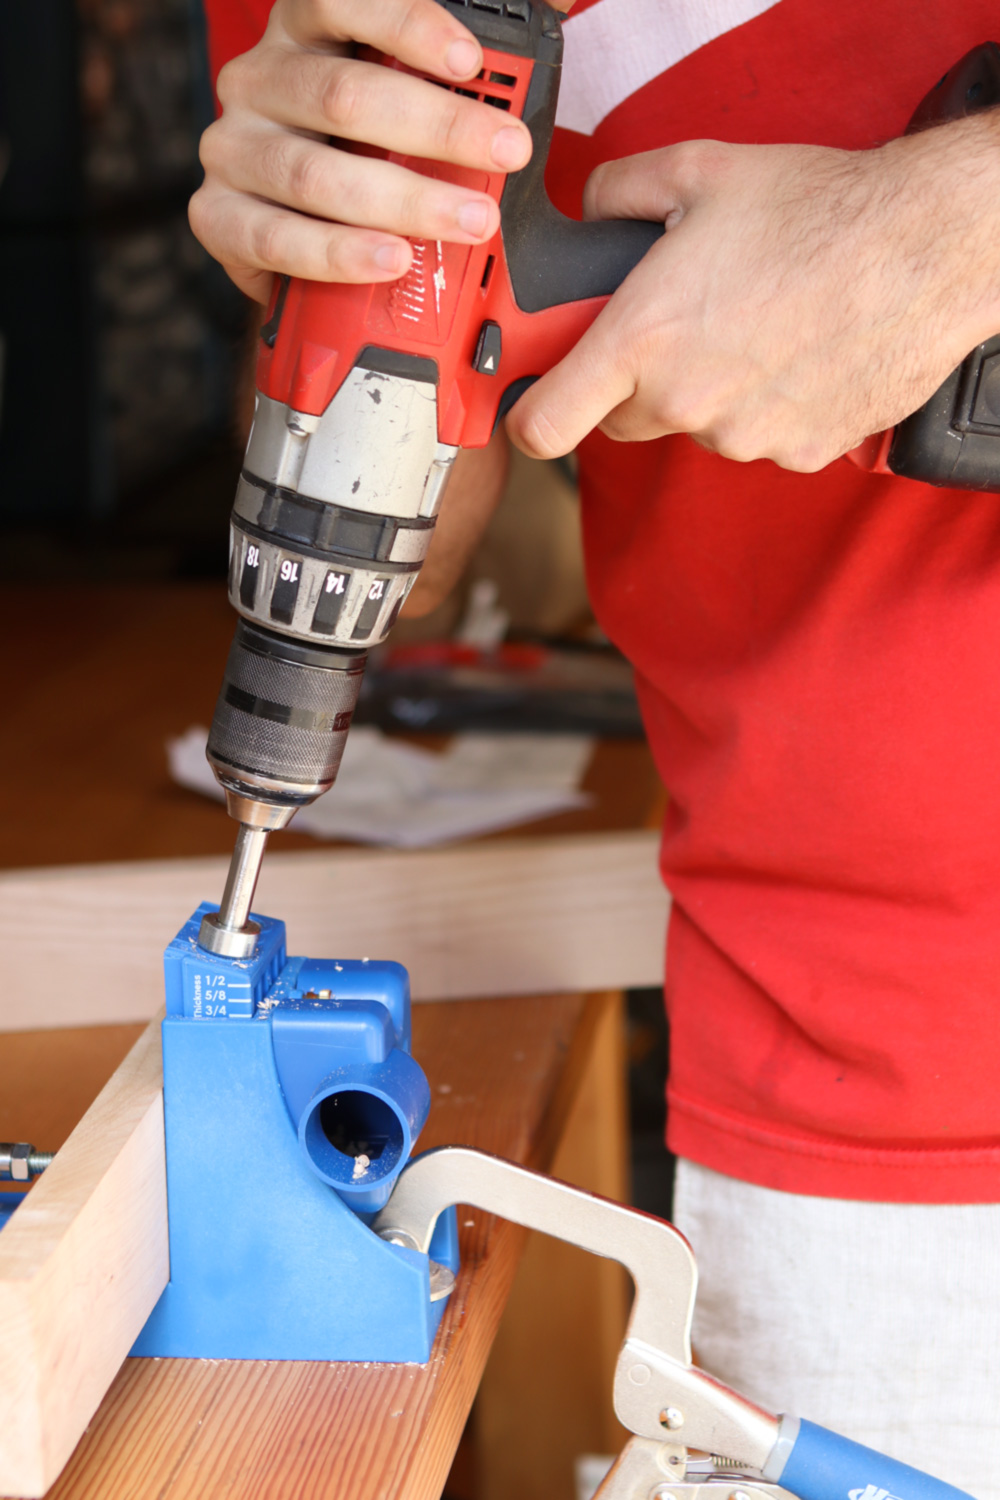
Select a drill bit that matches Measurement A above, the thickness of your clamp bars plus a 1/16" or so.  Drill out each crossmark above to create the back of your slots. You'll see now that you don't really care how much wood is in between the slots; the only thing you need to be concerned with the the distance between the centers of each slot, Measurement B. 

Use a square to extend the sides of these holes to the front of the work. 

NOTE: At this point, you can decide whether you want to store your clamps handles in front or handles in the back. If your handles go towards the wall, your slots will be much shorter, as only the distance behind the head gets slotted out, and the top jaw rests on solid wood. Gravity helps keep them in place.

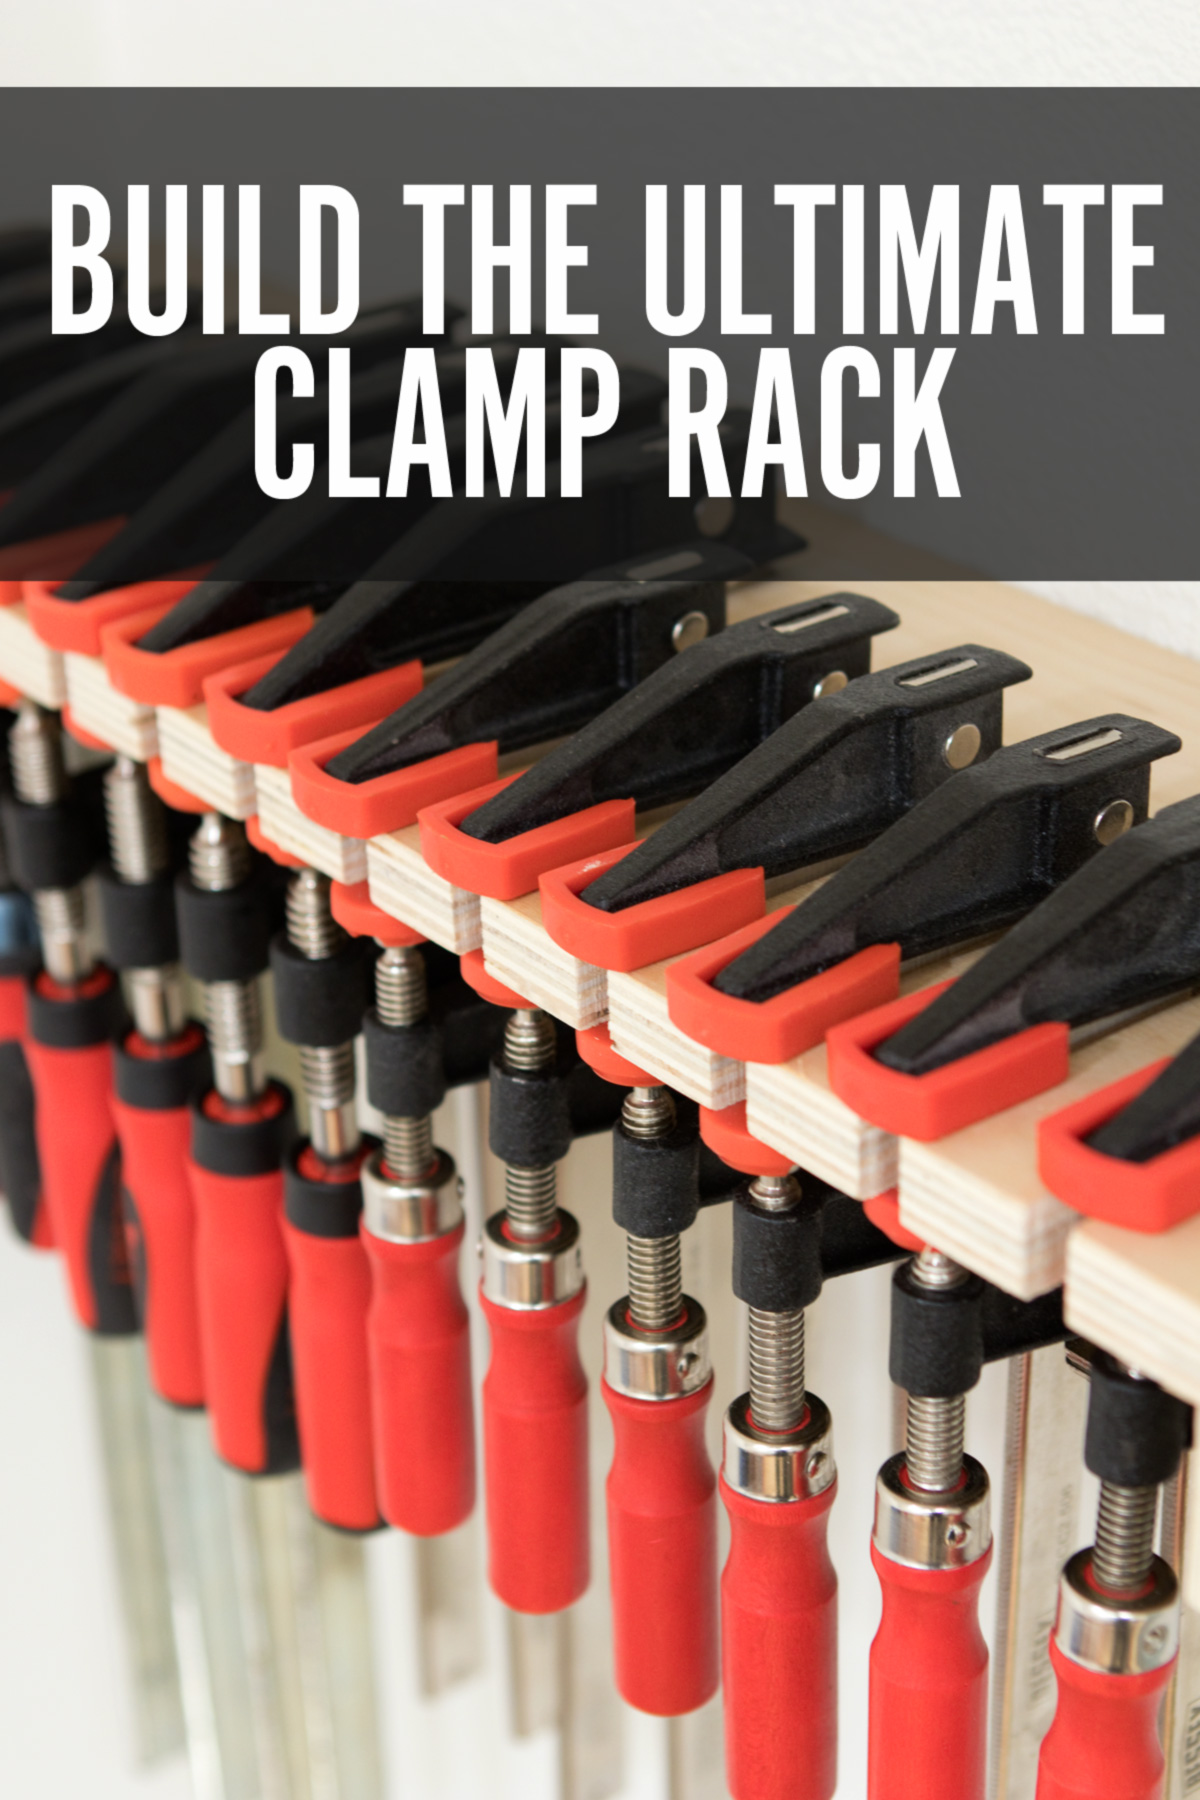
That approach wouldn't work for me, and here's why: I'm hanging my clamps next to my workbench, and I'll regularly be standing in front of them as I use my end vise. So, I want to use the clamps' built-in capabilities to secure them to the rack so they won't fall out or bounce around if I accidentally knock into them. Plus, I think all the handles lined up in a row look nice, and will encourage me to keep things neat and orderly. 

If you go with the handles in front design, you can still place them bar side out any time you want. So, handles in front/longer slot is the most versatile option.

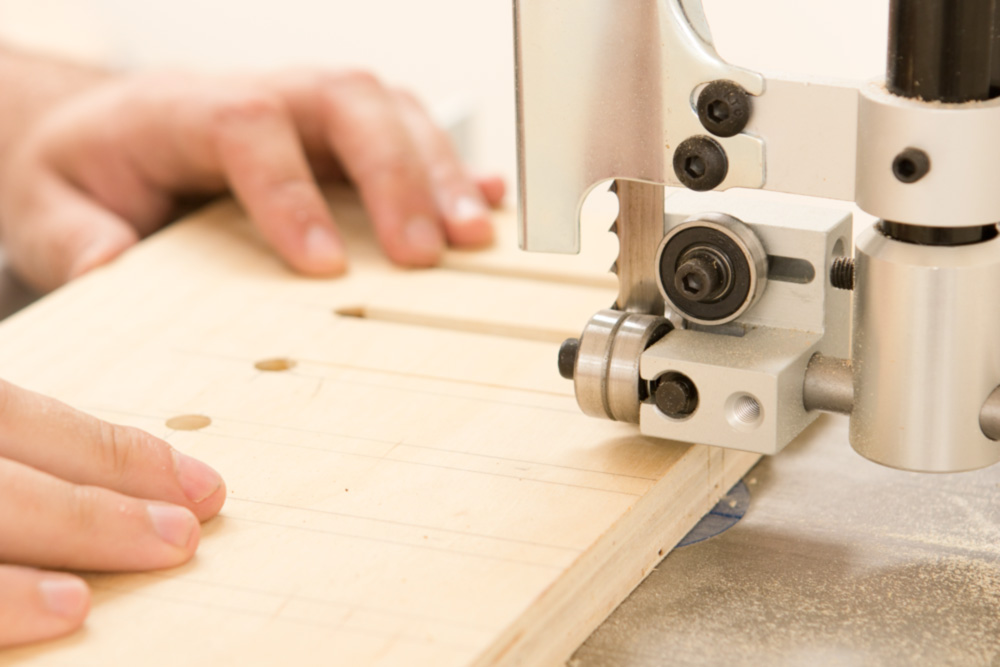
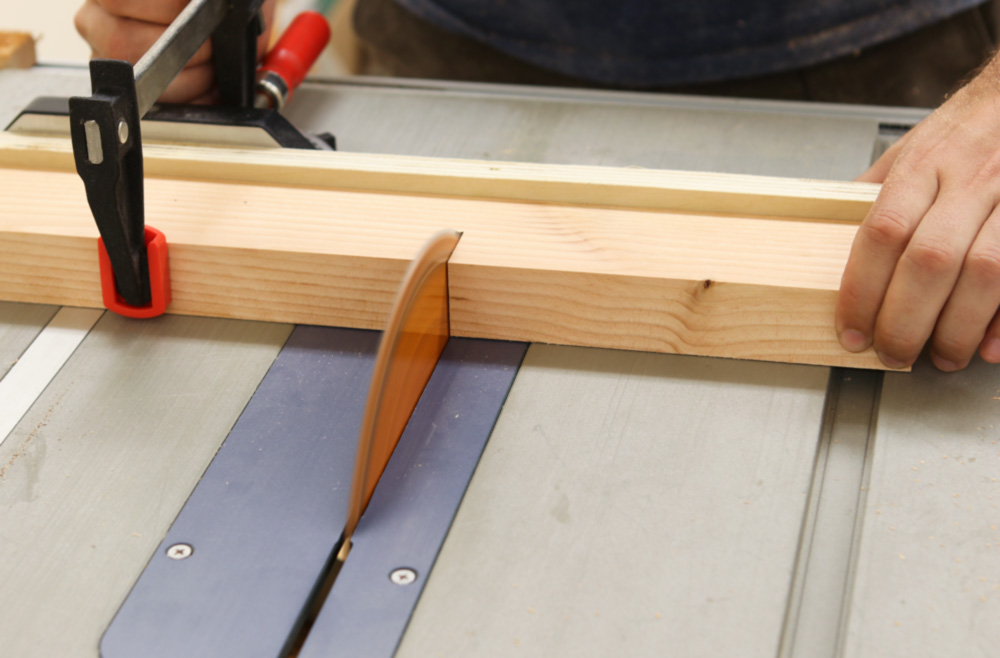
Now, use a jigsaw, band saw, or hand saw to cut down these lines and remove the waste inside the slot. If you have any excess wood in the front or back, cut it off now to determine your overall length. 


Cut the back and sides

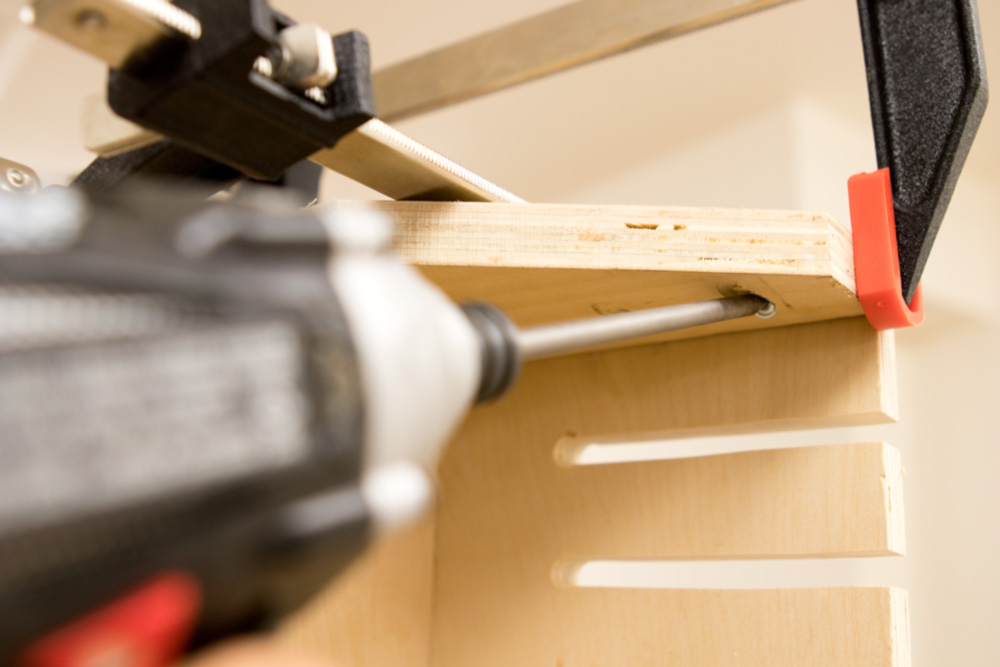
Next, cut the back of the rack. This will sit under the top slotted shelf you just created, and you'll screw through it to secure the wood to the wall. It should be exactly as long as the top, and as wide as you need to keep things rigid and sink at least two screws through. You could easily make it the same size as the top. Mine is 4 1/4" wide.


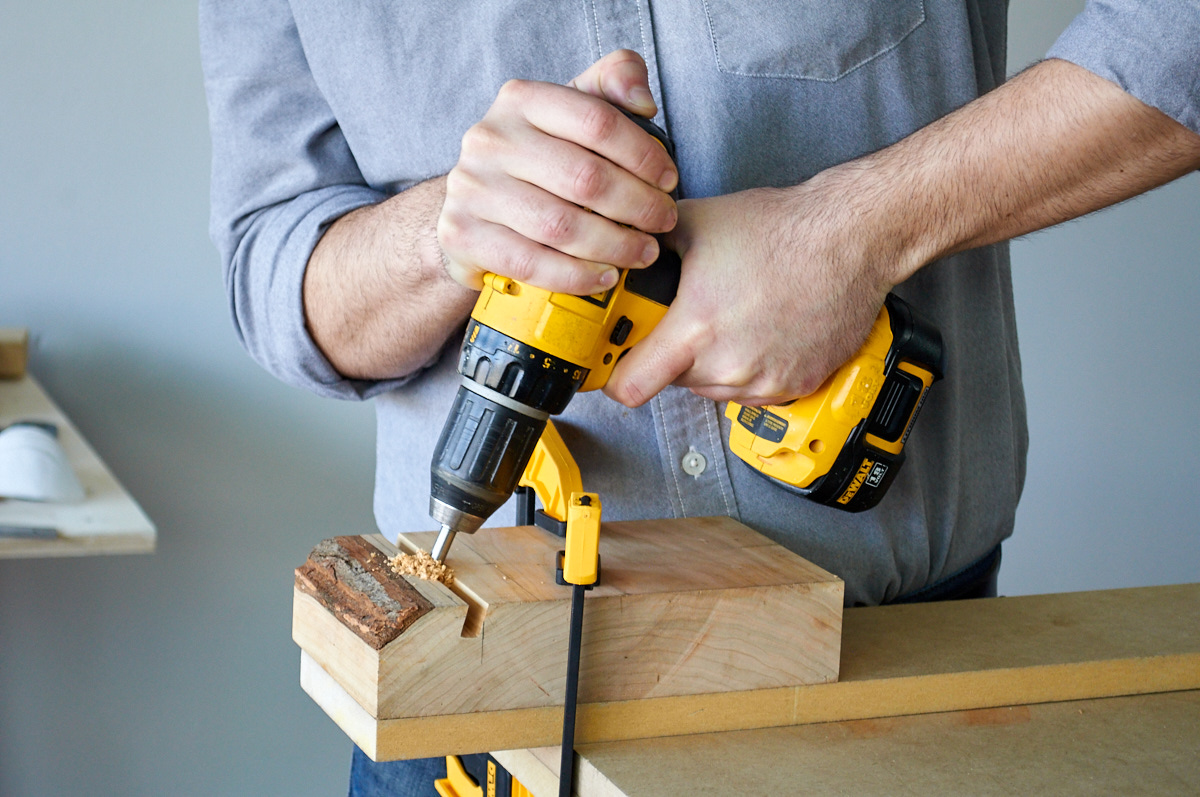
Attach the top to the back using screws. I chose not to use glue or nails here in case I ever need to take the rack apart. Just make sure the top sits on top of the back so the top is supported along its length. I went with pocket holes through the back, but you could easily just screw in from the top. 

With the back attached, create the sides. These attach to both the back and the top to make the whole thing rigid. Question of the day: does that make them corbels, brackets, or simply sides? (Not a quiz: I actually don't know what to call these. Someone please share in the comments below.) 


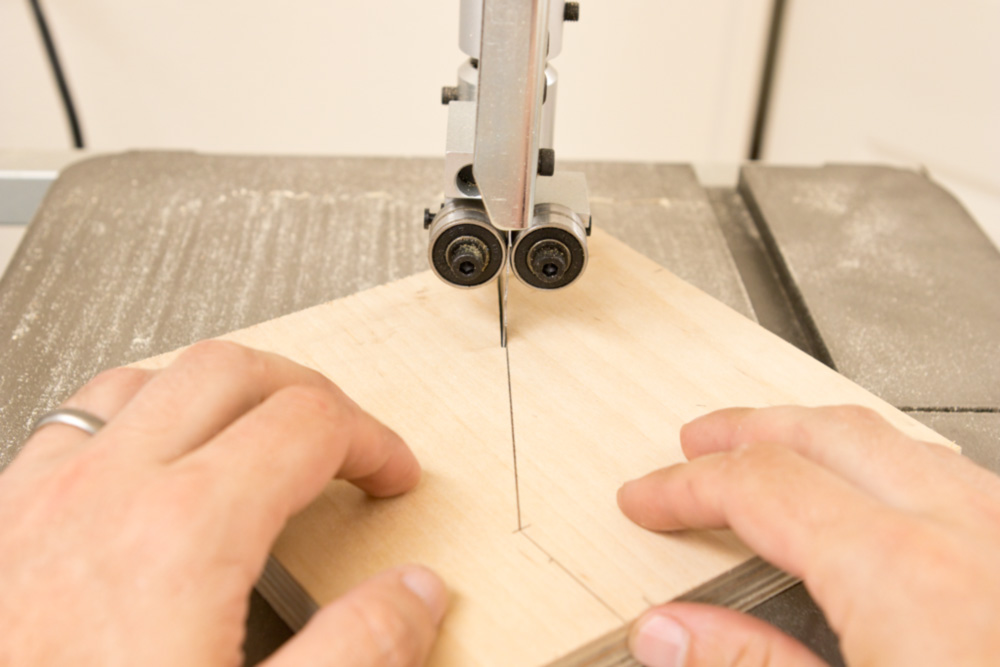
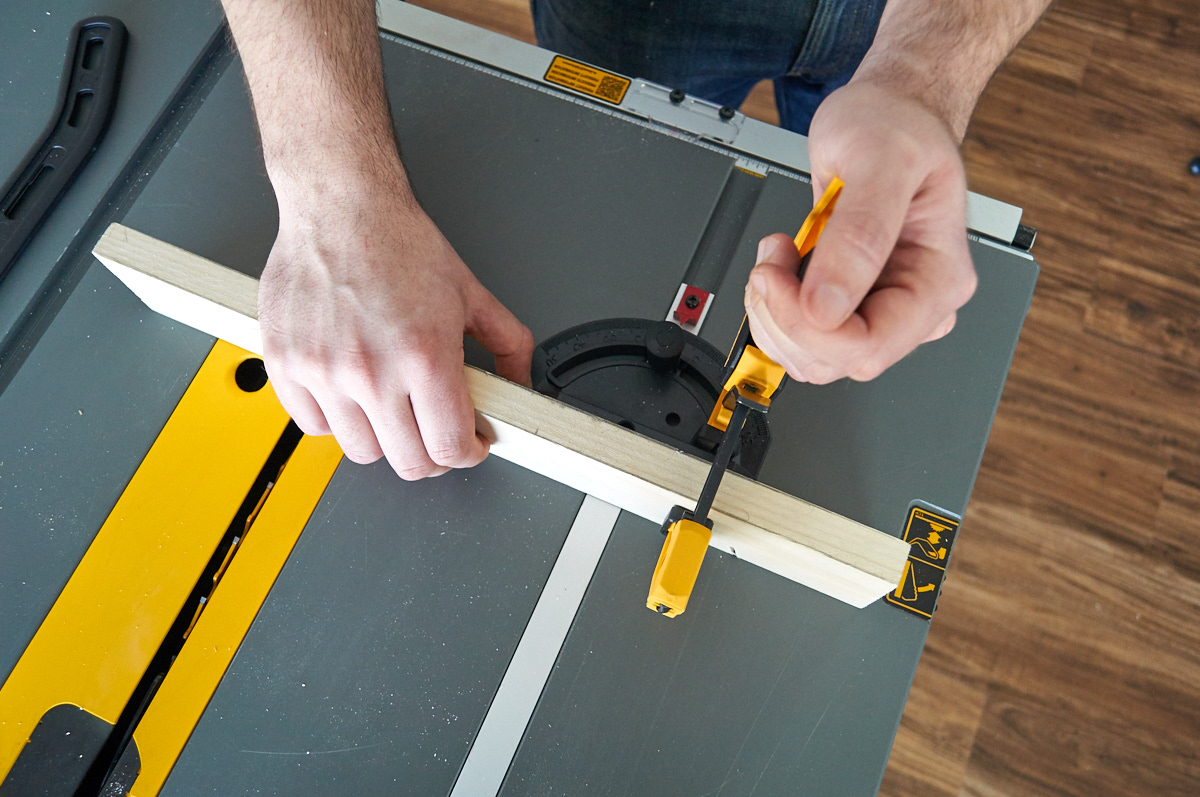
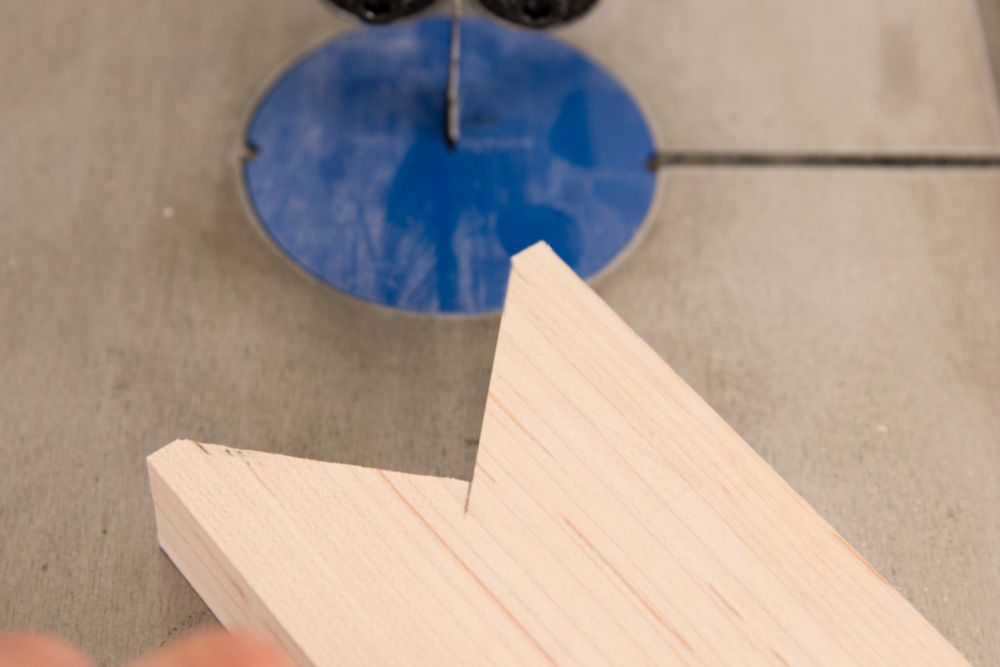
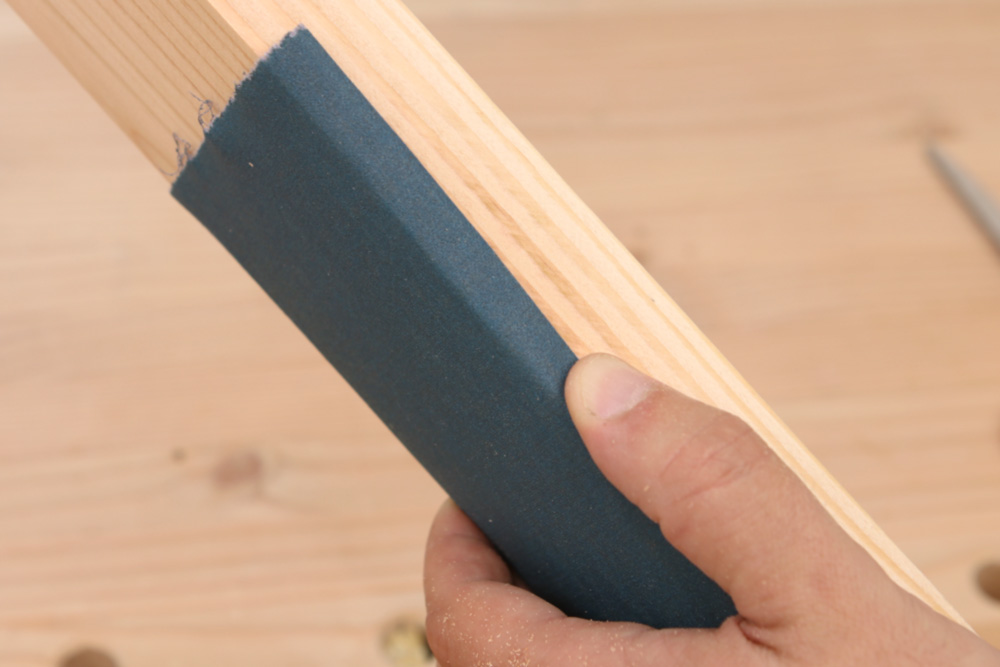
Your sides could be squares, triangles, or French curves; whatever you want. I went with a 45° angle, starting 1 1/2" in from each side, to lighten the visual weight and provide better access. I just held up the piece to the sides of the clamp rack and traced my marks, then cut it out on the band saw. Then I flipped it, traced the shape, and cut the other side. 


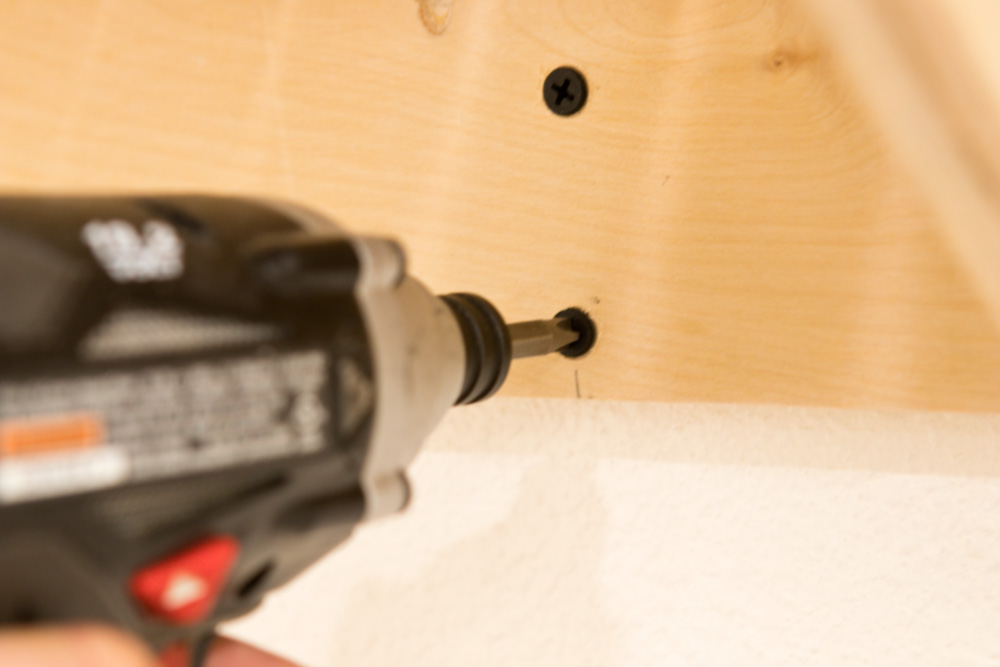
Attach the sides to the inside of the rack with more screws. 

Hang it up!

Find your wall studs, or use appropriate anchors, to hang the rack up, screwing through the back. Use at least four beefy screws, and more if you can. If you're hanging heavy pipe clamps, you may want to counterbore and use some lag bolts to get into the studs to support the extra weight. 


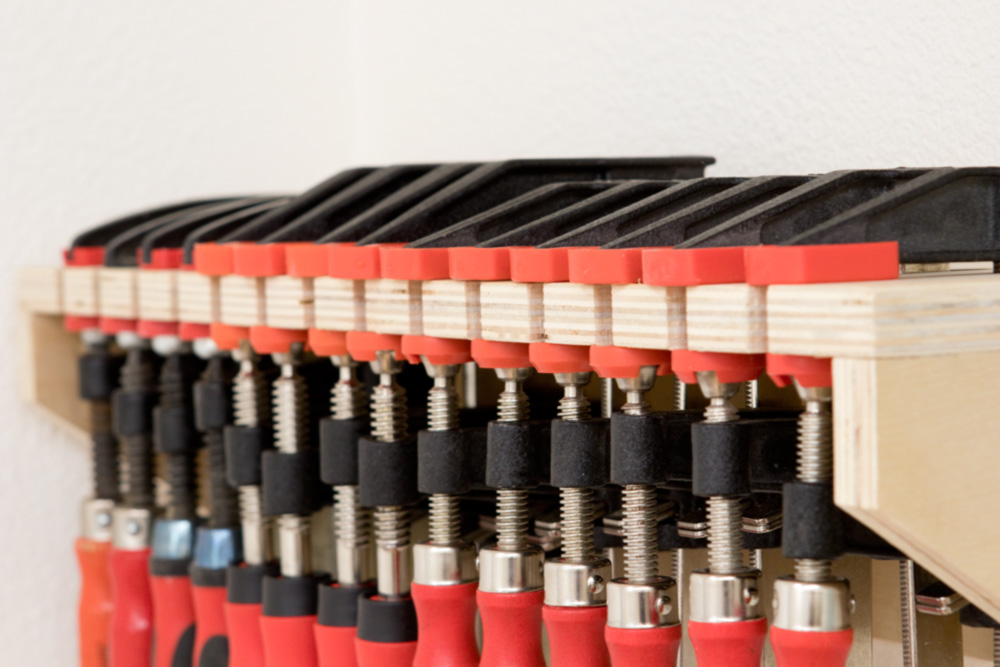
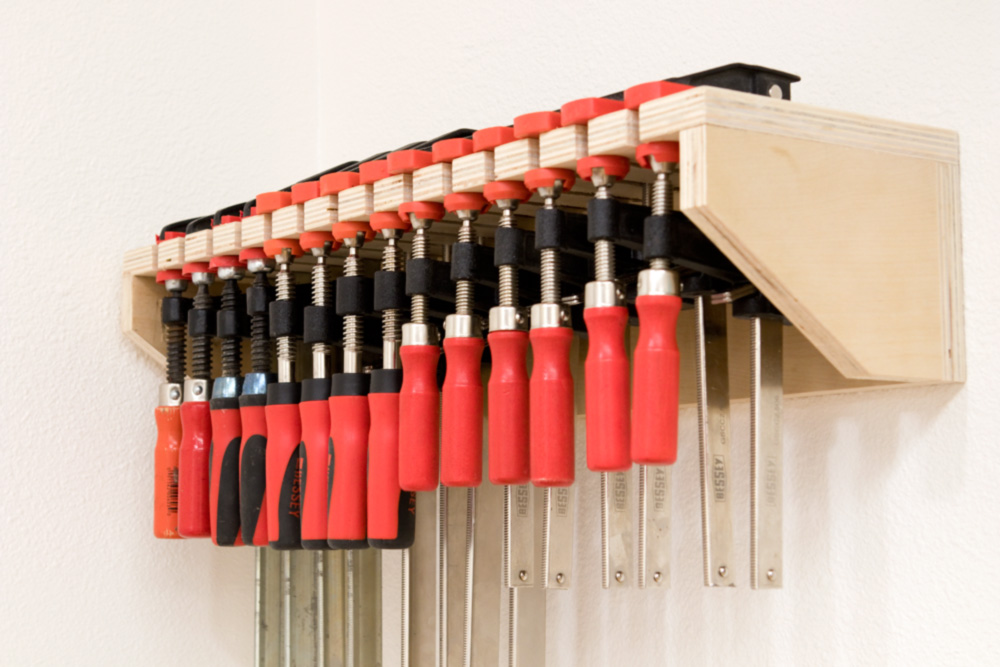
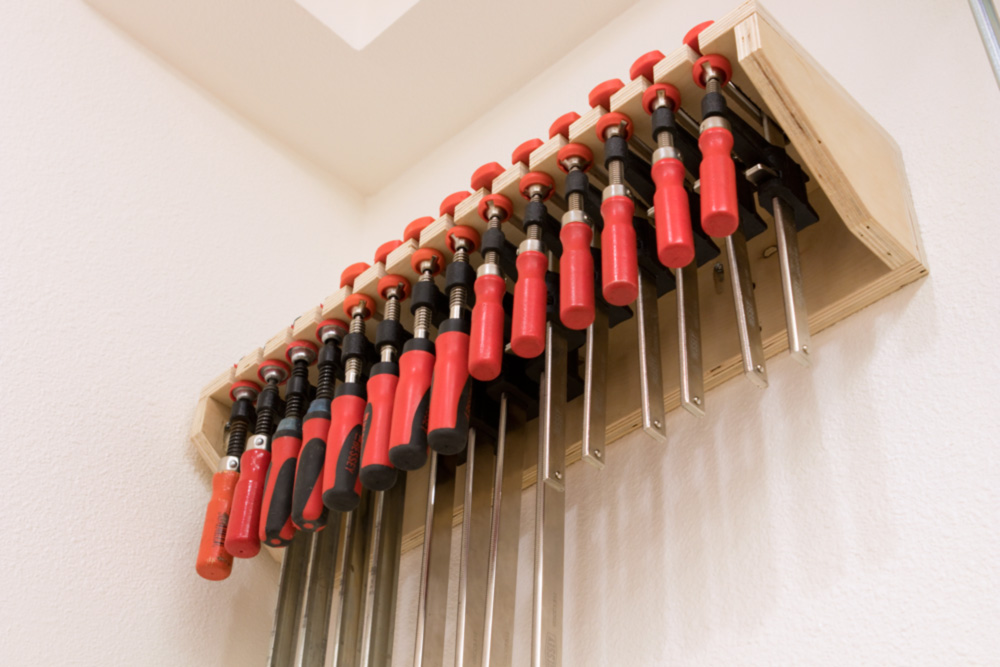
Add your clamps, and you're done!


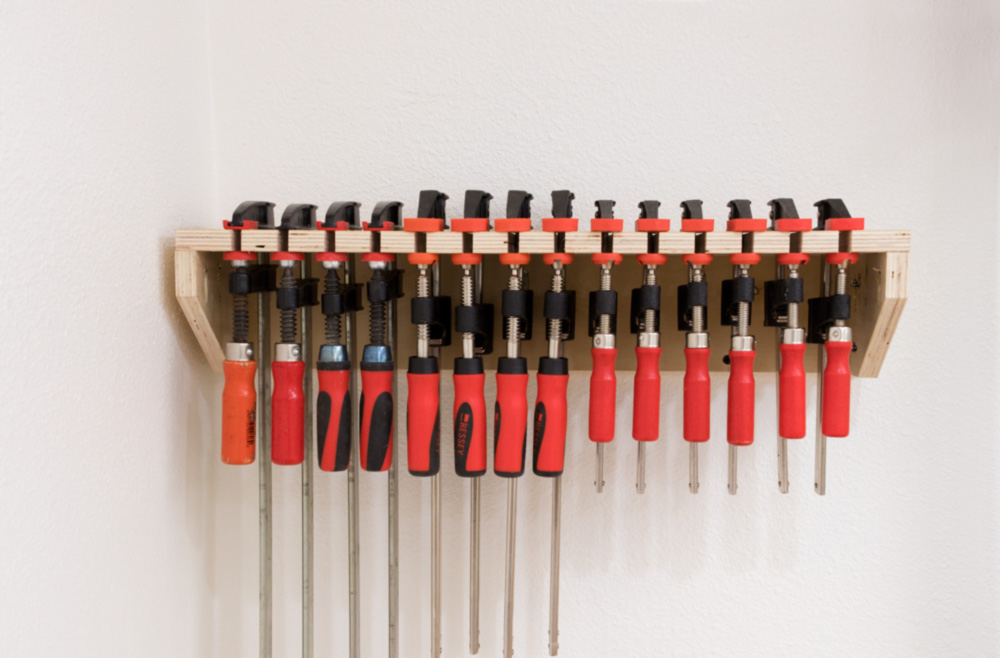
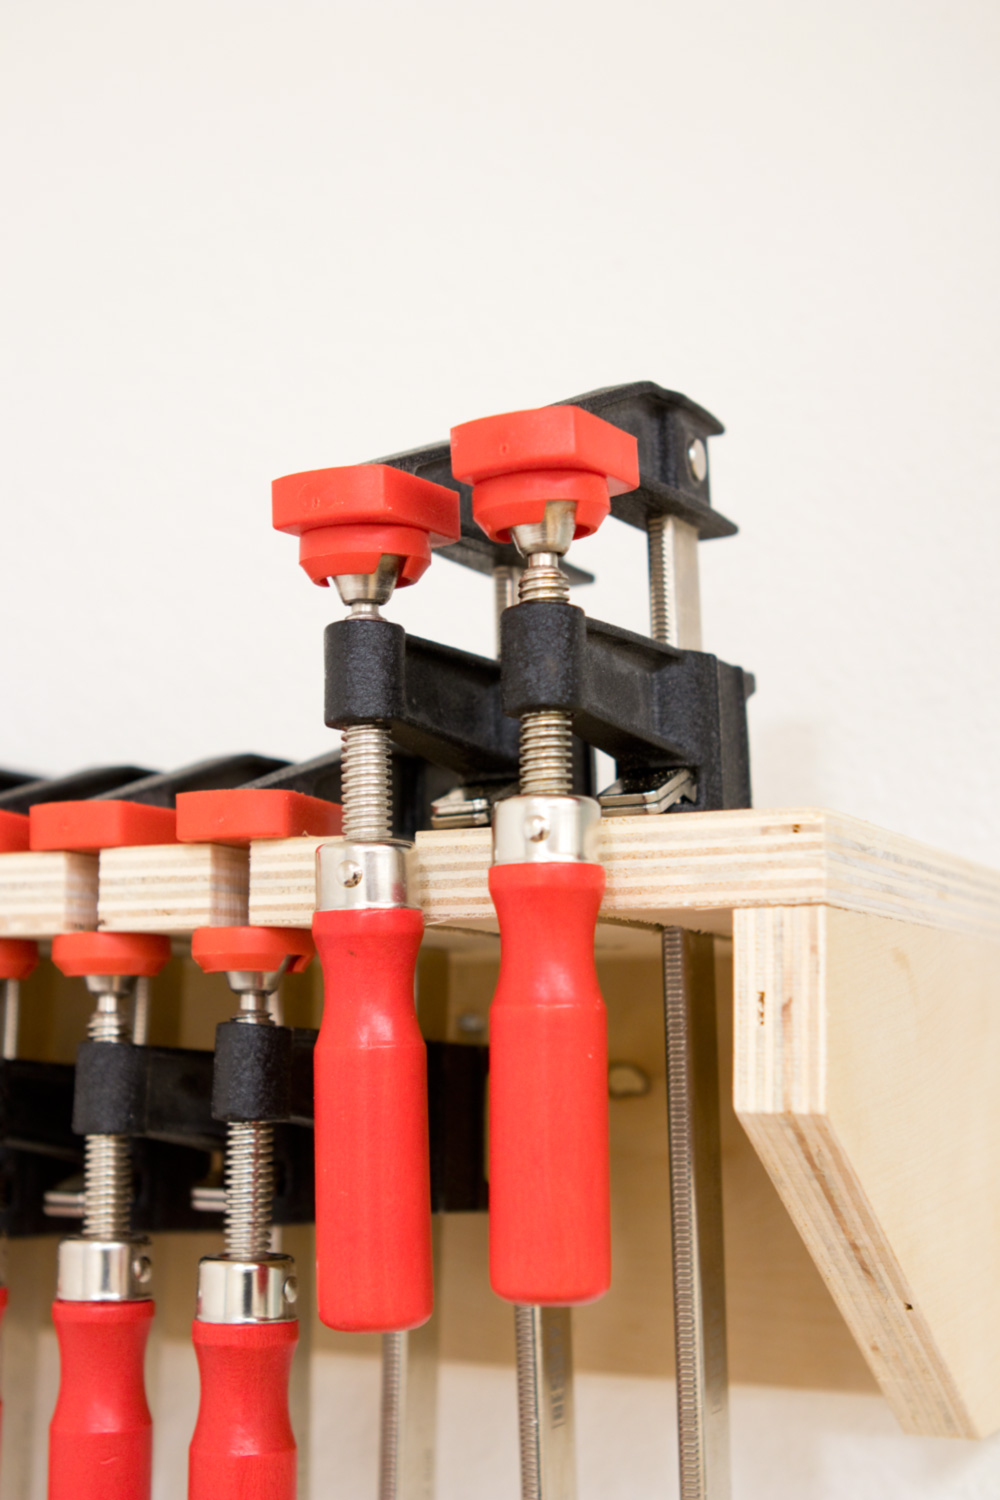
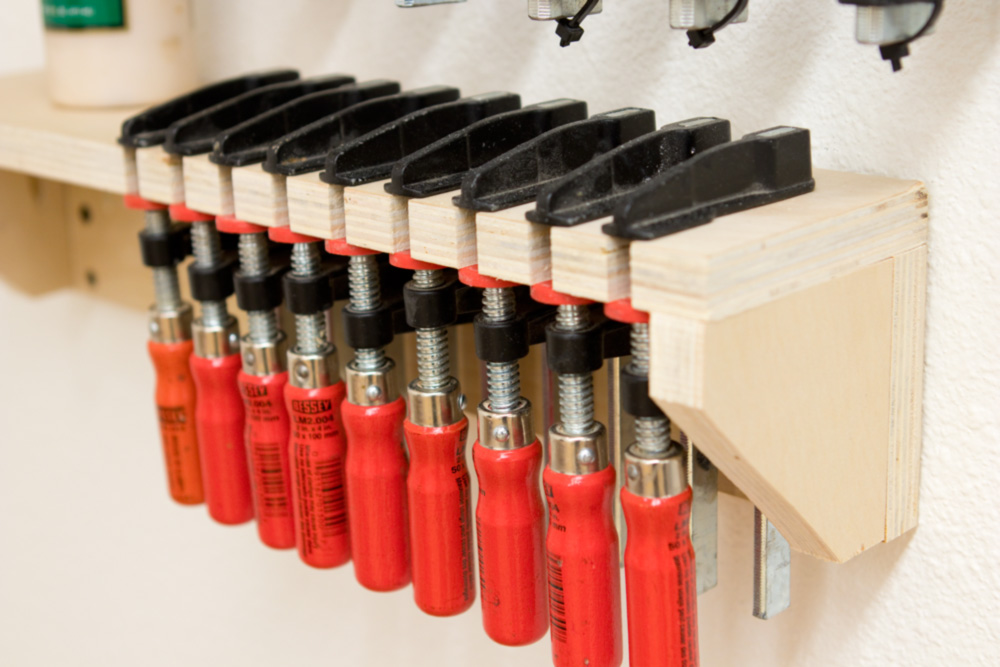
Once its on the wall, you can see the number of ways you can place the clamps in the rack. You can clamp them in, placing the rack between both jaws, put them handle side first and just let them hang, or rest them on the bottom jaw, as above. This is great when you're using them frequently, but don't want them to clutter up your workbench.


Here, you can easily see the profile of the sides, and how the screw joinery works to best support the weight. 


Here's a second rack made with the same design to house my smaller clamps. I made the rack longer than I needed, and shifted the clamps to one side. This was necessary in order to hang it from two studs, but also used otherwise wasted space on the wall to make a shelf for storage more quick-grab items. 


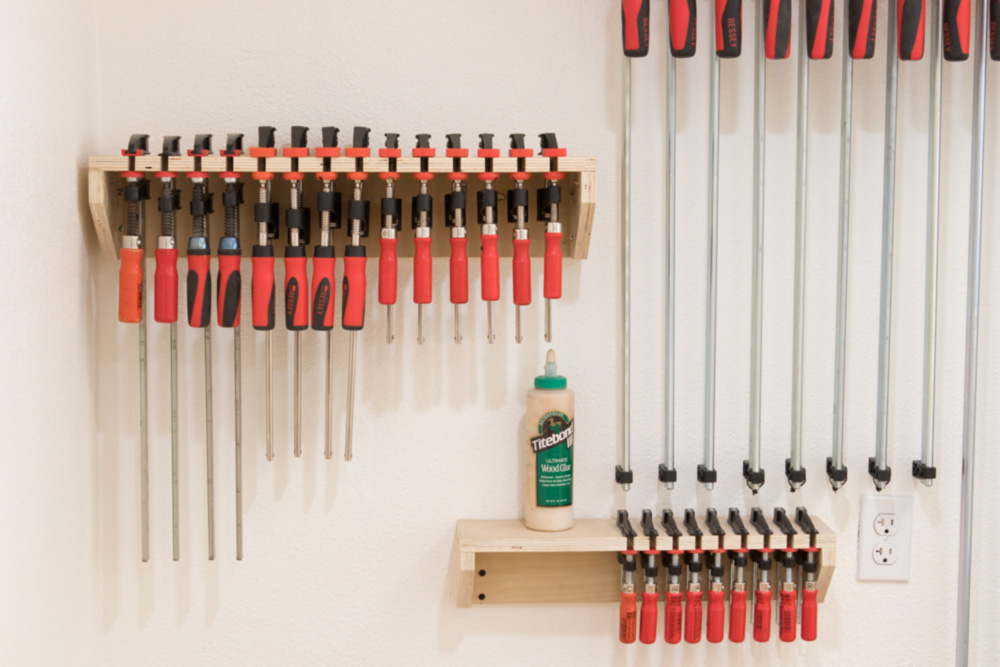
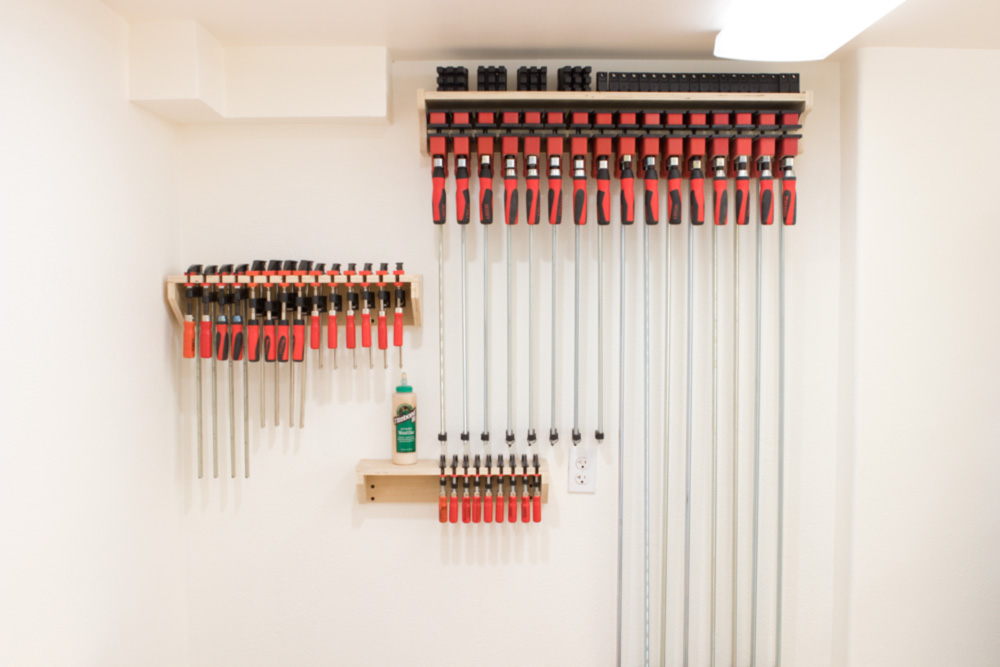
My clamp wall is almost complete. If you're interested, check out the tutorial for the parallel jaw clamp storage system I made. Next up: a way to store my wooden hand screws.  Stay tuned.  


How to Make a Rustic Phone Charging Stand from a Slab of Hardwood

$
0
0
DIY Wood slab phone charger dock
Sponsored by the DIYZ® app

I love the idea of combining modern technology with natural textures. I keep my tablet in a case made from an old linen-covered notebook, and my sleek and shiny DSLR in a worn brown leather bag. So, I wanted to make a simple place to house my smartphone, while warming it up a bit. I went with the most natural thing I could think of: a big slab of forest tree. 

I like this design for a DIY wooden smartphone charging station because it fits the charging cable nicely, but it isn't stuck in place, so you can remove and use it elsewhere without the stand.

Enough talk! Let's make one!       

DIYZ® is THE DIY app for getting detailed step-by-step project instructions and how-to videos that can help you complete your home repair or renovation without having to hire a professional handyman or contractor!


Tools & Materials: 

  • Wood slab, at least 1 1/2” thick and 3" long
  • Table saw with flat-bottomed blade
  • Long, thick scrap of wood to use as miter gauge extension fence
  • Clamps
  • Cordless drill
  • Forstner bits - ⅜” and ⅞”
  • Self-adhesive rubber bumpers
  • Smartphone charging cable
  • Oil finish (we used Danish Oil)

Step 1. Select a wood for your project. Choose something that's at least 1 ½ "thick and a piece that’s beefy enough to support a phone while charging. We're using a piece of 8/4 live-edge cherry. Crosscut your wood around 5", or slightly wider than your phone. 

Step 2. Next, draw a line across the center of the width of the wood. This will eventually line up with your charging cable jack in your phone. Then, mark 1 ½ inches back from the front edge. Use this cross-hatch as your center point to drill a stopped hole with the 7/8" Forstner bit, 1" deep. This will become the thumb hole for your charging station.


Step 3. Unplug your table saw, and load up a table saw blade with a flat-bottomed tooth pattern. Tilt the blade to 15° and replace the throat plate. 

Clamp or screw a long piece of scrap wood to your table saw's miter gauge. This will allow you to accurately make a series of cuts into the wood, while keeping your hands safely away from the blade. 

Step 4. Clamp your charging station to the wooden miter gauge extension. Set the blade height so it cuts 1" deep into the wood, matching the depth of the thumb hole. Carefully make an angled pass one inch deep, aligning the cut to the center of the hole you drilled in Step 2. 


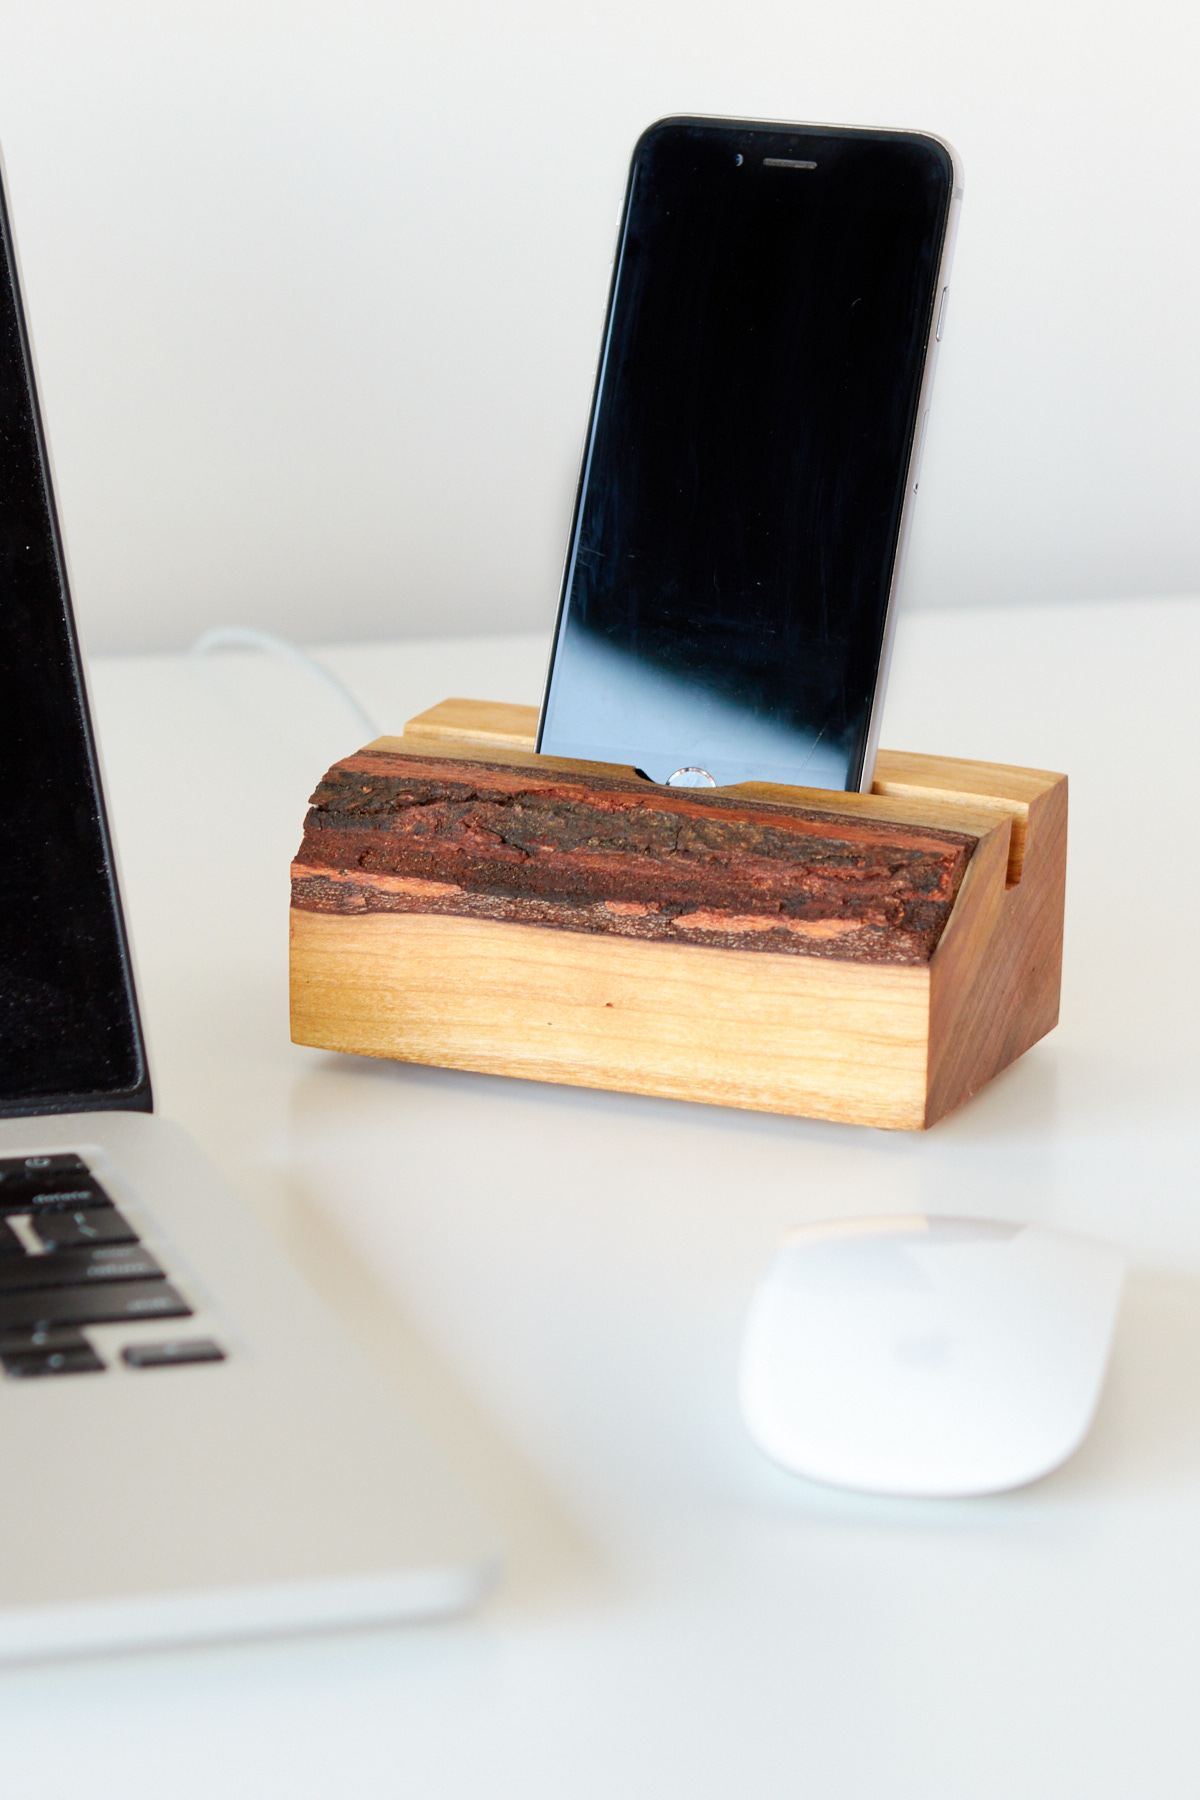
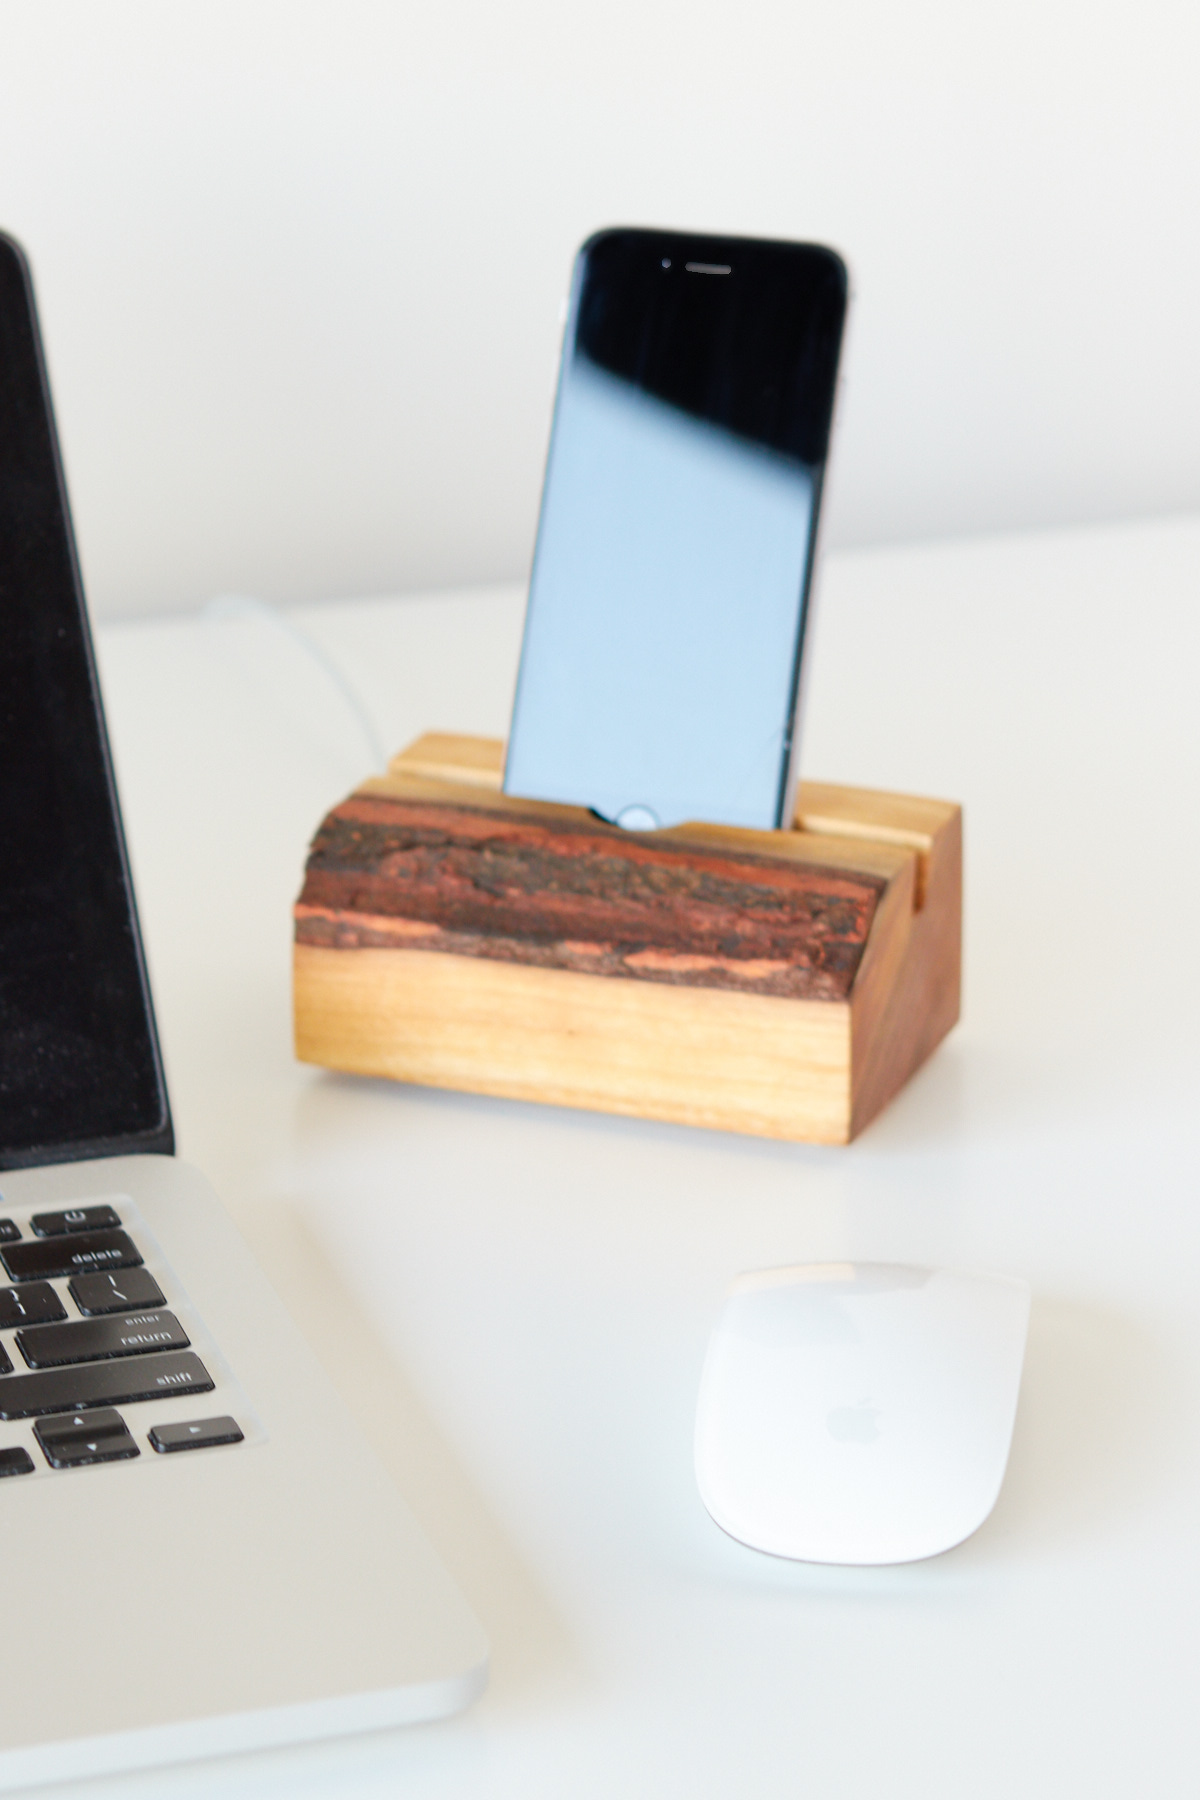
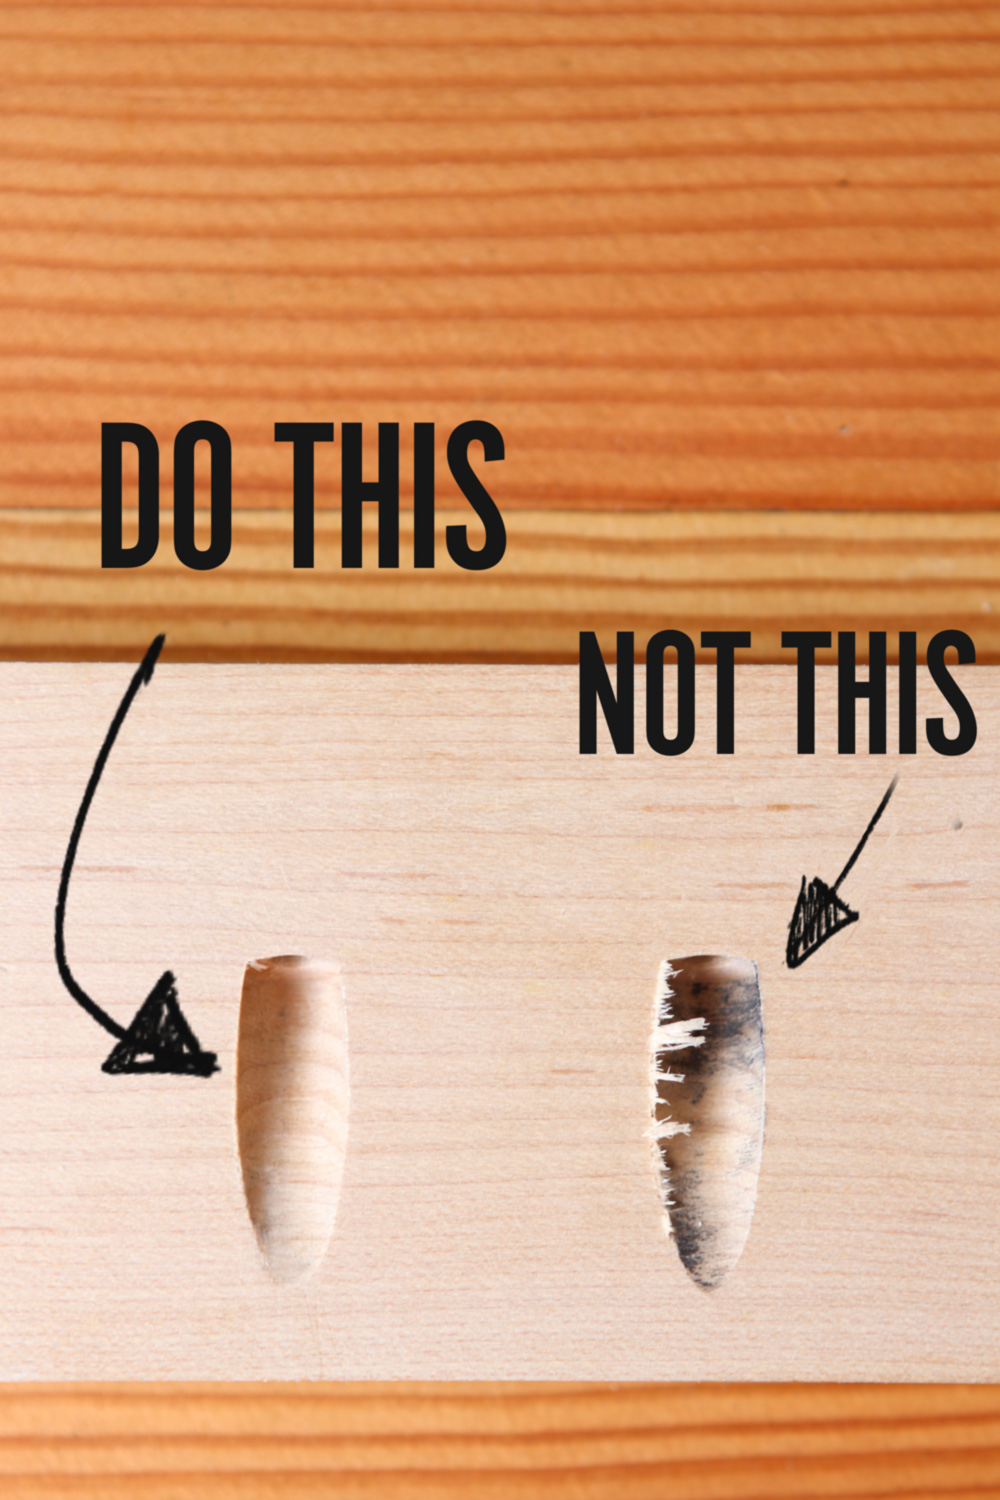
Adjust the position of the work-piece along the fence and make another angled cut, aligned to the back of the thumb hole. Then, make several repeated passes and clear out the remaining waste. Before moving on, ensure this slot is wide enough to hold your device.

Step 5. Chuck a 3/8" bit into your drill, and place it in the angled slot, matching the 15° angle. With a scrap piece underneath, drill a hole through the slot through the bottom of your wood. This will allow you to insert the Lighting or Micro USB end of your charging cable.

Step 6. Depending on the size of your workpiece, you may want to trim it for a more proportionate look. We cut ours to 3" deep. 

Step 7. Sand the entire piece up through 220 grit, and finish with Danish oil, following the manufacturer's directions. After allowing your project to cure, add 4 rubber feet to the bottom. This allows you to raise the charging station up a bit, so the cable can slide underneath without any wobble.

Boom! You're done. Check out how sweet this thing looks:


This post is sponsored by DIYZ, but all opinions are mine alone. Thanks for supporting the brands that make ManMade possible.


Minimalist DIY: What's Happening Halfway into My 30-Day Workshop Purge

$
0
0

I've heard it said that minimalism isn't really about "getting rid of stuff", it's about refining it down to the "right stuff". I'm halfway through a 30-day shop purge and I have a few lessons learned, a few personal reflections, and a lot more space.  My last update focused on the starting point of the 30-day minimalist challenge for my shop. If you haven't read that, pop over real quick and catch up! Essentially, I'm trying to dig out of the most common shop problem we all face, too much useful stuff is cluttering up my space to the point that I just can't work in the chaos any longer. I've collected an astounding array of small screws, bolts, cut-offs, duplicate tools, and cheap things that I'm going to fix someday. 

The thought that has always made me save the little things is the thought that I might need it, and that triumphant feeling when I actually do need that $2 plug that's been in the drawer for 4 years. But that's hard to hold onto when the mess closes in.

So, two weeks ago I started a purge. A few things at a time was all it took to get the ball rolling and I've started to dig out. I started with the low hanging fruit - in my case the piles of trinkets. It easily went into the trash. Next were the dark dusty corners, the loose collection of battered tools, and a bin full of tile cut-offs. For the first week (28 things) it was all easy trash. Clearing was easy, and it was rewarding. But then it changed a bit. At that point I started having to toss up to 8,9, 10 things a day, so the choices got into things of a bit of value (a few dollars at best, but still something). That started shifting a few things to the sell box, but I still found plenty to toss.

Trash box on the left, Give box on the right. I was holding onto a lot of junk.

Now, I'm rounding out the second week with 105 things purged. It's made a difference in the feel for sure. I'm seeing open spaces, clean corners, and a bit of hope that my shop will get to the frustration-free, organized place where I can actually make things again. With all of that in mind, here are some tips I've learned so far:

1. Set a time everyday - Make a set time to take 5-10 minutes to look around and make it happen. I missed a few days and that made the catch-up a bit of a hurdle when having to toss 10 and 11 things at the same time.

2. Embrace the process - I got into a mood and really started to toss more than the day called for. Which made it hard to keep on task, and hard to come back in the next day for another round. It's meant to be a marathon, not a purging sprint. So keep the pace and make it a habit.

3. Remember you can give too - It's natural to feel a bit of connection to the things that we feel have some value. It's great to give to someone that actually will use it so that the loss doesn't sting.  

So, with a few more weeks ahead, and a lot more things to purge I'll keep at it and update again in a few weeks on the uphill side of this challenge.


ManMade Recommended: You Need to Get Your Hands on these Sandflex Rust Erasers

$
0
0

Earlier this week, for the Fourth of July holiday, some friends and I decided to try our hands at roasting a whole pig. We were cooking for 60-80 people, and wanted to do something more special than hamburgers and hot dogs, and figured: well, if we're going to try it, now is as good of a time as any. 

We wanted to go with a Southern United States-style "pig picking," meaning lots of wood smoke, and cooking over low and slow temperatures. In order to get the whole animal ready to eat with such a gentle heat, we needed to start the night before. And that's where this story begins.    

We weren't cooking at my house, so I'd taken whatever tools I thought would be helpful: thermometers, blowtorch, butchery books, ash bucket, and my knives and meat cleaver. All of which we used - in the dark, at 1 am. By the time we got the animal prepped and fire temperature stabilized, it was 6:00 am, and the second shift team came in to relieve us. 

Exhausted, I returned home smelling of smoke and ready to get a few hours of sleep. When I woke up again, I'd realized that I hadn't done my best to clean up after the process. Among other things, I hadn't washed my knives and tools after prepping the pig. I didn't want to wake the host family at three AM by splashing around in their kitchen, and then, without sleep, I'd just forgotten. That's 1) unsanitary and 2) in the case of my cleaver, bad for the tool itself. Like a chisel or plane blade or carving knife, my clever is made of high carbon steel, not stainless, and, once it sat wet with meat juices for six hours, went from shiny and bright to dull and spotted with dark grey - the early signs of...you guessed it: 

RUST. 

The truth is: that's not the end of the world for something like a meat cleaver. But it's a good reminder that high carbon steel, which allows our tools to get sharp, stay sharp, and stand up to years of abuse can develop rust from time to time. And when that happens - you gotta erase it. 

For the task, I love these little Sandflex Rust Erasers. They're basically a bunch of grit (like sandpaper) embedded into a friable rubber block (like an eraser). Unlike a sanding block from the hardware store, as the Sandflex block wears, more grit is exposed, and a fresh surface available. 


They come in a coarse, medium, and fine grit, and could be easier to use. I especially love that they can be carved, rounded, or shaped to get inside corners, grooves, etc, like a carving gouge or other concave/convex surfaces. You can use them on cookware, your steel sink, leather and suede, ceramic, and tons of other spots. 


It's not only a cool idea; the truth is: these products actually work. It takes very little effort to get the results you're after, and uses very little material, making these things last for years. 


I spent about three minutes with the medium block, going over the whole surface to the discoloration, and then came back with the fine block to smooth the scratch marks. It's helpful if you can go in the direction of the grain, but not totally necessary. You won't damage the steel, it's just more likely to show the scratch pattern. 


Once you're done, add a thin coat of oil to protect the steel. I have camellia oil that I use on my woodworking tools, but mineral or butcher block oil works just fine. 


Seriously, these things are legit, and you can get a pack of all three grits for around $16 on Amazon right now. They'll last forever, so for only ~$5 a piece, that makes them a seriously good DIY best buy. Pick some up!


No Vise, No Workbench, No Problem: How to Hold Your Woodworking with a Simple Wooden Batten

$
0
0

I'm a lucky guy. My family has allowed me to dedicate half our basement into a dedicated shop space, complete with a custom woodworking bench and a growing collection of tools. It's bright, clean (at least right now), and I'm slowly turning it into a functional workspace that will allow me to be as productive as possible. 

But it took me a long time to get here. For nearly fifteen years, I worked out of dining rooms and back porches and portions of the garage, lugging my tools around in plastic totes and home center toolboxes, setting up shop on the washing machine, folding tables, and 1/2" plywood scraps screwed to 2x4s.

And, in the early days, it was that lack of a proper workbench that prevented me from thinking I could could use hand tools. Without a vise and hold downs, how could I safely secure my work for handplaning, chiseling, or sawing?The answer: a batten, which will take you 5 minutes to make and turns any flat surface into a work bench. Let's make one!    

Begin by selecting a piece of hardwood (or plywood), about 2-3" wide, and 18 or so inches long. Ideally it will be at least 3/4 of the depth of your worksurface. I'm using a scrap of western maple, 2 3/8" wide. 

First, make sure the edge is cut at 90°, then draw a small tick mark 1/4" from each side. Use a combination square or speed square to draw a 45° line in from each tick mark. They'll meet in the center of the board.


Cut out this bird's mouth shape using whatever you have: a back saw, jig saw, coping saw, band saw. 

Then, gather the rest of your materials. You'll need a second long piece of wood (like a plywood scrap) and some clamps (or, if you can, some screws)

Set up the long piece of wood as a stop against the end your worksurface. If you're right handed, that's the left side; if you're a leftie, then the right side. Clamp or screw it in place.

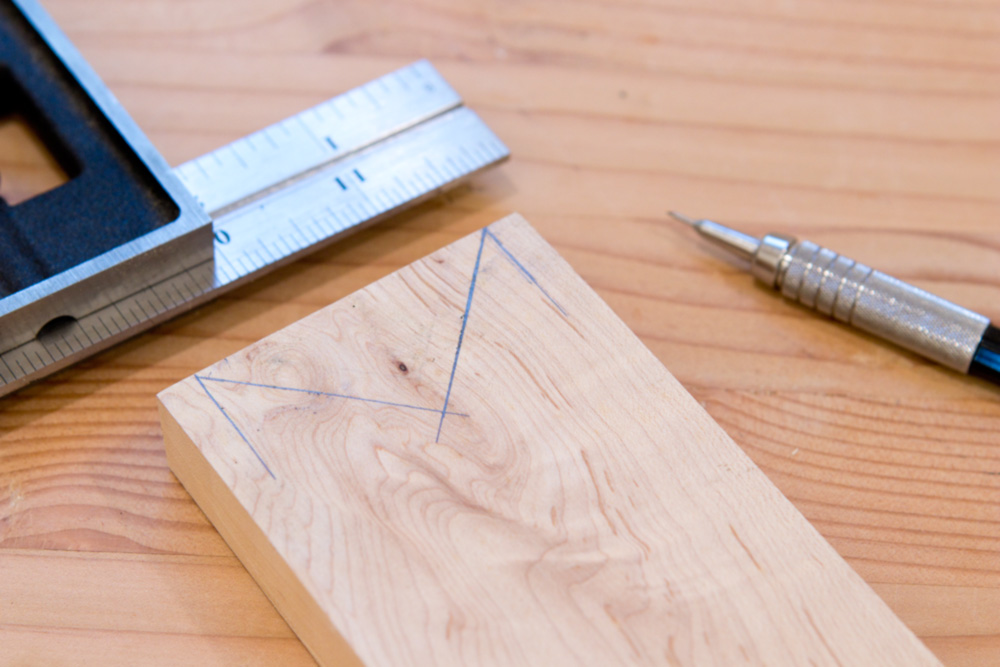
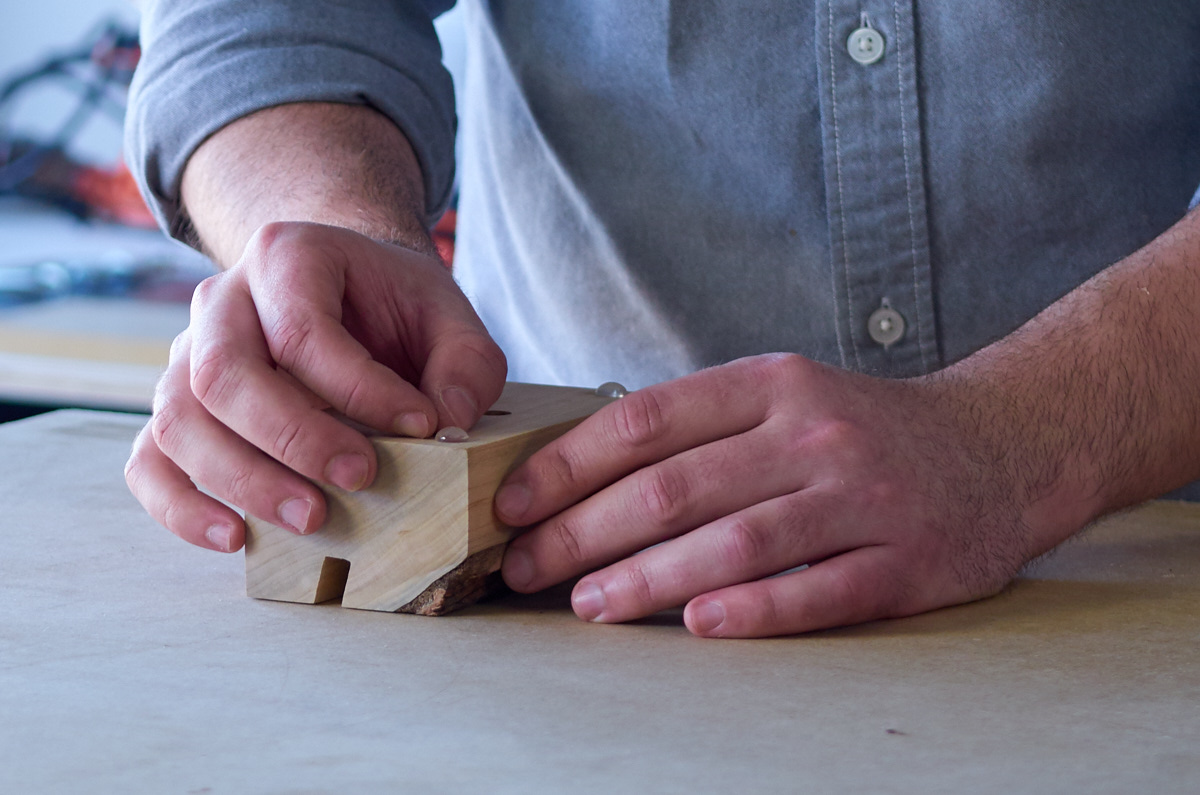
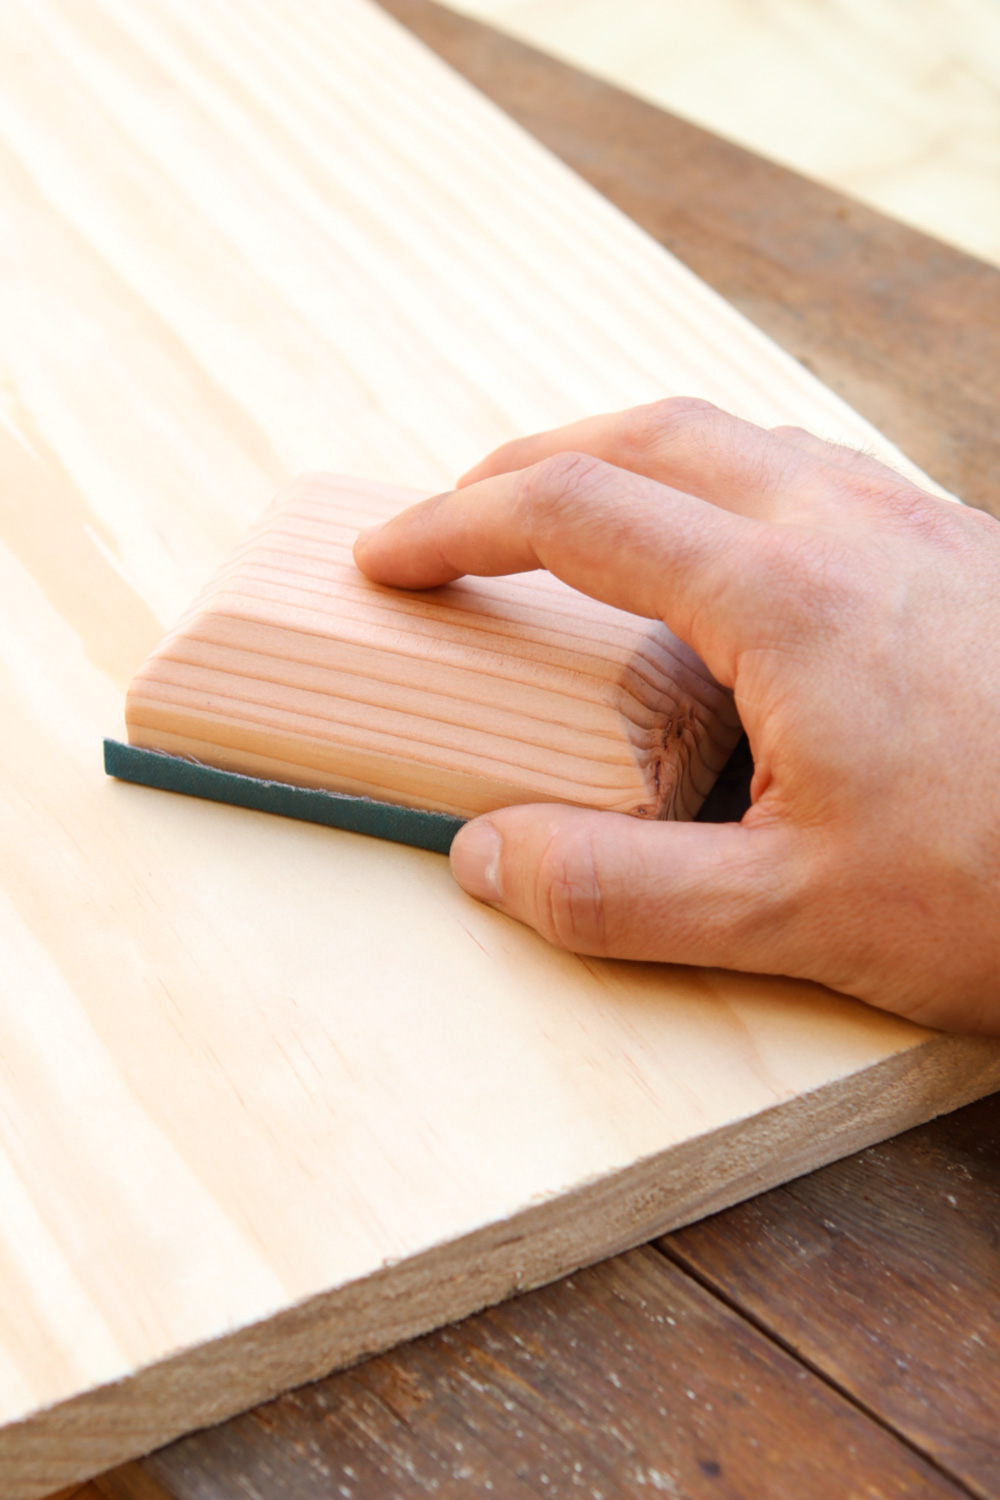
Then, butt your workpiece up to the stop, then press the notch in the batten up to your wood.


If you're handplaning, etc, it's best to set the batten against the opposite back corner, so it can absorb the force from pushing back as well as holding it side to side. 

Wiggle everything around to make sure it's secure, then double check the clamps. And, voila — your wood is now secure.

You may have to reposition this a few times depending on how you're working, but this a great way to turn a lightweight garage work table into a place for woodworking. Or, if you can get away with it - your kitchen island or dining room table. 

Now, get some woodworking done!


How to Make the Ultimate Sanding Block

$
0
0

When it comes to sanding, the rules are simple. When you're dealing with curves and soft edges, you can use the contours of your hand to back up the sandpaper and naturally mimic the shape. But when it comes to flat surface: never sand without a sanding block. This keeps the paper flat, which means your final project will also stay flat. 

I was in the bad habit of cutting a new one every time I went to finish a project, which sometimes meant I went against my best judgment and ignored the sanding block rule when working on flat panels and tabletops. (I know, I know.) So, I decided to spend an hour and whip up a block I'd be excited to use every time.  One that's confortable, produces a great finish, and that makes best use of my sandpaper, minimizing waste.    


Note: it's just as easy to make two or three of these as it is to make one, so we recommended crafting a handful of them in one go to have around whenever you need them. 

Step One: Determine your sandpaper size. 

No one uses a full sheet of sandpaper at once. So, size your block to be as economical as possible. A standard sheet of sandpaper is 9x11", and to make a block that can fit in your hand, it's best to either divide it into four pieces (one horizontal fold, one vertical) or into six (two horizontal folds to create thirds, one vertical).


My block is designed to use the six piece fold, which makes for a more comfortable block to hold. I began by folding the sheet into thirds across the 11" side, like a letter. 


Then I placed a ruler on the folds and tore it into pieces. You can use scissors or a knife here, but you'll just bang up the blades. Once it was into threes, I folded each in half and ripped again. Six more-or-less even pieces.


Step Two: Cut the block to size.

The block itself is construction from "two-by" construction lumber. Here in the Northwest, that means the mighty Douglas fir, but it could be pine or even whitewood where you live. I used a scrap of 2x10 that I had, which had nice straight grain on the edges, which I could cut one the ends to essentially get quarter-sawn stock. By the time it was planed down smooth, it ended up being just north of 1 1/4" thick. 


Next, I cut the strip so the sandpaper scraps would wrap around with a 1/4" on each side, making the paper easy to hold while using. My final width was 2 7/8".


I then cut the strip into several 4" blocks. 


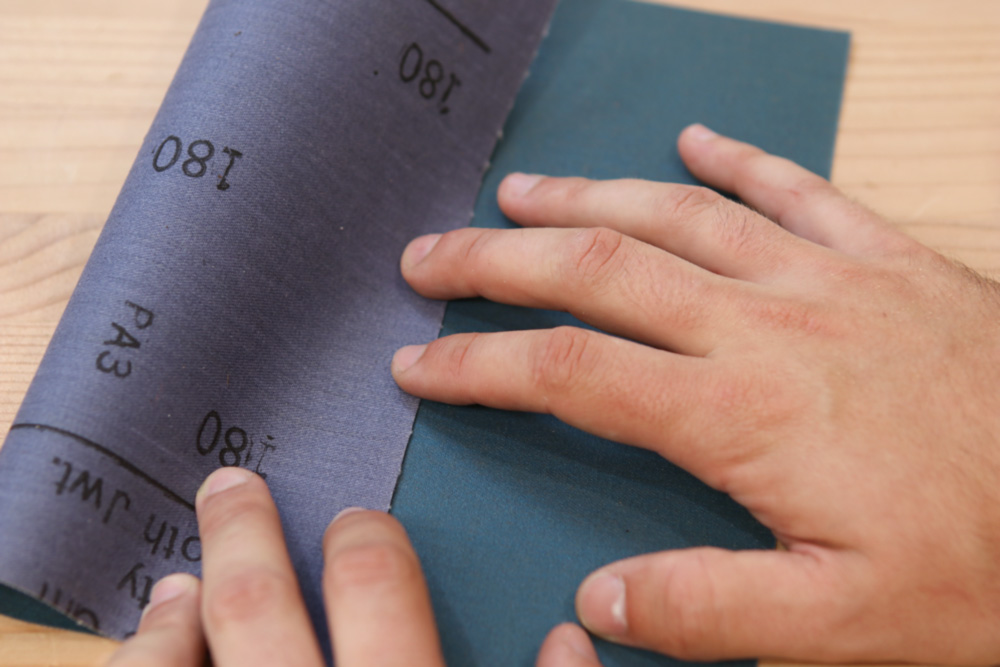
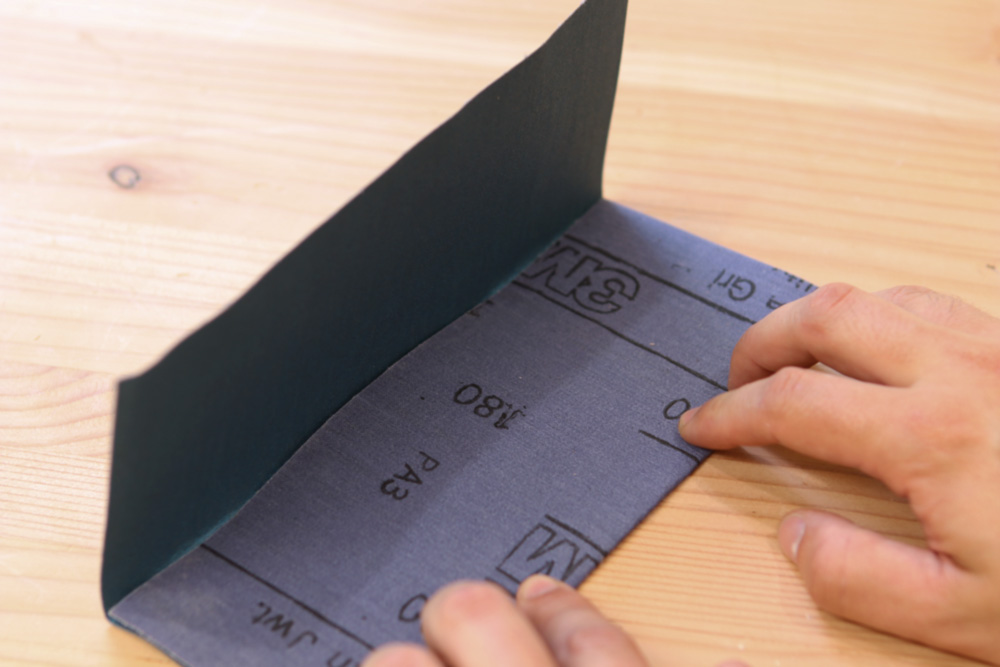
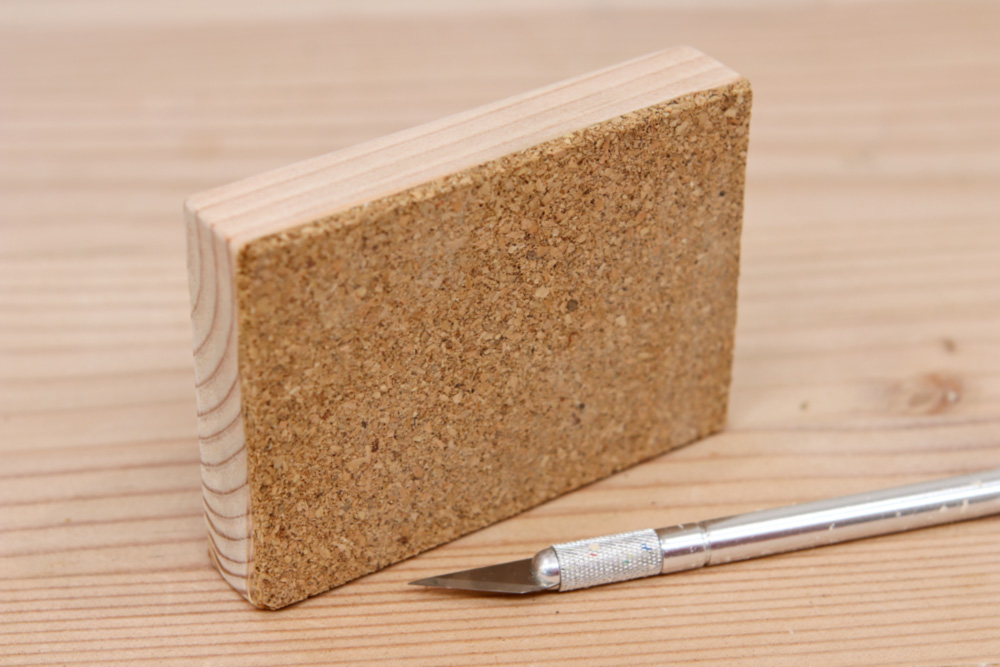
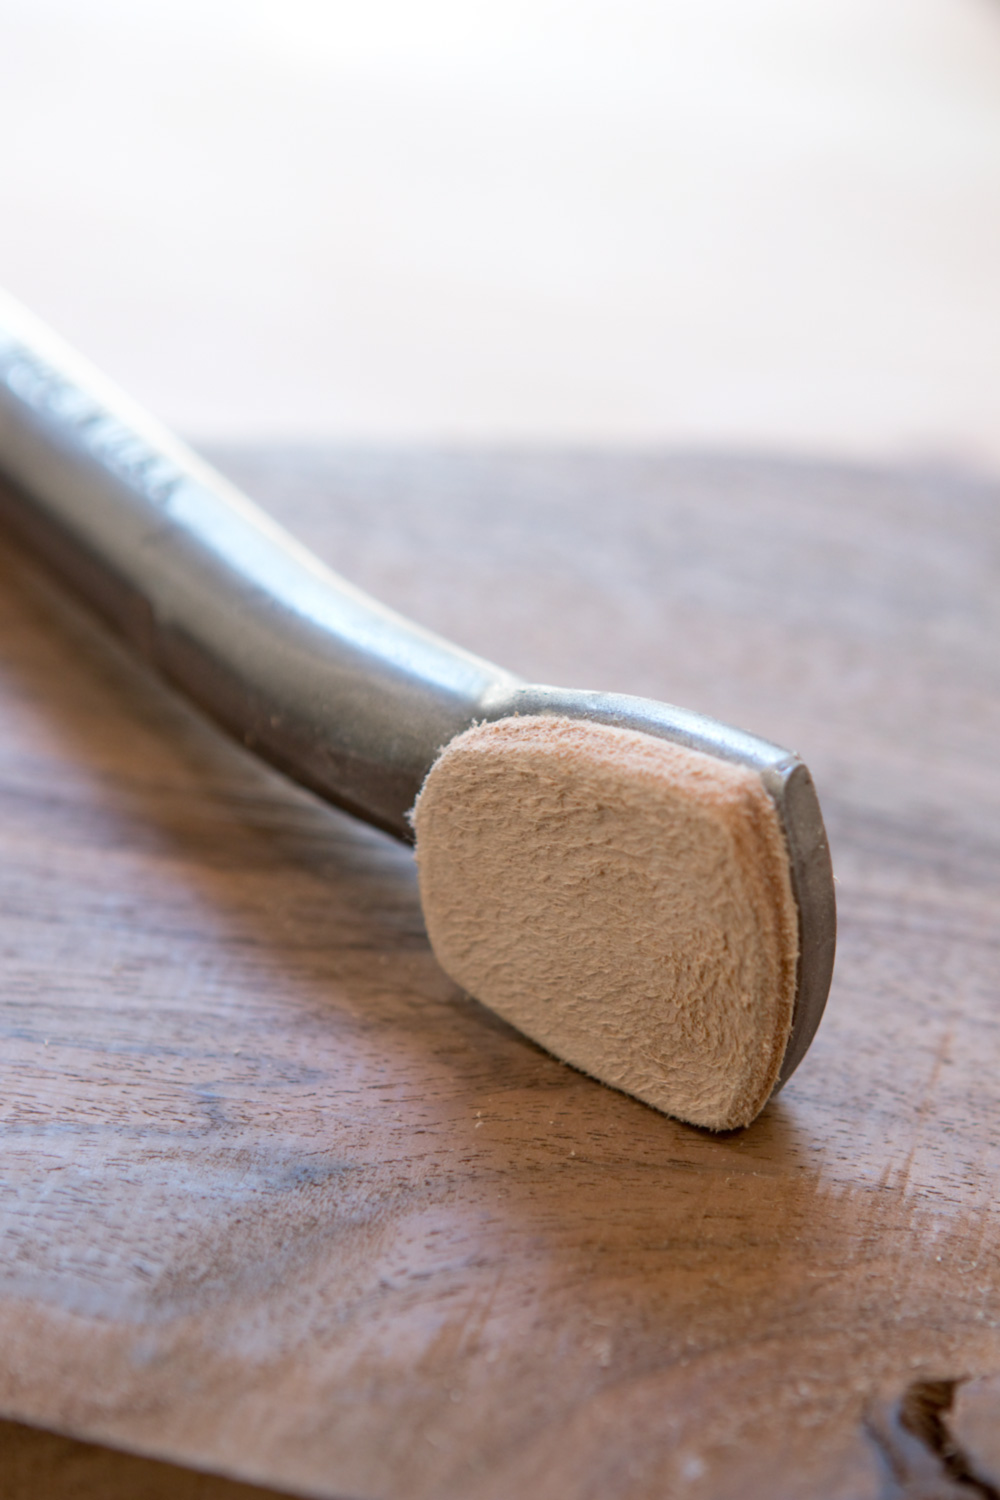
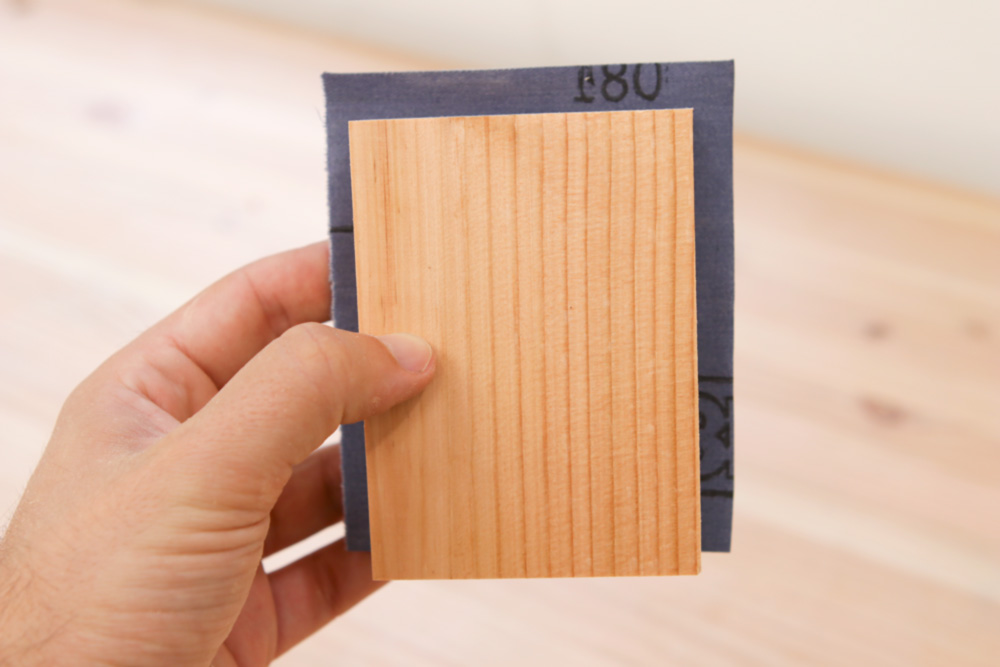
Final block size = 1 5/16" thick x 2 7/8" wide 4" long. There's a nice even 1/4" border of excess paper around the edges.


Step 3: Shape the block. 

To make it more comfortable to use, I secured the block to my workbench, then put a wide 45° chamfer around the top edges. I did this with a router, but you could use a hand plane, or even a saw if you're careful. 


Once the initial facets were cut, I smoothed over all the sharp corners and edges with sandpaper. 


Step Four: Add the cork. 

The final step is to attach cork to the bottom of the block. This allows the block to accommodate invisible ridges, valleys, and peaks in the wood. You can't see them now, but they'll greatly improve the quality of your final finish. 

I have a roll of 3/32" thick cork I use for a variety of projects, so I just used that. But you can buy 1/8"-ish thick cork from the craft store or Amazon. You can also use cork Con-Tact paper shelf liner, which comes with an adhesive backing. 


Whatever you use, cut it oversize at first. Spread a thin layer of yellow wood glue on both surfaces, allow it to become slightly tacky, then sandwich the glue sides together. Clamp or set something heavy on the block to ensure full contact. 


Once the glue has dried, use the sides of the block as a guide to trim the cork to size.

If you can, cut the cork at a slight bevel to ease the sharp edges a bit, then use some sandpaper to round everything over just a bit. 


To use, wrap a piece of your sandpaper around the bottom, and hold it by the edges. Then, just sand away!


This thing is super comfortable to use, makes the best use of a sheet of sandpaper, and helps create a smooth finish. It makes sanding actually fun! Well...almost. 


This Isn't the Only Way to Install a Screw Hook, but It Is the Best

$
0
0

Okay, friends. This is one of my all-time favorite DIY hacks. I learned it more than fifteen years ago from a book I got from the library, and committed it to memory. I only need it about once or twice a year, but it works every. single. time. I'm always super grateful to have it on hand, and so today, I'm sharing so you too can stop busting your hand and banging your knuckles every time you need to install a hook somewhere.    

The trick with inserting large hardware like this is, you need quite a bit of rotational force, or torque. Your arms and pliers might work with smaller hardware in extremely soft wood, but otherwise, most of us can't just spin one of these in.

Most hardware has a drive-able head, like a bolt or a screw, and we've developed tools to apply torque to them: a wrench, a socket, a screwdriver, a drill, etc And while there may be a tool out there called a hook driver, I don't have one. And, to be honest, with this hack, I don't need one. So here's how to install a hook screw or screw eye, or even an eye bolt: use them against each other. 


First, determine your desired location, and if you can, drill an appropriately sized pilot hole. This isn't always necessary, but it makes your work way, way easier. In this case, I'm in my garage working in 90-year-old vertical grain fir, which after the years, is so dry and so hard, it's nearly impossible to get into. 


Then, chuck the opposite hardware into your drill. If you're installing a hook eye, use a screw hook; if you're inserting a hook, use an eye. 


Insert the hardware into the pilot hole and spin it a few times until the threads start to catch.


Then, just interconnect the hardware, and pull the trigger slowly until they get in sync. 


Then, just keep going at the mininum amount of speed it takes to sink it home. (Going slow will reduce the likelihood that you'll bend the metal.)


And, done. Onto the next one. 


Do you have any favorite DIY hacks like this one? Please share in the comments below. 


Stop Marring Your Wood: How to Make Leather Holdfast Pads for Woodworking

$
0
0

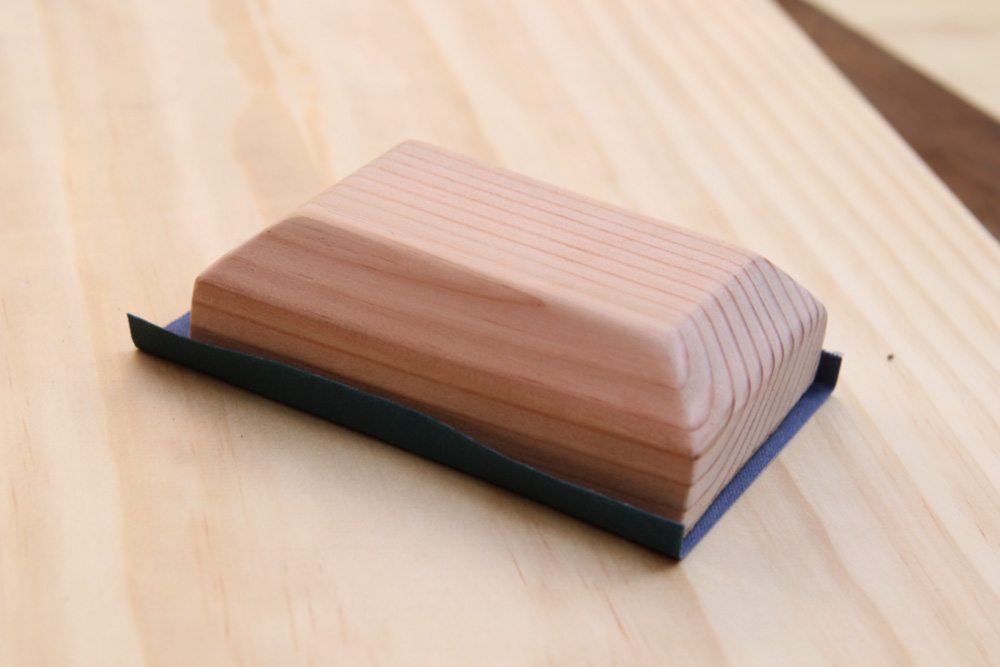
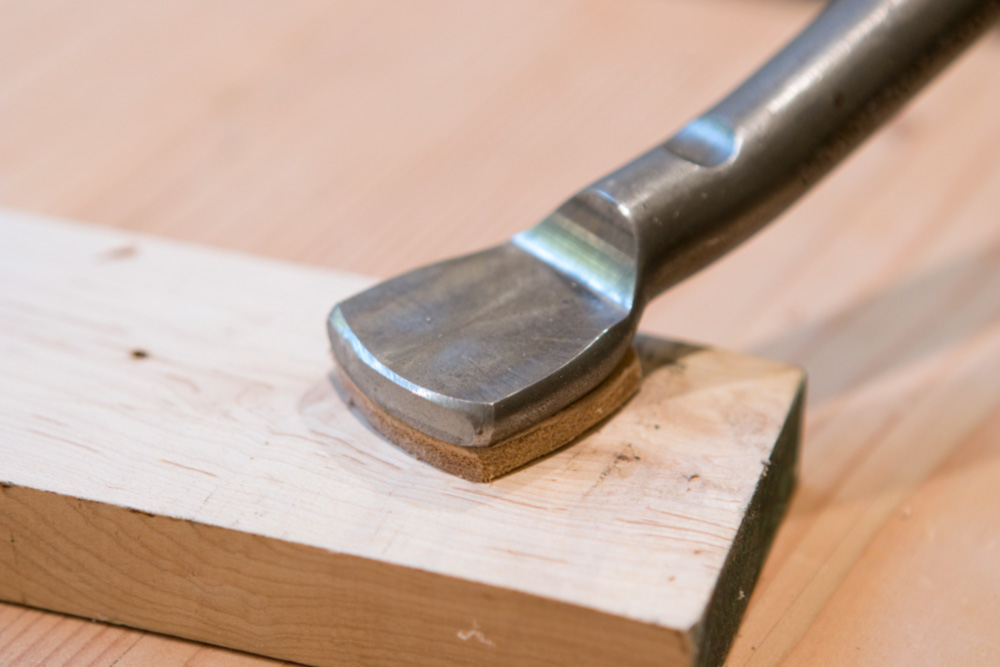
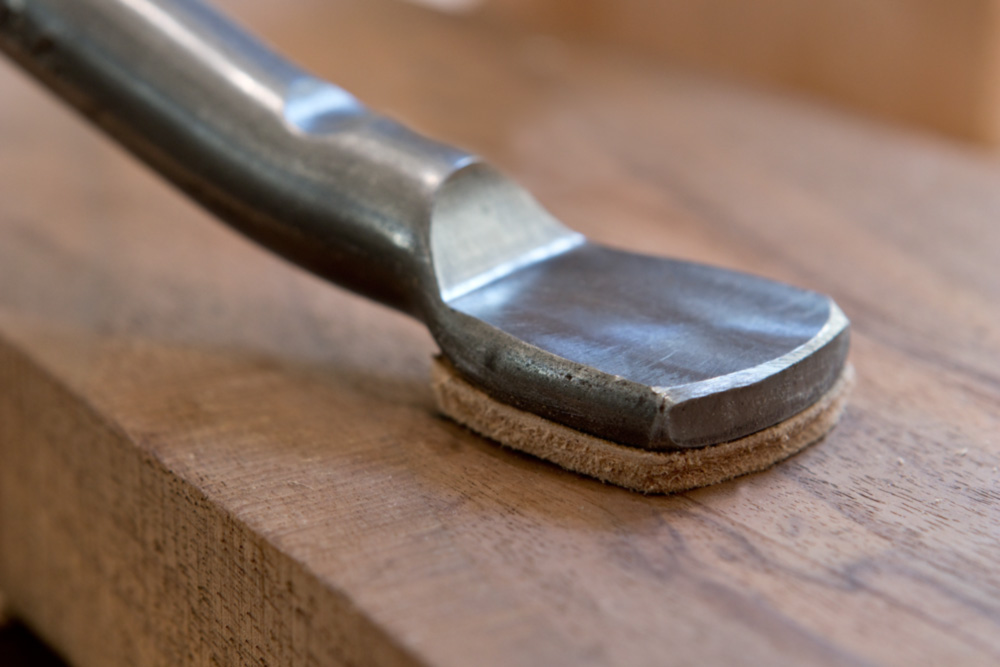
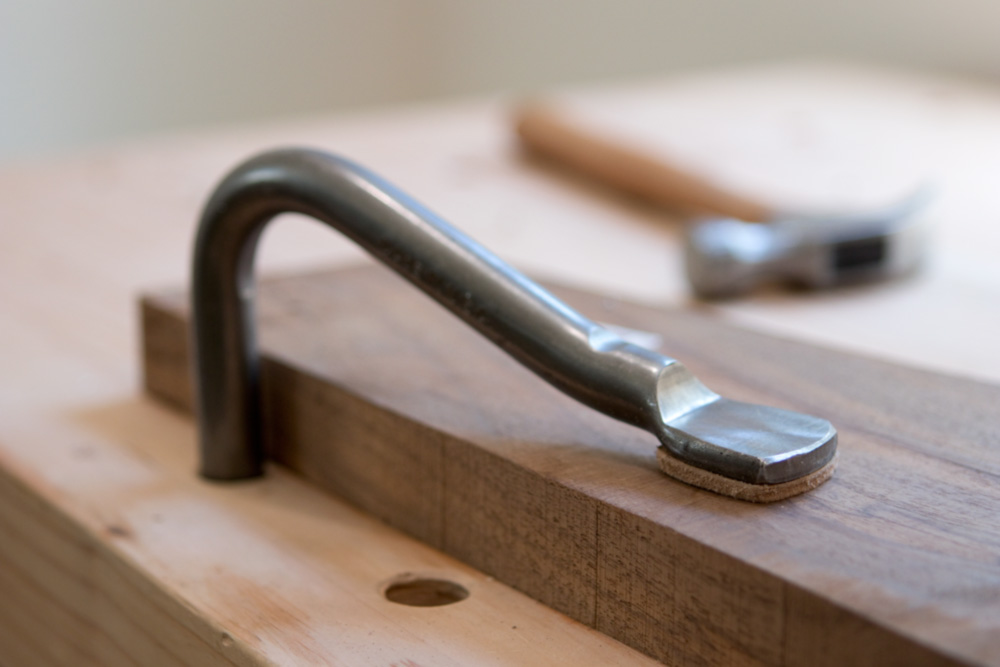
I'm a huge fan of having a few rows of dog holes in my workbench top. And, more than anything else, I use them to secure a holdfast - an ancient and genius piece of design that secures your work to the work surface with a simple tap from a hammer or mallet. When your ready to release it, just hit the back and it's free. Seriously - it's ten times fast than clamping, and you can fasten your work anywhere across the bench top. Brilliant.

To speed up the process even more, I wanted to come up with a permanent way to protect the wood from the force of the steel being banged into it. You can use a hardwood scrap between the holdfast and the workpiece, but I figured there's reason to spend twenty minutes once and protect my work forever. No digging around for scraps required. 


Tools and Materials: 

  • Small piece of 8, 10, or 12 oz leather (at least 1/8" thick. Raid the scrap bin)
  • Craft knife
  • 60- and 150-grit sandpaper
  • wood glue
  • Scrap wood
  • Optional: self-healing cutting mat or plastic cutting board


Step One: The design of the holdfast makes this super easy to pull off. You simply place a piece of leather on top of a cutting mat or piece of scrap wood, then use the holdfast to secure it down. It not only works as a clamp, but provides it's own template for cutting out the shape.

I'm using 10 oz veg tanned leather here. I got a 4x9"-ish random shape in the scrap bin of my local Tandy leather store for about $3. There's enough there to make a dozen of these. Whatever you find, just make sure its thick enough to stand up to abuse and absorb a mallet whack. 

Step Two: Use the craft knife to slowly trace the head of the hold fast. You'll need to make multiple passes to cut through the thickness.


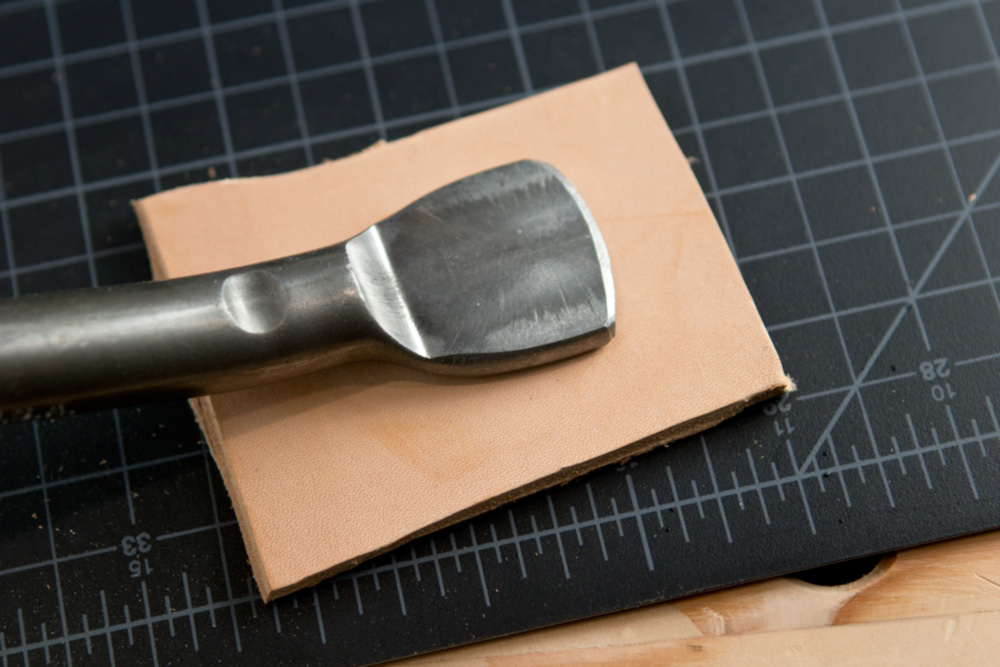
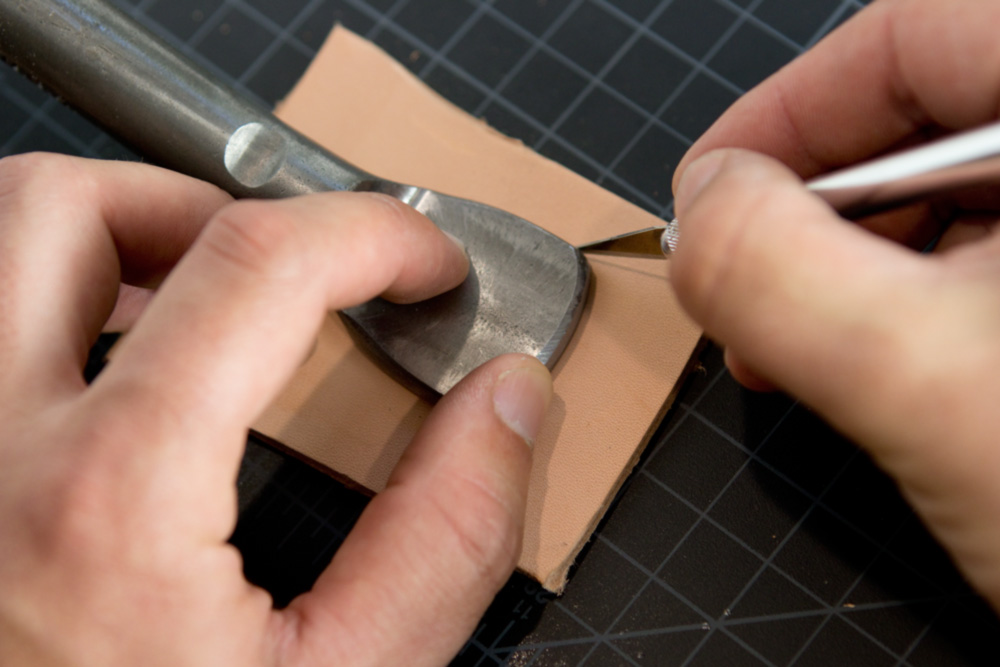
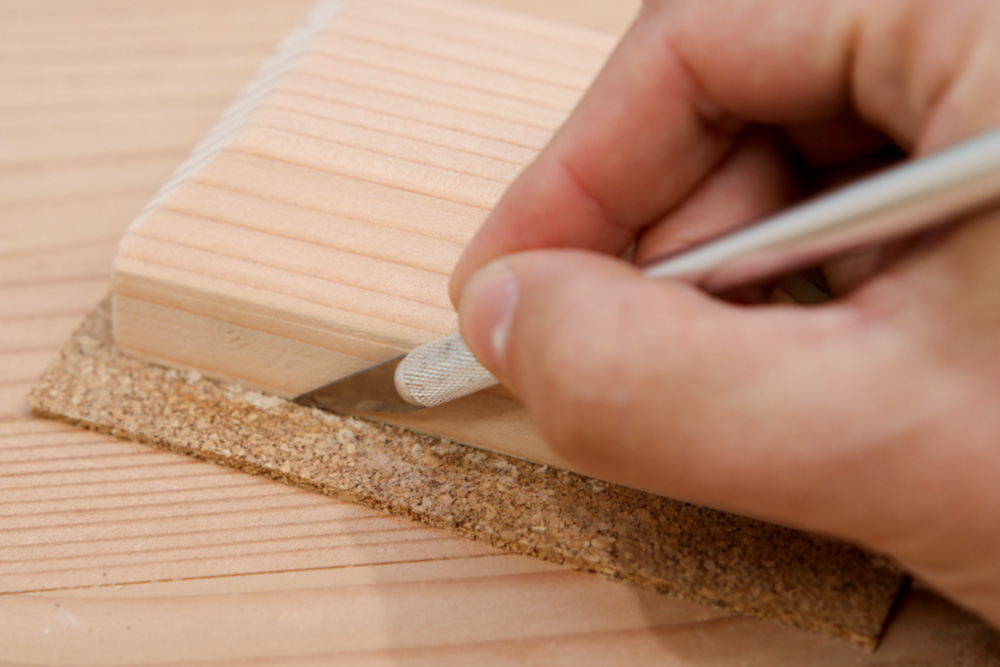
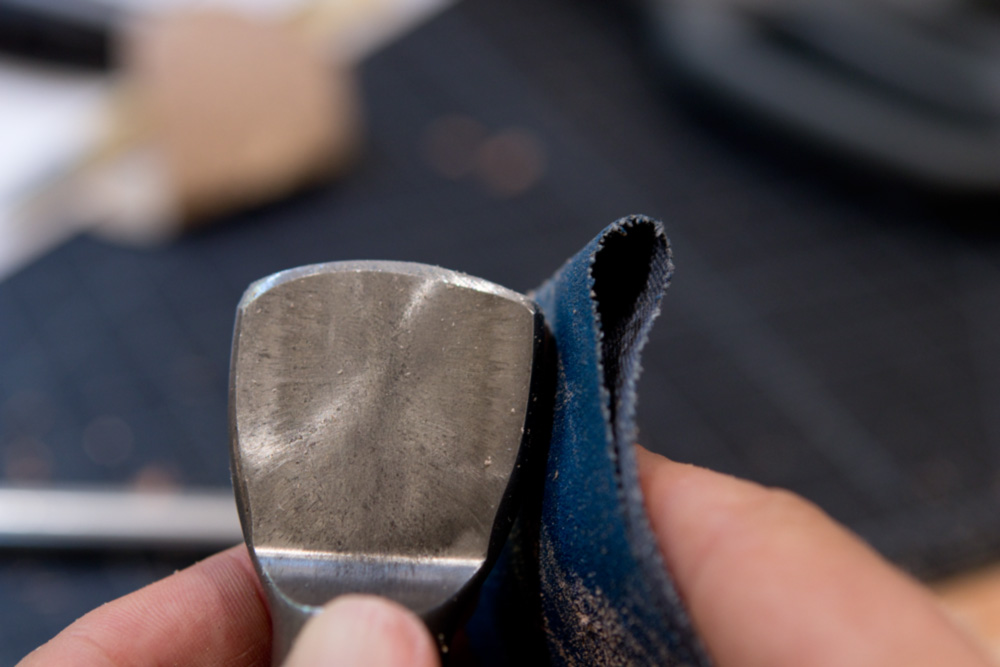
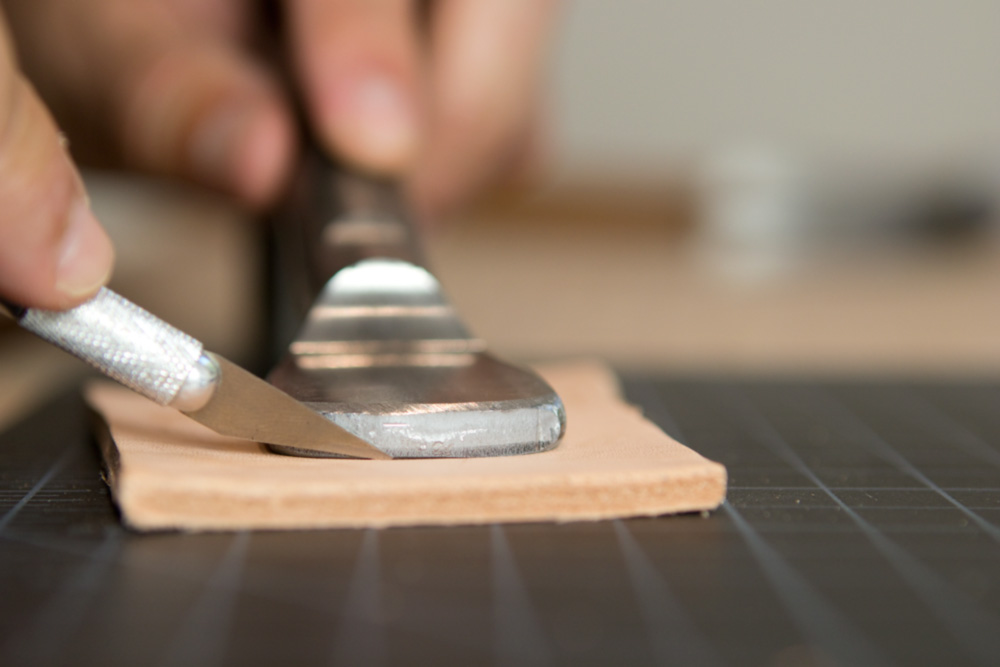
It's always easy to cut on the pull stroke with a craft knife, so make sure you approach the holdfast head so that you're always starting at the top of a side. Be sure to keep your knife at 90° — it will have a tendency to undercut and push in as you cut downwards. 


Step Three: The edges of fresh cut leather can be quite sharp, so use a bit of 150-grit sandpaper to smooth them over. This will also help round over your cut shape.


Step Four: Now, prep the surfaces for the glue. Grab some extra coarse sandpaper, like 40 or 60 grit, and scratch up the bottom face of the holdfast.


Do the same on the smooth side of the leather. You want to glue this so that the rough/shaggy side of the leather, the inside/suede of the hide, touches the wood for a better grip. So, smooth side gets glued to the steel. 


Step Five: Apply a thin layer of wood glue to both the roughed up leather and the holdfast. You could get fancy with two-part epoxies or other adhesives here, but wood glue works just fine. Plus, it's easy enough to remove and glue back in case you ever need to. 


Again, use the design of the holdfast to your advantage: place it in a dog hole and put the rough side of the leather down on some scrap. Align the pad and the holdfast, and once you like the placement, give it a whack to secure it while it dries. 


After the glue has set up, use the 150-grit paper to smooth up the edges and round over any irregularities. You can also bevel the bottom edges of the leather just a bit to guarantee they won't cut into softer wood. 


Then, just use them to hold whatever you need to the benchtop. No cauls or scraps required!


If you don't have a pair already, I really recommend the Gramercy holdfasts from ToolsForWorkingWood.com. They're priced right, look great, and work perfectly. 

And if you're ready to start drilling dog holes in your workbench, here's our guide for getting the process just right. 


How to: Start a Campfire with One Match

$
0
0

created at: 05/07/2014

Starting a fire is an essential life skill, for sure, and most of us have our preferred technique: the lean-to, the tepee, the log cabin. But, even though most fires aren't started in emergency, or even in one-match situations, that's part of the fun. Once you've learned how to do it without turning a gas knob or lighting one of those Duralast logs, lighting a fire with one match (or spark from a starter) becomes part of the game, even if you have a whole box at your side.    

This video from Backpacker magazine has the most thorough explanation I can find, so I'll let them do the talking. 

As expected, success lies in the prep work. Here's to a whole new season of campfires, friends. 

Top photo: Steven Leonti cc 2.0


How to Drill Better, Cleaner Pocket Holes

$
0
0

Pocket hole joinery has a lot going for it. An affordable jig makes the process fool-proof, it comes together in less than a few minutes, and the joint itself is super strong.

The Kreg jig itself does most of the work, but a little knowhow makes the pocket hole clean and precise. This is especially important if the pocket hole will be visible, plugged, or filled.

Ready to make nice, sharp pocket holes? Let's go!     

Use your drill's high speed setting. 

Many cordless drills have two, or even three, speeds, which you can switch at top. These are designed to help you get the right balance between torque, rotational force, and its rotational speed. For cutting pocket holes, set your drill to its highest speed setting.


Use two hands.

One hand will press the trigger and keep the drill straight from side to side. The other should sit on top, slowly pressing the drill down into the wood, and preventing the rotation of the bit from bouncing it up and down as it meets the wood. This, of course, isn't really a problem when drilling a 90° hole in a 2x4, but it can mangle the surface when cutting an angle into face grain.


Let the drill come to full speed.

Always make sure the bit is spinning as fast as possible before it starts to cut the wood. Once you've done all your setup, place the bit in the guide hole, bottom it out, then pull back 1/2" or more. Depress the trigger, and wait a few seconds for the drill to come up to speed, then lower it into the wood. This is especially important when you drill multiple holes in a row — wait for the drill bit to be at full speed before inserting it again. 

You'll also want to make sure your battery is as fresh as possible, especially if its Ni-Cad, which will slow down as it loses its charge. (A Li-Ion battery which will basically just stop when its spent.)


You'll probably still need to sand a little.  

There's nothing wrong with sanding the surface to clean it up. Just move towards the hole, with the direction of the tearout. This will smooth and finish cutting the fibers in the right direction, instead of lifting them out and causing more tearing of the surface. You can even push them down in to the hole with the sandpaper, using the edge as a cutting edge to abrade the fibers where you want it.


When driving the screw, use a cordless drill or driver with a clutch. 

You know that little numbered ring on your drill? That's your clutch, and it can be set to provide just the right amount of torque, which means you won't overdrive your screw. A dedicated driver with a chuck that will slip works even better. 


Note: this image doesn't totally make sense. You'd obviously want to use two pocket holes when attaching parts like this, else they parts will spin. I didn't realize mistake until I'd already cleaned up this photoshoot and imported my images. #ooops

Hit the Trails: 6 Next-Level Gear Items to Take with You On Your Next Car Camping Trip

$
0
0

There's something about a winding road. It's still a bit wild and rebellious, like nature hasn't completely given in to the straight line of civilization just yet. That's the kind of highway that I think of when I want to take a road trip, and no road trip is complete without a day or two of car camping. For me, car camping is a great mix between roughing it and going posh in a rented bed. I just seem to find a lot more enjoyment when I can bring just a few more pieces of gear along, but still sleep outside. Here are a few of my favorite pieces I take with me on every car camping adventure these days.    I used to live a few hours from the coast in the mountains of Northern California. So my go-to road trip was a quick jaunt down a scenic byway all the way to the end of the world, where the ocean pounded against the shore, and the rocky cliffs held firm under the fanning branches of ancient Redwoods. Car camping became my way to adventure on the cheap, but also let me really experience the ease of living simply with a handful of things. Here they are:

1. Thermacell Portable Mosquito Repeller $20 - This handy little tool uses a small infused pad and an even smaller butane flame to keep those bloodsuckers at bay for hours at a time. It's almost like magic how fast the air becomes clear when this thing is turned on. I actually went out and grabbed a patio version for home use because it worked so well, but there are actually quite a few options with lights or adapters to make sure wherever you wander it can come along.


2. Kilamanjaro Kibo Camp Knife $40 - Every time I'm out in the woods, I find a need for a good knife. This large, durable blade holds an edge, doesn't rust, and just feels nice in the hand. I've hacked firewood, cut ropes, and hammered stakes in with this knife, and I still don't see a scratch on it.


3. Brunton Revolt Battery Pack $65 - When you need to stay juiced up for a few days at a time, this is the way to go. Charge it once and keep your phone topped off all weekend. I'm a fan of this battery pack because it's durable enough to keep up, with a rubberized outer layer and a waterproof shell that holds strong no matter what happens out there.


4. Napier Backroadz SUV Car Tent $250 -This was a bit of a game changer for me. First, this tent is huge. Slated to sleep at least 4, it's the headroom I love the most. I can stand up, and still have a few feet above me. That means no stooping to get dressed, and no smacking your head on a hanging lantern. Next is the nifty part - it hooks up to your car. There is a durable, stretchy tube that makes the back of your car part of the tent for a massive amount of extra space for storage, organization, or even sleeping if you want to fold down all the seats.


5. Kammok Roo 2 Person Hammock $100 -The hammock is an underrated and often forgotten part of relaxing in general, and I make sure to always bring one along to help me unwind after a great day. I first started sleeping in a hammock when backpacking in the Trinty Alps. It was so much less weight and I didn't have to find a flat spot. I love the quick set-up python straps and lightweight feel of the Roo that keeps it cool in the heat, and still coax a nap out of me almost every time I climb in.


6. Jetboil Flash Java Kit $110 - Yep, I need that coffee boost like I need my first breath of air in the morning, so taking grounds and a press along is just an essential part of the day. The jetboil gives me boiling water in just a few minutes, and a built-in press means I'm enjoying my fresh cup of joe before the sun peeks above the ridgeline. This is also my go-to backpacking stove because it's so small, economical, and did I mention it boils water incredibly fast?

You owe it to yourself to make a car camping trip a part of this summer. Toss a few things in the car and go gather up some memories of an adventure that you'll be dying to repeat every year for the rest of your life. 

Do you have any favorite pieces of gear that come along on every car camping adventure? We'd love to hear what you consider an essential part of your car camping setup. Leave a comment be

How to (Safely) Age and Antique Hardware for Your Woodworking Projects

$
0
0


Let's face it: modern hardware leaves a lot to be desired. Sure, it's inexpensive and abundant, but visually, it looks...well, cheap. No character. You spend weeks on a project, choosing wood grain carefully, sanding and planing to a glass smooth finish, and then you're forced to add some blindingly shiny yellow brass or bright blue metal to finish your project. 

Of course, there are high-end hardware makers out there producing specialty hinges and components for period furniture, but I wanted a less expensive way to transform general home center hardware into something I actually want to use on my projects.

So, I called my dad.    

See, my dad taught high school chemistry for thirty-six years, and he knows his stuff. Sure, that means when we were kids he would literally say things like "pass the sodium chloride" and "is it clear or colorless," but it also means he can help you find cool, science-based ways to hack everyday life.

So, I asked for his help in stripping the (visually) harsh zinc coating on modern bolts, screws, hinges, etc. "Sure," he said. "you can use hydrochloric acid or sodium hydroxide, which is lye." I, of course, know both of those are pretty intense substances, and while they might work, would take a little work to procure at my local neighborhood hardware store, and are quite harsh to use and require proper disposal. 

"Anything else? Something a little easier to work with," I asked. "Of course. Just use tricarboxylic acid." I looked it up. Boom - citric acid.

Of course, you know citric acid. You ate it as a kid - it's present in all kinds of candy and drink mixes. That Lik-a-Maid stuff in the envelopes with the white chalky sticks is basically just citric acid with sugar added and some flavorings. (Seriously, taste it; it'll make you feel eight years old again.) And it's completely safe to touch with your bare hands, and you can just pour it down the kitchen sink when you're done. 

So, I ordered some on Amazon, and got to work. 

Okay, so here's what you need: citric acid, water, a plastic tub or bucket, and some sort of machine oil. That's it, and it only takes five minutes of active work.


Begin by placing your hardware in the tub. Add some citric acid. How much? I don't know what the perfect ratio is, but I did six tablespoons, and it was perfect. I suggest you start there, and then add more if you need it. 

Then, pour in enough water to cover the hardware, plus a little extra. About an inch worked great for me. Stir to dissolve all the solids into the water. 


After two or three minutes, you'll start to see bubbles forming around the hardware. This means it's working! If you don't see any reaction after ten minute, add a bit more citric acid to the solution.


Then, just wait. Screws, bolts, and nuts will be done in just a few minutes. Hinges and plates, etc, will take a bit longer to cover the surface area. Here, I pulled out a hinge after about twelve minutes. The acid worked on the first side, and you can see it starting to react around the holes and gaps on the second. Give any flat pieces a flip to make sure both sides get affected equally. 


Once the pieces have a uniform surface and a color you like, take them out of the solution and rinse them off with clean water. You can dump the citric acid water down the sink; just follow it up with some clean water to flush it down. 


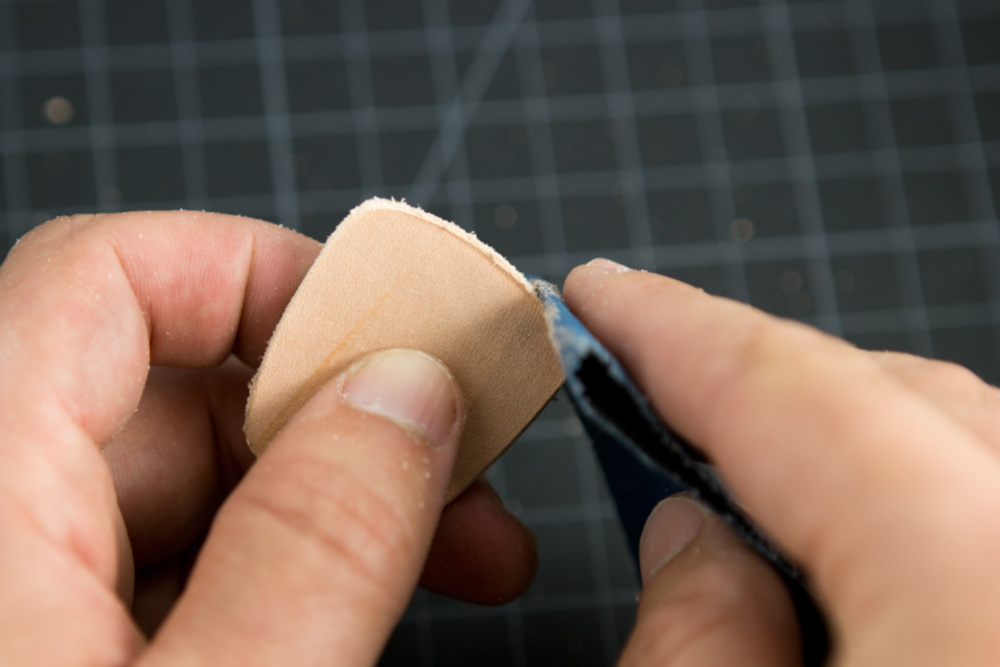
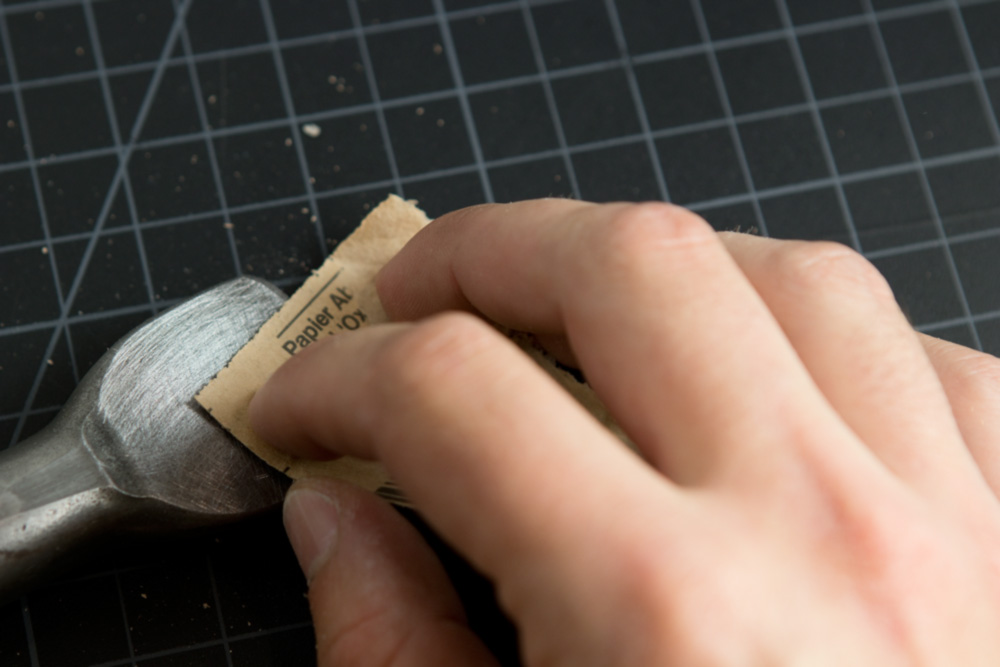
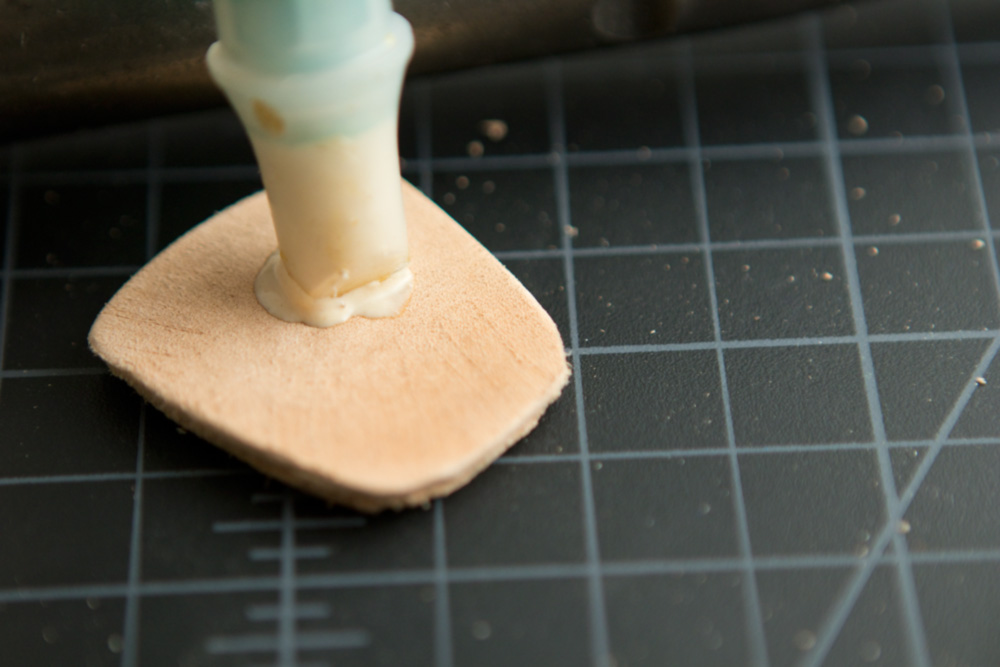
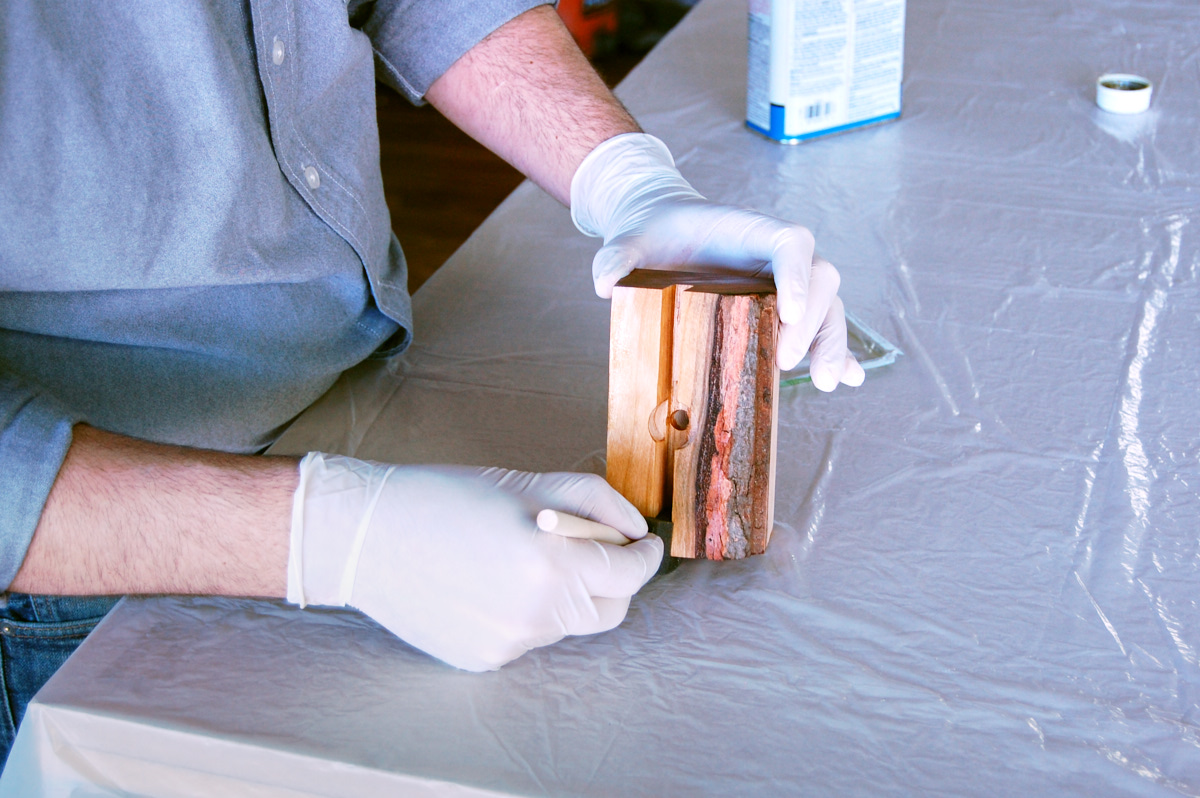
Of course, that zinc was there for a reason - to prevent the steel from rusting. So, you'll need to cover the hardware in with protective oil. You can really use anything, but the spray straw on a can of WD-40 makes it super easy to apply.


Pretty cool, right. Not only does the color darken, but the way the piece reflects light totally changes as well. No more harsh, brittle tones, just a perfectly "aged" vibe. I love the look, and plan to employ this technique as often as possible. 


Shop Skills: How to Clean Your Saw Blades

$
0
0

Dirty Sawblades
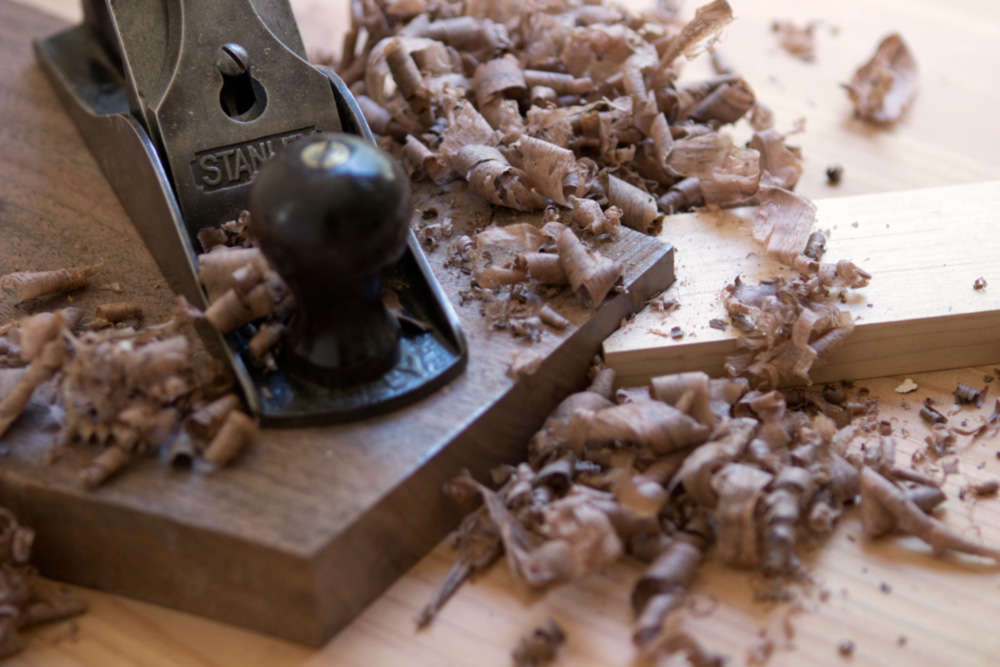
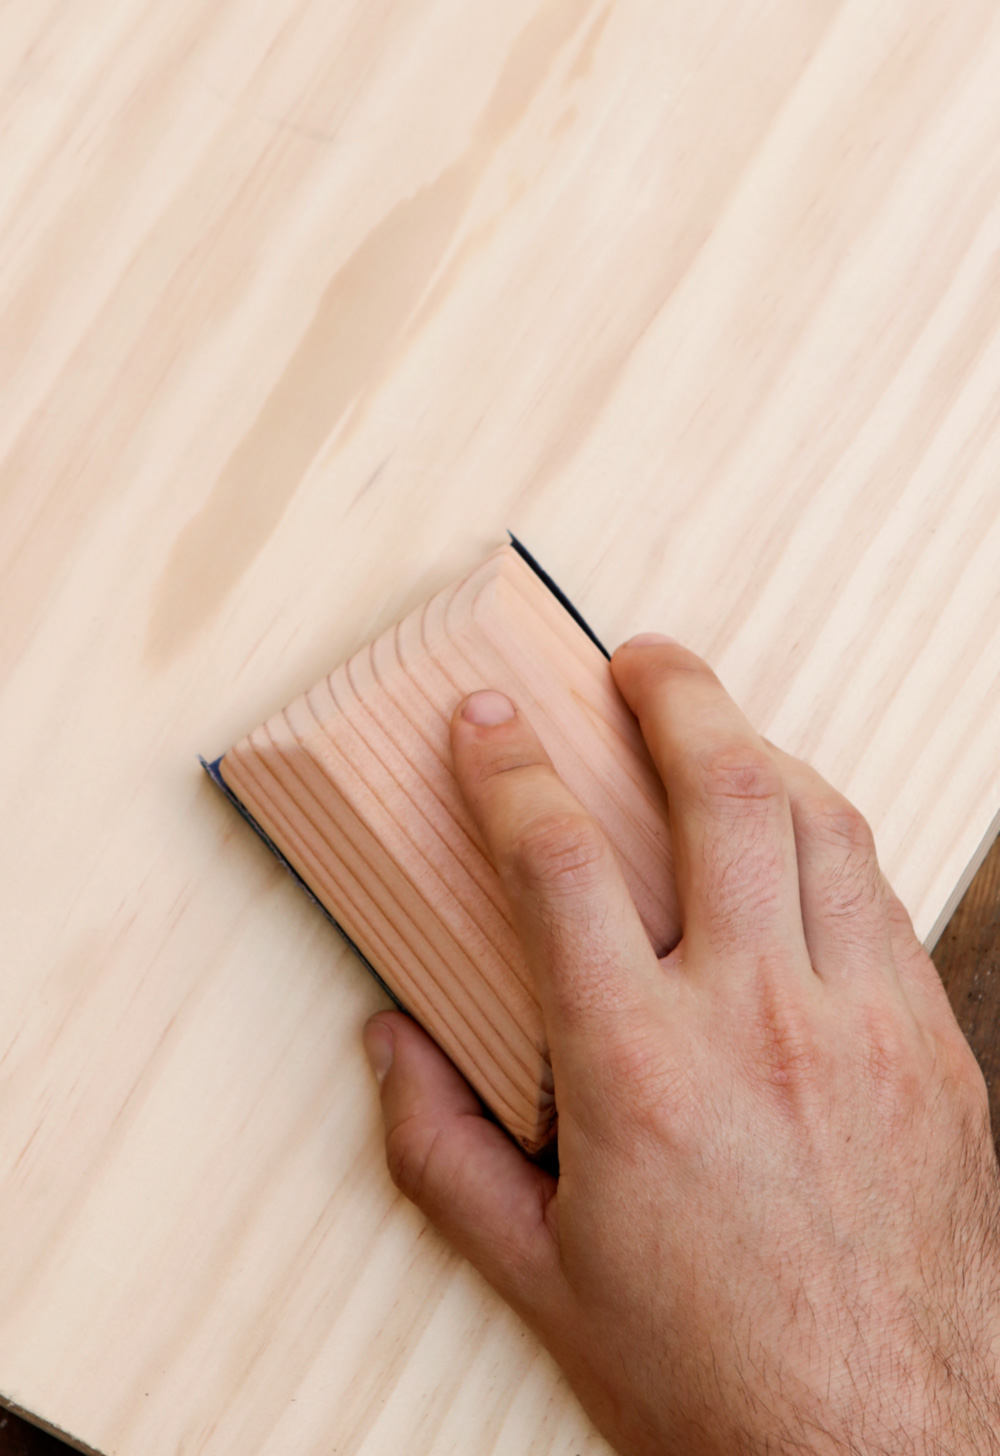
Maintaining your shop tools starts with keeping those blades sharp and well lubricated. Here's a quick overview on how to tune up your cutting edges.   A few times a year, I take a break from working in my shop and spend a few hours working on it. After oiling up the various moving parts and sucking a huge amount of sawdust from the corners I turn my attention to the most important surfaces in my shop - my cutting edges. Saw blades are under-appreciated and generally neglected until they're smoking through that huge piece of hardwood or chipping out an expensive plywood panel. After reading a few forum posts recently, I picked up a clean non-toxic blade and bit cleaner and lubricant that really brought my blades back from their sap-laden state.

1. CMT Formula 2050 Blade and Bit Cleaner $14.50

2. Bostik Bladecote (formerly Dricote) $18.50

3. Bostik Glidecote (formerly Topcote) $18.50

Product Shots

The non-toxic cleaner is biodegradable and there are no fumes to suffer through so using it is much better on the lungs compared to other products on the market. The lubricant adds a protective layer that keeps the blade sharp longer and helps it to cut through hard wood a bit easier. Here are the steps to get those blades from grimy to gleaming.

1. First, keep in mind that carbide edges are brittle and break off easily, they're also very sharp so handle very carefully. Gloves should be worn to keep your hands protected.Carbide Tips

2. Remove all blades and carefully check blade edges for sharpness. Check for any chips or broken teeth. While a few small nicks won't ruin a cut, anything more than minor wear could require a fresh sharpening.Spray off Blades

3. In a small plastic bin, spray down both sides of the blade and let soak for a few minutes. After a brief soak, scrub the blade edges where pitch is build up with a nylon brush. Don't use wire which can damage the edges.Scrubbing Blades

4. Once the blades are well scrubbed, I like to let them soak in warm water to free up any left-over residue. Directions on the blade cleaner say that it doesn't need to be rinsed off, but since I'm adding a layer of protective lubricant onto the blade I wipe them clean to prepare for the final spray-down.Rinsing off Blades

5. With the blades fully rinsed and dry, spray on the lubricant and re-install into your tools for a few more months of clean cutting.Lubricated Blades

I also picked up Bostik's Glide Coat for my tool surfaces and what a difference it makes. After a few solid coats, materials slide over the table like they're on ball bearings. To upgrade your wood-cutting experience, it's a simple process for great results.Cleaned Blades

Note: This isn't a sponsored post, I was just impressed with the process and thought you might be as well. Now get out there and polish up your shop so you can go back to making sawdust.

Product List:

1. CMT Formula 2050 Blade and Bit Cleaner $14.50

2. Bostik Bladecote (formerly Dricote) $18.50

3. Bostik Glidecote (formerly Topcote) $18.50

If You're Not Doing This Every Time You Grill, You're Missing Out on Serious Flavor

$
0
0

During summer, it's my goal to bust out the charcoal and chimney starter as much as possible. Call it a masculine stereotype if you must, but I never miss an opportunity to take advantage of extended daylight to cook dinner outside. It avoids heating up the house with the oven, and, of course, makes everything taste amazing.

And, if you want you grilled food to taste even better, here's my tip. It takes all of five seconds to set up, and takes your meal up to the next level:      

Add a chunk of hardwood. Like, every time you grill. 

Sure, we all know about using wood to slow smoke barbecue, or employing a cedar or alder plank for fish, but nestling wood next to your fire does wonders for even the most basic weeknight grilling session. I started doing this for special cuts like a ribeye or salmon, and now it's become part of the routine. I basically add a wood element every time I fire up the grill, and my food tastes better for it.

It especially does wonders for vegetables, which are at their peak during this time of year and lovingly take on wood-fired flavor. Proteins are a no brainer, and even hot dogs and hamburgers are improved from a kiss of wood smoke.


Of course, you don't just throw a log on top of the fire. That will ignite immediately, producing flames (which look cool, but don't taste good) and blacken your food. Instead, just set the wood chunk about an inch away from the coals. The heat will start to toast one side, and you'll produce a thin wisp of blue smoke. If you get big white clouds or see flames, it's too hot, and the harsh smoke will make your food taste acrid. Simply move it away from the coals and let it smolder. 

You can do this with a gas grill too, although it takes a little more prep: simply soak some wood chips in water and then place them in a foil packet and place it on top of one of the burners.

As far as species, I find cherry to be the most versatile. It works well for everything, and since I'm often cooking multiple components of a meal on the same fire, it complements each ingredient. Save your mesquite and oak for brisket. 

This is the wood I use, and I recommend it. 


Of course, you're producing tasty airborne particles, so it's best to capture them with a lid if you can. After the wood is in, place the food of the opposite side of the coals in a two-zone fire, and place the lid with the open vent over the food. This draws the smoke through the grill and over the food. I find it's usually helpful to go for a "reverse sear" — where you place the food on the cooler side to bring it almost to temp and draw out the water, then put it over the hot fire to brown and caramelize. 

You won't use a whole wood chunk on a single meal. Just use your tongs to separate it out from the fire when you're done, and let it cool with the rest of the grill. A large chunk will last for five or six grilling nights.

Oh, and it makes you smell like summer, too. Enjoy. 


ManMade Essential Toolbox: The Key to Keep Yourself from Going Crazy in the Workshop

$
0
0

ManMade Essential Toolbox: Bin Storage

Small-parts storage is one of the biggest steps you can take in creating the perfect workshop zen. When all those little fasteners, nails, washers, odds and ends all have a home you can work in peace, not pieces.

The life of a DIY-er is paved with extra parts. Instead of just a singular hobby focus you've expand yourself into building and making almost anything and it's important to always keep around all those extra parts because you never know when you're going to need them again. However, it can be a nightmare storing all things! I don't want to admit how long I went with a teetering stack of cardboard nail and screw boxes piled on a shelf all mislabeled and rusted.  I finally gave in an invested in some serious bin storage for all my little bits and it's changed my life! 

Types of Bin Storage

There's two major types of bin storage that work for different kinds of needs. If you have a permanent shop and not the garage with the car backed out, you might find a better investment in wall and shelf bin storage. These are the more common products you'll see with hundreds of tiny plastic drawers with detailed labels. These boxes can be secured to the wall for easy and permanent access. 

ManMade Essentials: Bin Storage

Arko Mils 44 Drawer Cabinet


The other kind is more portable in nature. Perfect for DIYers like me who don't have any kind of permanent shop. These products allow me to toss all my things into my truck and head to my next project or stack them neatly in my shed for easy access when I need them. They seal tight and keep each compartment intact as you sling them around. I have two different kinds of portable bin storage.

ManMade Essentials: Bin Storage

One is my larger Husky cantilever storage system. Here's where I store all kind of odds and ends like compressor parts, stray machine screws, Dremel accessories, razor blades and more. It's my catch-all for small items that don't have a home. If you don't have a ton of shop bits (not yet at least) start with one of these.

ManMade Essentials: Bin Storage

If you find that your bits and pieces seem to grow exponentially with every project, you might want to invest in a more modular system like a stacking deep-bin organizer case. I have several of these, arranged by use: screws, nails, nuts and bolts, etc.

ManMade Essentials: Bin StorageThe best part is that each bin is removable. Need your 2-inch screws for a project? No need to take the entire box with you, just slip out the inner bin and leave the rest behind. It's simply amazing. 

If you continue down the thrilling path of DIY trust me when I say you're going to really need these storage solutions. The best part is all of these products are inexpensive and in the end will save you time and money by keeping track of all the little things you would otherwise lose or throw away.

Man Made Recommended

Permanent Bins


Portable Bins


If you need more inspiration on the zen of shop organization, check out the shop of one of my favorite gods of DIY, Adam Savage, and see how he keeps his OCD at bay with his awesome storage system.


10 DIY Beard Oil Recipes

$
0
0

Anyone who's read ManMade for more than a week or so can attest: we're never gonna wax poetic about the beard. Some men look better with them, some do not. Some can grow a full one, and some can't. There's no magic in the beard. It's a choice, and if yours looks nice, it's good to have options. Personally, I tend to wear one in the fall and winter, and then go clean shaven in the warmer spring and summer. 

created at: 03/23/2015

What we do know is: having a beard is much more than just not shaving. You've got to care for it, clean it, trim it, and keep it healthy.    There are, of course, many brands who are happy to sell you products to do just that. They are (sometimes) surprisingly expensive little tubes of stuff that you rub into your facial hair to keep it happy. They all contain the same basic ingredients: a natural oil (coconut, olive, almond, etc), some essential oils to give them fragrance, and perhaps a bit of beeswax for conditioning and strength. 

Which means: you can make them yourself with the same basic ingredients. We stumbled across this collection of recipes at Jebiga.com, and it's a nice roundup of different styles of beard care products. They'll all basically do the same thing, so start with the one that uses ingredients you already have, and just branch out from there. 

10 DIY BEARD OIL RECIPES [Jebiga.com]


Weekend Project: Make a DIY Reclaimed Wood Wall Bike Hanger

$
0
0

There's a great adage in the home decor and organization field...you've probably heard it on one of those room makeover TV shows. The phrasing varies, of course, but the central idea, "When you run out of floor space, you've got to go up."

Eric and his office mates came up with this clever DIY solution for storing a whole mess of bikes in a relatively small space - 7 on a single wall - using a super simple hanging system. The design mimics commercial wall mounts for bikes (I have three in my own garage), but is built from those DIY standbys - plumbing pipe and reclaimed wood. A length of inner tube is used to to protect the wheel rims and spokes. 

Making one of these might not save you a ton of money over a manufactured one, but if you need to get several bikes on the wall, it's a great solution. And it looks pretty sharp, too.

Reclaimed Wood and Pipe Bike Hangers [Instructables.com]


How to Stop That Annoying First Song from Playing Every Time You Plug Your Phone Into Your Car

$
0
0

It might not happen with every smartphone and car stereo combo, but if you know what we're talking about, this tip is for you. You get in, you fasten your seat belt, you turn the car on, you plug in your phone, and.... 

THE. SAME. &*$%. SONG. COMES. ON. EVERY. SINGLE. TIME.

Of course, you've figured out why this devilish contrivance occurs. It's the song who's title comes first alphabetically in your library. On my phone, it's A.M. 180 by Grandaddy; on my wife's, it's Vampire Weekend's A-Punk. And I actually And it just... starts playing, at whatever volume your stereo is set to.

Here's how to stop that first song from playing when your plug your phone into your car:    

You replace it with a new song that is guaranteed to come first, and is nothing but sweet, sweet silence for a few minutes.


Here, we're using an iPhone and an OS X computer. I'm not sure if this happens with an Android phone, but the process should work the same. 

1. Open up GarageBand on your computer. It came free with OS X. If you don't have OS X, try one of these alternatives. 

Select the Loops option, and hit choose. 

2. Next, you'll set the settings for your "song." This is the important part. Title it "A.A.A.A.A" or something similar that you can guarantee will appear first in your music. Then, at the bottom, set the tempo to the song to 40 BPM. 

3. Then, select a random loop. and place it on the track timeline. It doesn't matter what you pick, really, but you might select something moderately pleasant you won't mind hearing on occassion. (See below.)

4. Then, drag the loop to the right, placing it later in the song. This will create the length of silence before the loop plays and the track ends. You can make it as long as you want: two minutes, five minutes, ten minutes. I went with three.  Then, drag the volume slider for the channel to quite low. 

5. Lastly, click "Share" from the menu bar, and "Send Song to iTunes" You can also export it to disk, but you'll need to then import into iTunes. Both of these get the song into your library, which is the only way Apple will let you get music onto your iPhone. 


6. Then, fill out the forms however you want. The only trick here is to make sure the song is set to 112 KBPS. Apple won't allow you to upload lower-quality files into your iCloud library. Anything with a higher fidelity is just a waste of your phone's disk space. 

7. Now with your song in your iTunes library, you can either drag it to to your phone from iTunes, or make sure it's uploaded into your iCloud library, which you can then download onto your phone. 


8. You'll find the song in your "Recently Added" section of the Music app. 


Click the song to download it to your phone's library, and you're set.


What's actually happening here?

You've created a song that's silent for a huge chunk of time, then will play a simple, quiet bit of music as it ends. The silence will give you time to select a podcast, song, or turn the audio off. Then, in case you need it, the loop at the end will tell you the music is about to start, and you'll know the volume.


Done and done. If this is all too much work for you, and credit where due - you can pay a dollar to buy a song from iTunes to do this. But, of course, it's more fun to hack it together yourself, and it takes fewer than five minutes. 


Shop Skills: How to Care For Your Cast Iron Table Tops

$
0
0

If you're like me, the cast iron in your shop sits atop the most prized tools you have. Those tops are solid, durable, stay dead flat, and make working wood just a bit easier. But to keep them at their best takes a bit of routine work, fending off rust and staining doesn't take much but make sure you do it. Here's how.    

Some background: I'm a bit excited, because I just got a new toy for the shop. The Laguna 14 twelve band saw has been on my radar for a while, but the sticker price was keeping it way out of my budget until I found one on Craigslist last week. A few hours later it was firmly installed in my shop and ready for a brief overhaul.

It had been in a shop for a few years, well used but still running well. The dust wasn't an issue, but some surface rust and staining needed to go.

Rust and staining happens on cast iron when moisture or liquid is allowed to sit on the surface, because even though cast iron is solid, it's still porous and the metal reacts to the moisture by oxidizing.

 Step 1: Wipe it off - The dust and dirt need to be brushed and wiped off so you can see what you're working with. I use a shop brush or old paint brush to get it cleaned of debris, and to clean out miter gauge slots and tight corners.

Step 2: Apply mineral spirits - Use a clean rag to wipe on a layer of mineral spirits and let it sit for 10-15 minutes.

Step 3: Work on the stains - Add additional mineral spirits and scrub the top with a fine steel wool pad, paying attention to the stained and rusted areas. Scrub in a back-to-front motion, to keep the grain of the pattern parallel to the blade. For more intense rust, you can try 400 or 600-grit wet/dry sandpaper, lubricated with mineral spirits or a little WD-40.

Step 4: Wipe clean - Once the stains have been removed, wipe the entire surface clean with a new rag, and additional mineral spirits if necessary. The surface may still have minor staining, but as long as it is smooth it will perform well.

Step 5: Protect the surface - Some people like to use carnuba or similar car waxes to give a slippery, protected surface, but that tends to attract dust and gum up over time. I have really been impressed with GlideCote ($20) to give it a smooth and protected surface that lasts.

With a bit of elbow grease the top looks great, and wood slides over it effortlessly enough to make me keep sneaking out to the shop to play with my new toy! If your cast iron tops need a bit of TLC, it's time to make it happen, you'll be glad you did.


How to Tie the Most Useful Knot in the World

$
0
0

This how-to is not for sailors. Nor anglers, mountaineers, first responders, or anyone else who need to know a huge diversity of knots, their strengths and weaknesses, and what situation calls for each.

This is for the rest of us. Those of us who go through normal life and its adventures, and encounter rope, twine, string, line, paracord, and the like, and when we need to secure it, say "Should I tie this like my shoes, or in a square know that I know will be nearly impossible to get off when I'm done."

The truth is, at this point in our lives, we're probably not going to learn how to tie a complex calvalcade of knots, and even if we did, would probably not have enough opportunity to practice them in real world situations in order to commit them to long term memory.

But, still, we should all know how to tie at least one pro-level option, and so we say to you — if you're only going to know how to tie one kind of knot, let it be:    

The Bowline. 

Sure, you've heard of it. Here's why it's great: 

  • It's the most useful knot in the world for the widest variety of applications. It's utilized in all sorts of situations that require rope, by a diversity of cultures and traditions. 
  • It's secure. Quite secure, in fact. It will hold when kept under tension. (Of course, don't use it when climbing, where a safety knot it required.)
  • It will not slip when placed under load. 
  • It can be used to tie two ropes together.
  • It can be tied one-handed, which is helpful when you're using your other hand to hold the thing you're tying it around.
  • And, most-importantly: it easily comes undone, no matter how much weight is put on it. 

See? Versatile as can be, and actually quite easy once you practice it five or six times. Here's how to do it: 

You'll only need to work with one end of the rope for a bowline. If you're trying to tie two ropes together, make a bowline in one rope, then loop a second bowline around it with the other. 


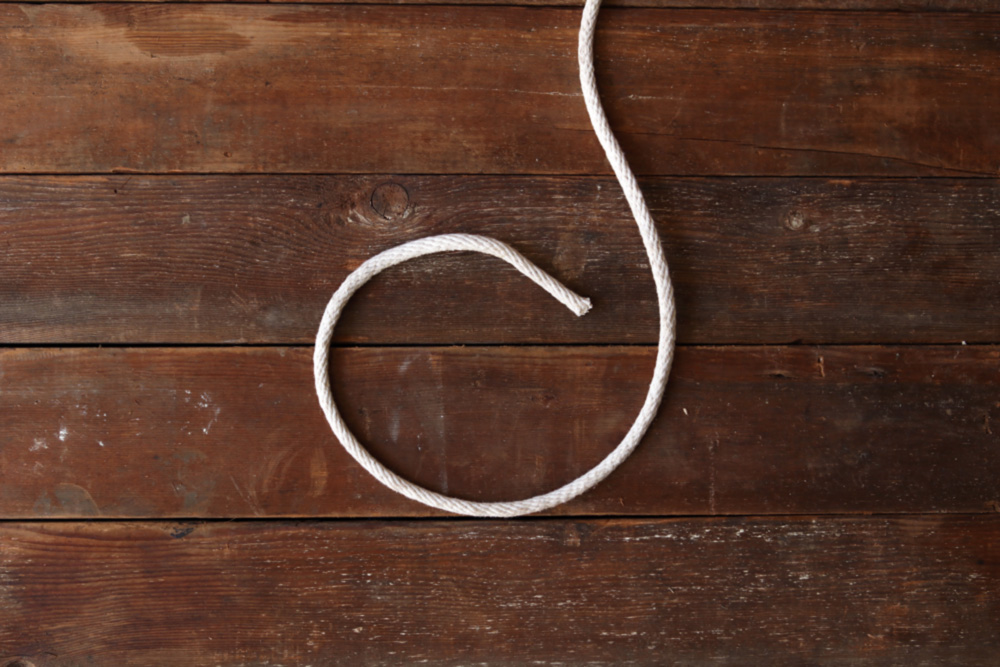
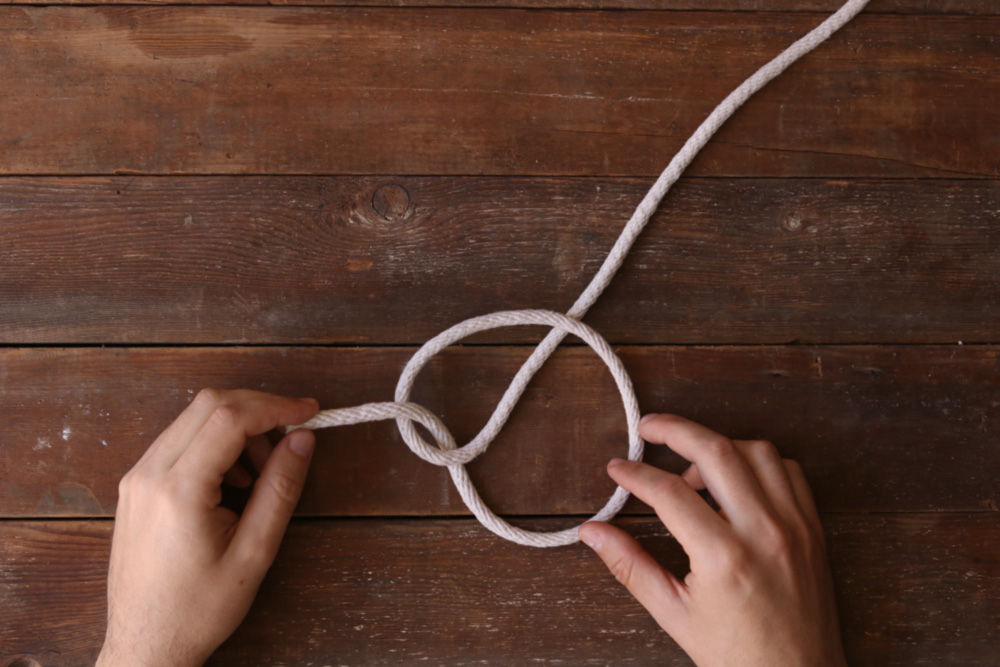
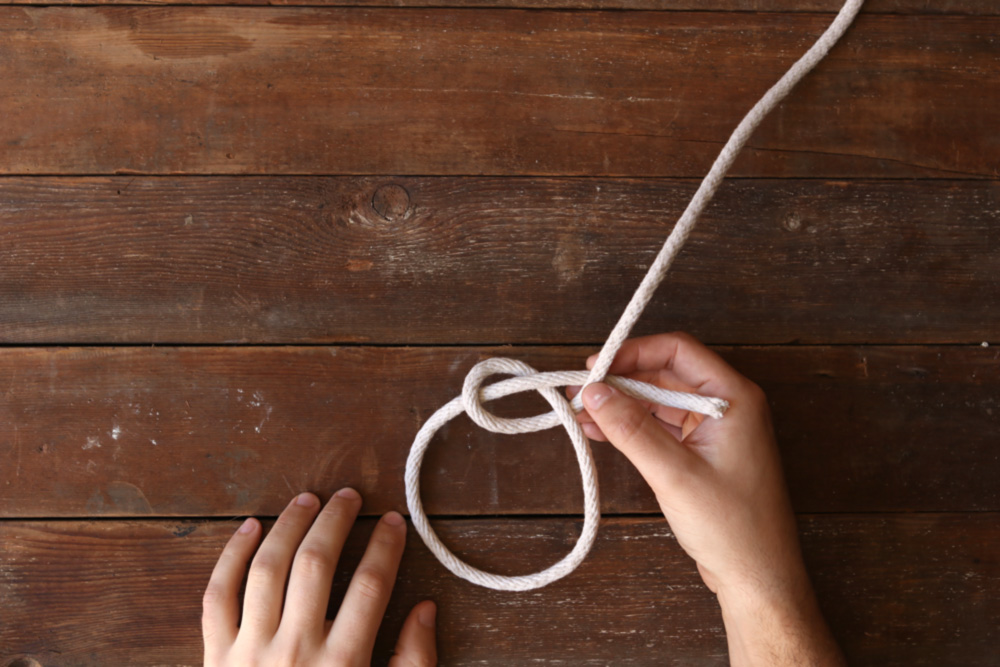
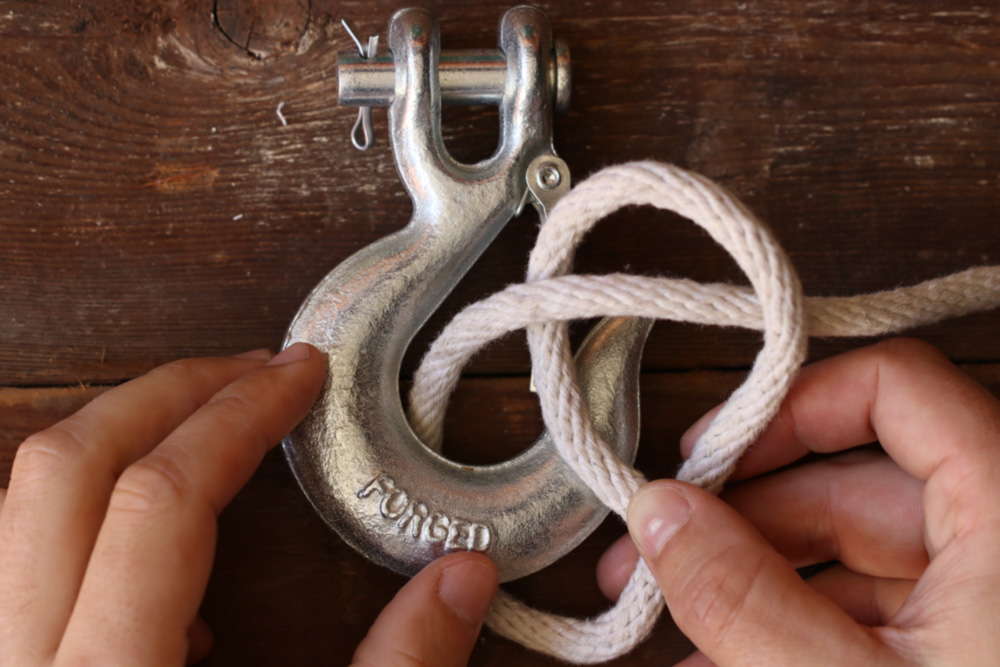
Make a loop in the rope, leaving a bit on the end to tie the rest of the knot. The rope will pass over the top. How much excess you leave will determine the size of your loop.


Insert the open end through the loop...


...and pull it through slightly. 


Then, wrap the open end behind the main line above the loop. This is the key to the bowline, and the most important part to commit to memory.


Then, just pass the open end back through the loop... 


... and pull through the other side. 


Pull it tight to secure. 


That's it! Here are the steps I say in my head to remember:

Loop over top, pull through, wrap behind and around, pull through. 

Practice it fourteen times, and you'll never forget. 

To secure a bowline around an object, just make your initial loop, and wrap the open end around the object. Complete the know on the same side as the loop, and the know will tighten around the object. 

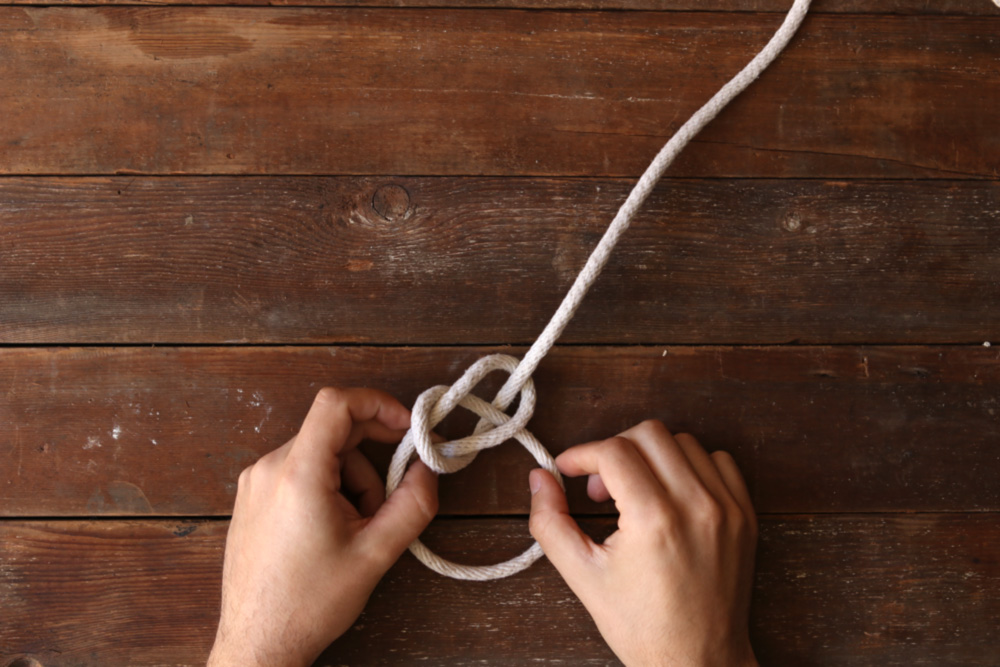
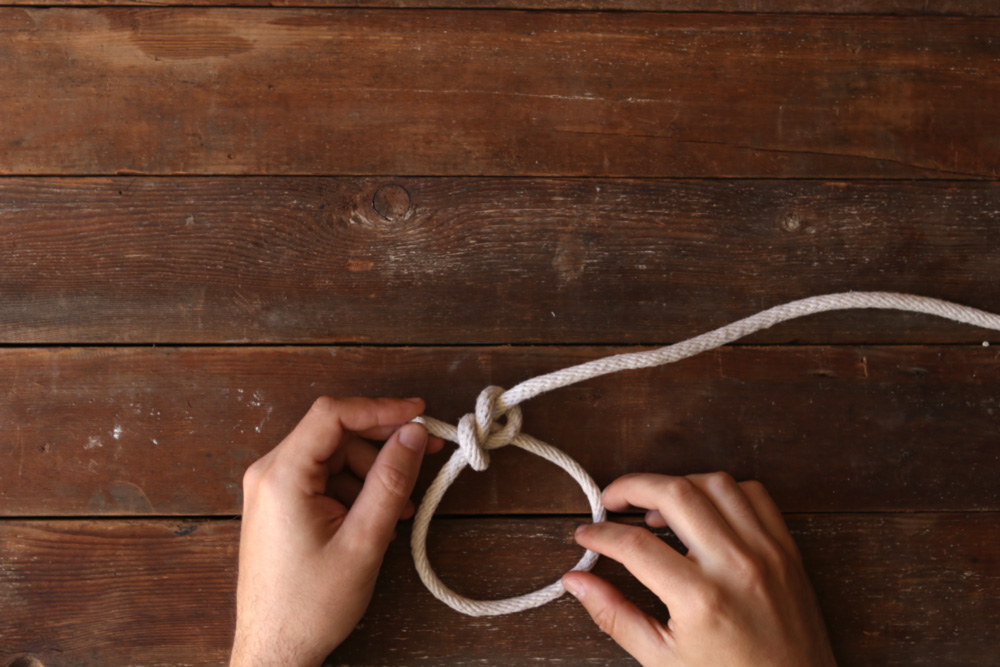
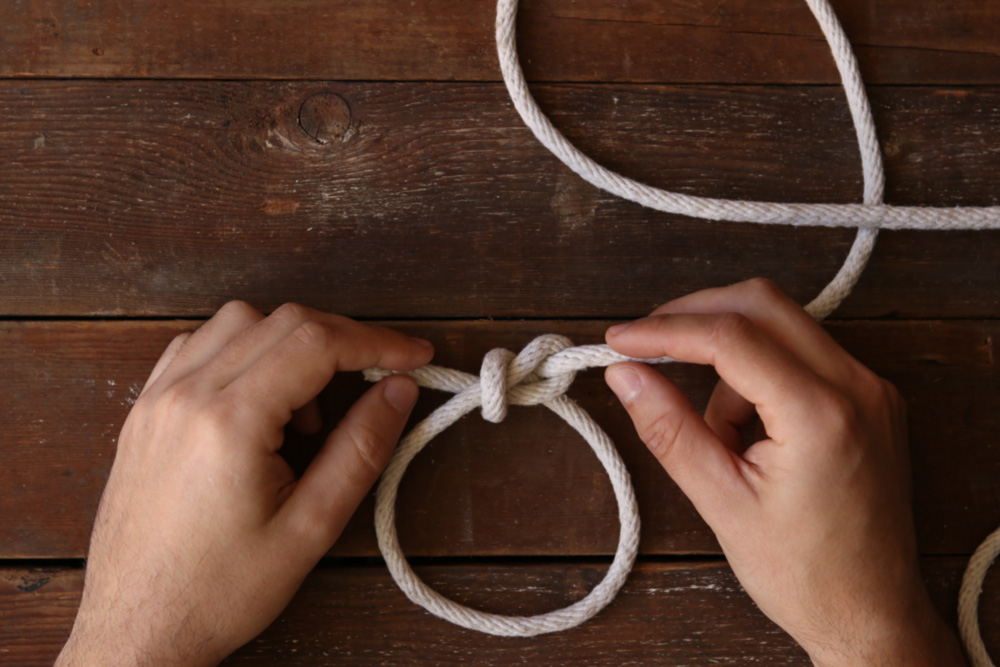
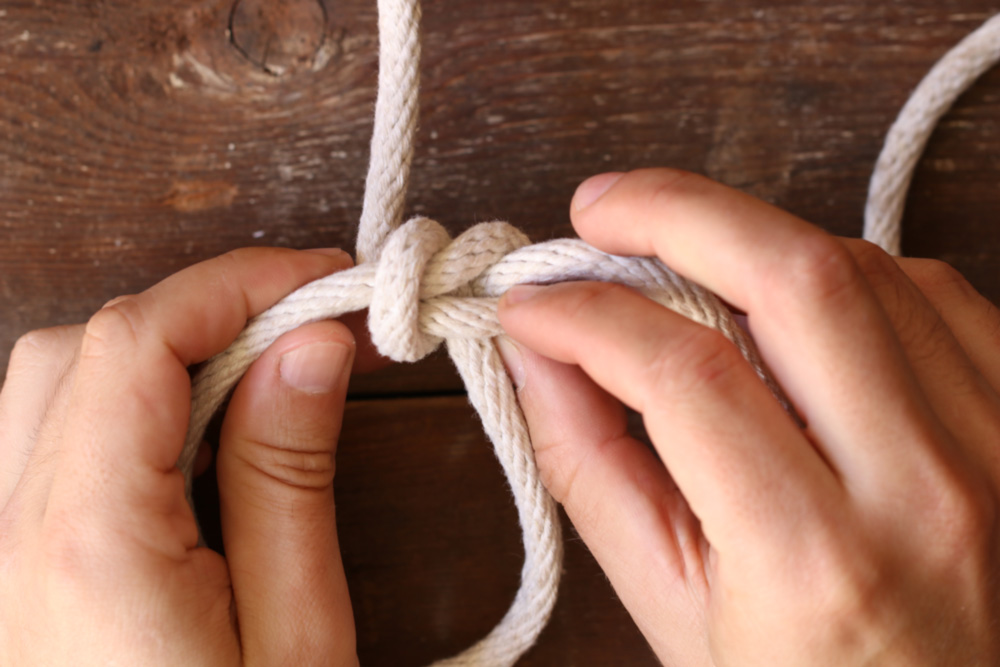
To undo it, just grab the knot where the open end has passed through the final time. This will relieve the tension, and the knot will fall apart. 


Done. Remember, it's: Loop over top, pull through loop, wrap behind and around, pull through loop. Now that you know it, you'll use it all the time. 

Have fun out there, and be safe and secure!


Viewing all 2425 articles
Browse latest View live


Latest Images