Quantcast
Channel: Man Made DIY Recent Posts
Viewing all 2425 articles
Browse latest View live

You Can Build This House for $4,000

$
0
0

4k house

I've always been a fan of small houses. In small spaces, everything has a purpose, and everything is so easy to organize because you can't fit much in there to clutter it up. Here's the plans and instructions to build your own very small (cozy) cabin for about $4k.   Just think of all the things you could do without a house payment. First, there's the inevitable vegas trip, a few weekends (heck, how about weeks) at the beach, and that shiny new toy something in the driveway. Of course, living in a positively tiny house has a few drawbacks, like no privacy, no entertaining, no pets bigger than sparky the fish, and no escape when that taco tuesday catches up with your spouse on wednesday evening.One Room Cabin

Thinking about it a bit more, I'm all for the tiny space but would probably have to push a few of these together to make it all work. Still, 12k isn't too bad for three awesome tiny homes in a row. Click here to head over and get a free PDF planset to build your own small house for less than a used Corolla.


How to: Make a Hood Ornament

$
0
0

Quick: what was the make, model, and production year of the first car you owned? Mine was a 1984 Honda Civic, tan, with a tape deck that got used significantly, and get this, power door locks! Snazzy!

created at: 07/09/2015

I bet most of you had no trouble answering that question - the cars you've driven throughout your life leave a mark on you. Remember how bad you wanted that soft-top Jeep in high school? Or the white Celica you took with your girlfriend on that first big cross-country road trip? Well, today, I'm teaming up with Autotrader for a project that pays homage to that feeling, as well as centuries of great auto design.

It's been a while since most cars came with hood ornaments (sadly, no, my '84 Civic didn't have one), but still, the hood ornament is an enduring symbol of what we love about our cars. So I decided to make a hood-ornament inspired by the ManMadeDIY 'M', working with my favorite material: wood. Check out the process below, and learn how to enter Autotrader's #DrivetasticSweepstakes contest.

Autotrader is a car shopping web site that puts you in the driver's seat. That fear and apprehension that comes when you think about car shopping? It's gone; replaced by Autotrader's powerful search tools, and the largest online inventory, all to help you find the one car that makes you feel utterly 'Drivetastic'. 

At Autotrader, you can receive car alerts on your phone and quickly search for cars with just the features you're looking for (heated seats, navigation, even a tape deck, if that's what you want!). 

  created at: 07/09/2015

1. For this project, I decided to use a nice, thick chunk of Western black walnut. I thought the dark color would give a more substantial look at the small size, and the thickness made it heavy enough to stand up and stay balanced. 


created at: 07/09/2015

2. I was inspired by the old British roadsters, so I decided to add that classic "winged" look to the ManMade M. I whipped up a quick sketch on my computer, and then printed it out and attached it to my walnut with spray adhesive.  


created at: 07/09/2015

3. Then, I cut out the shape on the bandsaw with an 1/8" blade. It took some creativity to get inside the complex shape, but I  was able to nibble away the wood to the line. 


created at: 07/09/2015

4. I sanded everything smooth, using a variety of round and flat objects to smooth the curves. I rounded over all the edges just slightly for a more handmade, sleek feel that echoed all those great cast hood ornaments of yore. 


created at: 07/09/2015

5. Then, I finished the wood with Danish oil for that deep, rich look without any shine. Whenever I use rub on oil finishes, I like to use a very fine grit sandpaper (like 320 or 400) to apply it. That allows the oil to penetrate in the wood, and creates a thin sawdust and oil "slurry" that will help fill in a coarse grain wood like walnut.


created at: 07/09/2015

6. While the oil cured, I created a base for my hood ornament from concrete. I used a rapid-setting mix, which sets up in about an hour. For the form, I used a paint mixing cup from the hardware store, and applied a piece of painter's tape to create a fill line at 1/2". Then I mixed it up, let it cure, and then sanded everything smooth. The bottom of the coaster is quite smooth due to the fine grit of the mix and smooth plastic form, but if you're concerned about scratching your furniture, you could apply some felt or cork to the bottom. 


created at: 07/09/2015

7. Once the concrete base and wood finish fully cured, I attached them together with an E6000 adhesive. It works well when joining a variety of materials. 


created at: 07/09/2015

Done! Zoom, zoom. 


created at: 07/09/2015

The folks at Autotrader are also running a #DrivetasticSweepstakes contest where you can enter to with your own 3D printed hood ornament. They were nice enough to print me out one of my own... Sweet, right? Get all the details on how to enter right here. And be sure to follow along with the conversation at #Drivetastic on social media, and with AutoTrader on Twitter, Facebook, Instagram, and Pinterest


 created at: 07/09/2015

This is a sponsored post by Autotrader.  All opinions expressed in this post are unbiased and based on my personal view. Thanks for supporting the brands that allow ManMade to keep publishing free content. 


7 Essential Tools for Cooking Meat Like a Pro

$
0
0

Here's the thing with cooking up a flavorful piece of protein: it's kinda expensive. Especially if you get the good stuff from a butcher you trust. Mess up a carrot? It's pretty easy to peel and cook up another one. Mess up a 48-day aged Frenched crown roast of prime beef? You're out nearly a Benjamin.    

All of which is to say - cooking a great piece of meat is important. And while technique is always king, the right set of tools will help set you up for success. 

Food52 has assembled this great list of tools, including everything from prep work to cooking surfaces and the best oil for getting a great crust without filling your home with smoke. 

The only thing I'd add is a great finishing salt, like Maldon. It'll take any cut to the next level. 

7 Tools for Preparing Meat [Food52.com]


Restoring a 400-Year-Old Painting: The 5-Minute Video to Change Your Art Appreciation

$
0
0

Most art forms involve some level of collaboration, sometimes with people who work long after you've done your part. Or in this case, after you've been dead for 300 years.   The five minute video covers Michael Gallagher's delicate process of restoring the vibrancy of this 17th century life-size family painting of the artist's friend was in awful condition when it was acquired by the Metropolitan Museum last year. Gallagher's team spent ten months working on the painting, removing decaying and discolored varnish as well as deconstructing the canvas and restoring places where it was poorly creased and even re-stitched. There's something enticing about watching the artistry this team puts into saving someone else's art, knowing that their work will go unnoticed by almost everyone. I know I'll never look at museum paintings the same way again. 

Learn more about the painting from the Met's Online Collection.

ManMade Guide: Step Up Your Summer Drinks with Grown-Up Flavored Ice Cubes

$
0
0

Around here, we've moved past the short glass - the whiskey in a tumbler, the shaken 3 oz. cocktails of spring -and opting for the long and tall. With sunshine comes all-day drinks: those mixed with plenty of ice and fresh ingredients to keep you cool.

How to make flavoured ice cubes

Of course, it's ice that keeps 'em cool, and when your glass sits around in the heat...well, ice melts. So, this summer, make that a good thing. We're sharing our technique and recipes to allow the ice to actually contribute to the flavor of a drink or cocktail, not just its temperature or dilution. Check it out!   

How to make flavoured ice cubes

The Basics:

First off, making flavored ice cubes is super easy. It's like making regular ice, but, you know, with not just water. The process is simple: flavor a liquid, and freeze it. Good to go. 

For tools you'll need:

  • Measuring cups and/or spoons
  • Sauce pan
  • Ice cube trays (we recommend silicon trays as they are easier to handle and won't break your ice cubes to pieces). These are our favorites. 

For ingredients:

  • Liquid (e.g. juice, water, wine)
  • Flavoring/infusing agents (spices, tea, aromatics)
  • Sweetener (agave syrup, rice syrup, honey) 

how to make flavoured ice cubes


The Method:

1. Infuse: heat or boil liquid with add-ins, or let them sit together in the fridge overnight for 24 hours.

2. Cool liquid, strain, and place in ice trays.

3. Enjoy!

So... easy, right? Now here are a few extra tips:

  • Ice is only good as the water it came from. Consider using filtered water, spring water, or boiled water to remove cloudiness. Don't go crazy - the 80¢ gallon jugs from the grocery store work perfectly.
  • For ice cubes you want to infuse the liquid as much as you can. The cold makes the flavors harder to detect, so if you're gonna do it, go big. 
  • Taste the liquid before freezing and make sure it's strong, and we mean STRONG. Since it's going to slowly melt you want the flavour to really come through. So don't be shy!
  • If using spirits, heat them up for to remove most of the alcohol so it can freeze. Spirits with high levels of alcohol should simmer longer. And, of course, choose something with flavor...Vodka-flavored "ice" is really only cold vodka. If you're gonna reduce the liquid, make sure there's something besides ethanol and water. 
  • Always strain your mix before freezing, as sediments could settle at the bottom of the cubes making them gritty.


RECIPES

Dark Chocolate Ice Cubes

How to make flavoured ice cubes

These cubes are the perfect companion for a cold-brew coffee, a white russian cocktail, or even with plain cold milk! Super tasty, and all homemade.

Ingredients:

  • 1/4 cup cocoa powder
  • 2 cups water
  • 1/4 cup agave syrup

Steps:

  1. Place all ingredients in a heavy-bottom pan and whisk until combined. Bring to a simmer and remove from heat.
  2. Let mix cool completely and place in ice cube trays.
  3. Remove from trays and serve with your favorite drink (or even munch on them!)

How to make dark chocolate flavoured ice cubes


Cinnamon, Anise, and Cardamon Ice Cubes 

How to make cinnamon, anise, cardamon infused ice cubesThese flavourings are perfect for straight up cocktails like an Old Fashioned, a manhattan, or even a whiskey on the rocks. You can also add them to your favourite iced tea to spice it up.

Ingredients:

  • 2 Cinnamon sticks
  • 1 Star anise
  • 8 Cardamon pods
  • 2 cups of water
  • 3 tablespoons of agave syrup

Steps:

  1. Brew all ingredients for about 5-10 minutes, until fragrant.
  2. Strain, let brew cool down, and place in ice trays. You can add a cardamon pod in each cube as garnish.
  3. When ready, remove from tray and immediately place in your drink.

Angostura, Black Tea, and Thyme Ice Cubes

Use in everything. 

Ingredients:

  • 2 cups water
  • 2 black tea bags
  • 20 dashes Angostura bitters
  • 5-6 sprigs thyme, leaves picked 


Steps:

  1. Heat water to a boil, turn off the heat, then add tea and bitters. Allow to cool a bit, to 150-160° or so, then add thyme leaves. Cool to room temperature. 
  2. Remove tea bags, and pour into ice trays to freeze. 


ManMade Recommended: 


If you're a fan of this idea, please help us out by sharing the image below on Pinterest (thanks!):

Make flavored ice cubes


There you have it. Let us know your ideas for flavor combos in the comments below. Enjoy!


This ManMade post was originally published on June 17, 2o14. We're sharing it again because it's summer! 

David's Shop Upgrade on a Budget: Step 1 – The Master Plan

$
0
0

Cluttered ShopI’ve been working in my shop several days a week for a few years now, and it shows. When it’s polished up, it’s useable, but the whole thing seems to unravel into chaos within minutes of starting a project. The main problem, as in most things in life, is a lack of organization. I tell my kids daily that “every toy has to have a home”, but I have a lot of orphan tools in my shop that simply occupy the nearest shelf.   Honestly, I love my shop. I’ve made it my own and isn’t that really what counts? Well not really. Today after tripping over a cord, wasting 20 minutes searching for a square and just about losing it when I spilled my iced tea all over the router table I decided it was time to begin my long awaited upgrade. My shop is dusty, disorganized, and work doesn’t flow well through it, and all efforts to bring in some upgrades have just turned it into a haphazard mess and at this point I’m ready to start from scratch. My goal with these projects is to show in detail the steps to some major upgrades in the shop, without the major cost. My budget on this project is minimal at best, and I’ll keep track so it will be easy to see how much each step takes. Here’s what I’ll be doing in the next few months to make my space into something more enjoyable and much easier to use:Cluttered Shelves

  1. More Cabinets and Drawers– I inherited two cheap metal shelves during a property flip a few years ago, and those rickity frames are fully of junk, and topped with a pine workbench. It’s flimsy, and I don’t have the ability to keep anything really organized on there. Replacing the shelves with built-in cabinets will add an upgraded look, but more importantly provide sturdy and dust-free spaces that I can dedicate to storing tools out of the way. Adding drawers will provide space to store small items close enough to get to, but off the countertop. On top, I’ll be taking down a few small shelves and adding a bank of cabinets above for even more space to store it all.Countertops
  2. New Workbench Top – I’m not sure what materials I will be using for the top yet, but I’m very sure it’s time to get rid of my current one. I originally glued three 2x6 pine boards together and within a few days they were warped. I added a metal cap to at least have a flat edge, but it's just not something that I want to stand by and work on. It's too narrow to use for projects so I find myself always on top of my tablesaw and that’s just a pain in the neck. I’ll be upgrading to a 36” wide, 2-3” thick top firmly installed to the wall and on top of a solid cabinet. This will give me plenty of solid assembly space and it’s going to look dynamite as well. I’ll also be building in my Radial Arm Saw to get rid of the mobile base and provide a long flat support area for large stock.My Big Shop
  3. New Power Tool Island– Turns out I have the space to put a few of my small tools on an island in the middle of the shop. I’ll be building a workbench area with a drill press, bandsaw, jigsaw, and planer all set in their own dedicated area.
  4. Lighting, Electrical Outlets, and Extras– I’m tired of tripping over extension cords, having to switch out charging cables, and sweating like mad out in the shop. I’m adding a few extras to make it somewhere I like to hang out even more.

Along the way, we’re going to go through a series of skill building tips I'll use during construction of the project, including: 

  • Using Sketch-Up for planning, design, and layout
  • Dovetail Jig Drawers
  • Plywood Shop Doors
  • Countertop Construction
  • Air Compressor Upgrades
  • Dust Collection System Design and Installation

So stay tuned and start thinking about projects in your shop that can help you stay organized, and more comfortable along the way.

Here’s my SketchUp so far as I start to layout the general dimensions of the space, I’ll be adding tools in next to map out flow and cutting areas.

SketchUp Layout

How to Bend Wood and Plywood at Home: Laminations Explained

$
0
0

I've always been fascinated with curved wood furniture. It doesn't feel right to take straight stock and curve it like that, but at the same time the results are fantastic. It's definitely an art and now I've found a great video that makes it something I'm a little less afraid to do.   As you may remember from a previous post, The Wood Whisperer is one of my favorite sources of woodworking inspiration. He is constantly introducing me to techniques that make me better at what I do, and he has a great approach to how things should be done when making something cool out of wood. Here's a quick 8 min video that walks through the steps he took to make some curving laminated rocker legs for one of his projects:

I still need to find my own project that this will come in handy on, but now I know how to approach it and will definitely give it a shot in the near future!

Crispy, Crunchy, Juicy, Flavorful: How to Make the Ultimate Southern Fried Chicken

$
0
0

There are a few things nearly everyone can agree on. The Beatles wrote some really great songs, mountains are awesome, and every one looks silly when they use an iPad as a camera. And, I submit to you, this: no omnivore doesn't like fried chicken. It's just simply a slam dunk of flavor and texture, and when done well, it's a treat anyone can get excited about.   

Except, it isn't always done well. Bathing those bits in hot oil means all kinds of opportunity for greasy, flabby skin, burnt outsides and undercooked insides, and a bland flavor profile that's just not worth the effort, or the calories.

But the secret doesn't lie in a hidden blend of herbs and spices...you can make great fried chicken just seasoning salt and pepper. Instead, it's all about technique, and that's someone anyone can master. 

J. Kenji López-Alt from the Food Lab offers his version on how to make the "crispiest, crunchiest, juiciest fried chicken around." His process lies in these essential steps: 

    • An intensely flavored buttermilk brine tenderizes the chicken while keeping it moist.
    • Adding wet ingredients to the dry flour coating ensures an extra-craggy crust with lots of nooks and crannies.
    • Starting in hot fat and finishing in the oven gives you fried chicken with a crisp crust and evenly cooked meat.

Can't beat that. Get the full explanation of what's going on and the recipe at: 

The Food Lab: The Best Southern Fried Chicken


ManMade Essential Toolbox: The Best Combination Square for Woodworking...and Why You Definitely Need One

$
0
0

Each week in 2015, ManMade is sharing our picks for the essential tools we think every creative guy and DIYer needs. We've selected useful, long-lasting tools to help you accomplish a variety of projects, solve problems, and live a hands on lifestyle that allows you to interact with and make the things you use every day.

created at: 07/16/2015 The saying goes, "Measure twice, cut once." So does that mean that the layout and setup process is twice as important as the sizing and milling? Absolutely. In fact, it may be more like three or four more times. Any person who's completed a full-on woodworking project can attest: you spend much, much more time getting your parts and tools ready then you do actually using them. And if you use power tools, the cutting time is trimmed down even more. Tape measures are great for rough work, and calipers for small parts and thickness measuring, but for most tasks like laying out joinery, setting up machinery, or checking for square, you need: a great adjustable square for woodworking. 

Which, as it turns out, isn't a woodworking tool at all; it's for machinists. But in the modern era of hand tools and power tools, there's no better way to measure, well, almost everything. 

created at: 07/16/2015

What to Look For in a Woodworking Square?

There are a variety of types of squares, but the most commonly used is the 12" combination square, so that's where to start. You want a tool with 4R graduations (meaning 1/8, 1/16, 1/32, and 1/64") with etched markings that are easy to read (as opposed to stamped). 

A great combination square is more than just a ruler with a sliding thingie on it. It becomes a reliable way to check for 90° and 45° on any stock or tool, as a reference surface for determining flatness, a depth gauge, a way to transfer dimensions, a center finder, and the like. 

created at: 07/16/2015

Which Types and Sizes Should I Get?

More complex kits include protracting and center-finding heads, but, while occasionally useful, just drive up the price for woodworking. 

While some prefer a 6" square as their go-to (it fits easily in an apron pocket) I suggest investing your bucks in a high-quality 12" square. It will last you the rest of your life, and there are so many times in a project when I need an adjustable stop longer than 6".

created at: 07/16/2015

Then, for smaller tasks and setups, look for a 4" (or 6") double square for precise work on small parts, and to use as a square-reference for tool setup in tight corners without having to remove the head from the ruler, like a drill press, router table, etc. The double square here is nice so you can use either side. With such a small head, the 45° wouldn't help much at this scale.

Lastly, for basic tasks and nice-to-have convenience, pick up a less expensive 6" square that you can keep in a pocket, throw in your toolbox, etc, or use in tandem with your 12" when you want to lay out two dimensions on multiple parts. 

So, again, the plan of attack here is: invest in the best 12" square you can afford, and take care of it. Supplement that with a nice-quality 4" double square for try-square tasks and measuring of small parts (just having a fine ruler is amazing, too). Then, add a "good enough" 6" square with the standard head for general work. Cool? Cool. 

created at: 07/16/2015

Oh, and you know that little knurled knob on your square? It's not an adjuster - it's a scribe point, that allows you to mark lines or points on your work. Keep that in mind next time your pencil is on the other side of the room, and you've laid everything out and both hands are holding things in place ;)

Which Combination Square Should I Buy?

created at: 07/16/2015

You might never suspect it - but if any item in your toolbox attests to the "you get what you pay for" adage, it's a good square. This is finely machined piece of kit, which takes great care and quality materials to keep things adjustable and easy to use. If you've ever touched a Starrett (the cream of the crop for measuring tools) after you've become used to you $7.99 hardware store model, it's like they're two different tools . A simple pleasure to work, and the accuracy will make your projects that much better. 

So, spread your bucks appropriately. Again, that means investing in a nice (but not insane) 12" square, a reasonable 4" double square, and a good enough 6". Cared for, they'll last for generations to come. 

created at: 07/16/2015

Which Combination Square Should I Buy?

12" Combination Square: 

4" Double Square

6" Combination Square


How to: Modify an Inexpensive Tool Cart to Organize All Your Hand Tools

$
0
0

created at: 07/17/2015

My buddy and colleague Timothy spied this great video tutorial for turning this affordable three-level tool cart into a full-on organization system for all of your tools. Mark Massingill starts with this basic cart from Harbor Freight, then outfits with 3/8" plywood and some hardwood scraps to make a little cradle or hook for each of his hand tools. Mark's more of a mechanic, so he creates a screwdriver rack and a place for each of his sockets and wrenches (in order, so he can find the right size), but you could apply this technique to any style of handtool to keep them organized. If you can find an old office cart or other used item on Craigslist, the project becomes even less expensive. 

Check it out in the video below, and read more of Timothy's original post at the Lifehacker's Workshop Blog


13 Things You Didn't Know You Could Grill (That You Totally Should...)

$
0
0

Most men love some good summer-grilled meat, but that isn't the only thing you can grill...   

Grilled donuts are always a crowd-pleaser, just don't use glazed donuts since they tend to drip everywhere.

Grilled fruits in particular can take on a whole variety of new flavors, just add a little olive oil and dust a dash of salt and pepper and you're good to go. Or go after a spicier afternoon and try a personal favorite of my by opting for some chili powder.

Check out all the ideas from Popular Mechanics.

How to: Properly Clean Canvas Shoes

$
0
0

I recently heard an episode of the NPR podcast, Selected Shorts, in which Sean Astin read Ray Bradbury's short story, "The Sound of Summer Running." The story tells of special place a pair of sneakers holds in the heart and imagination of a young boy, and how he passes along that imagination to those around him as he tries to acquire a pair. I don't know if it was Bradbury's genius or the nostalgia of hearing it read by Rudy / Samwise Gamgee, but the story moved me. I got the thinking about the sneakers I loved as a boy and how quickly I wore them out.    

 
That still tends to be the case unfortunately. Since I'm not a huge shoe guy, I tend to have one pair of canvas sneakers that I favor more than the rest and wear them out quickly as my "everyday shoe." But this doesn't have to be the case as I'm sure many of you know. Check out this nifty canvas shoe care guide from Jack Threads and keep those bad boys running for years. 

8 Tips for Taking Amazing Summer Travel Photos with Your Smartphone

$
0
0

Travel smartphone photo tips.

I've spent many vacations lugging high-end camera gear around to document my travels. But these days, my phone has replaced every piece of gear I used to carry; for their convenience and the decent quality photographs they can take, smartphone cameras are hard to beat. And  a little know-how will help you get the best images possible out of that little pocket-sized gadget. I'll walk you through some of my favorite composition tips, and show you a few ways to use Adobe Photoshop Elements to give your photos an extra boost. Here's how to do it. 

Editor's Note:  This post is part of our 2015 partnership with Adobe Photoshop Elements. We're excited to be working with them again (remember our rustic wooden ornaments?) , because creating digital images is a part of our daily routine. 

When you're using a phone it's easy to sneak in shots in hard-to-get-to places, or grab an angle you might not see with a clunky DSLR. But it's disappointing to get home and sift through hundreds of images, just to end up with a mere handful of really good ones. Here's what I look for while on vacation to help me get the most out of my smartphone camera.

how to Get the best vacation photos with your phone

1. Know the Rule of Thirds (and when to break it)

The golden rule of photography (and most visual arts) is to remember the rule of thirds. Divide the canvas up into thirds (a grid of nine equal squares). The most interesting or important elements should end up where the gridlines cross.  

You can place your subject slightly to the left or right of the picture to create a strong composition. The rule of thirds works most of the time, but once you know a rule, it's time to experiment with breaking it, so sometimes, you should put your subject smack in the center of a photograph. 


how to Get the best vacation photos with your phone

2. Make it Bottom Heavy

Most phone photos are shot vertically (I forget to turn it horizontal too!). So, when shooting vertically, push the subject of the photo to the bottom, and make the sky or ceiling the largest part of the image. This creates strong and an interesting composition.

I recently did this at a show where the musicians were too far away for me to get good pictures of them, but their light show was jaw-dropping. This photo captured both the band and the amazing lighting in one shot.


Get the best vacation photos with your phone

3. Don't Use Your Flash

Never, never, never use your flash. Unless you absolutely need to grab a picture of you and your friends in a dark restaurant (to document some shenanigans), the LED flash dot on your phone will wash out your photographs. Instead, relish the dark, use the contrast at hand to create an amazing, compelling piece.


Get the best vacation photos with your phone

4. Look Down

I recently ate at an amazingly beautiful restaurant in Atlanta. I was tempted to take a ton of interior photos, but I didn't want to be rude to the other guests. As I was leaving I noticed the floors were really cool, so I quickly snapped a pic. Now I have a small reminder of the delicious meal I had there. Don't forget to look down and see what you're stepping on!


Get the best vacation photos with your phone

5. Find Natural Symmetry

Buildings can be boring, but two buildings that look just alike can be interesting! Symmetrical photos can easily transform a trip to the city into a work of art. Notice my framing in the photo above: the frame is split into thirds vertically, and the low camera angle gives a sense of grandeur to a scene that, frankly, isn't that amazing. Add in the leading perspective lines of the windows, and you've got an image that's fun to look at!


Get the best vacation photos with your phone

6. Seize the Golden Hour

The hour or so before a sunset, the sun drenches everything in a beautiful golden yellow hue. It's guaranteed to make any picture the best picture of the vacation. Make time to take a hike or stroll during the golden hour, and look for the long afternoon light. Above: the composition puts the walking path front and center, where you eye can follow it up into the horizon and the sunset.


how to Get the best vacation photos with your phone

7. Use Photo Effects (Tastefully)

Get a realistic, vintage picture like the one above by using Adobe Photoshop Elements' Light Leak film effect. I love how the White Leak Effect fits the photo style of this old factory through a fence.

how to Get the best vacation photos with your phone

Get the best vacation photos with your phone

8. Minimize

Get an idea of what you want the picture to be, then remove, remove, remove! I love this photo of a hill I shot in Tennessee; the emptiness of the shot is so peaceful, and lets you imagine what might be going on just outside the frame, or beyond the hill. I always try to find ways to tell a story with as little as possible in a photograph.

If you end up with something in your shot that shouldn't be there (or would look better in a different spot), Adobe Photoshop Elements has a great tool called 'Content Aware Move' that allows you to select items in your frame and move them around – the background will just magically fill in!


how to Get the best vacation photos with your phone

Overall: Edit your photos

Don't leave your photos on your phone! Taking photos on your vacation is only half the battle. Now you need to edit them!

All of the photographs from this post were edited using Adobe Photoshop Elements' Quick View Panel. From there you can take your good photos and turn them into great photos with easy photo filters and effects.

how to Get the best vacation photos with your phone

On the right side of your workspace, there are several options on how we can update this dreary photograph. I happened to visit the historic Biltmore Mansion in North Carolina on a rainy day :(.

how to Get the best vacation photos with your phone 

We'll start with Smart Fix. This will bring the photo up to a nice brightness and color. It needs some more color, so we'll bump up the saturation. Select the Color Bar just under Smart Fix.

how to Get the best vacation photos with your phone

Finally, let's boost the shadows with the lighting panel. Select Shadows and select one of the squares until the shadows increase to your liking.

how to Get the best vacation photos with your phone

Let's run it through the Crop Tool to put the focus a little more on the mansion.

how to Get the best vacation photos with your phone

Now, that's a house I could live in! Where are the mortgage papers?

how to Get the best vacation photos with your phone

There you have it, some really simple tips to help you take the best photographs on your next vacation! What are some things you like to shoot with your phone when you're abroad? Have a really great travel shot you want us to see? Share it on Instagram with the hashtag #MMadventures - we'll re-gram the ones we like best!


This post is sponsored by Adobe Photoshop Elements, but all opinions are mine alone. Thanks for supporting the brands that support ManMade. 


Make This: DIY Concrete Sphere Fountain

$
0
0

Lowes Concrete Sphere FountainConcrete is the ideal material for outdoor life. It looks great, holds up to just about anything, and blends well with wood and greenery. Here's a weekend project to make a concrete fountain that will class up any outdoor space.   Outdoor fountains are a great feature in a backyard to hide those background noises like traffic or annoying neighbors, a bit of babbling water just makes it all fade away a bit more. The great thing about this fountain is the dry base, which means water hits the rock and flows down below the surface into a small recess where the pump picks it up and pushes it back to the top. The lack of standing water curbs algae, mosquitoes, and it just looks great.Adding the base

Another big plus on this project is the fact that it's made from durable, solid concrete. Making things out of concrete makes me feel like a boss. It's so great to basically take sand and water and mold it into something lasting. Sphere fountain

So take a look at the tutorial and make one of these for an instant ambiance upgrade.

Not Your Father's Pegboard

$
0
0

created at: 07/21/2015

This is the tool wall in the workshop of Rhode Island furniture maker Hank Gilpin. It places every hand tool used in the shop  - including saws, clamps, scrapers, drill bits, chisels, planes, and measuring tools - within an arm's reach of the shops two main benches.   Hank says, "The wall's layout is simple and practical. Each of the primary tools...has a spot to sit in and can be taken out without moving anything else. Blade's stay sharp, squares stay true, and saws stay true. The slanted shelves for the planes and chisels make the tools easy to locate and grab. A strip of wood tacked along the lower edge of these shelves keeps the tools from sliding off, and 5/16-in.-sq strips between the tools keeps them spaced properly."

That's it. No fancy how-to... just some seriously droolworthy workshop inspiration for your Tuesday. See the full article from the June 1998 issue of Fine Woodworking at Issuu: Not Your Father's Pegboard


ManMade Essential Toolbox: 7 Must-Have Books Every Woodworker Should Own

$
0
0

Each week in 2015, ManMade is sharing our picks for the essential tools we think every creative guy and DIYer needs. We've selected useful, long-lasting tools to help you accomplish a variety of projects, solve problems, and live a hands-on lifestyle that allows you to interact with and make the things you use every day. 


created at: 07/21/2015 

Here's the great thing about woodworking... it really hasn't changed much over the last few decades, even centuries. Sure, there are new tools and technologies that make things come together faster, light-weight power tools that cause less fatigue, and safety improvement measures like that table saw that stops if you put your tongue on it.    But the techniques are classic, and the purpose and design of hand tools are the same as they were for our grandparent's generation, and their grandparents before. All of which means - there's some staple, go-to techniques and joints and processes that every woodworker should know, and you don't have to make sure your sources are up-to-date before you seek out the best way to cut a mortise.

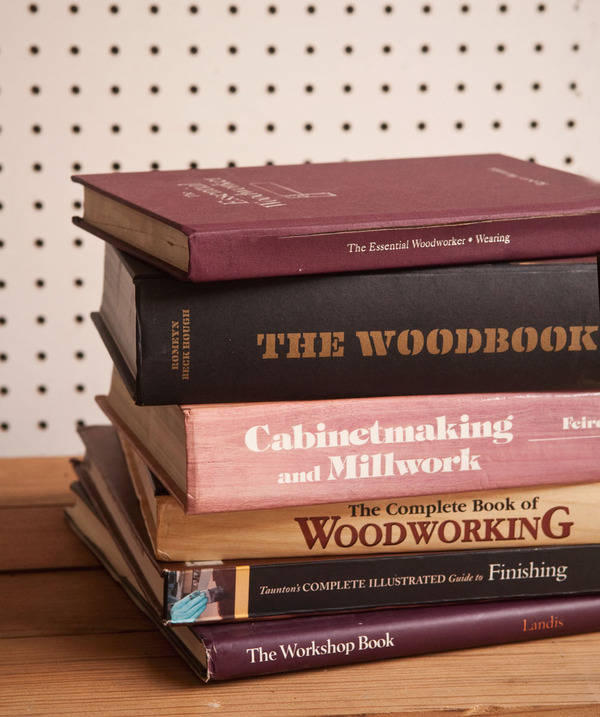
So, we suggest a basic library of classic woodworking techniques, tool use, and DIY approaches from before there even was a DIY movement...just the "doing." Here are seven of our favorites. Some are pretty new, and some many years old, but the info in them will never be outdated. 

created at: 07/21/2015

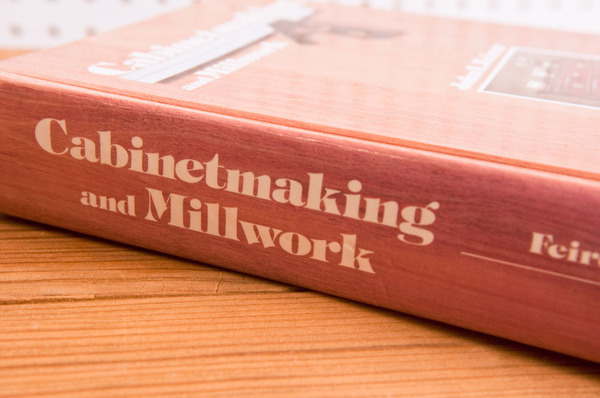
1. Cabinet Making and Millwork by John L. Feirer. I read this book cover to cover when I first got into woodworking, and its still my number one reference book when researching a project or technique. I believe it was intended as a textbook for a high school shop class, so it's laid out in great 101 style. It includes descriptions of everything from how sandpaper is made to best practices for shop math, and provides details for both hand and power tools.

created at: 07/21/2015

Some of the sections on finishing is a bit outdated, but the techniques for cutting and shaping wood are timeless. There are several different editions, but anything after 1975 will work well. And the vintage photos are kinda awesome. 

You can find this everywhere in secondhand bookshops, and online for pennies. Get it. Use it. 


created at: 07/21/2015

2. Bill Hylton's Power-Tool Joinery by Bill Hylton. From the editors of Popular Woodworking magazine, this is a go-to for setting up power tools for making joinery. Organized by joint type - rabbets, half-laps, dovetails, etc - it provides detailed instructions show you how to make each joint with every tool possible. I especially like the jigs and fixtures details that show you there's definitely more than one way to skin that cat.

Available for under $2.00 plus shipping at Amazon, or free in the Kindle lending library.


created at: 07/21/2015

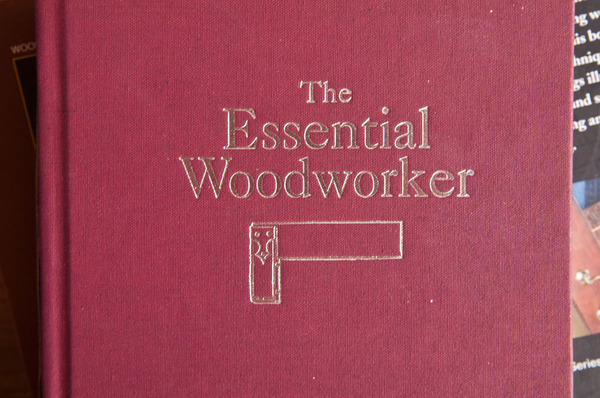
3. The Essential Woodworker by Robert Wearing. This one's the polar opposite in approach of Hylton's book above: there's not a single power tool discussed, not even a drill. Instead, it focuses on skills - working real wood that twists, expands, shrinks, goes unsquare, and is of uneven thickness.

created at: 07/21/2015This updated edition includes 500 illustrations for cutting, planing, scraping, sanding, and facing and edging. It then applies those skills to some basic furniture projects such as cabinet cases or carcasses, drawers, handles, and boxes. Super fun, super informative, super traditional. 

Available from Lost Art Press or as a used paperback from Amazon.


created at: 07/21/2015

4. Taunton's Complete Illustrated Guide To Finishing by Jeff Jewitt. This isn't the only book on the subject, but it's a great place to start. The real strength here is the bounty of color photos, which show exactly what's happening as you finalize your projects. It discusses finishing new projects, but also repairing old finishes and matching vintage pieces. It's not a "start here, end there" walk through, so you'll need to familiarize yourself with the way it's organized before beginning a project, but it is indeed a "complete illustrated guide" with encyclopedic-like thoroughness. Belongs in every library. 

It's available new everywhere


created at: 07/21/2015

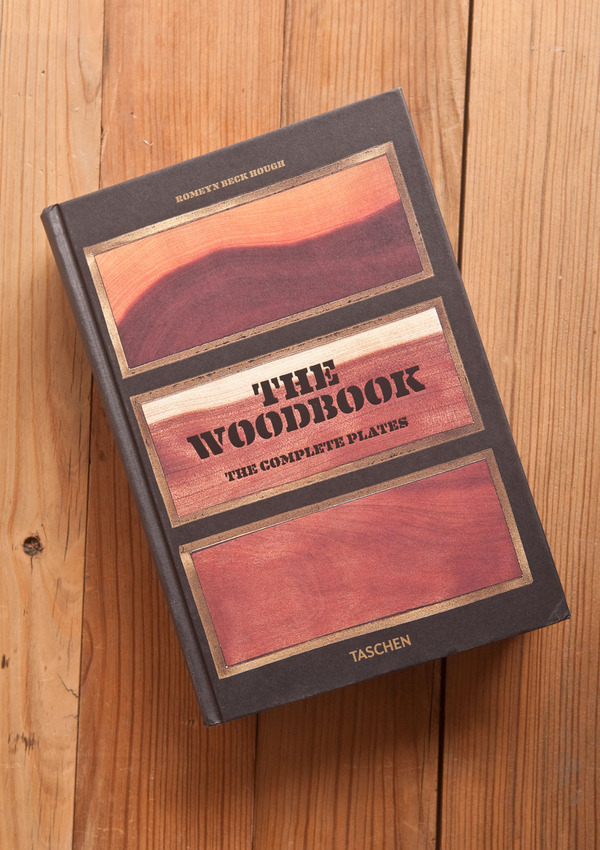
5. The Woodbook: The Complete Plates. This one contains no instructions, no techniques, and no how-to information. Rather, it's the most complete collection of American wood samples ever created. Assembled between between 1888 and 1913 by New Yorker Romeyn Beck Hough and originally published in fourteen volumes, Taschen's publication "reproduces, in painstaking facsimile, all of the specimen pages from the original volumes... For all trees, now arranged in alphabetical order, three different cross-section cuts of wood are represented (radial, horizontal, and tangential), demonstrating the particular characteristics of the grain and the wealth of colors and textures to be found among the many different wood types. Also included in this special edition are lithographs by Charles Sprague Sargent of the leaves and nuts of most trees, as well as texts describing the trees’ geographical origins and physical characteristics."

created at: 07/21/2015

 It's only $23.00. You want this book...just be sure to wipe up that drool. 


created at: 07/21/2015

 6. The Complete Book of Woodworking by Tom Carpenter. Another great reference book you'll come back to again and again. The latter half contains a bunch of projects you may or may not end up making (I bet you won't) but the details covered in the first half are as good as any overview-style book I've come across. When I want to make sure my process is up to snuff when I'm working on a ManMade post, this is the one I check first. 

Available new or used from Amazon.


created at: 07/21/2015

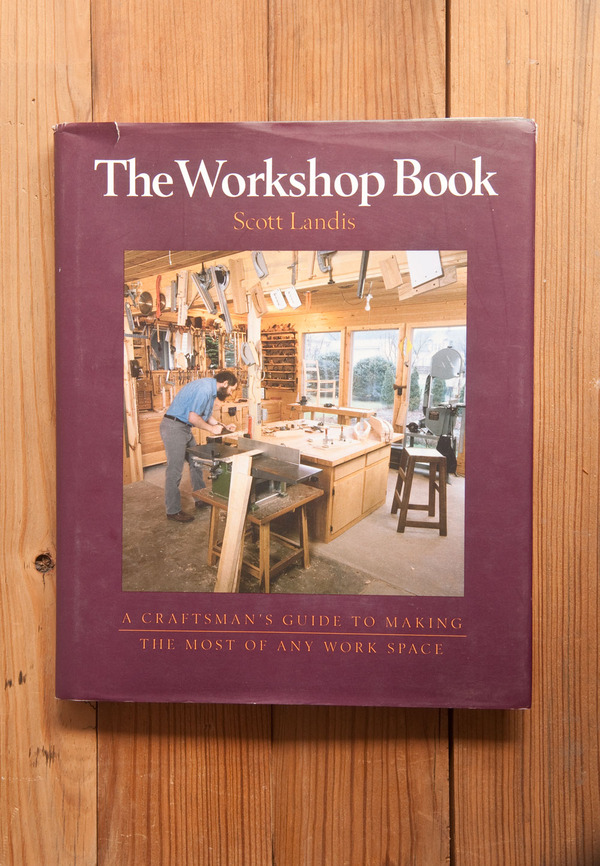
The Workshop Book: A Craftsman's Guide to Making the Most of Any Work Space by Scott Landis. This is not a new book - it was written in 1987. And the photographs reflect that. But what it lacks in that flip-through-the-pictures-and-get-major-workspace-envy, it makes up for in the actual text. It provides, mostly, creative solutions for a variety of different tasks from real professionals working in limited space. If you're interested in upgrading your space or building your dream shop from scratch, this really is a good place to start. It doesn't have a ton of up-to-date and practical advice; its more of a reflection on the nature of workshops in all their variety. And that never goes out of style. 

Available new and used at Amazon.


Oh, and a few others I like that aren't quite essential, but super nice to have. 

created at: 07/21/2015

Honorable mention #1: The Workbench Design Book by Christopher Schwarz About one thing and one thing only, but it's the best on the subject I've seen. Don't build a new bench without it. 

created at: 07/21/2015

Honorable mention #2: Understanding Wood Finishing by Bob FlexnerA very, very fine practical and comprehensive guide to prepping and applying finishes. This one helps you make sense of what you read on the manufacturer's can, and figure out what you're really getting yourself into. 


What are your favorite woodworking references? Post 'em in the comments below. 


Take a Taxi Through Vintage New York City

$
0
0

created at: 07/21/2015If you're interested in the actual design, style, and swagger of a forgotten era, step into this time-capsule and see life as it really was in 1970's New York City. As someone who was once able to claim the moniker of a New Yorker, I found this footage engaging but I think any stranger to the land will as well. I feel like as modern men, most of our experience of the styles of the past are filtered through cinematic recreations, which is why I found this silent footage so striking. Just seeing the streets, the lights, and the people (especially void of sound) casts the whole nostalgic experience a different light. 

Watch this widescreen POV shot of a taxi ride through Times Square down 7th Avenue and Broadway and experience history in a whole new way.   

Blow My Mindsday: July 22, 2015

$
0
0

Each Wednesday, I post some of my favorite can't-miss links, images, and otherwise mindblowing goodies from across the web.

created at: 07/22/2015
Perhaps you've seen this go by this week, but I'm pretty fascinated with this theory on why time seems to go by so much quicker as you get older. It takes a little while to get through, but I'm on board with the idea that we perceive time relative to our absolute experience of it. And yes, when you're five, waiting 24 days for Christmas feels the same as a year in your 50s... at least, I bet. I'll let you know when I get there.  Maximilian Kiener: Why Time Flies


Talk about winner winner...make this chicken tinga for dinner this week. 


So...apparently, there are four kinds of introverts. Take the quiz to find out which one you are...or if you are at all. (Though, if you were, you'd probably know that already.)


The article title says it all: "Follow This Simple Principle, and You May Never Eat a Mediocre Meal Again" Go low, go high...and stay outta the inbetween. 


Dope.And I don't even own a video game console... 


How to Sell Your Handmade Stuff at a Craft Fair

$
0
0

created at: 07/22/2015

If you’re like me your DIY obsession can get so out of hand you have to start selling your stuff to fund more stuff! One of the ways my wife and I do it is setting up a booth at local festivals, barn sales and craft fairs. With a little bit of business savvy and DIY ingenuity, you too can start turning a profit on your passions.

Consider Your Investment
As you’re doing research on what fair or festival to do, count the cost of things like booth fees, ticket costs (if any), travel and food. After adding up all those costs make sure you have or make enough product to exceed those costs. If you all of those factors turn out to be a worthy investment for you then you’re ready to apply for a booth!

Start Small

If you've never done a booth before, consider doing smaller, cheaper events. I got my start in local school gyms and church parking lots. After a couple of small events you could start applying for larger, more popular shows. As you grow, start to invest in things like a pop-up tent (about $125), folding tables and other booth props and displays. The better your booth looks the more likely the juries of larger shows will approve your applications. 

Assess The Event
Before you pay any money for a booth fee, make sure you know the audience of the event, last year’s attendance, what kind of marketing the organizers are generating, how many days the market will run and the season when the market is held (Spring, Fall and Christmas usually are the best times). Factors like these will help you gauge whether or not the fair will be worth your time. You definitely don’t want to be a welder selling iron at the inaugural quilting show in the middle of nowhere.

Colorful flowers in a vase and box

Decorate Your Space
Depending on what it is you like to sell, you’ll definitely want to add some interest and appeal to your booth to entice buyers to check out your work. Adding common items around the things you sell help the buyer visualize your product in their home. I sell a lot of woodworking so I stack my plates and boxes on top of small crates and vintage linens to offset the brown of the wood with a nice creamy white. In the above picture, I filled some of my vases with flowers, set it on a handmade tray on top of an industrial chair flanked with old books and a tea cup. 

Product price tag on a wood board

Over-communicate Your Products
Asking “how much is this?” Isn’t a favorite phrase for most shoppers. When they can see the price easily they are more likely to make a purchase. Upgrade your price tags from a sticker to a hand written paper tag or small chalkboards next to large item for a really nice handmade touch. It’s also a good idea to make some signs that have your business name and craft. If you make wood bowls, hang a chalkboard sign that says “handmade wood bowls” This will make it easier for shoppers to see what you have to sell at a distance.

Wooden box with matches

Stock Up On The Smalls

If a lot of your DIY inventory is expensive furniture or home decor, consider spending some time making some sub $20 products. If someone comes to your booth and sees that everything is over $100 but they really want to buy something from you, they’re going to reach for some of the small things you have to offer instead. For example, i mostly make furniture and carved plates but most customers don’t have 75-300 to spend on me. So I started making simple flower vases and matchstick boxes to sell alongside my finer things.

Be Friendly But Not Too Friendly

Always be checking the temperature of the room when your visitors come into your booth. Give them a simple greeting but don’t press for too much small talk unless you can sense that they are genuinely curious of your wares. I’ve scared away too many people by being too friendly. Just think about how you’d want to be treated as you walk around your average retail store and do the same with your booth.

hand holding a phone

Advertise

Tell everyone about your booth! Post it on social media, hand out event post cards and spread word of mouth about your new venture. In the beginning, your best customers can and will be your friends and family. They’ll definitely want to come see you and what you’ve been doing in your garage for months. Post pictures of your booth as the event progresses. That way, your post on Friday will inspire someone to come see you on Saturday.

bonus tip: If you have a business page on Facebook, spend a few dollars to boost your post to more of your followers. I’ve had some decent success spending $10-15 on one.

Finish With a Business Card

Finally, if a buyer is really interested in your work but isn’t ready to buy, have a business card ready to hand them. Sometimes, I make more sales after a fair because a buyer has a custom request or is interested in something you might sell online and don’t have it at your booth. You can even sweeten the deal and offer a discount on a later purchase.

Above all, remember that you’re doing this to have fun! Celebrate when you have a fantastic weekend of sales and don’t get too discouraged if you have a weekend that doesn’t do as well as you wanted. Keep trying and tweaking until you find the right formula for crafty success!


Skill Builder: Getting Started with Google SketchUp for Woodworkers and Makers

$
0
0

created at: 07/23/2015

SketchUp is free, robust, and really helps to bring your projects to life. I stumbled through the basics for way too long, so here are a few steps to get you modeling faster.   The first time I downloaded SketchUp, I was completely attracted by the amazing promises of fast and easy models, perfectly measured plans, and finally a way to put my shop plans on paper without using a pencil and straightedge.  Of course this isn't how my first experience went.  Opening the program is a disorienting process and at the time there were very few tutorials to figure it all out. After a frustrating wasted hour, I logged out and promised myself I would learn what to do the next time I had a chance.

Almost a year later, I had played with the program a few times and had come up with some basic shapes, but the process was still frustrating and very slow. Then I stumbled onto this video by Jay Bates and it all changed:

Now I know it's hard to follow his movements, but he does an incredible job of saying what he's doing and that makes all the difference. Here are the highlights to keep in mind:

1. Toolbars - You'll notice his toolbar looks much different than the default panel. The tools are organized differently and there are definitely more options. To get this beefy toolbar, right click on the top toolbar and select "Large Tool Set". Now you've got the tools.

2. Groups - You'll notice how each component of the model is turned into a group by hitting: Space - triple click the component - hit G (for group). This makes the piece a single item that can be colored or copied easily.

3. Dimensions - the measurements can be entered quickly by just entering number, number. I spent way too much time trying to drag each piece to the exact measurements and it was a constant source of frustration!

4. Units - On that note, go to: Window-Model Info-Units to change the units of your model from 1/64" to a more manageable 1/4". This adjustment means that the pieces snap to 1/4" increments instead of catching every 1/64". Night and day adjustment right there.

Now go back and make that cabinet step-by-step, pausing or reversing the video as many times as it takes to get it right. This quick exercise will result in a huge skill boost that will bring your modeling skills up a few major steps.

If you want to begin learning SketchUp from the very basics, take a look at this series from Matthias Wendel:

Next time, we'll take a look at setting up scenes, exploding parts views, and laying out cut sheets so you can bring those projects to life.

Viewing all 2425 articles
Browse latest View live


Latest Images