Quantcast
Channel: Man Made DIY Recent Posts
Viewing all 2425 articles
Browse latest View live

Try This Simple Trick Anytime You're Laying Out Cuts or Marks on Your Woodworking Projects

$
0
0

created at: 11/12/2015

Over the weekend, I was working in the garage when I found myself in a familiar position. I needed to transfer a pencil line from one face of a piece of stock to the one around its corner. Sounds simple enough to do with a square, but I've had this problem before. Sighting the line isn't accurate enough, and a traditional try or combination square isn't of much help here. Here's why:    

created at: 11/12/2015

Layout and measuring squares all have two faces that are set 90° to the blade. This is great because it allows you to flip the tool and butt it up against any edge, and it allows you to use the inside corner of the tool to check for square. But it means that the square doesn't have a single, straight line that can turn a corner. The fence of the square obscures the mark you need to transfer the line.

The solution? 

created at: 11/12/2015

Check your combination square case. In it, you'll find the center finder attachment, which I'll admit to having used exactly 0 times since I bought this square seven years ago. (I have a special Robert Larson center finder plate I use all the time. It is amazing and only costs $7.00.) But, unattached to the rule, the center finder attachment is the perfect tool for transferring marks from face to face. A perfectly square inside edge, and two co-planer outside edges to register your mark. 


created at: 11/12/2015

So, scribe your line, place the center finder against it, and boom - a fence to guide your pencil exactly 90° around the corner. Done and done. 


How To: A Guaranteed Way to Deep Clean Your Water Bottle

$
0
0

created at: 07/14/2014

Anyone who regularly uses the same water bottles several times a week - runners, cyclists, hikers, athletes, or any general person-on-the-go that likes to stay hydrated - can attest: they can get nasty. Even if nothing but water and ice ever go in, the crud can still build up, and non-H2O fluids like sports drink or add-ins make the taste, odor, and junk even worse. 

The common-sense solution here is to use a bottle brush. Which will work, if you do it after every use and start with a perfectly clean bottle, and then rinse and dry thoroughly every time. But if the gunk has built up, or your hydration system uses any squeeze tops, bladders, tube, bite valves, etc, there's more than just the bottle cavity to clean. 

What Is That Stuff?
Of course, you're never actually drinking just water. Tap water contains all sorts of minerals, disinfecting agents, and there's thousands of (safe) bacteria living in your bottle and under the mouthpiece. Plus, every time you drink, you're adding stuff back into the bottle from your mouth and lips. The nutrients and moisture mix with spores from the air, and, basically, produce mold.

There are supposed hacks that will fix this, like using Alka Seltzer or denture tablets to clean them, but I've never had much success with those, particularly with hydration bladders with long tubes.  

So, if you've got a BPA-free system that you like and you really want to get those heavy-use bottles clean, this'll do it for just a couple of cents, with no need to replace.  

created at: 07/14/2014

1. First, disassemble your bottle or water system into as many parts as will break down. Take off any lids, valves, tube, etc. Use a bowl for smaller parts, but don't add them in just yet. 

Now, add 1 teaspoon baking soda and 1/2 teaspoon chlorine bleach to each bottle or bowl. Fill with warm water and stir to combine. Place any small parts in the bowl and use a plate to weigh everything down to completely submerge. Allow to sit four 4-6 hours, or overnight. 


created at: 07/14/2014

2. After resting, pour out a little solution and see if it's broken down the build-up. If not, wait a while longer until the black stuff will move with some encouragement. Now, grab a bottle brush or rag on the end of a chopstick and give a little friction to remove any crud. Be sure to check the top, especially around the lid threads. 


created at: 07/14/2014

3. To clean small or tight parts, use a cotton swab or a toothpick/bamboo skewer to remove gunk. Be extra careful using any sharp object, so you don't puncture any flexible seals or gaskets.

Now, rinse everything thoroughly and completely with soap and clean water. Then do it again. Make sure no bleach residue remains. You can run some bottles through the dishwasher, but if you're not sure, don't do it. Rinse a bunch, then allow everything to completely dry. 


created at: 07/14/2014

4. Lastly, if there's any musty smell or odor remaining (other than chlorine; if that's the case, wash and rinse again), you can swish around some anti-septic mouthwash to remove the funky odor or taste. 

From now on, rinse and dry after each use, and you can slow the build-up. But, really, anything made from polyethylene that sees heavy use will require a deep cleaning every year or so. And if you follow the directions, and are sure to rinse carefully, this way is safe and very effective. 

If you found this post helpful, here's an image you can share on Pinterest to help spread the word (thanks!):

 How to deep clean your water bottle, guaranteed.

This ManMade post was originally published on July 14th, 2014. We're sharing again because it's summer!

Make This: How To DIY Your Own Charcoal

$
0
0

created at: 08/01/2016

Charcoal. It's signature smokey flavor makes summer smell like...well, summer. But have you ever wondered how its made? Guess what. It's pretty straightforward, and with just a few ingredients you can make your own. Take a look.If you talk to the pros, cooking with charcoal is an essential part of meat done right. Here's a great video on how to make your own at home you can fully DIY your grill night or barbecue sesh. 

Have any other tips to up that grilling game? We'd love to hear how you cook!

Pesto 101: The Complete Guide to Making Summer's Perfect Condiment

$
0
0

A guide to making the perfect pesto

Pesto is a mighty Mediterranean-style sauce and condiment that’s super versatile and easy to make. It's amazing all warm weather season long, when the fresh ingredients are bountiful, and tastes fantastic on anything from the grill, on pizza or fresh pasta, or, as many will confess,  a spoon.

Pesto has been around for a while, pretty much since ancient Rome, although back then they likely used herbs other than basil. The word comes from the same word as "[mortar and] pestle," and references that fact that it's a ground or pounded paste. Nowadays, you can certainly purchase pesto at any grocery store, but like most things, the flavors pale in comparison to a homemade version. 


THE BASICS

There are a few basic ingredients required to make a classic basil pesto:

A guide to making the perfect pesto

Traditional Basil Pesto Ingredients:

  • 2 bunches of basil (about 4 cups)
  • 2 cloves of garlic
  • 1/2 cup of freshly grated parmesan cheese
  • 1/4 cup of pine nuts
  • Olive oil
  • Salt and pepper


THE METHOD

  1. Wash the herbs.Pat dry.
  2. In your food processor, pulse the greens with the grated cheese, nuts and garlic. It's better if you make it in batches.
  3. Drizzle olive oil as you go until you form a chunky paste (don't puree it!)
  4. Serve and enjoy

In short: you need something as your base (in this case the herbs), some nuts for texture, and seasonings. Easy!

Now the classic version is delicious, but is heavy on basil, pine nuts and parmesan cheese, both of which are quite pricey in your local supermarket. You can (and should!) grow your own herbs, but it's an investment, for sure. (Though worth it!) Thankfully, this classic recipe has lots of options and now there are plenty varieties with different flavors, textures, and price-points. 


A guide to making the perfect pesto


THE RECIPES

Here are a few variations using different ingredients as a base. As you can see, as long as you stick to a base, a nut, and a binder (like cheese or oil), you can be as creative as you want. Have fresh mint on hand? Go for it? Pumpkin seeds? Sure. Just make some.

Spinach Pesto

This is one of my favorites; it's more subtle than the original one. For this recipe you'll need:

  • 5oz (a medium pre-washed bag) of spinach
  • Half a bunch of basil
  • A few sprigs of parsley
  • 1/4 of a cup of toasted walnuts (way more affordable than pine nuts)
  • 1/2 cup of freshly grated parmersan cheese
  • Olive oil
  • Salt and pepper

Follow the same steps mentioned above and you're good to go. You can even add kale and collard greens to make it extra green and nutritious!


Sun Dried Tomato Pesto

Ingredients needed:

  • 5 oz of sun-dried tomatoes
  • Half a bunch of basil
  • 1 tablespoon of tomato paste (adds richness)
  • 1/4 cup of roasted walnuts or pine nuts
  • 1/4 of freshly grated grana padano (similar to parmersan, but more buttery)
  • Pinch of chili flakes (optional)
  • Salt and pepper

This recipe is awesome when you pair it with a hearty cold pasta salad and a glass of red wine. Yum! 


Dairy Free Pesto

This is a healthy alternative that contains no cheese, but still has lots of flavour. You'll need:

  • 5 oz of base of your choice (greens, tomatoes, basil, etc)
  • 1/4 cup of walnuts or pine nuts
  • 1/4 cup of nutritional yeast (this is your cheese!)
  • Hemp or flax seed oil
  • Salt and pepper

The nutritional yeast will add a boost to your pesto as it is rich in vitamin B12. This recipe is totally worthy of Popeye's approval!

The perfect pesto

Pesto Tips:

  • Pesto tends to turn brown if left at room temperature, for this reason, you should use it right away.
  • When storing it in the fridge, cover with plastic wrap and drizzle a bit of olive oil on the top to prevent it from browning.
  • Want to keep it for longer? Place the pesto in ice trays and freeze it. Once it's frozen, pop the pesto cubes out and store them in a plastic bag in the freezer. Whenever you need a quick meal, place a few cubes of pesto in a pan with pasta and you're good to go!

So, what's your favorite kind of pesto?


 This ManMade post was originally published on May 29, 2013. We're sharing it again because it's summer!

How to: Charge Your Phone with a 9-Volt Battery

$
0
0

This is real MacGyver territory. I've been stuck in a handful of urban survival situations and the inevitably dying phone battery is by far one of the more pressing issues. Most important will of course be immediate safety, shelter, water and food, etc., but it's likely that the use of a phone will help you secure those things. And when the power is knocked out it can be a real challenge.   

So here you are: How to Charge Your Phone with a 9-Volt Battery. All you need is a battery, a key, a car charger, and preferably some duct tape and you'll be all set. Check out the video below, try it out for yourself and let us know your results!

Looking For Something Different? Make Some Leather Drawer and Cabinet Pulls

$
0
0

Leather DIYOne of the most distinctive features on a piece of furniture are the drawer pulls. Try something different with a leather pull to really make an impression.One of the very last items during a project are the pulls. They are installed as a centerpiece on every piece of furniture so it's important to finish off with something interesting. Here are a few great ideas for DIY leather pulls to make it really pop.

Leather Pull1. Simple DIY Leather Pull

Leather Pull2. Large Leather Pull

Drawer Pull DIY3. Simpler DIY Leather Pull

Drawer Pull4. Flat DIY Leather Pull

Leather Pull5. Painted Leather Pulls DIY

Do you have any great projects that you've finished off with some interesting pulls? What did you use to finish it off right?

The ManMade Guide To Better Product and Tabletop Photography

$
0
0

There are sorts of reasons a guy would wanna take great photos at home: an artist or crafter, online shop owner, Instagram power user, or just an everyday documenter extraordinaire.

Manmade Guide to Better Product Photography

 No matter your focus, these easy and affordable tips will help you dramatically improve your photography skills.

They say a picture is worth a thousand words, so when the photos are lacking, so are the words, and likes, and comments, and overall quality. With sites like Pinterest, Instagram, and Facebook driving massive traffic to blogs and websites (primarily through images), you gotta stay on top of your game and get your slice of the online cake!

You don't need a super expensive set up to be able to capture great photos. All you is good lighting and a few tricks to get THE shot. Grab your camera and follow along this Manmade Guide to Better Product Photography. 

Manmade Guide to Better Product Photography

The Tools

  1. Product and props: these are the stars of the show. Make sure to have a couple extra products in case one of them gets dirty (.e.g food splattering). Select just a few props that will compliment your product. Keep it minimal and simple so the focus remains in the product.
  2. Light reflector (optional): you can buy one on Amazon or at any photography shop. You can also look for second hand reflectors on sites like Kijiji or Craigslist. Choose one that has white and a combination of either silver or gold (silver reflects "cooler" light, gold is warmer and great for portraits, white is neutral and works for everything). You'll see how to use it in a sec.
  3. White foamcore board or white cardstock paper: these will also work as reflectors and are super affordable, make sure the colour is pure white. Any other shades (cream, pastel, etc) will cast unwanted colours on your photo.
  4. Backdrop/background: you can get a piece of fabric or even some paper some the craft store. Craft paper works great, so do old chalkboards. This will be your products' "canvas" so make sure it fits the design and theme.

Manmade Guide to Better Product Photography

The Setup

  1. Use natural light: you can do wonders with natural light and there's absolutely no need to spend thousands of dollars in lighting equipment (unless you become and pro and totally ace at it..and have the budget). To get the most out of the daylight, place your setup by a sunny window. Best times are usually in the morning when the light is nice and soft or later in the evening (though it might cast a yellow-ish hue from the sunset). If it's way too bright, tape a white translucent shower curtain (yep!) to your window to act as a diffuser... or any silky white fabric will do, too. Again, go for white white and nothing tinted.
  2. Bounce some light: to get rid of harsh shadows place your white foam board or paper on the opposite side of your light source. Move it around a little to see where the light reflects. You can use a couple wooden blocks or even some books to keep it from tilting and falling.

TIP: make sure all other light sources in your house are turned OFF. The more lighting sources you mix the harder will be to get a nice white balance. Also, avoid wearing crazy bright colours as this will also could bounce onto your product.

Sure, you can fix these things when you edit your photo, but the less you have to edit, the better!

If one white foam board is not enough and you still have some harsh shadows OR you want to add some light on a specific spot, then you can use the reflector we mentioned above (or a smaller piece of white paper). See example below:

Manmade Guide to Better Product Photography

You can hold the reflector using a clamp or ask a friend to hold it! (this one was taped to a lamp that has a movable arm).

In the example above you can see with the lines and dots where the light is bouncing. This is basically the handiest tip: just - as the saying goes - chase the light! 99% of the time when you're like "oh this camera sucks!" It's probably your lighting. You can even do the same setup and take photos with your phone's camera and we bet they'll look great.

Note how we use a piece of faux wood to frame the candle, this is when props really come in handy to make your product pop from its background.

Now, here's a another example of how bounce cards and reflectors affect your image:

ManMade Guide to Better Product Photography

The image on the LEFT was taken with the reflector and a bounce card and has softer shadows, also the colours look a bit more crisp. On the RIGHT there were no bounce cards and you can see more shadows and the candle isn't as nicely lit.

Mind you, in some situations harsher lighting might look cool (e.g. a tutorials that use rough materials). We suggest you master proper lighting techniques before venturing into crazy creative shoots, this way if anything looks wrong, you'll know how to fix it.

And that's it! With these super easy steps and setup you'll be able to take great photos. Got any extra tips and tricks of your own? Let us know in the comments below. 


Back to Basics: How to Make a Perfect Bloody Mary

$
0
0

These days, the Bloody Mary game is all about oneupsmanship. The goal in bars and brunch spots has become to adds so savory complements to the drink that they turn it into both a snack and a cocktail: spears and spears of pickled veg, whole shrimp, fried bacon, charcuterie, chicken wings, antipasti, mini cheeseburgers, firecrackers, tiny pizzas, everything.

created at: 10/31/2013

Which is fine, and fun, but takes away from the essence of the drink. Sure, it's a canvas for complementary flavors, but that canvas isn't blank in the first place...it's actually a perfectly balanced cocktail.

So, here are the basics on the Bloody Mary. If you're not one to drink vodka, well, then it also makes a darn fine amped-up tomato juice.

The trick to create the perfect balance follows the rule of another of our essential skills: the highball. In that Skillset post, we determined that the magic ratio was 4:1.5 - four ounces of mixer, one and a half of spirits. 

The Bloody Mary uses that formula, just with a bunch of other seasonings and modifiers thrown in. Also, like the highball, a Bloody Mary doesn't need to be shaken or stirred, but built in the glass in which its served. (I guess if you're really worried about presentation, you could stir it in a mixing glass and strain, but seems unnecessary if you're making them at home).


created at: 10/31/2013

After that, it's all about the "stuff," the things that make it a Bloody Mary, not just a vodka and tomato juice. Here, there are three can't-mess-withs: Worcestershire, something spicy, and a celery component, usually celery salt. Add a little black pepper and some fresh citrus for brightness, and you're done.

A Classic Bloody Mary:

  • 1 1/2 ounces of vodka
  • 3 dashes Worcestershire sauce
  • 4 dashes of liquid-y hot sauce (like Tabasco) -or- a generous squirt of a thicker sauce (such as Cholula or sriracha)
  • 1/4 ounce fresh lemon juice (a squeeze or two)
  • A pinch (1/8 teaspoon) of celery salt  -or- celery seed and kosher salt
  • 10 grinds black pepper
  • 4 ounces tomato juice
  • Garnish: pickled peppers, celery stalk, etc 

Add the vodka and rest of the ingredients to a tall or pint glass. Swirl to combine, using a straw to integrate ingredients. Fill with ice, and garnish as you please.

Okay, now: those are the basics. Vodka, tomato, hot sauce, lemon, celery, Worcestershire - that's the recipe to remember, and anyone who's willing to drink a Bloody Mary will drink that.

From there, you can start to play. Try adding a bit of prepared horseradish, some spicy mustard, play around with the hot sauce, sub the tomato for V8 or Clamato, try gin instead of vodka, lime instead of lemon, and the like.

How do you like your Bloody Marys? Share your thoughts in the comments below. 


How to: Make a Rustic Reclaimed Wood Charging Block

$
0
0

slotting for a charging station
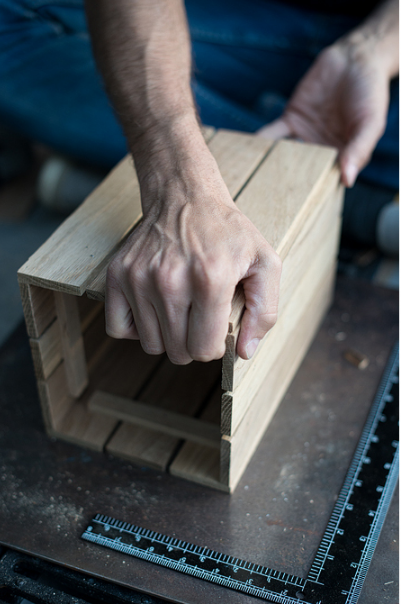
It's a whole lot easier to remember to charge that phone when it's secured in a spiffy looking block. We made a simple cube charging station out of reclaimed pallet wood.A few weeks ago, I built a large state sign for my wall from a busted up pallet.  I kept a few of the spacing blocks thinking about what could be made from this weathered wood. So, this weekend, I cleaned off my nightstand to simplify my daily landing space, and this project just seemed to be just the right fit.

Testing the fit of the cell phone charging blockHere's a few steps on what I did to make a custom charging block from reclaimed wood.


Rough wood block1. First, find a suitable block. Since it's going to be on the nightstand, I didn't want something too large, but a few of the bigger pieces may be made into tablet stands in the near future. One of the things I liked about the small block I picked was the light "China Treated" stamp that I traced and rubbed down with lubricant oil to make stand out a bit more. After picking the piece, give it a good sanding to smooth off the rough edges.


Drilling a hole through reclaimed wood block

2. I used a small Forsner bit to drill the hole through the block. This was a pain due to the thickness, so I had to go slow and evacuate the sawdust out often for a nice clean hole. I drilled the hole to give the bottom of the slot some play as I will be sliding the phone in and out often so I don't want it too tight. *My phone has a side charging port, if yours comes in the bottom I would recommend the same drilling through, then a hole down to the bottom and a small slot from the back to the hole in the bottom for the cord.


Cutting a slot for the phone

3. Set the table saw to cut a slot to the drilled hole. The angle doesn't really matter, but mine was at about 20 degrees or so. I cut one pass, then moved the fence back a bit for the second pass which left a clean slot the length of the block.


Finishing a Wood Block

4. Lastly, sand it up and finish as you please. I actually took a few of the rusted nails from the pallet and pounded them back into the block at this point for a bit of extra character. One coat of wipe-on poly finish and it was a complete project, ready for daily use.


Finished Charging Station

Why We Meditate (and We Think You Should, Too)

$
0
0

Why we meditate

This year Chris and I both started meditating, independently of each other. We got into the practice for different reasons, and with different approaches, but the thing we definitely both agree on is this: meditation is great. Since we're both newbie meditators who are getting a lot out of it, we thought we'd share a little about our experiences in hopes of encouraging a few of you out there to give it a try.

How did you start?

Bruno: I actually have tried meditation a few times over the last ten years or so, but never stuck with it for more than a couple of days. A few years back I picked up a copy of Mindfulness in Plain English (which I highly recommend), so I had a bit of a foundation to go on. This year for no reason in particular I made it one of my New Year's resolutions to meditate every workday morning at 6am.

Chris:  2016 has been a bit of a sabbatical year for me, so as part of my rest and continuing education plan, I signed up for a 10-day silent Vipassana meditation retreat in the spring. They don't cost any money and the retreat center is only two hours from my house, I was fortunate enough to have the time and flexibility to be able to commit to something like that. I'm always interested in new experiences, and so I figured there was no reason not to attend and learn some serious skills. 


Why do you do it?

Bruno: To a certain extent, I do it because I promised myself I would (New Year's resolution, see above). I've never been good at keeping routines or being really disciplined, so for some reason I don't understand, this year felt like the right time to tackle that weakness in my personality. 

Now that I've been at it for a while, I also do it because it feels good. Not euphoric, or mind-altering, but just calming and consistent. I've gotten to the point where the practice of meditating actually encourages me to get out of bed early, even on mornings when I'm tired and just want to hit the snooze button.

Chris: I signed up for the 10-day retreat because my wife has been practicing Vipassana meditation for several years, and started in the middle of our relationship. I was able to watch her become a different person, in both her other relationships and communities, as well as a spouse and someone who shares a life and home with me. So, I figured anything that affected someone I know so well so intensely, I wanted to know more.

Now, I try to practice daily because I want to start my day with something I'm proud of, something that's good for me. (Read: not checking email the moment I wake up.) I do feel different when I've meditated...my days go differently. Little emergencies and hiccups in my daily plans don't irritate me as much. I'm a better problem solver. I feel more organized, and so I behave more organized. Things that might have stressed me out before don't seem to get to me in the same way. 
 
morning

What's your routine?

Bruno: I set an alarm for 5:40 every workday morning. I started the year setting it at 6:00am, but have slowly been pushing it up to give myself a little more time. I keep a big glass of water by my bed, and I drink that as soon as my feet hit the floor.

(For people who have trouble getting up early, here's a trick: start setting your alarm clock five minutes earlier. If you normally get up around 8:00, set it for 7:55. What difference does five minutes make? If you can get up at 8:00, you can get up at 7:55. Do that, and then once you've gotten up at that time a few mornings, set it five, or ten minutes earlier than that. This gradual progression adds up quickly, and before long you'll be getting up at the crack of dawn.)

Then I go downstairs to the living room and do about 15 minutes of warm ups. That includes some simple stretches (if you've ever done a yoga class, think of some of those poses) to get my back and legs loosened up and my breath and heart rate up. There are two poses I always end with:

- I do a one-minute stretch pose, where you lie on your back, lifting your feet and head/shoulders off the ground, straightening your body out like a bow. Holding it for one minute is really hard for me, no matter how many times I've practiced it, so it's a good challenge.

- A pose called 'Ego Eradicator', which is a weird, nonsensical name, but then, I don't name these things. You sit cross-legged and hold both arms up in the air at about 45 degrees away from your body. Then you do a rapid, intense breath, using your stomach muscles to briskly force air out of your lungs as hard as you can. Two minutes will pick your heart rate up and clear your head.

Chris: We have an office in our basement that has a little alcove that's our dedicated meditation area. I go down there the second I wake up, and leave my night time earplugs in. I set a timer using the i-Qi clock meditation app, which has some nice bell and singing bowl sounds that welcome me into the space. I find that getting started while I'm still groggy and waking up through the meditation process allows me to keep the clearest head and avoid distraction. 

I shoot to do forty-five minutes during most work days, and sometimes thirty minutes on Fridays and weekends. I wish I had more time, but I also have some other interests that meet similar goals. Long, multihour bike rides, woodworking, personal disciplines, and other meditative, mind-quieting activities that complement this work. 

How do you meditate?

Bruno: I usually set a timer (anywhere from 10-45 minutes depending on how I'm feeling) and just sit. I find a comfortable, upright, seated position, close my eyes and sit still. I breath easily, not forcing any particular type of breath. Just observing my breath and seeing what it's doing. Watching it settle down from something fast and irregular into something very shallow and gentle and calm. When my mind wanders, I try to acknowledge those thoughts without judgement, and let them go.

Recently I've started mixing in guided meditations (tons are free online). Guided meditations are great because they remove the pressure having to figure out what you should be doing and thinking about.

Chris: I learned some specific processes at my Vipassana retreat that I'm still able to practice at home. They mostly involve sensation awareness and sweeps throughout the body, which you notice, and then avoid reacting too. Some days, I can't quite get there, and so I just practice standard anapana meditation, which is about awareness of breath as a means to training the mind to be more tuned into physical sensations. 

created at: 08/03/2016

What does it feel like?

Bruno: It's not easy. Many mornings I'm bad at it, and get off on random trains of thought. This is what meditators call Monkey Mind, and it's a hard thing to control. For me, I know I'm doing something right when my body, especially my hands, which I rest on my knees, begin to feel light.

I also have learned to know what awareness feels like inside my head. To me it's a feeling of focused energy right in front and above my eyes. It sort of feels like all the 'energy' in the room has accumulated in that spot, or gravitated toward that area. I'll often also see a bright spot there, which I'm sure is just a result of me half-crossing my eyes and turning them upwards, but it still feels right. 

Chris: When I get dialed in, it feels very physical, very active. The goal is to be mindfull, not mindless. A common misconception about meditation is that it's like zoning out, losing yourself. It's not. The act of being present is hard work; it almost feels like running a race or doing one big long pull-up or push-up. You're holding a position in your body, and of awareness, and that takes work. The good thing is that when you do that work, you focus all your attention on the act, and like after a long workout, it becomes both restful and energizing. 

It still hurts me, physically. Not tortuous, or an exercise in pain tolerance, but I have some old injuries that get triggered from sitting on the hard ground, no matter how many pillows or supports I use. In the style I learned, the goal is to not move, at all -  to not open your eyes, legs, or hands - for the full session. That's still somewhat painful for me. The goal is, of course, not to react to these sensations (or pleasant ones). If you can do that on the micro scale of meditation practice, then you're training yourself not to react negatively to things in your real life. 

What should I read/listen to to get started?

Bruno: I think Mindfulness in Plain English is a really good place to start. If you need more structure, try taking a yoga class. Lots of yoga centers will let you try one for free, and most yoga classes end with some sort of meditation practice. 

Some guided meditation links here?

Chris: I agree with Bruno that some free yoga classes are a great low-risk way to begin. I'd also recommend the documentary The Dhamma Brothers, which isn't a how-to, but a look at intensive meditation retreats in the U.S. prison system. You start to understand the why, and then you can bring on the "how".

More than anything, I think not trying to DIY this one is the way to go. Go to a class. Sign up for a workshop. Go to a local retreat center (every city has several). I'm a super introvert, and most of my interests are self-taught. And it's because of that I think learning from a real teacher is the best way to go. You can't force it, and when you have guidance, you can shut down your autonomy enough to actually do the work, instead of just thinking to yourself... "Am I doing this right?"

Should I try it (rhetorical question)?

Bruno: Yes! I mean, listen, although meditation has been saddled with a hippie-dippy, far-out, squishy-self-help-ish reputation, it's really undeserved. This is a practice that billions of normal people have used throughout centuries as a tool to improve their lives. It's not some crap someone's trying to sell you on an infomercial. It's not some magical mystical club you'll be joining. You will not start floating around two inches off the ground chanting in tongues.

But I really think there's a good chance a meditation routine will make you feel good, get your day off to a better start, and reduce your levels of stress and anxiety.

Chris: Yeah, of course. But use it as a tool. Meditation is a means to bring about happiness, not the goal. The point isn't to have meditated. It's to learn skills, and shut down automatic reactions that harm your thinking and relationships. Meditation teaches you that things are always changing - tickles, numbness, pain, itches, sounds, a bug on your arm. They are there, and then they go away. When you react to things that are impermanent, you create stress and suffering.

Try it. If it works, you'll be happier, and you'll know it's worthwhile. Just remember, "this too will change." Nothing gives one a better sense of relief. 

 What do you think?

Any expert meditators out there? Tells us how and why you do it, or what we should try differently. If you haven't tried it, why not? Do you think you'll give it a shot? 


Crafting a Custom Bar Stool from Construction Lumber

$
0
0

Evan is the crafter and store owner behind Mr. Lentz, a leather goods and wooden accessories shop. He's also a great story teller and tinkerer, and we love when he posts his narrative builds as a look into the creative process.

This time, he set out to build a bar stool from scratch, without plans or measured drawings and made solely from dimensional lumber (2x4s, etc) from the home center. 

He details the process in a three-part series, which begins,

Now I’m not typically a ‘precision’ kind of guy. At least in the field of woodworking and joinery (inleatherwork I couldn’t stop that evolution). So when I decided to build this stool for my workshop I kind of thought it would be fairly simple. Boy was I wrong…and sometimes you have to face that as a DIYer. The fact is, with a stool – the more precise you can be in measuring lengths and angles…the less headaches you will have down the road.

It's fascinating to watch someone you respect think through each step, planning as things go along. It's these kinds of projects, and the mistakes/fixes that come along as things progress, where you really learn and continue to develop your craft.

Check out the full process here: How to Make a Bar Stool DIY: Day 1, Day 2, Day 3


ManMade Guide: Step Up Your Summer Drinks with Grown-Up Flavored Ice Cubes

$
0
0

Around here, we've moved past the short glass - the whiskey in a tumbler, the shaken 3 oz. cocktails of spring -and opting for the long and tall. With sunshine comes all-day drinks: those mixed with plenty of ice and fresh ingredients to keep you cool.

How to make flavoured ice cubes

Of course, it's ice that keeps 'em cool, and when your glass sits around in the heat...well, ice melts. So, this summer, make that a good thing. We're sharing our technique and recipes to allow the ice to actually contribute to the flavor of a drink or cocktail, not just its temperature or dilution. Check it out!   

How to make flavoured ice cubes

The Basics:

First off, making flavored ice cubes is super easy. It's like making regular ice, but, you know, with not just water. The process is simple: flavor a liquid, and freeze it. Good to go. 

For tools you'll need:

  • Measuring cups and/or spoons
  • Sauce pan
  • Ice cube trays (we recommend silicon trays as they are easier to handle and won't break your ice cubes to pieces). These are our favorites. 

For ingredients:

  • Liquid (e.g. juice, water, wine)
  • Flavoring/infusing agents (spices, tea, aromatics)
  • Sweetener (agave syrup, rice syrup, honey) 

how to make flavoured ice cubes


The Method:

1. Infuse: heat or boil liquid with add-ins, or let them sit together in the fridge overnight for 24 hours.

2. Cool liquid, strain, and place in ice trays.

3. Enjoy!

So... easy, right? Now here are a few extra tips:

  • Ice is only good as the water it came from. Consider using filtered water, spring water, or boiled water to remove cloudiness. Don't go crazy - the 80¢ gallon jugs from the grocery store work perfectly.
  • For ice cubes you want to infuse the liquid as much as you can. The cold makes the flavors harder to detect, so if you're gonna do it, go big. 
  • Taste the liquid before freezing and make sure it's strong, and we mean STRONG. Since it's going to slowly melt you want the flavour to really come through. So don't be shy!
  • If using spirits, heat them up for to remove most of the alcohol so it can freeze. Spirits with high levels of alcohol should simmer longer. And, of course, choose something with flavor...Vodka-flavored "ice" is really only cold vodka. If you're gonna reduce the liquid, make sure there's something besides ethanol and water. 
  • Always strain your mix before freezing, as sediments could settle at the bottom of the cubes making them gritty.


RECIPES

Dark Chocolate Ice Cubes

How to make flavoured ice cubes

These cubes are the perfect companion for a cold-brew coffee, a white russian cocktail, or even with plain cold milk! Super tasty, and all homemade.

Ingredients:

  • 1/4 cup cocoa powder
  • 2 cups water
  • 1/4 cup agave syrup

Steps:

  1. Place all ingredients in a heavy-bottom pan and whisk until combined. Bring to a simmer and remove from heat.
  2. Let mix cool completely and place in ice cube trays.
  3. Remove from trays and serve with your favorite drink (or even munch on them!)

How to make dark chocolate flavoured ice cubes


Cinnamon, Anise, and Cardamon Ice Cubes 

How to make cinnamon, anise, cardamon infused ice cubesThese flavourings are perfect for straight up cocktails like an Old Fashioned, a manhattan, or even a whiskey on the rocks. You can also add them to your favourite iced tea to spice it up.

Ingredients:

  • 2 Cinnamon sticks
  • 1 Star anise
  • 8 Cardamon pods
  • 2 cups of water
  • 3 tablespoons of agave syrup

Steps:

  1. Brew all ingredients for about 5-10 minutes, until fragrant.
  2. Strain, let brew cool down, and place in ice trays. You can add a cardamon pod in each cube as garnish.
  3. When ready, remove from tray and immediately place in your drink.

Angostura, Black Tea, and Thyme Ice Cubes

Use in everything. 

Ingredients:

  • 2 cups water
  • 2 black tea bags
  • 20 dashes Angostura bitters
  • 5-6 sprigs thyme, leaves picked 


Steps:

  1. Heat water to a boil, turn off the heat, then add tea and bitters. Allow to cool a bit, to 150-160° or so, then add thyme leaves. Cool to room temperature. 
  2. Remove tea bags, and pour into ice trays to freeze. 


ManMade Recommended: 


If you're a fan of this idea, please help us out by sharing the image below on Pinterest (thanks!):

Make flavored ice cubes


There you have it. Let us know your ideas for flavor combos in the comments below. Enjoy!


This ManMade post was originally published on June 17, 2o14. We're sharing it again because it's summer! 

How to: Make a Vintage-Inspired Shipping Crate... Perfect for a Bottle of Whiskey

$
0
0

created at: 08/04/2016

Ask any one who appreciates a fine sipping experience, and they'll confirm: a bottle of spirits makes for a great gift. But, it's a bit of a strange thing to hand over. Sure, you could use a gift bag (I guess?) or just pass it unwrapped to the recipient. But, why not make the whole thing a little special with a custom crate, which can be reused for storage, or regifted onto the next guy?   

That's the idea behind this simple gift crate project from the team at House & Fig. Built from flooring scraps, it's held together with brad nails, so you can assemble the whole thing in less than an hour. 

If you do make one, our vote is: nail it shut. Give the recipient a little challenge to open it. Only makes it that much more fun.

Check it out: Vintage-Inspired DIY Shipping Crate featuring Hudson Whiskey


DIY Masculine Decor Idea: Use Vintage Wooden Crates as Planters

$
0
0

Created Succulents via [http://blytheponytailparades.typepad.com/my-blog/2013/07/crated-succulents.html]

Summer markets are still buzzing with fresh produce and local goodies - but what's gonna happen when they're gone? Well, maybe you can score a few wooden crates to use as planters.

This is one easy DIY project. You basically need a few plants, which can be already potted, and some wooden crates (which sometimes are not as easy to come by as you think). You can either place the potted plants inside the crate and call it a day, or you could transfer them using a plastic bag with a few holes to drain the water.

Wooden crates are almost like a rustic kind of gold that's very valuable in the modern-thrifty market - so you're better off going to the farmers market and asking one of the vendors to sell you some, rather than fighting a bidding war on Ebay or Craigslist.

Keeping the crate "as is" will add a masculine touch to your space and, if you end up murdering your plants, you can always flip them around and use them as stools. Either way, you end up winning.

For more inspiring photos, visit Blythe Ponytail Parades

Crated Succulents

Have You Tried These? You Definitely Should Be Making Grilled Oysters For Your Next Cookout

$
0
0

Grilled OysterLooking for something beyond burgers and dogs to toss over the coals and infuse with the flavors of summer? How about grilling up some seriously tasty oysters? It's easier than you think.   

Last week I had a friend bring back some oysters from a coastal trek. He had no idea what to do with them, and honestly, neither did I until I looked around and found some amazing recipes to make those briny hardshells into something irresistible. Here are the top 5 that caught my eye:

1. Garlic Herb Oysters 

Grilled Oysters2. Chargrilled Oysters

Grilled Oysters3.  Parmesan Smoked Paprika Oysters

Grilled Oysters4. Korean BBQ Oysters

Grilled Oysters5. Bloody Mary Oysters

Now go out and find yourself a few dozen and make your next cook-out a bit more interesting.


The 50 Best Sci-Fi Films Of The 21st Century (So Far)

$
0
0

With summer blockbuster season in full-swing, and all its explosions and aliens and smashy smashiness, The Playlist decided to take a look at real science fiction films. Those movies that explore the relationships between the organic and technology, opportunities to explore what our moral standards actually are, and what really happens when we encounter the unknown.

I've never been a huge genre fiction person, and for a while, I think I inadvertently dismissed sci-fi for fantasy. It's not, and I know that now, so it's been fun to catch up with some of the better pieces that have stood the test of time. Here's my take: I appreciate world building, but just showing me a creature and saying he's good and then another one and saying he's bad and then having them fight and the good guy is never gonna be enough for me, narratively. (Sorry, Tolkien) So, I think sci-fi that is able to create a new and interesting set of circumstances and then figure out how to deal with the human experience or our sense of justice inside of those is actually a super cool opportunity for "last refuge of the morality tale"

Anyway, I'm personally going to dig into this list, and am busting out my library card as we speak. Of those I've seen, I'm highly recommending "Moon," "Another Earth," "Solaris," and "Upstream Color" as a great place to start.

The 50 Best Sci-Fi Films Of The 21st Century So Far [ThePlaylist.net]

Don't Miss The Meteor Shower of The Decade This Week!

$
0
0

This August 11th and 12th will be the peak of what is traditionally the biggest meteor shower of the year known as the Perseids, but this year it'll be the meteor event of the decade. Every year the Perseids features about 100 meteors per hour, but this week there should be double that due to the unique positioning of Earth's orbit this year...   

Popular Mechanics points out that: 

This year, the Perseids are expected to contain meteors from comet trails laid down in 1862, 1479, and 1079. This means that some of the meteors that will impact Earth's atmosphere next week broke off from the Comet Swift-Tuttle nearly a thousand years ago.

So pack an overnight bag and get out to the nearest under-the-radar wildernessand make a trip of it if you have the luxury. Or if you're locked into a nine-to-five like most men, use this dark sight finder to locate the best viewing area around you. Don't forget to bring a date. Or the kids. Or the dog. You get the idea. 

Make This: Custom DIY Dart Board Set

$
0
0

Dart BoardI don't think any rec room or local pub worth its dinged up bar top is completewithout a simple dart board in it. Here are a few tips to make a classy board set that will give that room some serious character. 
1. The Board - The heart of a good dart board set-up is the board itself. Sharp darts have been replaced with plastic tips, so sisal fiber boards are a bit more difficult to find. But it's worth taking a bit of effort to get one as they will last longer, and just look better. There's something about that solid thunk that makes throwing a set of traditional darts completely worth it.

ManMade Recommended:

1. Viper Razorback Sisal Board $45

2. Winmau Blade Sisal Board $60

2. The Darts - Metal darts are the only thing that should be found in a proper man cave. Look for a set with replaceable tips and fins for longevity and ease of repair.

ManMade Recommended:

1. WM Darts $32, pack of 3

2. Black Mamba $18, pack of 3

3. The Cabinet - The cabinet can be made from just about anything, and in any style that matches the room. It should be made from wood thick enough to hold up against errant darts thrown by that wild friend, but not something that can damage the points like acrylic or metal. It's your choice if there are doors on them or it's just open. Integrate drawers or shelves to hold darts close. Here are a few ideas:

Dart Board

Dart Board Cabinet

Cabinet

Here is the link to that last DIY cabinet set-up with instructions on making you own. So, now that you know, when are you going to build your own DIY dart board set up on your wall?

The Process: Making an English Longbow from Scratch

$
0
0

With the summer Olympics in full swing, it's time to start paying attention to one of the many sports that most of us barely remember until this time every four years: archery. (We love you too, steeplechase and race walking.) As an ancient sport dating back some 64,000 years, the bow and arrow's construction has understandably undergone some manufacturing changes. But not for John Neeman Tools...    The fellows at John Neeman Tools truly are master-craftsmen in every sense of the word; here they take you through the entire process of producing a period English longbow by hand. We've covered some of their other process videos before and as can now be expected this one is just stunningly shot and utterly engrossing. Check it out below.

The Birth Of A Weapon. Part I. English longbow making. from John Neeman Tools on Vimeo.

Make This: Simple DIY X Side Table

$
0
0

Side TableWe're betting there are plenty of places a great looking side table would fit in your house. Here's a simple and sturdy design that's plenty strong, and easy to whip up in a weekend.I don't know about you, but I'm always looking for a simple table or two. There are just a few places in my house that would really benefit from having a spot to set a paper or a cup of coffee. This simple table uses readily available lumber dimensions, but the angles really help to make it stand out a bit. 

Table Legs

Take a look at the detailed instructions here to make your own. While you're at it, go ahead and double up to make a few because once you get one, there will definitely be others in your future.Fastening the top

Viewing all 2425 articles
Browse latest View live


Latest Images