Quantcast
Channel: Man Made DIY Recent Posts

How to: Build a DIY Knife Sharpening Jig

$
0
0

Sharpening a blade at home - whether a pocket knife, a chisel, a kitchen knife, a hand plane blade, a pair of scissors - is a relatively simple process. In theory. In practice, it can be a bit difficult, since the essence of sharpening a blade is less about the ability to remove material and create/straighten a new edge. Rather - the trick is removing that material at the right angle to create the bevel that makes up a blade's sharp edge. Instructable-r gpierson came up with this great way to create a jig to safely sharpen your knives. He says,

For years I have sharpened my knives on a bench stone (with the stone resting on a table or "work bench"), and most of the time, I'd hold the stone in my hand.  I didn't like having the stone flat on the table, so most of the time, I'd hand hold the stone.  After cutting my fingers on more than one occasion, I decided I should figure out a safer way to do this.  If you are sharpening free hand, many of you already know it's very difficult to get the right angle while sharpening your stone.  So not only is this jig a safer way to sharpen your knife, it also helps you get the right angle every time.

He explains how to create the basic structure, then set it up to create the right bevel so you can sharpen at 90°. As he reminds us, a sharp knife is actually safer than a dull one. 

Get the full how-to here: Knife Sharpening Jig[Instructables]


If You Have Any of These 11 Items in Your Closet or Dresser, You Should Probably Get Rid of Them

$
0
0

Spring had traditionally been the time for deep cleaning and purging, but we say fall is better suited. It's the one time of year when all your layers are on display. You've pulled out your wool sweaters and heavy coats for the season, but your short sleeves are still viable options. Every single item you own is in the same place. Only then can you truly assess what you have, and to what you can say goodbye.     

1. White Cotton Tube Socks

Are you an eight-year-old boy in gym class? Then stop covering your feet like one. The truth is, if your clothes fit properly, someone (namely, you) will see your socks multiple times throughout the day. And there is literally no time in a man's life where white, mid-calf length cotton socks are the ideal option. If you need cotton, go for a sub-ankle liner sock for warm weather, or for a medium gray or brown tone for jeans and sneakers day. But when you buy new socks, buy wool or wool-blend. They're the ones that actually wick moisture away from your feet, and don't get dirty brown dingle-pills all over them. 

2. More than One Pair of "Paint" Jeans and Two Shirts

Yes, you need a set of clothes that can get dirty. Believe me - every hobby I have involves something messy: sawdust, glue, bike grease, ink, spray paint, or mud. And its natural to downgrade a pair of jeans once they develop an unrepairable hole or a spill that will simply never come out.

But you only need one set. One pair of pants, and two shirts. These are not your "work clothes," and if you're a tradesperson or craftsman, you know what you need to do your job. But for DIYing or stuff that will just get straight up stained, you need to cover yourself for a weekend: one pair of pants, two shirts. Save the nicest ones, or downgrade something else you're getting rid of. Then, let the rest go. 


3. T-Shirts with Deodorant Build Up

It's unfortunate, but it happens. If you wear deodorant and/or antiperspirant, it will get on your clothes. And eventually, it will build up to the point that the pits of your t-shirts are covered in a waxy, wet-looking layer, especially on colored or dark clothing. And, when that happens, it's time to let it go. Solace: at this point, the collar and sleeves are probably also completely worn out, so at least there are multiple strikes against. 

4. Ties or Belts You Haven't Worn in the Last Two Years

Generally, the rule is to move on from anything you haven't used in the last year. With dress accessories like ties, belts, pocket squares, and the like, give them two years, but no more. The truth is, unless you suit up for work everyday, a lot of these items are used sporadically, and might not get called upon seasonally. But if they've managed to stay on the rack for two years or more, their time has come. 


5. That Button Down Shirt That's Just so Wrinkly You Never Actually Wear It 

You know the one. You liked it at the store, perhaps even shot one of those mirror photos in the dressing room. And you wore it, and everything was great. And then you washed it, dried it, and it's 100% cotton-ness and interesting details came back to haunt you so hard that it's just stayed on the hanger for years. Not even two hours of ironing could help that thing (not that you'll do it anyway). 

6. Your Oldest, Most Worn Out Pair of Shorts

Before you put all your shorts away for the season, set your next summer self up for success and remove one pair. Preferably, the dingiest one - anything will extra pockets, dangly bits, or longer than a 9" inseam. 

7. Socks and Underwear That Will No Longer Stay Up by Themselves

Shirts rest on your shoulder. Pants fit your whole lower half and have belt loops and buttons. Socks and underwear, on the other hand, use elastic or woven ribbing patterns to stay put. And, because these things are designed to compress and expand, they will eventually wear out. And when they do, it's their time to depart. Yes, it's annoying to have to spend money to replace things you already own. Yes, that is what's called being an adult. 

8. Anything You've Ever Worn as Part of a Wedding Party

Yeah, maybe it isn't that bad, and maybe you do like it, but the truth is: that tie tack or handkerchief isn't something you bought for yourself, and you have a hard enough time remembering to wear those that are. The wedding party asked you to join them on their special day, and to be all matchy matchy in the photos, not to design your wardrobe. You're not going to wear it, and they won't care if you do. 


9. Anything With a Hole In

You know why. Yes, you love it, but yes, people can see it, and yes, you can make do without it. Rip off the band-aid. 

10. Extra Warm Coats You Only Wear a Few Times a Year

It's good to have options, of course, but the truth is: if you own coats that you only wear once or twice each winter, they're not doing their job as a coat. And, most importantly, there are people out there who need a coat every single day to survive and stay healthy. Find out who in your city helps those people stay warm, and give them your extras.

The one exception here might be a classic wool top coat that you'll wear over a suit or tuxedo. Those basically haven't changed in a hundred years, and their the kind of thing you buy once and use for life. 

11. Any Piece You've Ever Said "Just in Case" About

You know the item. For when you lose weight, or gain it. For when you might need five different suits for five days. For when you have out of town guests and they need to go waterfall diving with you but didn't pack accordingly.

If you don't wear it, you don't need it in your life. Let it live its true purpose elsewhere. 


Hey, Do You Want to Work with ManMade? We're Hiring!

$
0
0

Hello to all our favorite people out there in ManMade land. We have a pretty exciting announcement to share:

ManMade is currently looking for new contributors. Kaboom.    

Here's a little more information about what we're looking for.

Job Description:

ManMadeDIY.com is seeking contributors. This is a paid, freelance position. We're seeking crafters, makers, designers, woodworkers, writers, and other creatives who are passionate about the handmade scene, men's style and decor, goods and gear, and the DIY lifestyle. Potential areas of contribution: how-to projects, men's style and accessories, guides and reference posts, and general men's lifestyle content.

We're looking for someone with a clear voice, strong writing, DIY skills, and excellent taste. Preference will be given to those who can shoot original photos or source high quality image illustrations. 

If you're a fan of ManMade and familiar with our point of view, please get in touch. Please send all inquires by email to chris@manmadediy.com, with the subject "New ManMade Contributor Position." Please include a statement about your experience, why you think you're a good fit for this position, and, if available, a resume or links to your other work or social media accounts.

Thanks! We're excited to meet you. 

How to Make: Crazy Tasty Spiced Pumpkin Butter in Your Slow Cooker

$
0
0

created at: 10/19/2015

You know those little pumpkins you practically trip over in the supermarket this time of year? It turns out: they're good for more than just Instagram props. With, like, no work, they make a really tasty pumpkin butter you’ll want to have in the fridge all year long. I’m talking about pumpkin butter with the magical spice flavor of pumpkin pie, but simple, less sweet and much more, well, pumpkin-y. Making a batch with “sugar” or “pie” pumpkins is easy because they’re small enough to roast whole in the oven. A slow cooker really does all the work letting the flavor develop a wonderful intensity and a just-right spreadable texture. All you need to do is throw everything in, hit “low” and let it go. All. Night.

Then, in the morning... wow. Delicious brown pumpkin butter. A great little energy booster spread on toast at breakfast. Keep some in the fridge so you can just dig your spoon into it, but keep more in the freezer so it will be ready to serve as a secret ingredient in all kinds of delectable creations. 

Here’s what you’ll need:

  • A 6-8 quart slow cooker (Crock-Pot) with a “low” heat setting. (Total cooking time will be about 8 hours.)
  • A food processor or strong blender
  • A hammer and a screwdriver (for venting the pumpkin)
  • 3 or 4 resealable half-pint canning jars
  • A few zip top bags for freezer storage (sandwich size works great)
  • An immersion blender (only if you have one -- completely optional)

Ingredients:

  • 3 or 4 small pumpkins -- usually labeled “sugar pumpkins” or “pie pumpkins”
  • 1 ½ cups brown sugar
  • ¼ cup apple juice or cider
  • ½ cup maple syrup
  • Juice of one lemon (about 2 tablespoons)
  • 1 teaspoon salt

The spice mix:

Spices can easily be adjusted based on your preference. Keep in mind, you can always add more of anything right into the slow cooker later if you want a bigger spice punch. Same goes for sweetness. The following amounts are more of a guideline -- no need to be exact.

  • 2 cinnamon sticks (or at least 1 tablespoon ground cinnamon)
  • 2 teaspoons ground nutmeg (grind fresh if you can)
  • 2 teaspoons ground ginger
  • 1 teaspoon ground cloves
  • 1 teaspoon ground allspice
  • >optional: ¼ teaspoon ground cardamom (one pod ground)


created at: 10/19/2015

Step 1: Bake the pumpkins

Line a large cookie sheet with foil or parchment. Carefully punch 2 ventilation holes near the top (stem) of each pumpkin. A hammer and a clean screwdriver work nicely for this task. (Small pumpkins tend to be very tough and jabbing a knife into these little guys can be ridiculously difficult.) Place whole vented pumpkins on cookie sheet and bake for 45 minutes to an hour at 350º. The pumpkins are done when they darken and are tender when poked with a fork. Be careful not to let them burn or blacken.


created at: 10/19/2015

Step 2: Prepare spices and additions

While the pumpkin is baking, make sure your slow cooker is ready but don’t fire it up yet. Measure out the brown sugar, the salt, and all the spices into a separate mixing bowl so that everything is ready to add when needed. Separately, measure the juices and maple syrup so that they are also standing by. All of the added ingredients will go into the slow-cooker at the same time.


created at: 10/19/2015

Step 3: Make the pumpkin puree

Carefully remove pumpkins from the oven and allow to cool completely. Once they are cool enough to handle, use a knife to carefully cut them in half horizontally. Using a tablespoon (or a grapefruit spoon if you have it) scoop out the seeds and all of the stringy matter and set aside (you may want to roast the seeds later). Scoop the remaining pumpkin flesh away from the shells and into the bowl of a food processor. Mix together well until it is a smooth puree. A strong blender will also work for this but you may have to mix in batches.


created at: 10/19/2015

Step 4: Let the slow cooker do its thing

Put about half of the pumpkin puree into a slow cooker. Add the brown sugar, spices, salt, juices, syrup. Pour the rest of the pumpkin puree over this mixture and stir everything together. If you have an immersion blender, give everything a gentle blend breaking down any residual clumps and smoothing out the texture even more. If you are using whole cinnamon sticks, add them to the blended mixture now. Cover the slow cooker and turn it on the low setting for about 8 hours. If you’re comfortable with your slow cooker’s low heat setting, just let it go all night long. If you’re not sure, it’s always a good idea to check in occasionally to make sure the mixture is not burning along the edges. You may want to stir everything a couple times during the cooking process to help prevent this.


As the cooking time approaches 8 hours, the pumpkin butter should be turning to a darker brown, caramel color. This is a good time for a taste test to check out the spice level and sweetness. Feel free to add more maple syrup or brown sugar (or any sugar) now. Same goes for any additional spiciness you may want to add. Simply stir in and let simmer a little longer. If there is too much liquid in the mixture at this point, let the slow cooker work longer with the lid off.


created at: 10/19/2015

Step 5: Store in the refrigerator and freezer

When the pumpkin butter is ready, turn off the cooker and let it cool down a bit. Fill up some jars to keep in the fridge or pass along some refrigerated ones to friends. The rest can be stored in the freezer for months. A good way to freeze pumpkin butter is by filling up individual bags with about a jar’s worth in each one. This way you can use one at a time to refill your jar in the fridge or have a perfect portion to use in a different recipe.


In addition to spreading it on toast or a muffin, pumpkin butter works great in raviolis, cheesecakes, soups, sauces, lattes, bread, pizza, cookies and cocktails. My favorite way to use it is on a grilled cheese sandwich made with gruyere. Get creative and enjoy. Cheers.


created at: 10/19/2015


Yum, right? Here's all those photos all formatted up for social media. Do use a favor and share it on Pinterest, please?

 created at: 10/19/2015


Tom O’Connor is a photographer with a primary interest in food, travel and lifestyle photography. You can view his work here. He recently moved from Brooklyn to Pittsburgh where he is busy navigating his way through the city’s excellent bars and vibrant food scene. Tom is also the co-creator of Little Island Kitchen, a food based web store featuring a curated selection of small batch food products and kitchen items.

Follow Tom at his site and Little Island Kitchen, and on Instagram, Twitter, and Pinterest.

These are the Best Bottles of Whiskey Under $20

$
0
0

There are times for spending on an investment bottle, but there are even more times for enjoying something perfectly good that cost less than an Andrew Jackson. None of them are going to blow your mind, but you know that already. But - seriously - if you're having fun and it's more about the conversation than what's in the glass, twelves drinks of anything palatable for less than twenty bucks is money well spent.     

1. Kentucky Bourbon: Evan Williams Black Label – $14

Evan Williams is the second best selling Bourbon in the world, and, to our palate, is in a completely different class than the first, Jim Beam. It's pretty mild, which means it's smooth enough to drink neat. But it really starts to shine when mixed with ice and/or soda, and it holds its own with a simple mixer such as ginger ale. Once chilled and diluted, it almost becomes too drinkable. It goes down fast and easy, so be careful.


2. Kentucky Bourbon: Kentucky Tavern Bourbon – $10 

At the same price as a lunch plate at your local food truck, it's hard not to give this one a shot. The truth is: it's different, but it's really not that bad. Sipping it has a pleasant, oily texture and gives you a grain-forward flavor that reminds me a lot of Four Roses, one of my favorite distilleries. It's not too sweet, so it works well with cocktails with sugar added, like an Old Fashioned. 

3. Kentucky Rye Whiskey: Old Overholt – $18

In practice, I tend to prefer the spicier, more challenging whiskeys to corn-forward Bourbons, and I believe these show better in the less expensive bottles. Old Overholt is a damn good whiskey for the price, and if you're mixing up Manhattans or Sazeracs at home, there's not much reason to spend more. If I ever mixed a whiskey with cola, this would be the one I'd choose. 

4. Tennessee Rye Whiskey: George Dickel - $19

This is not as interesting as Old Overholt, in that it's not as challenging. But, for the price, it tastes pretty great. If you pretend it's not a rye and just a solid American blend, it's worth sampling at least once. This is what I think that other super popular and well-known Tennessee whiskey with the black & white label should actually taste like. 


5.  Irish Blended Whiskey: Kilbeggan - $18

From the oldest licensed distillery in Ireland comes a solid entry into the world of pot still whiskey. It's flavor is very grain forward, but still sweet and smooth. If were going to sip one whiskey on this list neat, this would be the one I'd choose. 

6. Canadian Whisky: Black Velvet Reserve - $12

The age statement on the bottle says it "contains whiskies age eight years," which likely means they blend a tiny bit of the old stuff with a whole bunch of brand new corn whiskey. That said, there is a fair bit of barrel flavor in this guy: some smoke, fresh fruit, and fall spices. It's not "smooth," but it's a bottle I'd take to a party or use in a bowl of punch or pitcher cocktail. At its price, is not much more of a risk than a six pack of craft beer, and it'll work with lemon-lime soda or juice or whatever else ends up on the make-your-own-drink table. 


7. Blended Scotch Whisky: Chivas Regal - $19

There are no single malt Scotches worth drinking under $20. There are barely any worth drinking under $40. 

But, I like the flavor of malted barley whiskeys, and I think Chivas Regal is a perfectly fine way to get there when you don't want to spend $50 on a bottle. (Or when you know someone is going to fill their glass with ice and club soda and you just can't bear to share the good stuff). This is likely the Scotch your grandfather drank, and it'll do the trick in between your investment bottles, or after your palate has been burned out by the Islay peat bombs. 


What are your favorite second-from-the-bottom-shelf whiskies? Please share in the comments below. 


ManMade Essential Toolbox: Why Every Person Should Own a Speed Square

$
0
0

created at: 02/03/2015
I love a tool whose common name indicates its purpose. Oh, what's a screwdriver do? A citrus squeezer? How about a box cutter? The function is all right there in the name. 

In many ways, a speed square falls right into the category. It tells helps you determine "square" - that is, when one edge or line is exactly 90° to another, and it helps you do it quickly. Done. Right? Wrong. 

created at: 02/03/2015

Well, actually, yes, but, wait! There's more. 

A speed square is a carpenter's tool, not a fine woodworking tool. It's intended for quick and reliable marking of butt and miter joint lines, rather than precision layout of parts for furniture. And, in this case, that's a good thing: cause, combined with a tape measure, this will help you break down dimensional or "two-by" lumber in no time. When using a marking knife, I'll reach for a try or combination square; but anytime I'm using a pencil, the speed square is the way to go. 

Since it's a solid piece of metal with no joints or moving parts, a speed square can be used as a try square and a miter square, or, a simple way of marking 90° and 45°, due to the long fence that runs along one side. It protrudes on either side, allowing the square to be flipped and used on any edge. 


created at: 02/03/2015

One of my favorite uses for the speed square is to scribe long lines parallel to the edge of a piece of plywood or solid wood, as for a rip cut. There are notches spaced every 1/4" on the inside of the square, allowing you to place a pencil in the notch, butt the fence firmly against and edge, and scribe a long straight line along the grain.


created at: 02/03/2015

When making crosscuts along shorter widths of stock, a speed square makes a great fence with which to guide a hand held circular saw. Just use the square to mark the cut line, and then a guide line the same distance of the blade to the shoe plate's edge. If making a rip cut, use the scribing technique above. 

The speed square includes common angles for roofs, stairways, and decks, noted by the Hip - Val (hip and valley rafters) scale. That can take some practice to learn, and specific jobs to use. But along the hypotenuse edge lies a relatively accurate - and super fast - protractor: a way to read and mark angles.

It works like this. Find the pivot edge (the right angle) and hold it up to one side. On the opposite edge, find your angle, and align it to the same edge. The long side of the triangle - the hypotenuse - now crosses your project at your desired angle.

So, as an example, let's say you want to scribe a 20° line across the face of the stock. Do this:

created at: 02/03/2015

Just make sure the pivot point is butted firmly against the edge once you've made your rotation. There. 20° line. Two seconds. 

The speed square's "rough and tumble" build quality is a strength, and key to its usefulness on a variety of projects. It's cast aluminum, not finely machined, which means you won't think twice about throwing it in a toolbox, taking it to a buddy's house, or using on a ladder above hard concrete, because there's no way for it to go out of whack. If you drop it, it'll still be a-okay. 

Oh, and they cost less than ten bucks. With that price, you might as well get two. Just make sure to keep the little blue book to reference in case you want to learn more about the Hip-Val scale. 

ManMade recommended: 

            Swanson Tool SO101 7-inch Speed Square -  $9.48 

            Swanson Tool SO107 12-Inch Speed Square - $18.23


How to Restore a Vintage Chisel

$
0
0

Unless you're a millionaire, I always recommend going with used hand tools when getting started in woodworking. (Though, full disclosure, no millionaires have yet to ask my advice.) Vintage tools are plentiful, much less expensive, and depending on their age, usually a better, longer-lasting tool than you can buy at your local big box store. And the best part? Antique tools are more likely to be made in the USA or Europe, where they've been crafted from higher quality steels than modern tools from the home improvement center. 

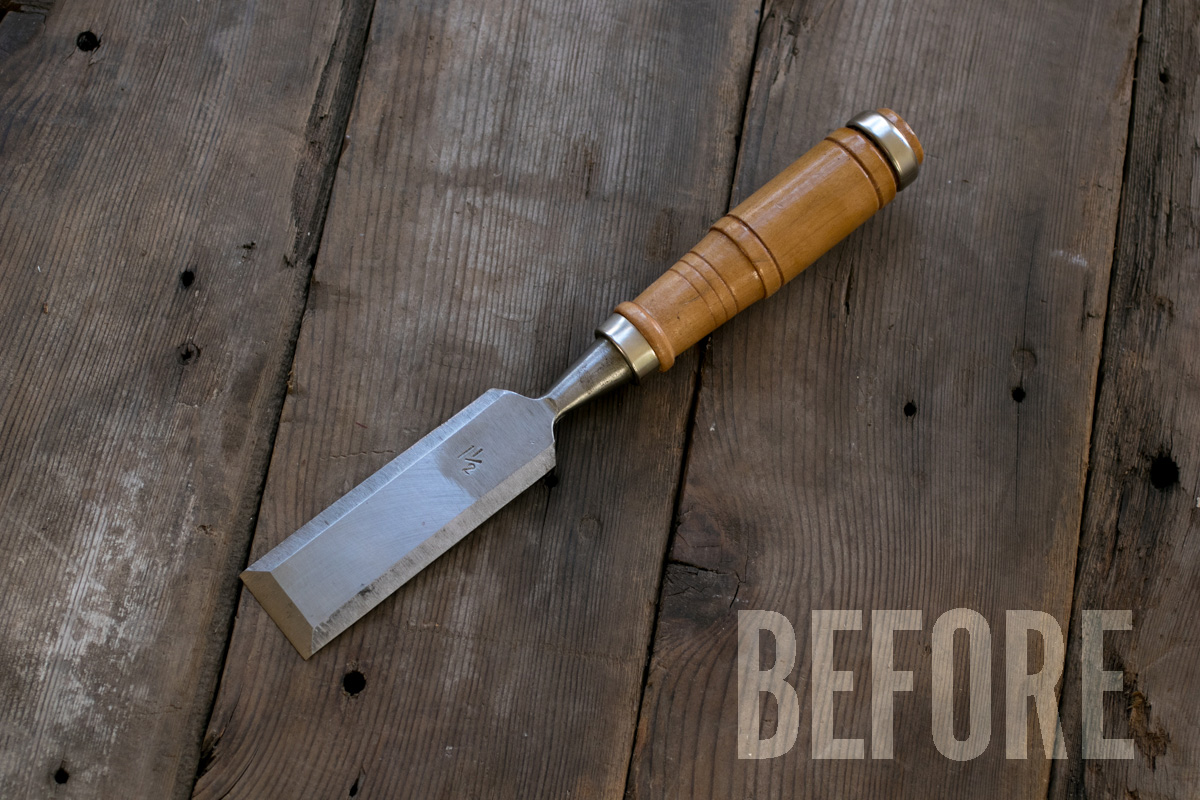
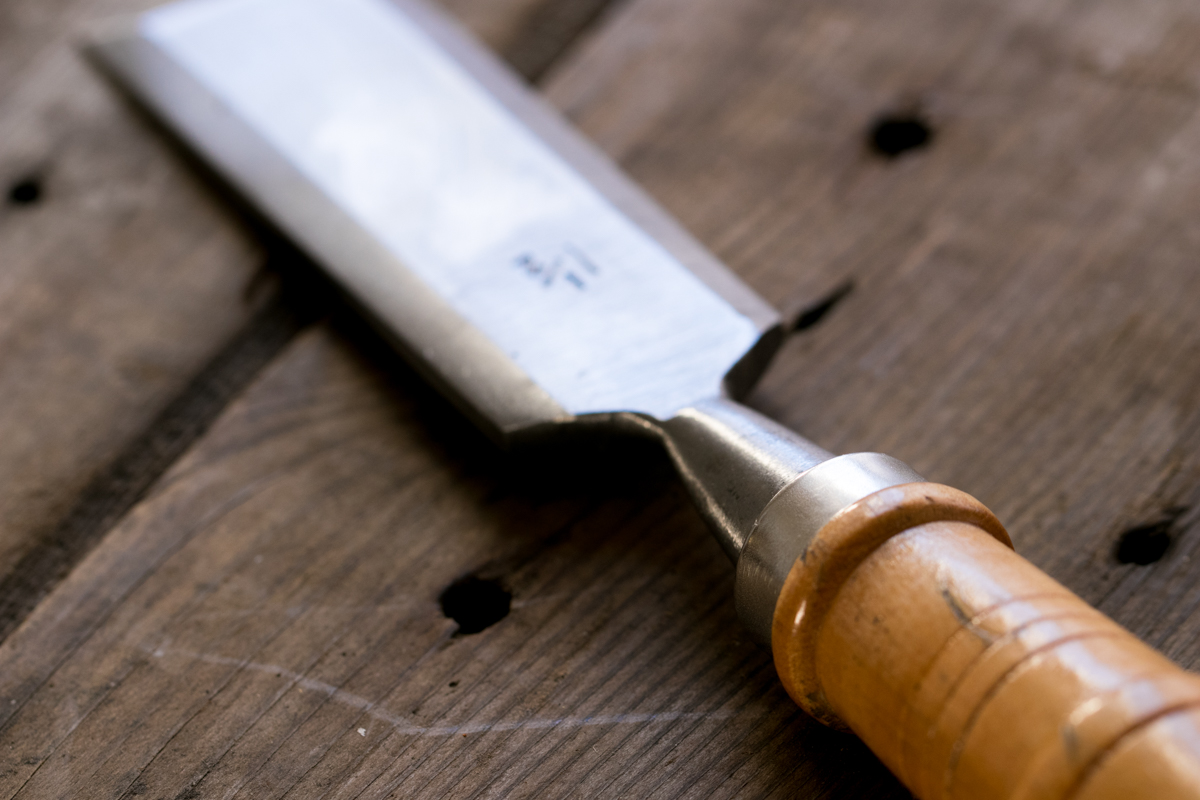
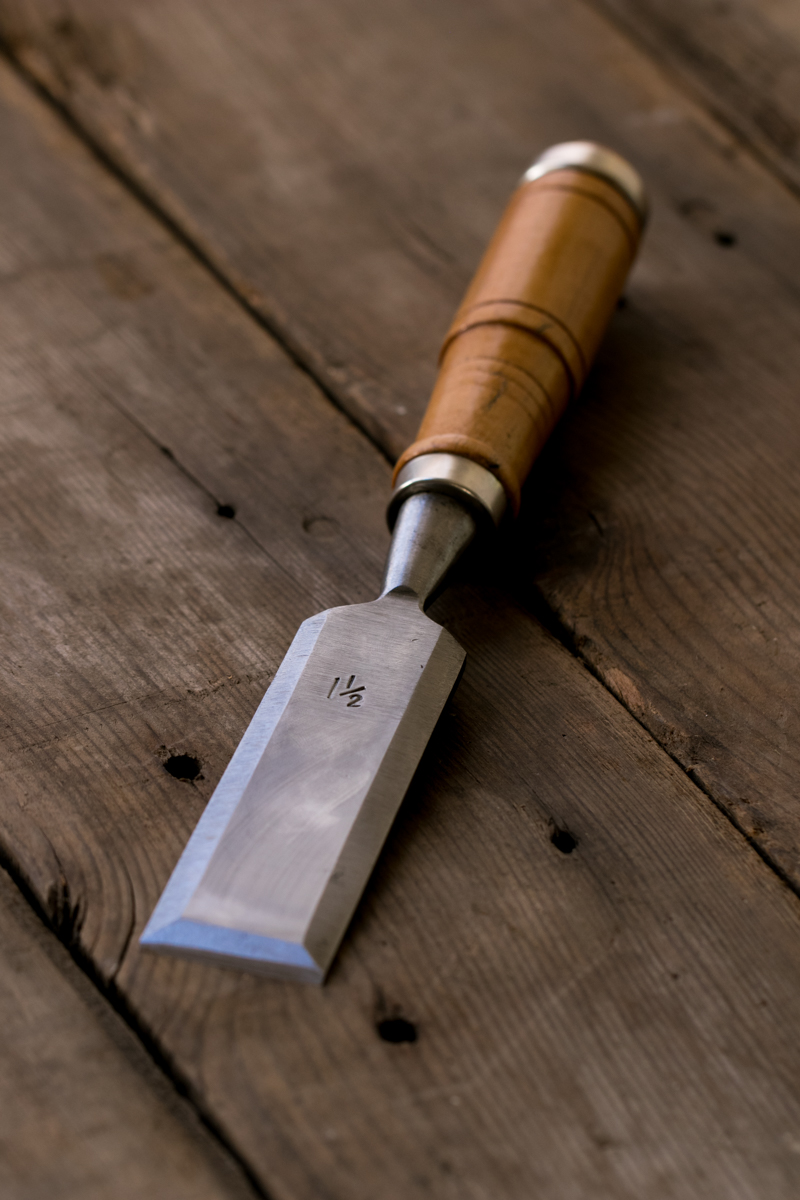
Over the weekend, I found this nice, broad 1 1/2" chisel at a favorite antique mall, with a mere $7.50 on the price tag hanging from the handle. It was in mostly great condition. The top and back had been coarsely ground a few times, and the bevel wasn't square to the sides, but the steel was in beautiful shape and the handle looks like it's never been pounded on.     

Of course, I bought it, and I took it through the usual regimen to get it tuned up and sharp. Here's how to it. 


Here's the "before". This might look scary, but it's 10000% safe, because... 

This chisel was as dull as a soup spoon. 

In fact, were I in a street fight, I'd probably opt for a spoon over this thing just so I could at least get some good jabbing and digging action. 


There are four steps to a getting a chisel into good working order: cleaning the steel, flattening the back, grinding the bevel, and honing the cutting edge. If your handle is banged up beyond repair, you certainly can also make a new one, but that's beyond the scope of this guide. (Also, if you have the tools and knowhow to make a new chisel handle, you probably don't need me to walk you through the process.) The last three steps are also necessary for a new chisel as well, so once you master the process, you're set for your whole woodworking life. 

Cleaning the Steel

Here's the best news about restoring older tools: the appearance does not affect performance. In fact, the built-in patina is the coolest part about using vintage steel. But if the tool has any rust, it can eat away at the metal and leave pitting, so you'll want to remove it as best you can.

The most straightforward option is WD-40. Spray on a little, let it work its magic, and likely, it'll clean things up perfectly. If you need a little abrasion, some #0000 steel wool works great, or 600 grit wet-dry sandpaper.

If you have large spots of black rust, we highly recommend the Sandflex Rust Erasers for any and all removal needs. (Seriously, dude. I love those things.)


Flattening the Back

The back of a chisel should be polished and flat. This is both essential to creating a sharp cutting edge, and for doing accurate work, as the back of a chisel is used as a reference surface for chopping and paring. 

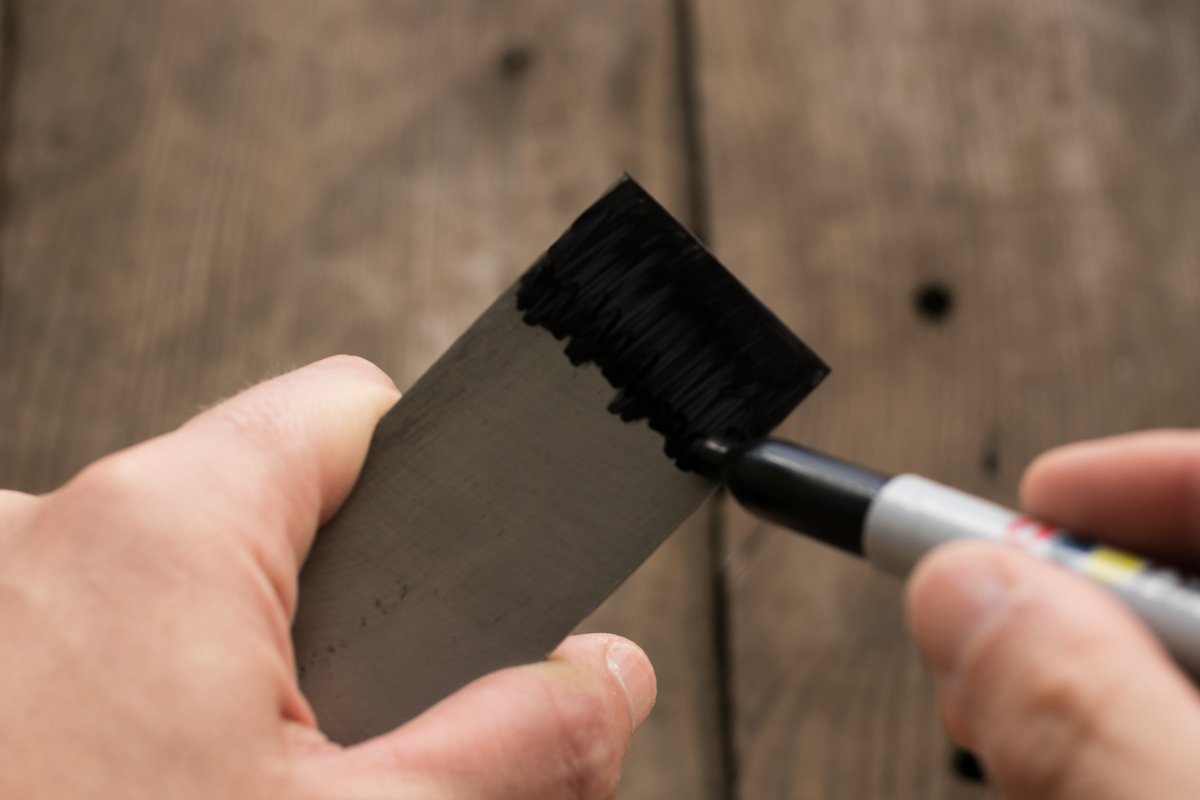
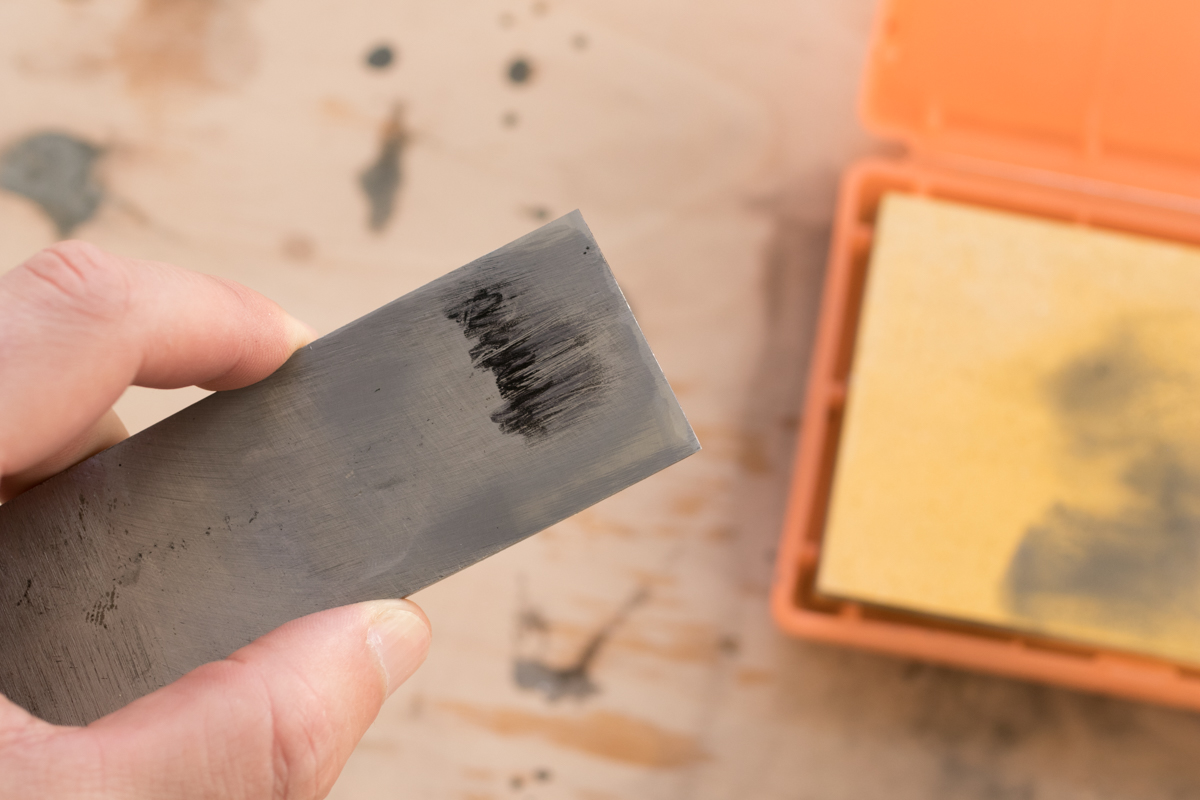
Begin by using a marker to color in top two inches or so of the back of the blade (above). This will help you monitor your progress – when the ink is completely gone, you'll know you've removed material across the entire back. 


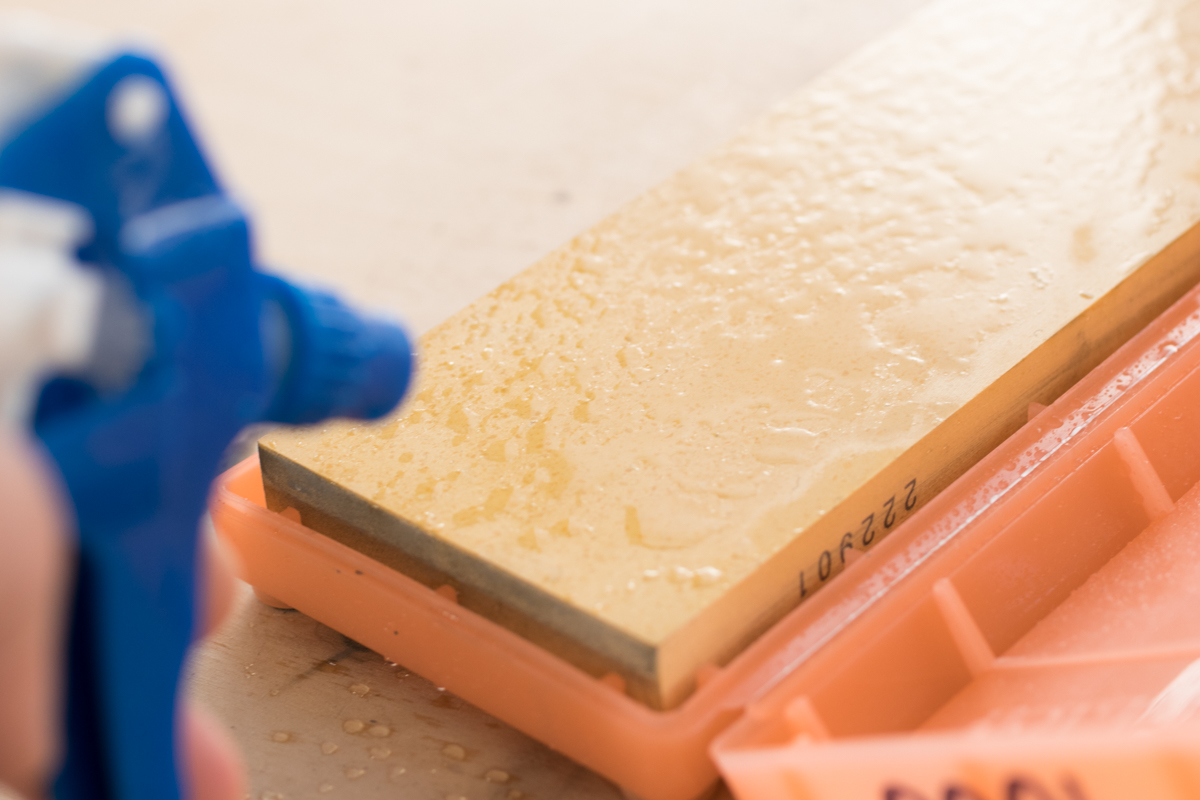
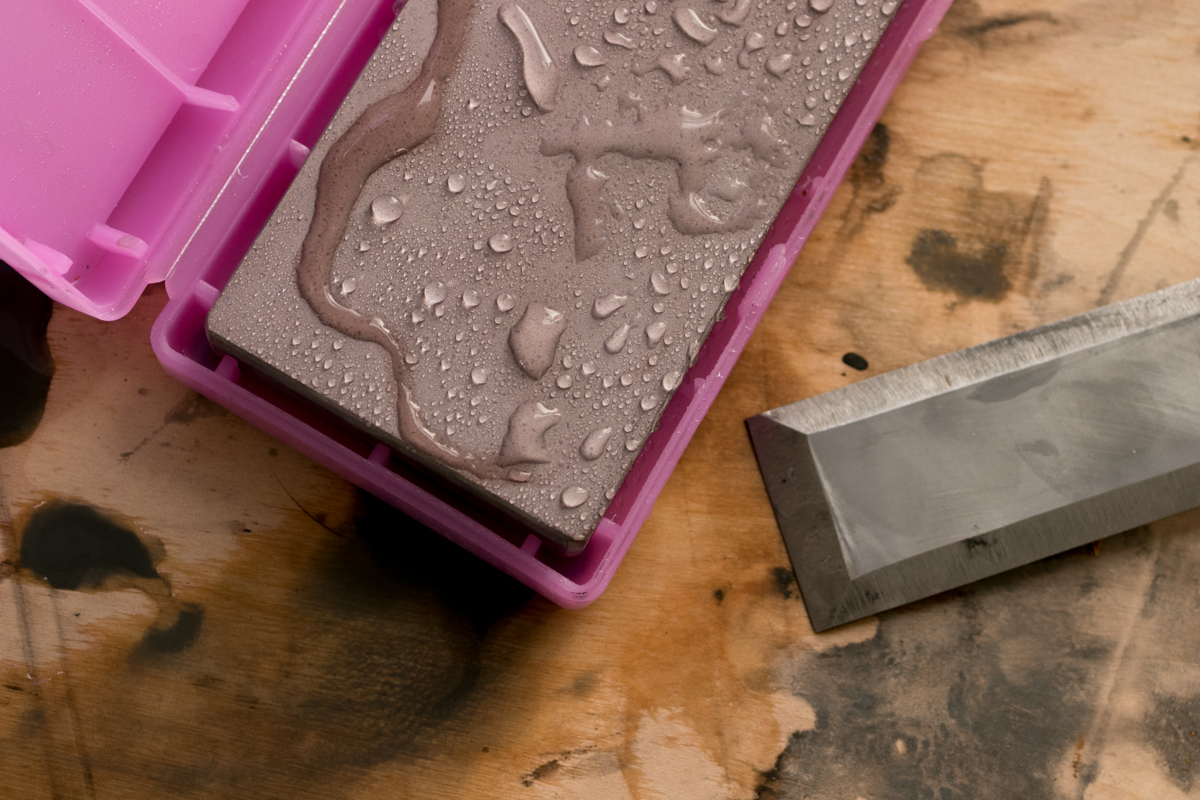
Next, add the necessary lubrication to your stone, either water or oil depending on which you're using. For this, and basically any sharpening task, you'll want a coarse (1000 grit), medium (4000 grit) and fine stone (8000 grit). If you're just getting started, a 1000/8000 combination water stone is a great way to save a bit of money. 


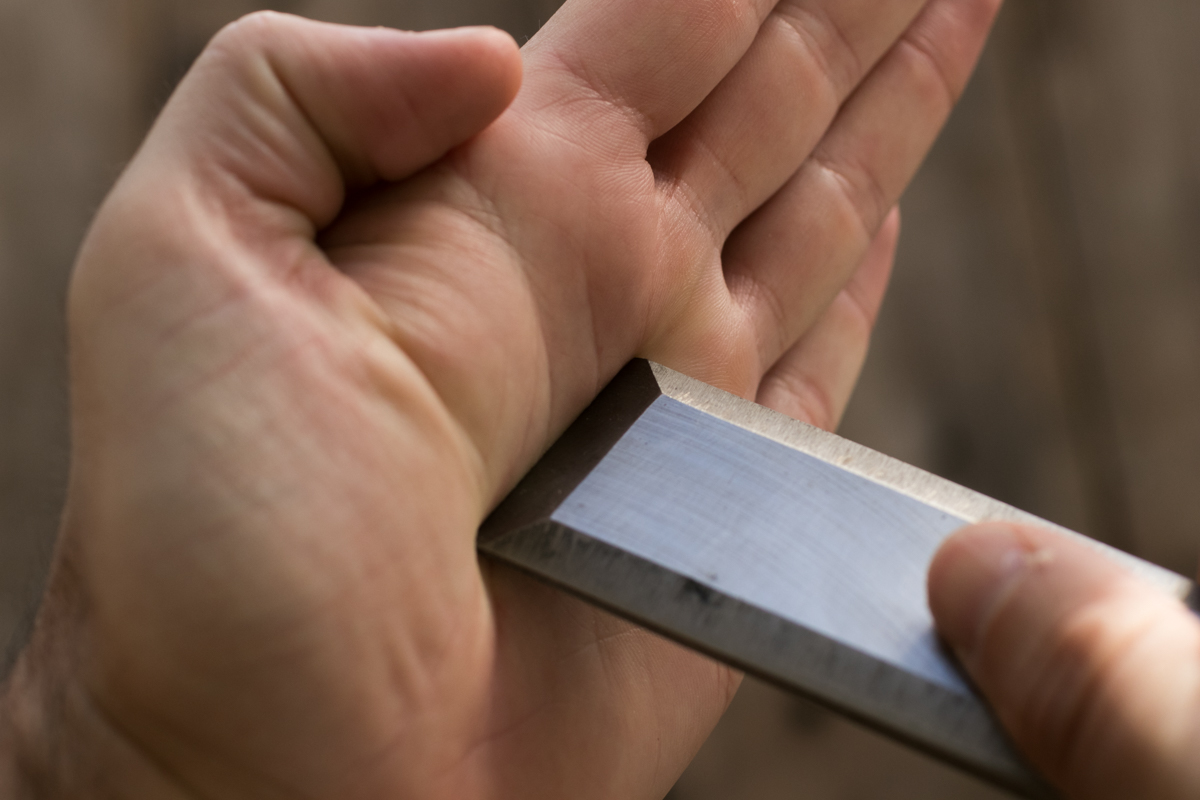
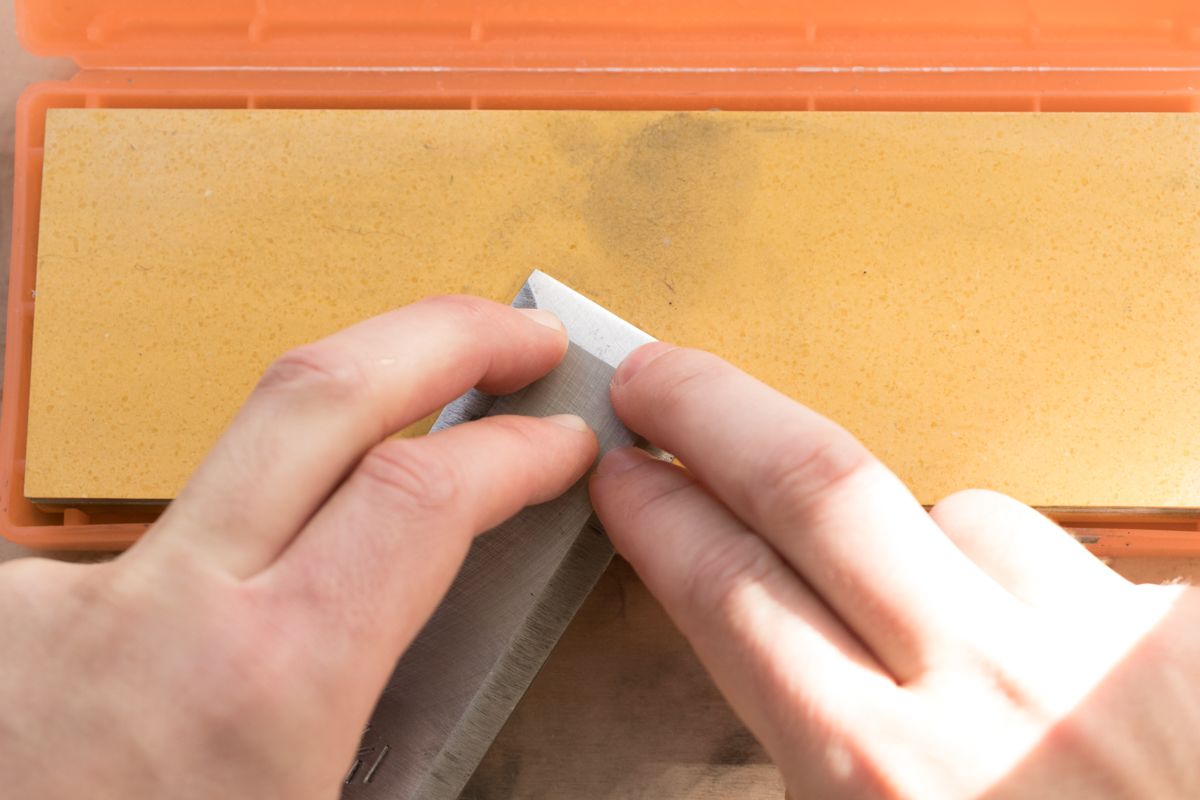
Press down on the front of the blade, using as many fingers as will fit to provide firm, even pressure. Allowing the far end of the blade to hang off the edge, work your way back and forth across the stone. 


Periodically check your progress to see how much material you've removed. Move your fingers accordingly on any remaining inked spots to work evenly. 


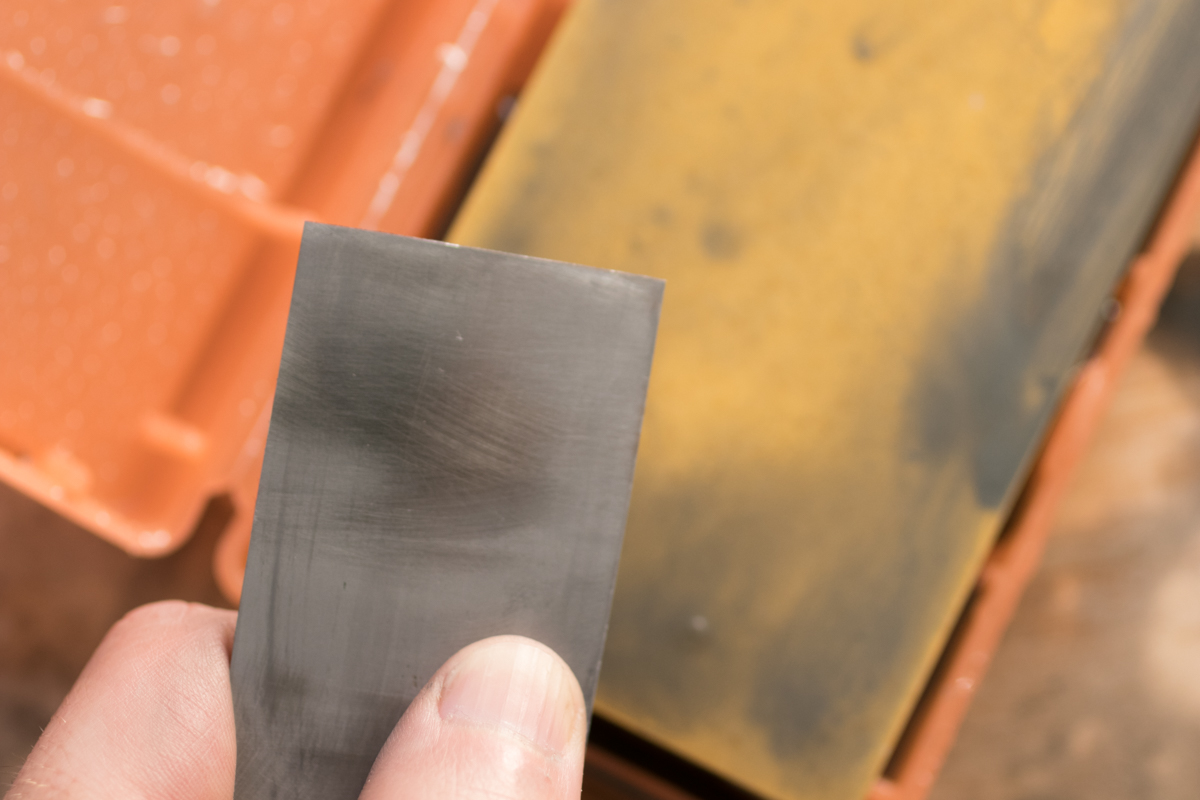
Keep going until you see a consistent scratch pattern all the way across the back of the chisel, and all the ink has disappeared. 


Then, repeat the process on your medium and fine stones.


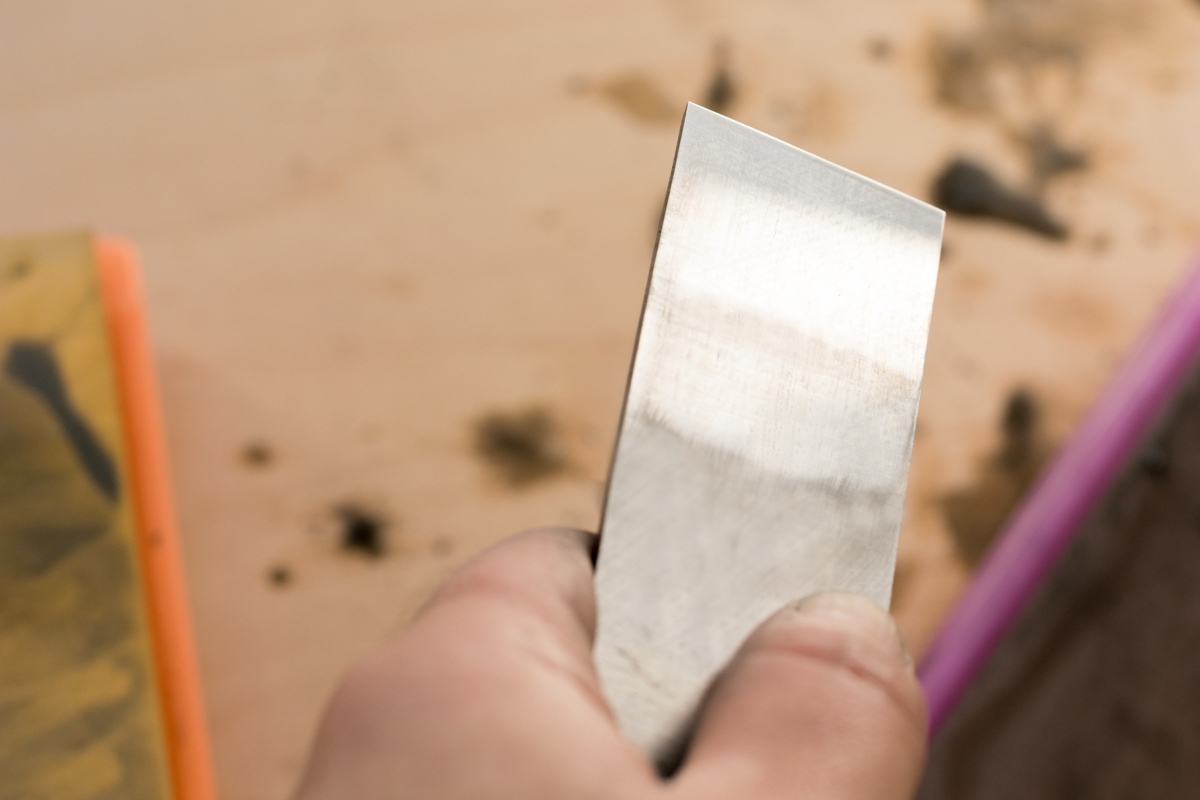
When you're done, you should have a mirror-like surface in the back. Wave to yourself! 


Grinding the Bevel

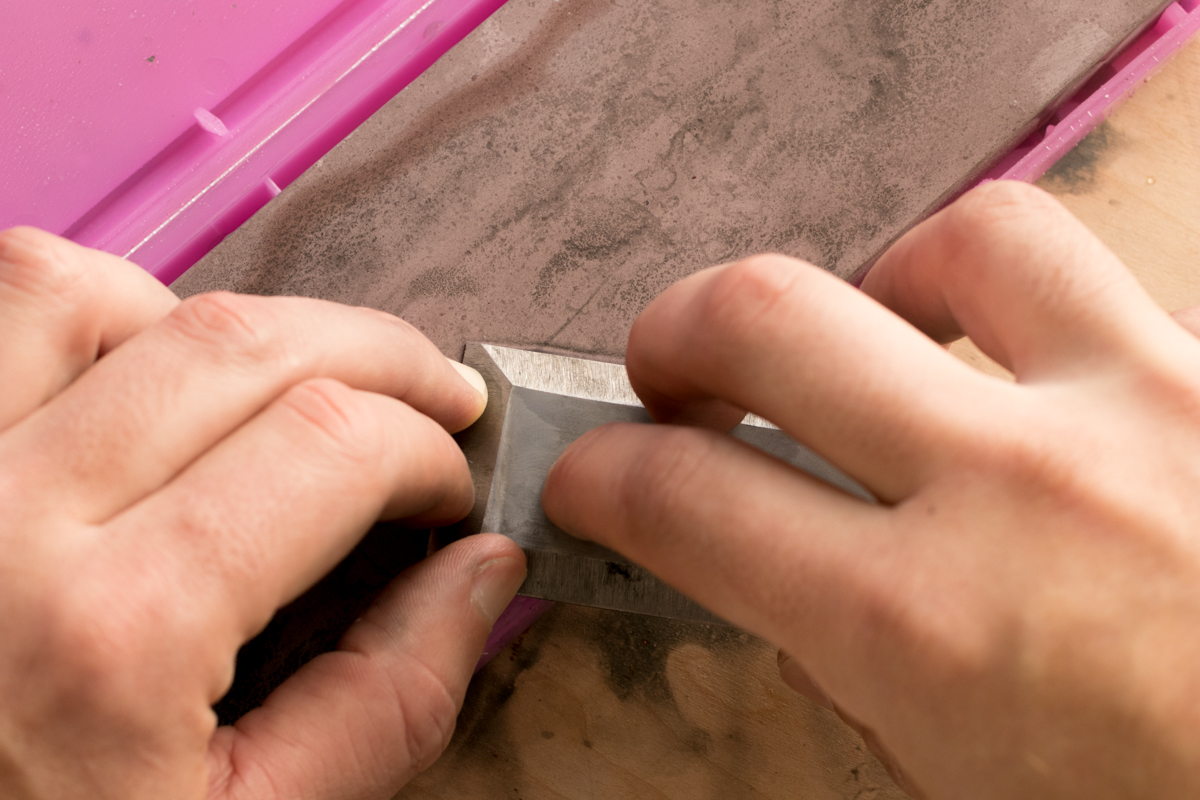
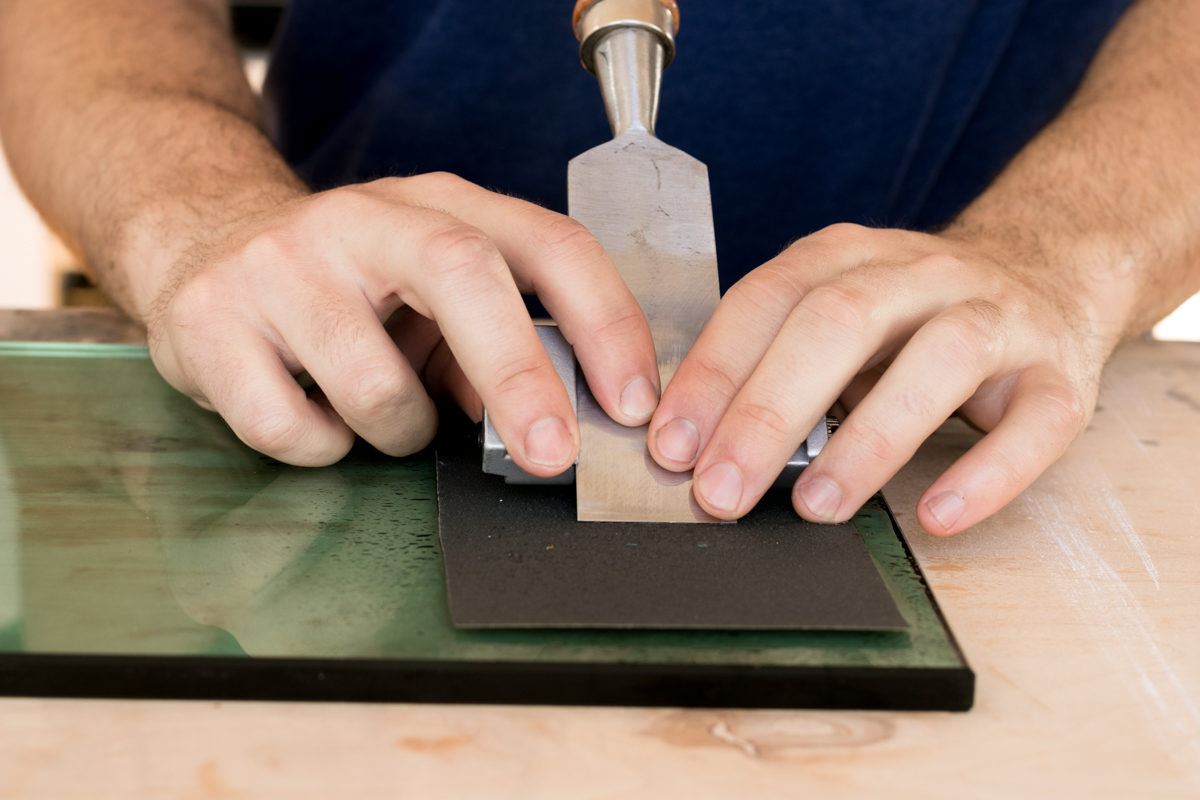
Next, you'll want to do the coarse work to create the bevel on the front of the tool. This can be done with a bench grinder or specialty sharpening tool, but can also be accomplished more simply, and less expensively, with a flat surface, some sandpaper, and a honing guide. 

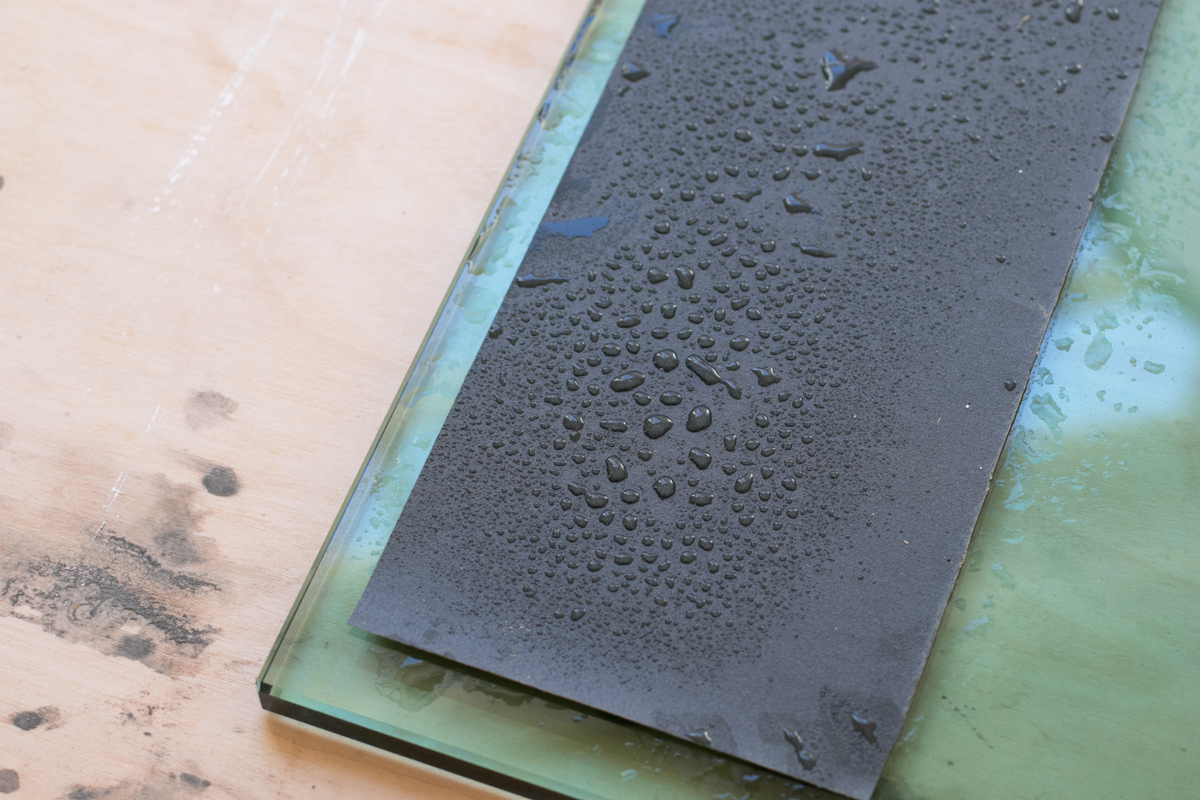
The easiest method is 220 grit wet/dry sandpaper stuck to a flat surface, such as a jointer bed, a slab of granite, or a thick piece of plate glass. 


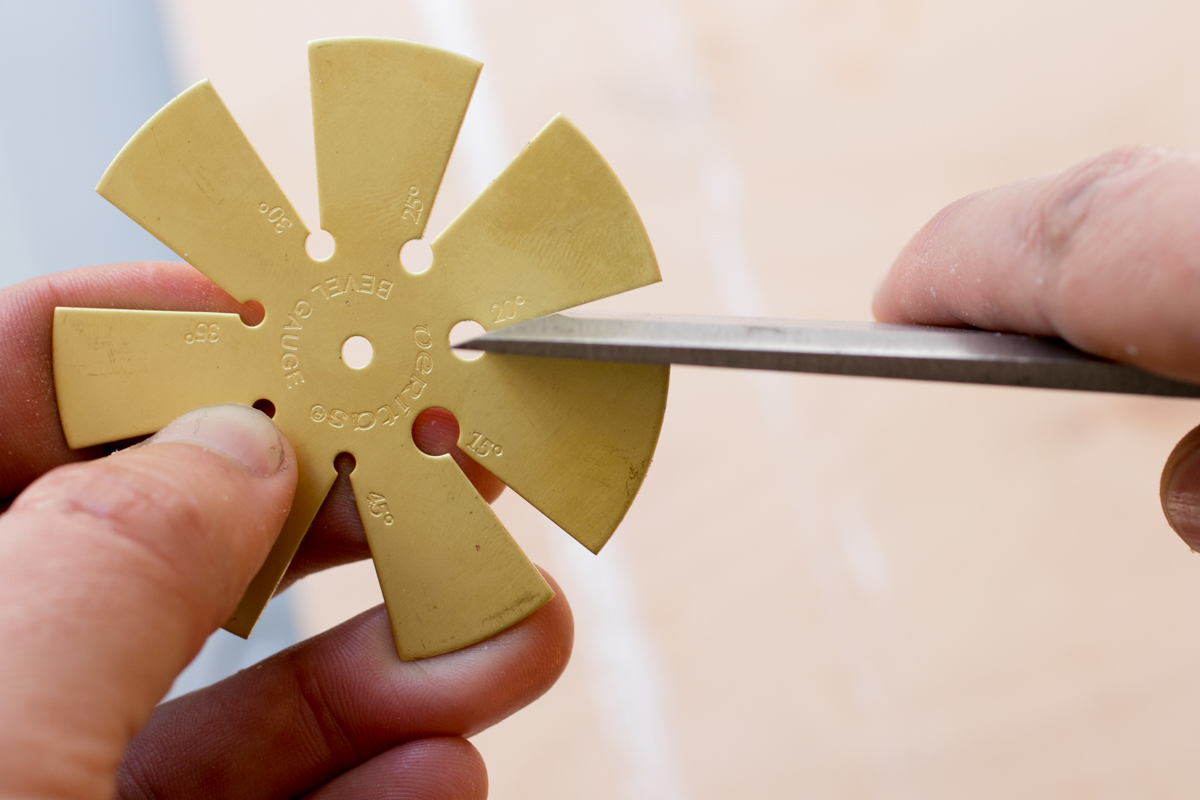
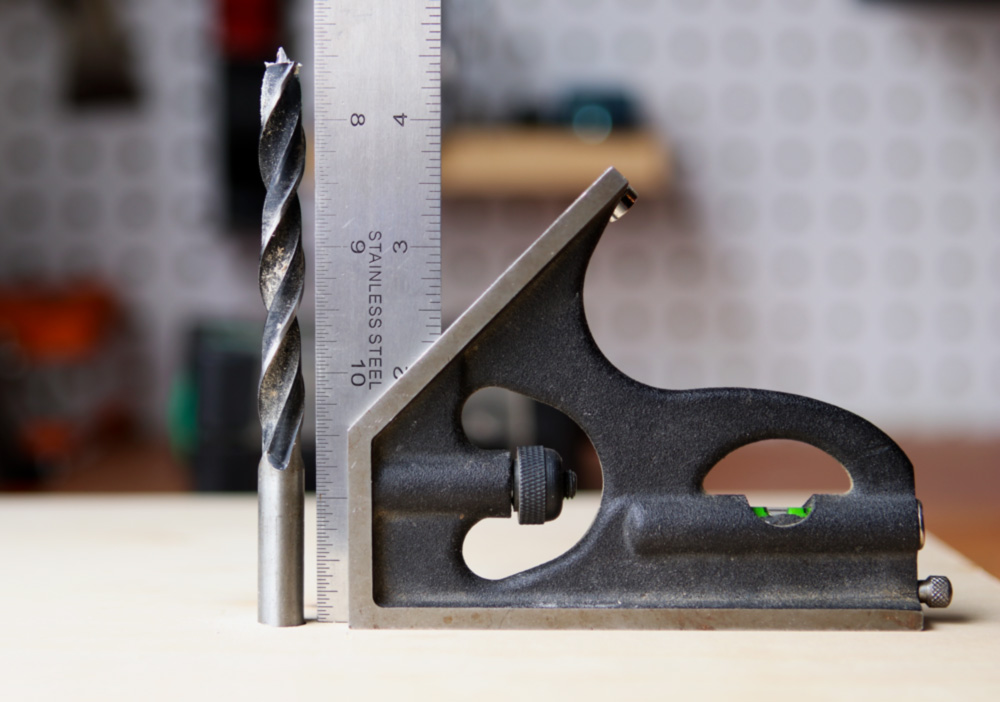
Next, determine the angle to which you want to sharpen. I have this helpful little bevel gauge, but you could use a protractor or a print out from the internet to figure out the existing angle. Most tools factory-ground at 25°, but it's not universal. In the photo, you can see mine was at 20°, which is too low for me. (I like to grind at 30° and hone at 35°.)


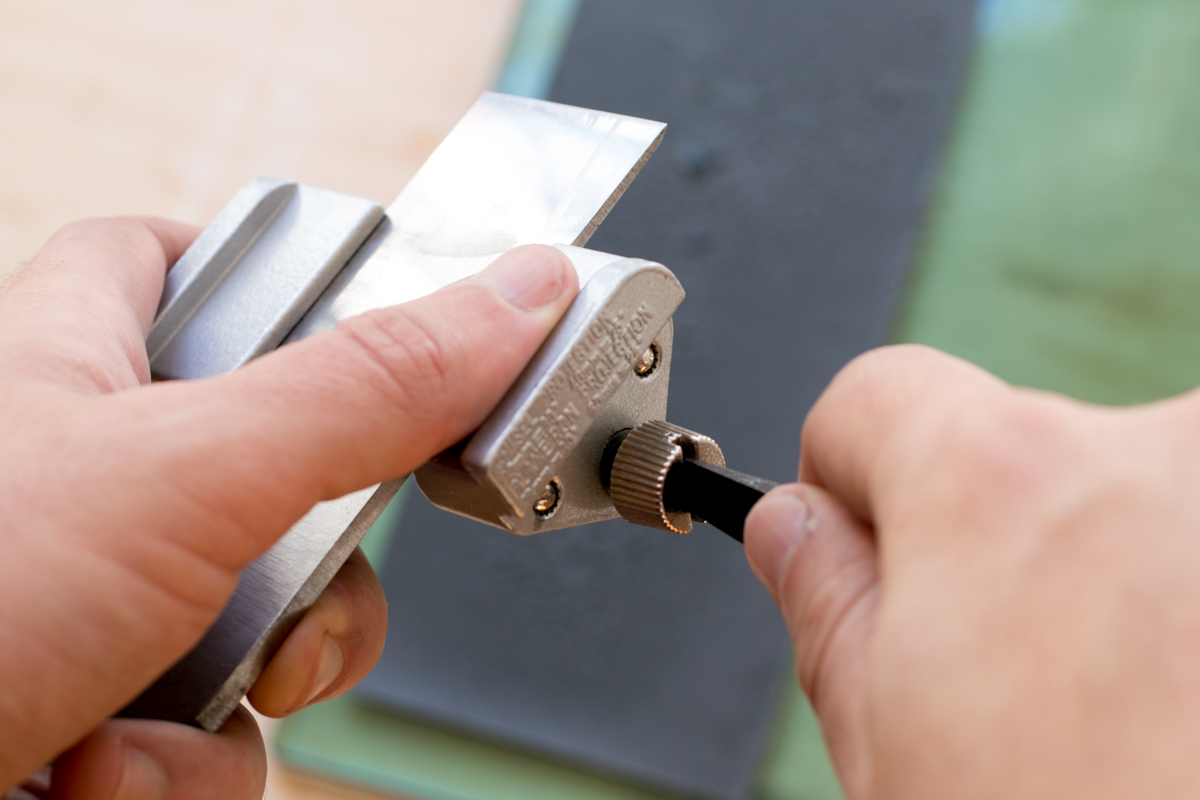
You can find these simple "Eclipse"-style honing guides at any woodworking shop, or online. They're not perfect, but they're inexpensive and get the job done. 


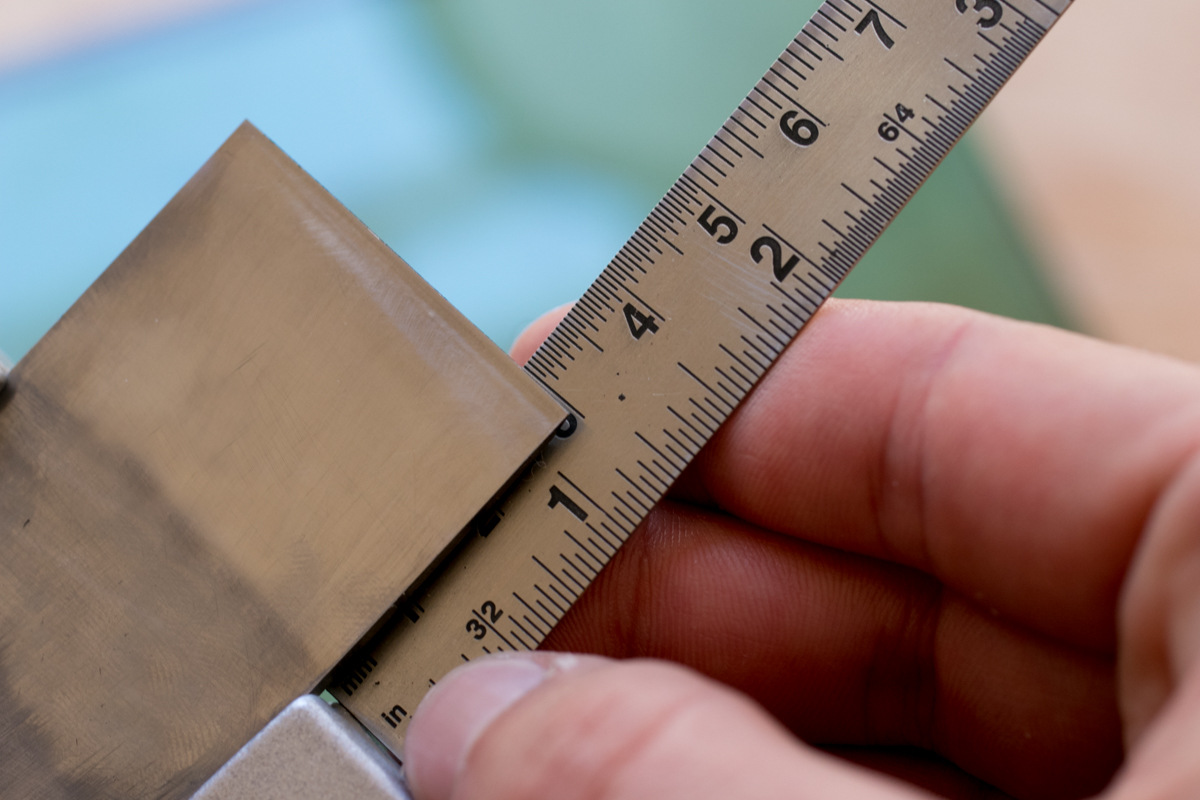
The angle is determined by how far the blade protrudes from the guide. Your guide will come with details, and there's also this helpful list at Lie-Nielsen's website. I'm going for 30°, so I set mine to 30mm, or 1 5/32". 


Then, place the whole apparatus on the sandpaper, and start to grind. You want to keep even finger pressure on the tip of the blade. (Note: I am not doing this in the photos, because I'm an idiot and totally forgot when taking this picture.) 

You might want to begin with pull strokes only, then switch to a back-and-forth motion once you get the hang of it. 

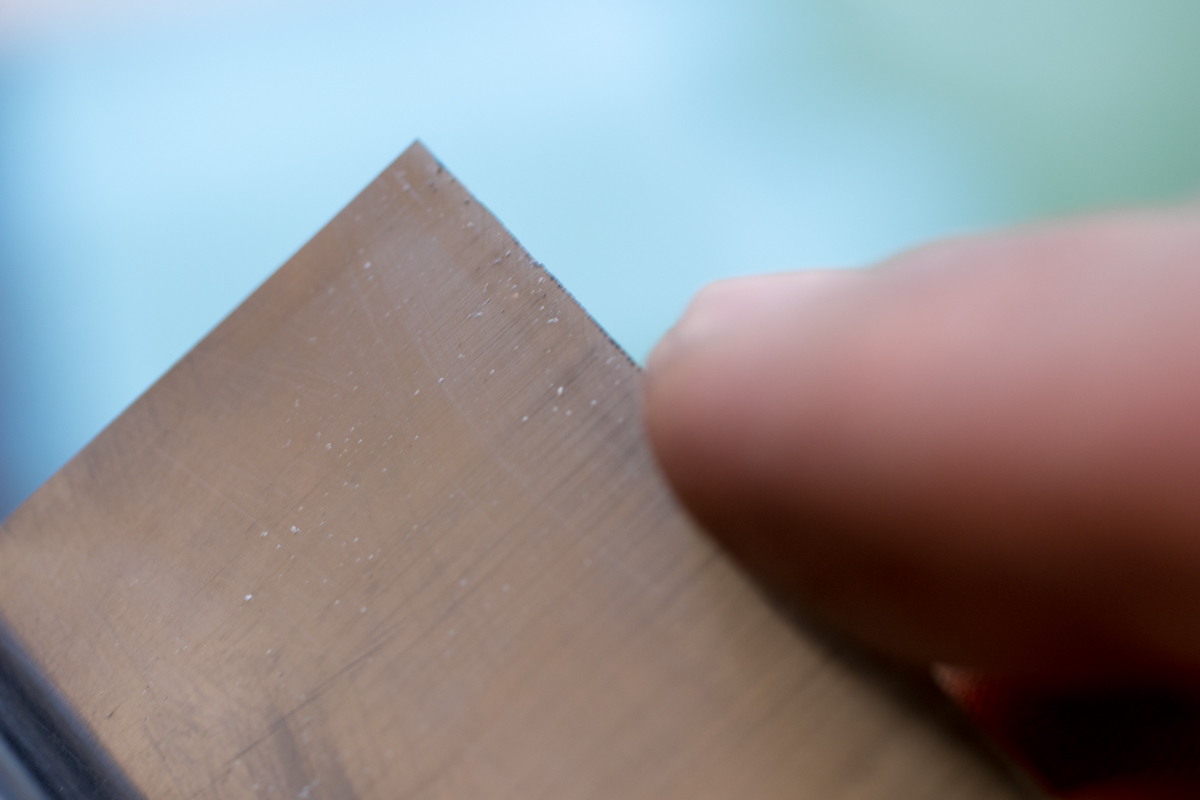
Keep working until you can see the bevel change, noting how the tip reflects light. You don't need to grind the whole length of the bevel to get sharp, just the business end.


Honing the Edge

Grinding produces the shape of the bevel. Honing makes it sharp. The remainder of the process is straightforward. Keep the chisel in the honing guide, as with grinding, (you can adjust the position by 5° to create a micro bevel) and use the marker to color the tip. Start working on your coarsest stone until you've removed the ink and you can feel a raised burr all along the back.


Then, Work your way through the medium and fine stones, using the marker trick each time to track your progress. Once the finest stone has removed it gone, you're sharp. Lastly, use the finest stone to remove the burr.

And with that, you're done. Good as (not) new.  


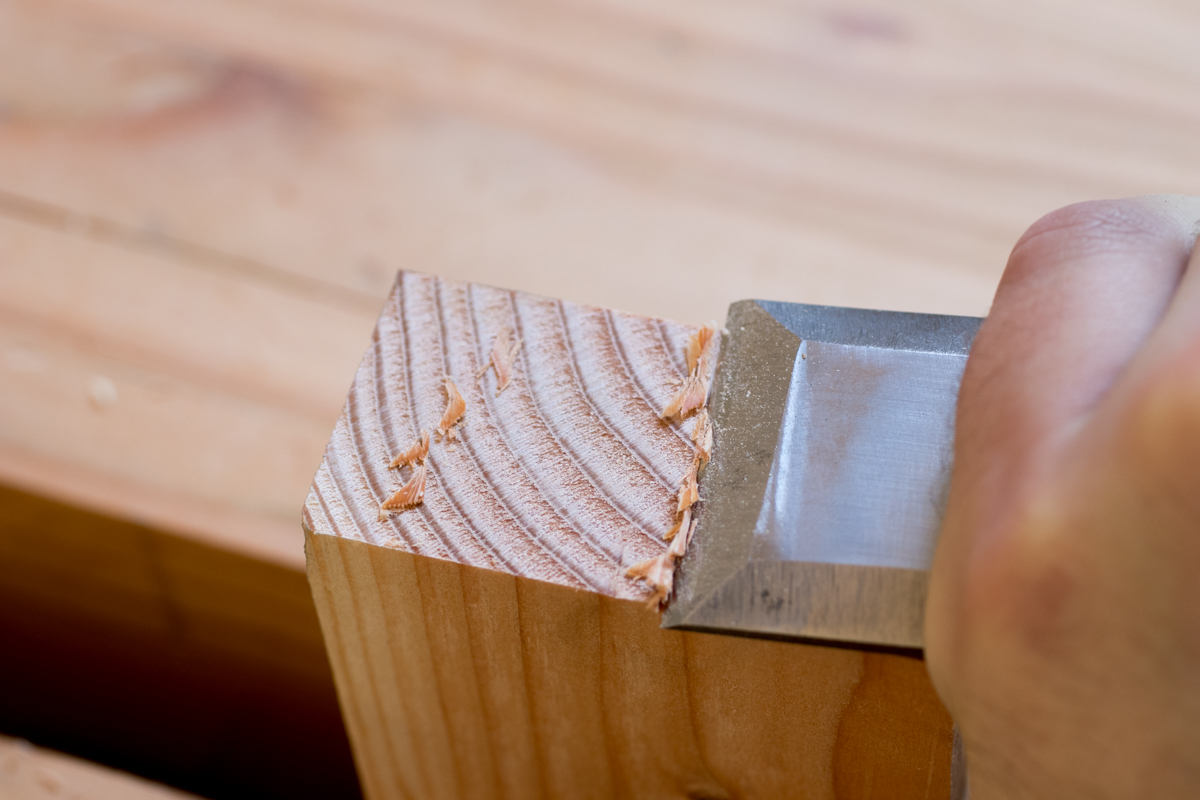
A sharp chisel should be able to cut the end grain of a soft wood, so find a scrap of pine or fir and give it a go. 


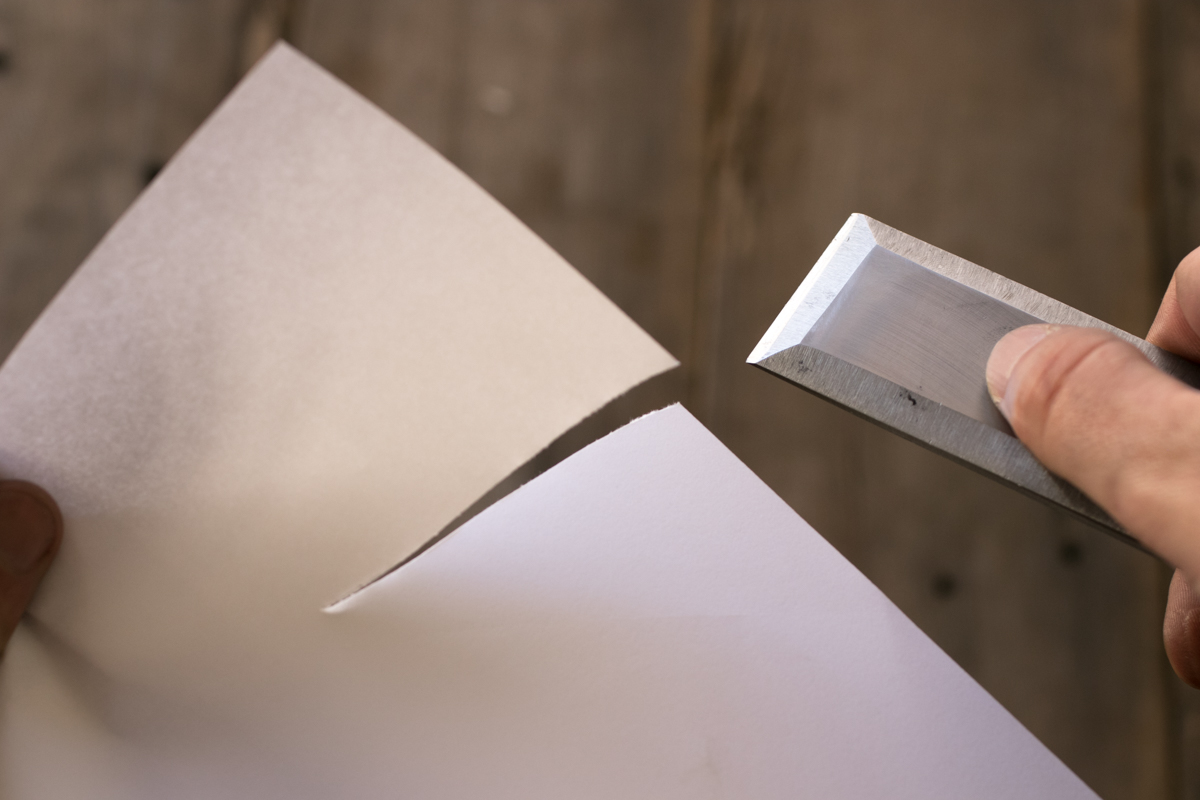
And - because why not - try out the classic sheet of paper test. 
 

When you're done sharpening, be sure to dry the steel thoroughly to remove any remaining water, and apply your prefered rust-prevention measurements ASAP. 


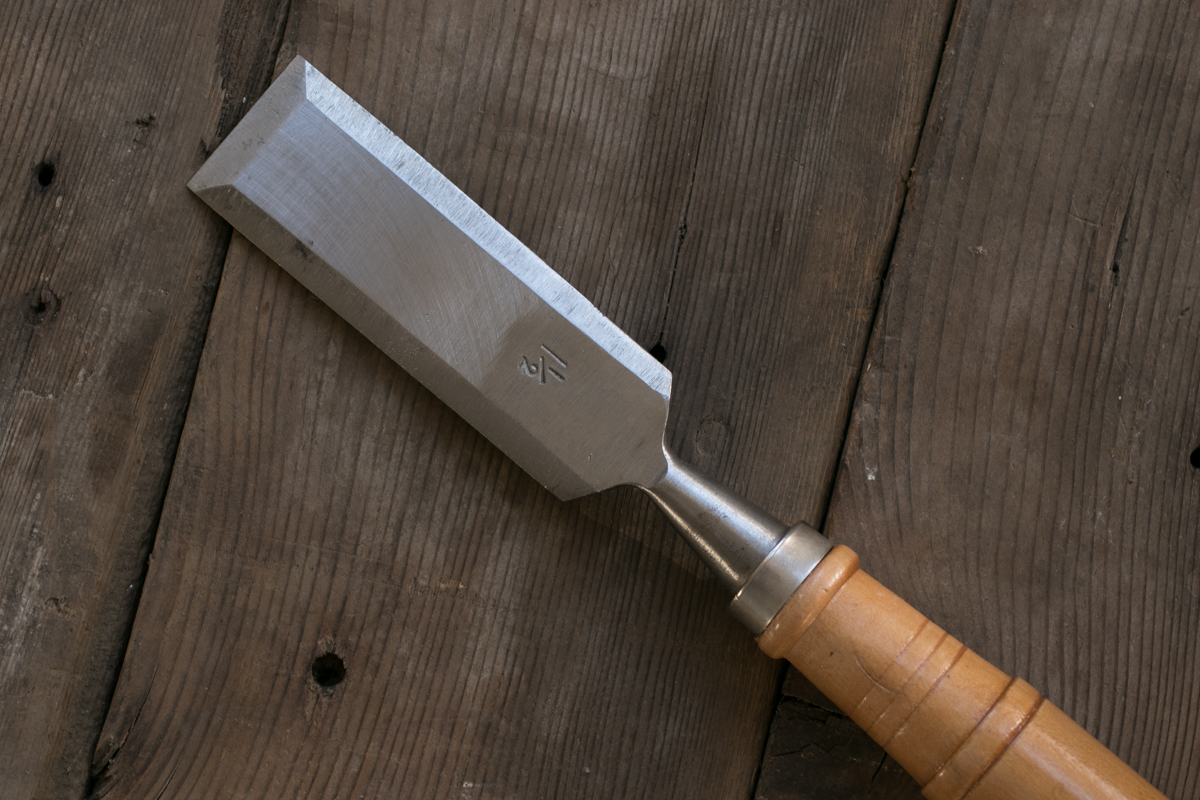
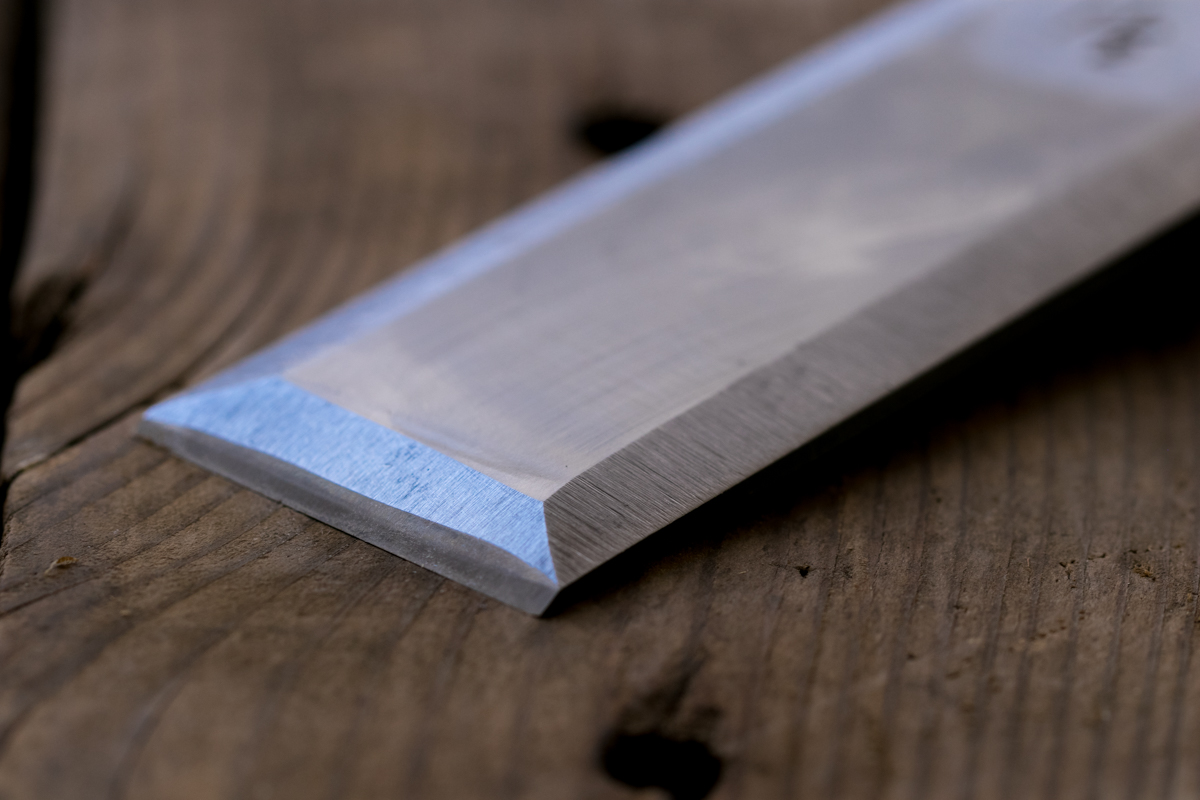
You can see how the original bevel was not square to the sides by the slight angle of the new one. 


Your chisel is ready to work. Please let me know if you have any questions or thoughts in the comments below. 


How to Drill a Perfectly Straight and Square Hole without a Drill Press

$
0
0

Sure, every once in a while, you choose to intentionally drill a hole at a specific angle. Perhaps your compound joinery demands it, or you're going for a stylish, contemporary look on a project.

But most of the holes we drill — I'd hazard to say a good 99% of them — are intended to be drilled straight on, perfectly perpendicular to the surface. You can do this precisely with a drill press, but many makers don't have one, and they require specific set up and work that's small enough to be placed on the table. 

So that leaves the cordless drill. A tool that, when balanced on the tip of a drill bit, can be easily canted and slanted off square in every single direction, especially when you're putting force behind it. 

But! The task is not impossible. Yes, DIYers, you can drill a perfect 90° hole with a cordless drill. Here's how it's done.     

First, Set Yourself Up for Success.

When you need to drill a perfect, 90° hole, you need to concern yourself with the angle of the drill and bit and nothing else. So, to make it easier, always make sure you create a small starting divot with an awl so your drill bit has a place to land. This way, you bit placement is set, and you can worry about the other moving parts.


The Commercial Option

The Milescraft DrillBlockis a simple and super handy aid made for exactly this task. It only costs $8, and it helps you create perfectly square holes in 1/16" increments from 1/8 – 1/2". It's a seriously good value, and if you use a cordless drill more than a couple times a year, it's a no brainer. Get one. 

You just place it over your drill bit, set the bit on your mark, secure it with your hand or a clamp, and drill.


Bonus:  the DrillBlock has a v-groove on the bottom, allowing you to drill 45° holes into corners and edges with ease. 


The DIY Option

Okay, but let's say it's 10:00 p.m. on a Saturday, and you need to keep going with your project. Or, perhaps you need a hole that's not in increments of 1/16". Or any other of the dozen reasons you might need to drill a straight hole without the aid of the commercial guide. Well, then, my friend, you make your own.

It's deceptively simple. Start with some wood scrap, about 1 1/2" wide and 10" long.  Cut off 2" from one end, ensuring the cut is perfectly square. 

Spread a little wood glue on the cut off, then place it on the longer piece 1" from the end. Use a square to make sure the two pieces are aligned.

Clamp the pieces together while the glue sets up.  (If you're in a hurry, you can set the alignment with screws and get on with your project.)


To use it, simple line up the drill bit with the corner created by the guide. Use your hand or a clamp to secure it to the work, line up, and go. You'll bore hundreds of spot-on holes of any size. Eventually it'll wear out, any you can just slap two pieces of scrap together and make another one. 


The Reusable Jig

If you need to drill a lot of hole of the same size, you can modify the DIY jig for even more consistency. Go to the brass and aluminum rod sections of the hardware store or hobby shop, and look for a tube with an internal diameter than matches your drill bit. This won't be the number on the label, so take your drill bit or a pair of calipers with you to measure. Cut a 1 1/2"-ish piece off the end.

Then, use some hot melt glue to secure it to one of the sides of your drill guide. You've essentially made a collet to guide the bit, which uses the same principle at the DrillBlock above.


Now... let's check our work.

Nailed it!


How to: Make a Custom Leather Luggage Tag

$
0
0

created at: 06/11/2014

Working with leather only needs to be as complicated as you want it to be. You can go deep, and get involved in stitching ponies, floral stamps, and swivel knives, or you can keep things simple with straightforward shapes and basic tools.   

This how-to from Fairgoods shows you how to create a sharp, classic leather bag or luggage tag, which beats the pants off that plastic-y job your suitcase came with. Or, you can get creative and make tags for anything you like... like your whiskey decanter ;) 

created at: 06/11/2014

If you want to take this up a notch, you can stain or dye the leather, or just ink the embossed recessed so the letters will stand out a little more. 

See how its done (plus a bonus project) at the Fairgoods blog - Father’s Day DIY: Embossed leather tag and tie clip


7 Things You Absolutely Must Do When Restoring a Classic Car

$
0
0

Editor's note: From time to time, we like to feature the voices of ManMade readers on the site. We love hearing what you're up to, what you're making, and how you stay creative. When ManMade reader Scott Huntington wrote in share his love of classic cars and the work that goes into restoring them, I asked him to share his experience. 

Restoring a classic car can be a fantastic way to bring a piece of automotive history back to life, especially if you've found a rare model that needs a bit of extra TLC. Here are seven things that need to be on your list of things to do when restoring a classic car, just to make sure that all your Ts are crossed, Is are dotted, and bolts are properly torqued.    

1. Finding the Car and Finding the Parts

The first step is to find your car — and then to find replacement antique car parts.  Do you have a specific make, model and year in mind or are you just looking for a project car? If you have a particular vehicle in mind, first make sure you're going to be able to find the parts for it — even if you can't get them locally, are they available?

This is when you should decide whether you're going to be okay with replacement parts or if you're going to stick to original parts wherever possible. Original parts are a great way to make your restored car as authentic as possible, but they may be difficult to obtain depending on the make and model of your classic car. If you're planning on aiming for one of the higher levels of car restoration, you should consider seeking out original parts whenever possible.

2. Decide What Type of Restoration to Do

There are four different levels of classic car restoration, and each one requires more work than the last. Driver restoration is the basic level — you get the car back on the road and operational and fix some minor cosmetic problems. If you're just restoring this car for your personal use, this is probably all you need to do unless there is some significant body damage.

Street show restoration is a step above driver restoration — you're restoring the car and repairing all major and minor aesthetic issues.

Show car restoration will probably require some professional work. This is a car that you probably won't be driving much once you restore it.

Concourse is the highest level — you should only aim for that if you're planning on putting your car in a private collection. Cars restored to concourse level aren't designed to be driven and are usually only completed by professionals.

3. Update the Safety Equipment

One of the most prominent problems with old cars is that their safety equipment isn't always up to snuff — they don't have airbags and could probably stand to have their seatbelts replaced to ensure that you and your passengers are safe in the event of a car accident. Even Jay Leno adds seatbelts to his older classic cars if they didn’t come installed initially.

You can also upgrade the electronics, the radio and even the air conditioning without the change being too noticeable. Of course, you don't have to worry about alterations being too obvious if you're just restoring the car for yourself — go crazy and bring your classic car into the 21st century with things like heads-up displays, Bluetooth enabled entertainment or other safety features like rearview cameras and parking sensors.

4. Pick up a Restoration Book

You buy a Haines manual when you start working on a new car — why wouldn't you pick up a restoration manual for your classic car restoration project? These books can walk you through everything from rebuilding an engine to the most common body restoration problems. If you're handy with cars, you might not even need it, but it never hurts to have some extra resources when you're working on a big project like this.

While you're looking at your restoration book, sign up for a few car restoration forums. Even if you're not especially social, these forums can be a great resource if you run into a problem that you can't solve with a restoration book or owner's manual.  These people are puzzling through the same issues that you are, and they may come up with some ways to fix a problem that you'd never even thought of!

5. Know Your Limits

Restoration's not as easy as doing maintenance on your daily driver. Take the time to assess your skills and know your limits before you buy your project car. If you're expecting to have to ask for help for any part of the restoration, make sure that there are local mechanics that can help — you're not going to take this project car to your local Jiffy Lube, after all.

6. Don’t Expect to Resell It

There are plenty of TV shows and websites that claim that you can restore your project car and resell it for thousands of dollars in profit.  Unless you've found an extremely rare model— and the chances of that are minimal — your project car will be something for you and you alone. You will probably end up spending more money to restore the car than you'd ever make back selling it.

If you're a junkyard junkie, you might get lucky and find a project car that is worth a lot. One of the two Mustangs used in the 1968 movie Bullitt was recently found in a junkyard in Mexico. Now, this is a one-in-a-million find, but if you keep looking you might get lucky.

7. Be Prepared for Setbacks

Don't stress if something doesn't fit or you break something. Car restoration projects inevitably come with setbacks. Don't let them stress you out — just be prepared for them. Take a step back, figure out a new plan of attack and get back to the project.  Don't feel bad if you have to take a break. Sometimes coming back to it with a clear head is the best way to move the project ahead. Have a plan ready for when you hit those setbacks and make a vow never to quit. The last thing you want is to sink time and money into a project that you give up on a few months later.

Restoring a classic car is a fascinating and rewarding project.  Just make sure you're prepared and have a plan in place for every contingency.

Scott Huntington is a writer and blogger from Harrisburg, PA. He is obsessed with his new hobby of smoking meats and other food, and never turns down the change to experience thee restoration of a classic. Follow him on Twitter @SMHuntington


Latest Images