Quantcast
Channel: Man Made DIY Recent Posts
Viewing all 2425 articles
Browse latest View live

40 Things You Can Do in One Minute or Less that Will Make Your Life That Much Better

$
0
0

A few years ago, I was attending a conference, and, as I recall, not really listening to the keynote speaker. It was one of those trying to eat-lunch-and-try-to-meet-new-people-and-I-can-barely-hear-from-the-back-of-the-room sort of things.

But, in a moment of unexpected drop in the banquet room din, I caught something that sunk in. The speaker, musing on happiness, suggested that it's all those little tasks and the clutter that hang over our heads and keep joy from settling in. That knowing you have a million little tasks to do is more stressful than actually doing those tasks. And it's not the big work projects, the term papers, the spring deep cleaning that keep us down, but the little stuff that piles up and creates anxiety about when we'll get it all done. The solution, she suggests, is to not put those things off, but to just do them now. The mantra here is "If you can do it in one minute or less, do it now." You always have 60 seconds available, and the impact is huge.

I've been trying to implement that in my life for the last three years, and though I get out of the habit sometimes, it's a commitment that consistently helps me feel more peace, more organized, and indeed, more happy.

So, with that in mind, here's a list of things you can do in one minute or less that really will make your life better and your mind quieter. 

1. Make your bed. It only takes 30 seconds.

2. Go around your house and pick up all the dishes and drinking glasses on your nightstand and coffee table. More than one is too many. 

3. Trim your toe nails. Seriously, it's less of a effort than you think. Don't be caught barefoot with those things. 

4. Clean off your computer desktop. An organized space is a productive space. 

5. Wipe off your bathroom mirror. You'll be amazed what a difference this makes, even in a less-than-spotless washroom. 

6. Open all the mail and envelopes you know aren't important. Just throw them away now. 

7. Pull in your trash, recycling, and compost bins from the curb. Might as well take out the trash while you're at it. 

8. Plug in your phone and charge it. Make sure it's ready to go when you need it. 

9. Take that pile of shoes by the front door (or under the coffee table) and put them where they belong. Which is probably not by the front door or under the coffee table.

10. Wash that plate or cereal bowl instead of putting it in the sink. If you have time to move it, you have time to wash it. 

11. Take all the receipts and papers and bags out of your car. You don't have to vacuum it clean, but there's no need for it to be cluttered.

12. Back up your computer. Don't give Time Machine a chance to tease you with those little pop ups.

13. Wipe off the front of your refrigerator or oven. Boom. Instant shine. 

14. Send that one email reply you've been avoiding. But just that one. Don't get caught up in your inbox. 

15. Clean the coffee pot or toss the filter and grounds now, not later. 10 seconds. No icky build up.

16. Floss. Your. Teeth. They're the only ones you got. 

17. Go through your text messages and make sure you've actually replied to the important ones, not just replied in your head. It's not the same thing. 

18. Invite your spouse or partner for some intimate time later. That should take way more than a minute, but the planning is easy and gets everyone on the same page about expectations. 

19. Microwave a bowl of half white vinegar and half water for one minute. This loosens the grime and makes it easy to wipe clean. 

20. Clean out your browser tabs. You're really not missing out by not reading that article you've had open for the past eight days. 

21. Replenish your toilet paper reserves. They'll be there when you need them.

22.  Throw all your dirty clothes in the hamper or a laundry basket. It won't make them clean, but it will make them not on the floor. 

23. Water your plants. And spend the remaining thirty seconds putting a reminder on your calendar to do it next time. 

24. Stack up books, magazines, records, DVDs, library media, etc, that you're currently enjoying.  You don't have to put them away, you just need to put them together. 

25. Switch out your bathroom towels. Time for a fresh option. 

26. Take your vitamins. Really, you have 3.5 seconds. 

27. Look away from the computer screen. Focus on something in the distance to give your eyes a break. 

28. Refill your soap dispensers. Don't have this issue come up when you're covered with germs.

29. Stand up, take a walk. Repeat every thirty minutes. 

30. Put on sunscreen. Then go outside.

31. Smile. Really, really big. If you don't have it in you, fake it til you make it. 

32. Fluff and straighten the pillows on your sofa. Sounds fussy; makes your living room look like you just cleaned it even when you didn't. 

33. Download current episodes of your favorite podcasts. Do it now while you're on wi-fi, so they're ready for when you aren't. 

34. Tell somebody you love them. Easy and free. Text your mom. 

35. Do 30 pushups. Or work on it until you can. Then go for 30 more. 

36. Take all the coats and jackets off hooks and back of the door and hang them up in the closet.  There's a reason they call it the coat closet. 

37. Shake out door mats and bathroom rugs. Go outside and smack them against something. 

38. Sweep underneath the toe kick on your kitchen cabinets. Do this once a day, and avoid getting the crud down in the crevices. 

39. Wrap and coil up your cables, headphones, and power cords. No more tangles. 

40. Close your eyes and breathe deeply for 60 seconds. You'll feel better. Trust us. 


The Most Instagrammed Locations in Every State

$
0
0

Many of us love to travel and it's always fun to see the local sights. Surprisingly though, the favorite sights are not what you'd expect. Since everyone has a camera in their pockets with the ability share their favorite places through social media, Busbud (a travel site for booking bus tickets) recently went through Instagram's location hashtags to find the most instagrammed places in the US.   

created at: 10/12/2015Some of the finds are no brainers and a little lackluster (the highest concentration of Instagramming young people in Kansas is going to be KU campus and surrounding area), but I found fantastic parks I'd never heard of and gorgeous districts you'll want to visit. The most surprising find for me was the number of baseball fields that topped this list. 

created at: 10/12/2015

Click here to check out the full list from CoolMaterial.com or get out there yourself and start changing those stats. 

ManMade Essential Toolbox: You Need a Quality Soldering Kit. Which One's Right for Your Project?

$
0
0

Soldering GunWhen most people think of joining metal parts, a big bulky welder comes to mind. But what about the jobs where something more precise is needed? You need a soldering kit. Here's a look at what kind is right for your project.  

We all come across the need to join soft metals in the shop. Whether it’s a copper plumbing joint or a loose appliance wire, there’s a soldering kit for that. Soldering is used for plumbing, electrical connections, thin metal joints for flashing or stained glass work and also jewelry. Technically, there are three types of soldering – Soft soldering, silver soldering and brazing. In all methods, heat is applied to the metal parts which melts the softer filler metal and joins the pieces together. The type and use of the joint is what determines the method used. All methods use a flux material which cleans and protects the metal from oxidizing while being heated, and heat to melt a filler metal that flows into the gap and joins the pieces together. So here’s a quick run-down on the different applications of soldering and which to choose for you project:Soft Soldering

Soft Soldering– This method is for projects where a soldering iron can be used to heat the metal, which is up to about 752f degrees. Soft solder is not strong enough to be used for structural pieces or anything that will be under stress, but the lower melting temperature is perfect for electrical connections where surrounding components can be damaged by high heat. Use this method to repair loose or broken electrical wire connections in electric devices or appliances (note- be safe when repairing any electrical appliances or tools. Only perform repairs if you are properly informed on the safety hazards of the job and always have a pro look at your work). This method heats the filler metal and once it reaches a liquid state it flows into the gap in the joint through gravity. There are two types of tools for soft soldering, the soldering gun and the soldering iron.

    • Soldering Iron – The iron is a small, affordable and very precise tool that looks like a long screwdriver with a cord. This tool is for tight work where visibility of the work is important. The small coil in the tool heats up slowly, and cools down fast so this is good for focused work but will fall short if used for a large repair or multiple joints. There is also a butane version available for portability, but expect longer heat-up times and a bit more hassle with the heat exhaust singing fingertips or plastic parts. Multiple tips are available for specialized work, or even minor wood burning.

    • Soldering Gun – The gun is a much larger and robust tool good for large repairs or multiple joints. While it is much less of a precise tool, the large coil heats fast and maintains that heat for long periods. Multiple tips are available, but don’t expect to get any that match the control of the smaller iron.

When working with precision joints, a few tools are invaluable. Consider these if you’ll be working small:

    • Precision Screwdriver Set – These super small screwdrivers will help you get to the repair with less headaches. There are almost always a few strange screws that need a special touch to get loose, and those small screws can be stripped easily with the wrong tool so be safe and get a kit. Bonus, they also work well on sunglasses and watch batteries.
    • Detail Work Magnifying Glass– This small tool holds a magnifying glass at the right angle to see everything a bit clearer. They also have a set of alligator clips that and act as a second set of hands to hold the pieces in place while you solder them.

ManMade Recommended:

 Soldering Jewelry

Silver Soldering – This type of soldering is used to make jewelry and other related items which need a strong joint that doesn’t have a gap to fill. This means that the metals must be essentially flush so the silver solder can be absorbed by the surrounding metals. This precise joinery is need when the joints should be indiscernible from the rest of the metal, but is very specialized. If you plan on heading into this type of project be sure to read up on the proper materials for the specific joints. Plan on needing a very precise torch for this type of work with a burning temperature of about 1400f degrees or so. Check out this tutorial for more information on soldering jewelry.

 ManMade Recommended:

BrazingBrazing – Brazing is still a type of soldering, and it is generally used to describe soldering at higher temperatures with a flame. This method is used in plumbing or other large metal joints where the material dissipates the temperature much faster than a soldering iron or gun can keep up with. This method heats the metals to be joined, and the filler metal flows into the gap through capillary action instead of gravity. Use of a handheld torch burning propane or MAP-Pro fuel is the preferred method of heating the joint. Take a look at our Blow-Torch Article for more details on handheld torches.

(Note – be sure to keep an eye on surrounding materials that may be sensitive to heat like studs, drywall or wiring. If in doubt, use a heat shield to protect them).

ManMade Recommended:

So no matter what type of soft metal you need to join together, there's a method and tool that will make the job a DIY success.

The Process: Crafting a Traditional Post-and-Rung Stool from a Tree

$
0
0

You know those videos that show some young dude dressed in leather boots and a crew neck sweater, walking into his shop or studio, blowing off the sawdust or unrolling a side of leather, arranging his tools and assessing his materials, all with some slow churning music and a shallow depth of focus?   created at: 10/15/2015
This is definitely one of those videos. Yet, it still manages to be totally inspiring and makes me want to 1) go out into the woods and 2) make stuff and 3) learn more about handtools... so, I guess it did its job. 

At nearly 20 minutes long, it certainly takes its time, but the overall effect works, and its easy enough to shuffle through. In some ways, the videos long shots and lack of dialog mimic the meditative nature of handwork... the medium matches the message. 

Check it out: 

Greenwood from Adam Newport-Berra on Vimeo.

Keep Your Busy DIY Mind on Track with These Super Effective Productivity Tools

$
0
0

DIY Memory Management

Perhaps the most essential tool for any ManMaker is your mind. However, if you're like me, it can be really hard to keep your mind on track. That's why I have to write everything down!

Although it may seem obvious all the materials you can use to make and keep notes, but I can't help but be inspired by all the ways I see others manage their productivity. I thought I'd share a few things I use on a daily basis to keep my mind on track with my ideas, price lists, sketches, quotes and plans.

Analog Options

DIY notetaking

Sketchbooks

We'll jump right in with the most common of them all. The almighty sketchbook! I love my large leather soft cover from Moleskine. Like most Moleskine fans, you can end up having a growing library year after a year. The best tip I can give about a sketchbook is to not compare your sketches to all the ones you see online. Some people make their books a beautiful canvas (not me) and some people just scribble all over it and don't care if anyone ever sees it (totally me). Just embrace that this sketchbook is yours and scribble away!

DIY Memory management

Pocket Journals

I also like to keep a tiny sketchbook for trips to the store or out for idea meetings. I'm the worst at remembering things and tiny books like these really help me remember groceries, how many bolts I need and where the heck that new lumber mill was. you can get a small pack of these from Moleskine or pick up a few of the ever-popular Field Notes books.

dog grid notebook


Behance Dot Grid Books

One of my favorite notebooks I keep for drafting is the Behance Dot Grid notebook. Instead of your typical graph paper and ruled paper Behance has developed a fantastic set of notebooks with perforated paper printed with a grid of dots that you can use to assist you in drawing with better precision! They offer several sizes as well as other types of books to help manage your productivity. Check them out over at The Ghostly Store.


Digital

DIY Project managementOne of my favorite management apps if Wunderlist. In reality, it's a simple list-making app, but it's ease of use and delightful interface have made it a lifesaver for my absent mind. It's where I keep all of my to-dos, blog ideas, guest lists for parties and the weekly grocery list. You can also share and collaborate lists with other users. You can get Wunderlist on your desktop, iPhone or Android.

Evernote and Google Drive

If saving paper is more up your alley EverNote or Google Drive are fantastic note-keeping companions. You can keep short and long form notes, to-do lists, attach photographs and documents and sync it across all your devices. 


DIY Project productivity

SketchUp

Sometimes, big ideas need more detail than several pages of cat-scratched mockups. Once you get the hang of it, SketchUp can really help you plan out exact dimensions of your next project even help you figure out exactly how much material you could need. It's 3D rendering capabilities can help you plan out a project down to the very centimeter. I've started on a (pictured below) pair of side tables; next is the drawer layout. 


photoshop mockup

Photoshop

Photoshop is another great mockup and planning tool for placing your creations into real spaces. Got a new print that needs a custom frame but you just don't know how big you want the frame to be or where it should be placed on your wall? You can use Photoshop to place your sketches into an iPhone pic of the actual wall you need. Not to mention, it's kinda fun to see how real you can make it look. Too bad you can't just print the entire project from your design!


Hopefully those have given you some great inspiration to get your ideas sketched on. It's the first step to increasing productivity! What are some of your favorite ways to keep your thoughts together?


Best Value in Booze: What's the Best Single Malt Scotch Under $30?

$
0
0

created at: 10/15/2015

There are times to try new things. Times to taste different flavors, experiment with products, seek out something you've never encountered before...And sometimes, you just want to know what the best option is. The easy choice. The go-to. The everyday variety you know will work when you need it, and rely on every time.      Throughout the next few months, ManMade is seeking out the best affordable bottles of a variety of spirits that work well in your home bar, but know you can grab at the store the next time you head to a friend's house or a party.   

Since it's fall, we've turned our sights to whisky, and we have good news. Yes, there is a delicious, clean, and super enjoyable single malt out there for under $30. 

Of course, when bottom shelf bourbons go for $12.00, the more-than-twice-as-much $30 range doesn't, at first, seem like that great of a value. And if you like bottom shelf bourbons, you probably have your expectations already set, and likely have a favorite, go-to bottle, so you're good to go.

For those who really appreciate the experience of a single malt whisky, drink it neat or with a tiny splash of water, and would love to enjoy nothing but Aberlour A'bunadhs and Lagavulin 16s and Ardberg Uigeadails if we could only afford it, this is something to rejoice in. In single malt land, bottles hanging out at the $45 and even $60 price range can be considered "value." So, sure, you can still get your collector bottles for special occasions, but a solid weeknight whisky for the same price as two tickets to the cineplex? Hallelujah. 

created at: 10/15/2015The answer to our prayers is: Speyburn 10 Years Old Single Malt Scotch Whisky. At my local store, it sells for $27.00, but goes for as low as $24.00 in some places. So, basically, a really flavorful single malt designed for sipping for the price of a good-enough blended Scotch? Big deal. 

Speyburn comes from the Highlands of Scotland, and so is similar in style to your Aberfeldys, your Obans, your Glenmorangies and Macallans. But, it is not as fruity as many Highlands...the flavor profile is more oily and oaky.

It's got a bit of peat, but to me, it mostly just tastes of its true nature: cereal grains. It's simply what distilled and aged malted barley tastes like. It smells great (the nose is definitely its greatest asset), and on your palate, a bit of citrus and honey, with an outdoor in the woods vibe. A little pine-y, and little rustle of dead leaves, a little campfire.

created at: 10/15/2015

It's good. Quite good. It's not my favorite Scotch in the world, but the deeper I get into it, the more I like it. Oh, and it's $27.00. For Single Malt Scotch. I would buy it for me and for company. I might even let someone put ice in it. Maybe.


Give it a shot this weekend, and let us know what you think in the comments. Cheers. 

For more in our Best Value in Booze series, check out these great bottles!


ManMade Essential Toolbox: You Need A Router, But Where Should You Start?

$
0
0

Palm Router
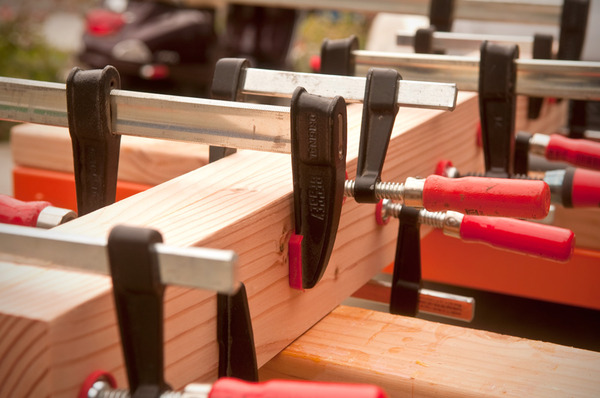
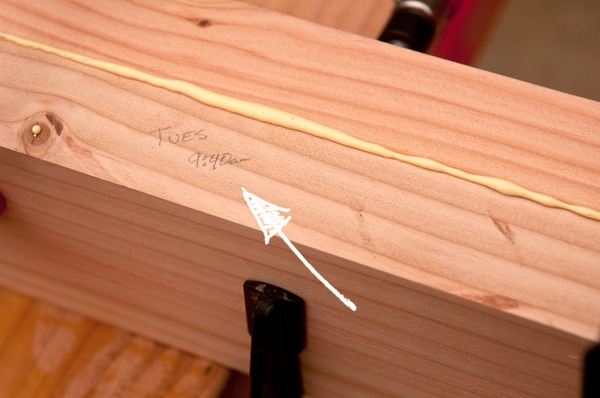
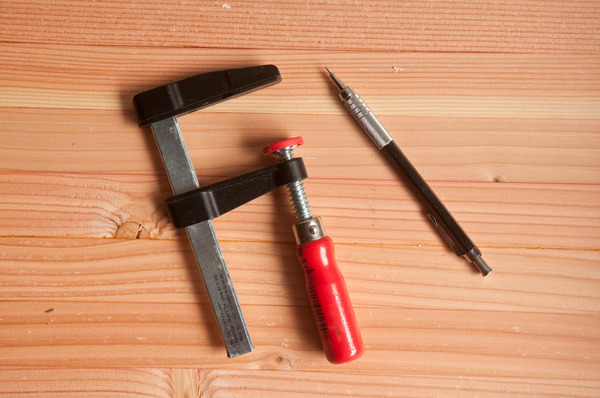
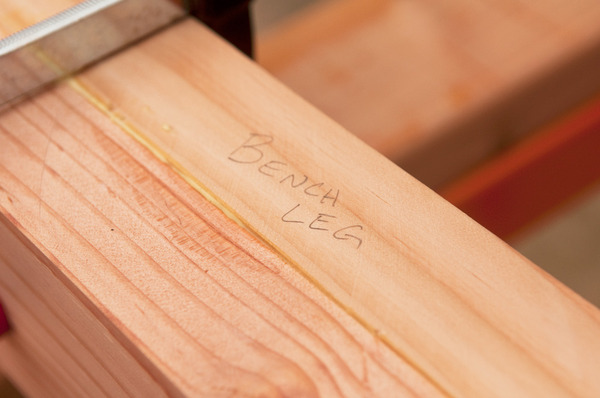
Aside from the table saw, one of the most useful tools in my shop is the router. This large, loud, powerful tool can be intimidating to work with, but once you know the basics I’m sure you’ll agree that it’s a tool worth learning to use.    The basic router is a large motor with a base plate that rides along the wood, and a shaft with a receiver called a collet that holds shaped bits which spin at high speed and shape the wood. The tool can be used by hand against a fence or guide, or can be mounted in a table with a fence for more control. The bits can be used on the edge of a work piece to round-over or profile the edge; they can plunge into the wood for lettering, decorative strips, dados; or even used to create raised panel doors.  I pick up one of my many routers for just about every project, because of the versatility, speed, and general usefulness throughout the process.Router with Trim Bit

First, let’s talk about a few basics:

  • Collet Size: Routers have a ¼” or ½” collet. This has to do with the size of the bit shaft. A larger shaft means there’s more weight behind the cutting edge so they result in smoother, cleaner cuts. For anything up to a 1.5 hp motor, the ¼” collet and bits work just fine and are quite a bit cheaper, but if you have the cash, start with a 2 hp motor with a ¼” adapter in the ½” collet. This will allow for upgrades of specialty bits in the future without the cost of a new router as well.
  • Speeds: Look for variable speed routers whenever possible as this gives a bit more precision and customization to the tool. Also, go for a “soft start” model that turns on and up to speed slowly. It’s a much more controllable experience that way, as the large motor can have a tendency to jump if it goes from 0 to 28k RPMs in a second.

Router Bits

  • Bits: As mentioned above, I recommend getting a starter set of ¼” bits to see what you like and use often. They are relatively cheap and give a wide range of options to experiment and then know exactly which bits you want to upgrade as the need arises.

ManMade Recommended:

Router TableRouter Table: A table makes routing many pieces much easier and safer to control. There are two types of tables, benchtop and cabinet. Benchtop tables are portable, low profile, and made to be used clamped to a bench. The downside is a small working surface, plastic components, and limited adjustability. If space is at a minimum or cash is tight, this is the option for you. If portability is less important that stability, look for the larger, more robust cabinet style table which has a larger top, more hold down features and an upgraded fence system. This type is less portable due to weight and size, but it’s much easier to use overall. If you have the room, I purchased a cabinet-sized table top, and installed it directly into my workbench. Take a look at that set-up here.

ManMade Recommended:

Now that we're talked about the basics, here are the three main types of routers I use throughout my projects:Router Base

  • Fixed Base Router – A fixed base router is the workhorse of the router family. It is the burly, stable, hefty piece that does most of the work when a lot of material needs to be removed. This is probably the first router you should buy because it does just about everything the other two can do, just not as delicately. A fixed base is just that, the bit is set and then locked down for a stable cutting depth. Go for a large 2 hp+ motor for your fixed base router, and definitely spring for the ½” collet for future expansion into large cutter heads.

Use for: Edge profiles, Dadoes, Signmaking, Edge Banding, Flush Trimming

ManMade Recommended:

Plunge Router

  • Plunge Router – This type of router has a spring-loaded base that allows for the bit to be plunged into the work piece for cuts that don’t go through to the edge. The plunge router is great for easing into a cut and hogging out the majority of the materials slowly without time-consuming bit changes. I usually keep a ½” straight bit in the tool for dadoes. I purchased my plunge router as a set with both a fixed base and plunge attachment which is convenient if you only have one motor, but I generally keep the plunge base on there, and have another with a fixed base.

Use For: Dadoes (especially stopped dadoes), Fluting, Signmaking, Keyholes and plunge cuts

ManMade Recommended:

Trim Router

  • Trim Router- Used for handheld shaping like small round-overs and flush trimming. The size and handling of this tool makes it easy to control the cut so one-handed operations can be done safely. It’s amazing how useful it is to use a tool this size that can be controlled with a single hand, as both the big brother tools require two handed operation to be stable. Keep in mind these small motors won’t stand up to heavy cuts or complicated profiles, but for about 90% of your edge trimming this will be the tool you reach for. I keep a flush-cut bit in it to use when cleaning up the edge of doors and boxes. Look for something with a thin and easy to hold body, easy to adjust depth, and at least a 1.25 hp motor for enough heft easily make the cut.

Use for: Trimming laminate, Flush cutting edges, Simple round-overs, Inlay work

ManMade Recommended:

While there may be a lot to learn about the usefulness of routers in your shop, there really should be no question about whether one will find a use. Start using one on your next project, and I'll bet you will end up reaching for it just about every day you spend out there in the shop.Roman Ogee Profile

Don't Spend A Dime This Weekend - It's Easier Than You Think

$
0
0

EscapeWith the weekend always right around the corner, it's time to think about plans. How about trying this - keep the wallet at home and figure out how to spend two whole days without spending a dime.   I was taking a look at an article a few days ago, and something caught my eye. The author talked about locking their wallet in the drawer, and figuring out how to spend time without dishing out cash along the way. This concept was interesting to me in a few different ways. First, I looked back over the past few months and I thought about the weekends that really mattered in terms of memories and experiences. You know what? The best ones were free.

You see, the best experiences are so much more about using what you have in a new and creative way. About visiting places you should be been years ago, but life was just too busy to slow down and go.  Here are three of my best weekends from this summer, where I spent almost nothing, but had a blast.Caved

1. Subway Caves - About an hour West of me, is a small 1/2 mile lava tunnel called the subway cave.  It's a deep, dark hole in the middle of tumbleweed and dry grass pastureland near Mt. Lassen. This tunnel has a remarkable smooth roof, and stays about 65 degrees all year, and it is the darkest place I have ever been. I took the family out there one morning for the first time, figured a walk through the cave and lunch by the softly flowing Hat Creek would be a good break from the valley heat. While there was no moment of transcendence, we had a great time and I got to see the wonder and hint of fear as my girls stared down into a gaping black hole; one wanted to go home while the other ran headlong into the adventure.

Castle Crags

2. A Midnight Hike -  This adventure took me to the top of a local wonder called Castle Crags, a towering granite feature that rises from the surrounding forest like fingers reaching for the sky. The best views from this lofty perch are caught during a full moon when the whole area is bathed in a faded white glow. Keep in mind the woods are no picnic in the dark, so be sure to bring along plenty of light and a fully charged cell phone just in case. A few friends and some sandwiches was all it took to make it a hike that we'll talk about for years to come.Booked

3. Book in the Park -  While not as grand as a mountaintop jaunt, a full day in the park with a good book and a hammock is just hard to beat. I cleared my schedule, walked to the nearest shaded park, and set up between two trees. This break in the busy side of life was a clean and easy way to reset and head back into the week well rested, and well read.

Those are just a few moments in the past year that cost little to nothing, but really gave me a lasting memory. There are definitely opportunities for you to do the same wherever you may call home, so plan a break soon, and let us know how you spend your well-earned time.


Reflecting on a Season of Outdoor Adventures: What Makes It All Worthwhile for Me

$
0
0

Atop Mount Whitney

Around this time of year I often find myself in the basement, getting my backpacking gear ready for winter storage. It's a bittersweet ritual I go through as the season comes to a close. If you love the outdoors like I do, you probably get asked from time to time, "Why do you do it?" After all, mother nature can be a tough mistress. As I unrolled my packs and checked my tents for damage, here are some of the moments from the last year that help me answer that question:

The best backpacking trips are also the toughest (I mean, if climbing mountains were easy, why would you do it?). The payoff is that surge of emotion when when you reach the highest summit, or that tender moment you share with friends when you find the perfect campsite at the end of a long day. Of course, having the right food along the way makes a big difference.

Jerky is my favorite protein-packed trail food, so I was excited to try a new product from Ball Park ('yep, you know 'em from the hot dog stand). They sent me a box of their new Tough but Tender Ball Park Flame Grilled Jerky (it's on shelves now); it's flame grilled (instead of dried like most jerky), with a uniquely tender texture that stands apart from other jerky. 

Ball Park Flame Grilled Jerky is gluten free and has no added MSG


#toughandtender Ball Park jerky is available in 5 varieties: original beef, Bourbon BBQ beef, peppered, beef, BBQ pork, and teriyaki pork.

Find out more and follow Ball Park on Twitter and Instagram


On Top of The World

Last winter I climbed California's Mt. Whitney, the highest peak in the lower 48 states.  The air was thin and crisp as we wound our way above the tree line somewhere in the Sierra Nevada Mountains. Submitting a mountain is a relentless string of switchbacks, and the only direction is 'up'. But the breathtaking views around each turn are their own reward.

Summiting!

I’m not sure who had the idea that a winter walk up the mountain was a good idea, but I do remember my water bottles freezing solid within minutes. We left before dawn, and my toes were completely, disturbingly numb when the sun broke the horizon and we crested the rocky summit.

As I sat down and inhaled a bag of  jerky between handfuls of trail mix, the feeling gradually returned to my feet, and I realized I was on top of my corner of the world looking all the way down to Death Valley miles below. At that moment, there was nowhere else I would've wanted to be.


Car Camping

Last spring, one Friday afternoon, I grabbed my lightweight gear and headed out to a local alpine lake for an overnight trek. Nature was waking up from under a winter blanket of snow, and the freshly greened landscape was the perfect backdrop for a great hike.  The warm weather called for a cloudless night, so I left the tent behind and planned to sleep in my hammock under the stars. About 2 miles down the trail, I heard the pounding rain before I could see it. Massive dark clouds came over the ridge and I was caught in a quick storm cell that lasted just long enough to soak everything I had.

Fog coming in.

Backtracking the mucky trail, I ended up right where I had started an hour before, and spent the night sleeping in the car. Later that night, as I stared at the explosion of stars through the sunroof, I laughed at how a great adventure is never what you expect, but always worth the journey.


Close Calls

During a fall road trip a friend invited me on a hike at a ski resort in Utah. While most people prefer to play there in the winter, it's a completely different experience when the snow melts is gone. The wide open slopes offer amazing views, and the valley explodes with autumnal color. 

The sky was full of high, fluffy clouds moving slowly across the expanse, so I packed a light jacket in case of a fall drizzle, and we set off up the trail. Packing light (thin jackets, shorts) made for a fast trip up the four-mile trail to the rocky ridge, where the soaring metal towers marked the end of the chairlift and the summit. We were stoked.

created at: 10/12/2015

But as we crested the ridge and looked down into the next valley, the group's mood changed. The fluffy cumulous clouds had given way to dark, angry storm cells that engulfed us within a few breaths. As the rain and wind pelted us on the exposed ridge, we pulled out our flimsy summer jackets and hunched over to keep dry; that’s when I first heard the rumble. It started off low, but was immediately punctuated by a flash of lighting a few ridges away. With metal towers and cables strung overhead on all sides, there just wasn’t a safe way to retreat. For the next half hour we silently huddled under foot-high scrub brush, and passed around the last of the snacks. When the storm briefly broke, we ran down the rain-slicked path toward the safety of an alpine lodge, limping in with an a great story to tell, but an experience I don’t ever want to repeat.


Those were just a few of my many (mis)adventures over the past year, and I’m looking forward to plenty more to talk about this time next year. But for now, here’s my go-to day-hike gear list. I keep it on-hand when I head into the great outdoors, where things never go according to plan, but always turn out alright:

  1. 35 liter backpack – Look for something with pockets to stash your snacks within reach.
  2. Lightweight hiking shoes – Day hikes don’t require boots, keep them light and comfortable.
  3. Rain jacket – Balance between light enough to pack small and coverage enough to fend off a storm.
  4. Sunglasses – Don’t bring your best pair, but polarized sure make the water look good.
  5. Lighter or matches – Just in case you end up in need of some extra warmth
  6. Flashlight – This can mean the difference between stumbling around and finding your way home.
  7. Easy, portable food – Like Ball Park Flame Grilled Jerky (I liked the Bourbon BBQ Beef best) - you want high-energy foods you can eat while you walk.
  8. First aid kit – Because you just never know.
  9. Extra socks – A fresh set of socks is like a warm hug for your feet.
  10. A watch – It’s  always good to keep track of the time when night comes on so fast in the woods.

Camping gear


created at: 10/12/2015

Do you have any stories of outdoor adventures that ended up being #ToughAndTender? Something that tested your mettle, but rewarded you in the end? What do you answer when people ask you why you love the challenges and adversity that can come with spending time in the great outdoors?

Leave us your comments and Ball Park will select a few readers to receive some free jerky! What's better than jerky in the mail?!


This post is sponsored by Ball Park. Thanks for supporting the brands that make ManMade possible.

Five Diverse Style Guides Every Man Should Check Out This Fall

$
0
0

created at: 10/19/2015

I think I have a fairly well cultivated sense of style, but I love seeing a well put together outfit with all the steps and accessories broken down nicely so that I can steal from it. If nothing else, I think it improves my style sense to see the trends in what makes great outfits. I found that nobody does this for my price range better than Primer Magazine, which recently put together five unique style guides for men this fall.  

Not only are they well crafted for diverse events (a night out in the city, an afternoon date hike, simply being the best dressed in a casual office), you can also click on each article of the ensemble and see where to buy it at the cheapest price. 

created at: 10/19/2015

Check them all out at PrimerMagazine.com under the Fall Getup Week headline. 

How to Make: Crazy Tasty Spiced Pumpkin Butter in Your Slow Cooker

$
0
0

created at: 10/19/2015

You know those little pumpkins you practically trip over in the market this time of year? It turns out: they're good for more than just Instagram props. With, like, no work, they make a really tasty pumpkin butter you’ll want to have in the fridge all year long. I’m talking about pumpkin butter with the magical spice flavor of pumpkin pie, but simple, less sweet and much more, well, pumpkin-y. Making a batch with “sugar” or “pie” pumpkins is easy because they’re small enough to roast whole in the oven. A slow cooker really does all the work letting the flavor develop a wonderful intensity and a just-right spreadable texture. All you need to do is throw everything in, hit “low” and let it go. All. Night.

Then, in the morning... wow. Delicious brown pumpkin butter. A great little energy booster spread on toast at breakfast. Keep some in the fridge so you can just dig your spoon into it, but keep more in the freezer so it will be ready to serve as a secret ingredient in all kinds of delectable creations. 


Here’s what you’ll need:

  • A 6-8 quart slow cooker (Crock-Pot) with a “low” heat setting. (Total cooking time will be about 8 hours.)

  • A food processor or strong blender

  • A hammer and a screwdriver (for venting the pumpkin)

  • 3 or 4 resealable half-pint canning jars

  • A few zip top bags for freezer storage (sandwich size works great)

  • An immersion blender (only if you have one -- completely optional)


Ingredients:

  • 3 or 4 small pumpkins -- usually labeled “sugar pumpkins” or “pie pumpkins”

  • 1 ½ cups brown sugar

  • ¼ cup apple juice or cider

  • ½ cup maple syrup

  • Juice of one lemon (about 2 tablespoons)

  • 1 teaspoon salt


The spice mix:

Spices can easily be adjusted based on your preference. Keep in mind, you can always add more of anything right into the slow cooker later if you want a bigger spice punch. Same goes for sweetness. The following amounts are more of a guideline -- no need to be exact.

  • 2 cinnamon sticks (or at least 1 tablespoon ground cinnamon)

  • 2 teaspoons ground nutmeg (grind fresh if you can)

  • 2 teaspoons ground ginger

  • 1 teaspoon ground cloves

  • 1 teaspoon ground allspice

  • optional: ¼ teaspoon ground cardamom (one pod ground)


created at: 10/19/2015

Step 1: Bake the pumpkins

Line a large cookie sheet with foil or parchment. Carefully punch 2 ventilation holes near the top (stem) of each pumpkin. A hammer and a clean screwdriver work nicely for this task. (Small pumpkins tend to be very tough and jabbing a knife into these little guys can be ridiculously difficult.) Place whole vented pumpkins on cookie sheet and bake for 45 minutes to an hour at 350º. The pumpkins are done when they darken and are tender when poked with a fork. Be careful not to let them burn or blacken.


created at: 10/19/2015

Step 2: Prepare spices and additions

While the pumpkin is baking, make sure your slow cooker is ready but don’t fire it up yet. Measure out the brown sugar, the salt, and all the spices into a separate mixing bowl so that everything is ready to add when needed. Separately, measure the juices and maple syrup so that they are also standing by. All of the added ingredients will go into the slow-cooker at the same time.


created at: 10/19/2015

Step 3: Make the pumpkin puree

Carefully remove pumpkins from the oven and allow to cool completely. Once they are cool enough to handle, use a knife to carefully cut them in half horizontally. Using a tablespoon (or a grapefruit spoon if you have it) scoop out the seeds and all of the stringy matter and set aside (you may want to roast the seeds later). Scoop the remaining pumpkin flesh away from the shells and into the bowl of a food processor. Mix together well until it is a smooth puree. A strong blender will also work for this but you may have to mix in batches.


created at: 10/19/2015

Step 4: Let the slow cooker do its thing

Put about half of the pumpkin puree into a slow cooker. Add the brown sugar, spices, salt, juices, syrup. Pour the rest of the pumpkin puree over this mixture and stir everything together. If you have an immersion blender, give everything a gentle blend breaking down any residual clumps and smoothing out the texture even more. If you are using whole cinnamon sticks, add them to the blended mixture now. Cover the slow cooker and turn it on the low setting for about 8 hours. If you’re comfortable with your slow cooker’s low heat setting, just let it go all night long. If you’re not sure, it’s always a good idea to check in occasionally to make sure the mixture is not burning along the edges. You may want to stir everything a couple times during the cooking process to help prevent this.


As the cooking time approaches 8 hours, the pumpkin butter should be turning to a darker brown, caramel color. This is a good time for a taste test to check out the spice level and sweetness. Feel free to add more maple syrup or brown sugar (or any sugar) now. Same goes for any additional spiciness you may want to add. Simply stir in and let simmer a little longer. If there is too much liquid in the mixture at this point, let the slow cooker work longer with the lid off.


created at: 10/19/2015

Step 5: Store in the refrigerator and freezer

When the pumpkin butter is ready, turn off the cooker and let it cool down a bit. Fill up some jars to keep in the fridge or pass along some refrigerated ones to friends. The rest can be stored in the freezer for months. A good way to freeze pumpkin butter is by filling up individual bags with about a jar’s worth in each one. This way you can use one at a time to refill your jar in the fridge or have a perfect portion to use in a different recipe.


In addition to spreading it on toast or a muffin, pumpkin butter works great in raviolis, cheesecakes, soups, sauces, lattes, bread, pizza, cookies and cocktails. My favorite way to use it is on a grilled cheese sandwich made with gruyere. Get creative and enjoy. Cheers.


created at: 10/19/2015


Yum, right? Here's all those photos all formatted up for social media. Do use a favor and share it on Pinterest, please?

 created at: 10/19/2015


Tom O’Connor is a photographer with a primary interest in food, travel and lifestyle photography. You can view his work here. He recently moved from Brooklyn to Pittsburgh where he is busy navigating his way through the city’s excellent bars and vibrant food scene. Tom is also the co-creator of Little Island Kitchen, a food based web store featuring a curated selection of small batch food products and kitchen items.

Follow Tom at his site and Little Island Kitchen, and on Instagram, Twitter, and Pinterest.

Try This Simple Trick Anytime You Use Wood Glue on Your Woodworking Projects

$
0
0

created at: 10/20/2015

Whenever you're working on a bigger woodworking project that involves milling and preparing stock for parts, you often have to work on several parts at once in order to maximize efficiency. For example: dimension, plane, and joint all the wood at once while the tools are set up, cut all the joinery while the dado stack is installed in the table saw, etc. One of the most important ways to stay organized and maximize your available hours is not only keeping track of parts, but knowing when its best to work on each component. Unless you're a production shop, you, like me, only have a limited number of clamps, so glue-ups and laminations need to happen over time. Once your stock is jointed and planed, it has to be glued up and fully cured before it can be machined again.

You only need to clamp your material for 30-60 minutes, but the curing time can take a full 24 hours before pieces can be cut to size, joints added, etc. So, to make sure each piece is safe to work on, try this simple trick: 

created at: 10/20/2015

Label each piece with the day and time you added the glue and clamps. You might think you'll remember, but with bigger projects and all sorts of setups, its easy to forget when it got slathered on. So, just label it with the day and time; the date isn't totally necessary unless you're a perfectionist. Anything more than a day old is safe to use, so if you don't touch a piece for a week, it's definitely good to go.

And of course I removed that squeeze out before it hardened :)

created at: 10/20/2015

Writing directly on the part with a pencil is fine if you're going to make additional cuts, plane it, or sand it. If you're worried about marking up the parts, just use a piece of painter's tape that can easily be removed. 

Oh, and while you're at it, go ahead and label the part as well. Don't risk forgetting what's going on. 

created at: 10/20/2015

Boom. Done. Organized. 


30 Things Every Man Should Know About Grilling

$
0
0

created at: 10/13/2015

Grilling and barbecuing meals is one of modern life's true great privileges. Earlier communities cooked over the open flame out of necessity, but we get to choose to adds layers of smoke, fire, char, and salt, because some foods just deserve it. To light a fire and cook your meal upon it is a ritual of gratitude that honors the ingredients, the technique, and the time it requires to make it work. It is, in every way, and opportunity to make food special again.

created at: 10/13/2015

That's why we teamed up with our friends at Murphy-Goode Winery, who are all about good wine, great friends, and amazing backyard barbecues. This year, Murphy-Goode is celebrating their thirtieth anniversary, so we're sharing our thirty favorite grilling tips, ideas, techniques, and bits of knowledge to help you produce the best food your grill can produce. Here we go. 


1. Your steak has six sides, not two. Don’t waste opportunities to create more flavor. Season and brown your meat on top, bottom, and all four edges for maximum crust potential.

2. Flames do not make your food taste good. It's heat and smoke that make your food taste good. You’re not “flame broiling” your steak... you’re burning it. Grilling over orange flames produces unpleasant, acrid flavor. Wait for glowing coals covered in an even layer of ash, and keep a spray bottle around to squelch flare-ups.

created at: 10/13/2015

3. You’re not grilling unless you’ve got a drink in your hand. It could be anything you want: a glass of wine, mug of coffee, tall tumbler of iced tea. But grilling is a labor of love. You're there cause you want to be. Take your time, and enjoy it. 

4. Be aware of cross contamination. You know that pair of tongs you used to put that chicken on the grates? Don’t use that same pair to take the chicken off the grill. Keep two sets of tongs, plates, pans, etc., on hand for pre- and post- cooked goods; or scrub thoroughly with soap and water before using them again.

created at: 10/13/2015

5. A chimney starter is the only way to light charcoal. Real men don’t use lighter fluid. They use their brain, airflow, and a chimney starter to get charcoal glowing hot. If you own a kettle grill, you need a chimney starter and to know how to use it. Fortunately, it couldn’t be simpler.

6. BBQ is safe to eat at 145°. It is delicious at 195-205°. Most pork and beef cuts used for barbecuing (brisket, Boston butt) are USDA approved to eat at 145° F. But, these tough cuts really shine closer to 200°F, where the collagen and meat fibers have broken down and become fall-apart tender. Our current standard temp is 201.5°F.

7. Toss that plastic case, and assemble the ultimate à la carte collection of grilling tools. Note - there are no gigantic forks required:

8. Grilling is about balancing convection and conduction. Your food gets cooked in two ways on a grill: the direct temperature exchange between the heated grates and the food’s surface (conduction), and the hot air and moisture than surrounds the food (convection). Understanding that your food is being transformed by both is the key to balancing a great crust and food that gets cooked through to the proper temperature.

9. Pressing down on your burger is a sin. When you press on griddle, you fry a burger in its own juices. When you press on grill grate, you squeeze out those flavorful juices and let them fall to their tasty, tasty death on the heat below. Smashing with a spatula produces a satisfying sizzle, but a sub-par burger.

created at: 10/13/2015

10. Season from on high. Large pieces of protein are big, and need a lot of seasoning to bring out the flavor and create a great crust. Grab a big pinch of kosher salt and let it fall from 10-14” above the food to evenly distribute it across the surfaces. If it looks like it’s snowing, you’re doing it right.

11. You can do a whole lot with heavy duty aluminum foil. It’s a pan, a lid, a fireproof play dough that allows you set up all kinds of contraptions to control the heat. Learn to love it.

created at: 10/13/2015

12. Clean grates and oil after each grilling session. Start with a clean grill every time by getting into the habit of cleaning and oiling the grates immediately after grilling. Don’t wait until the food gets cold and hardens. Use a quality grill brush to clean the grates, then oil them with several paper towels dipped in vegetable oil. This creates a non-stick surface for the next time you grill.

13. Use your hand to gauge temperature. A charcoal fire doesn’t come with a medium-low preset. Instead, place your hand over the fire and start counting to determine when it’s time to add your ingredients.

created at: 10/13/2015

14. Don’t add BBQ sauce and glazes until the end. These things are full of sugar, and sugar burns. Wait until the last five-to-ten minutes, once the food has mostly cooked, to add sauces and glazes. Then, after it rests, slather on some more.

15. Cast iron and stainless steel cookware are a grill’s best friend. Each can safely be used on any grill surface for sauces, mops, or to cook small ingredients that would fall through the cracks. Cast iron can be placed directly in the hot coals.

created at: 10/13/2015

16. Smoke [with] herb[s]. Adding woody herbs like rosemary, thyme, oregano, and sage to your fire creates flavorful smoke that coats the wood. Just soak them in water before using to encourage smoldering and prevent burning.

17. You should salt big food way ahead of time; as much as 2-3 days. Larger cuts like steaks, chops, roasts, whole chickens, etc., all benefit from a “dry brine,” which allows the salt to penetrate deep into the meat. Seasoning ahead of time and allowing them to dry out in the fridge produces moister meat and a more flavorful crust. Grilling on Saturday? Season your steaks Wednesday night.

18. Know cooked temperatures, and which food belongs in each category. Don’t memorize numbers for different proteins. Rather, learn the standard temperatures and which foods belong in each category. 165°F is well done whether it’s fish, chicken, pork, or beef.


19. Grill marks are beautiful, and overrated. Yeah, we eat with our eyes first, but we eat with our mouths most. Flipping the meat often helps for more even cooking and better crust development.

created at: 10/13/2015

20. Don’t be afraid to use the coals directly.  Not everything needs to stay on top of the grates. You can place peppers, corn, onions, potatoes, and shallots directly in the coals to roast them. You can even cook some steaks right on the surface of the coals. Since there’s no air in between the food and the fire, no flames can occur, producing off flavors.

21. Fireproof bricks are useful again and again. A set of four fireproof bricks can be used in variety of ways when grilling, and they're awesome to have on hand. Use them to elevate or add a second grill grate, to build an offset fire for low-and-slow cooking, or to wrap in foil and preheat to press food and cook from both sides.

22. Safety first. Keep a fire extinguisher handy whenever you're working with fire. A long hose attached to a spigot also works well, just make sure it reaches the grill. A spray bottle filled with water is a good tool to handle flare-ups.

23. Repeat after me: natural hardwood lump charcoal. It burns hotter, cleaner, and more flavorfully than briquettes, and contains no fillers, additives or chemicals that will affect your food.

created at: 10/13/2015

24. Where there’s smoke, there’s flavor. In case you haven’t heard, wood smoke is delicious. You can incorporate it into your grilling no matter what style of grill you have. For gas grills, use hardwood chips that you’ve soaked in water. Make a little pouch of aluminum foil or get a smoker box to keep them contained. For charcoal, use hardwood chunks or even dry logs and place them on top of, or beside, the coals. Species like oak, hickory, apple, cherry, and pecan are all versatile and taste amazing.

25. Gas grill temps are adjusted with knobs.Charcoal grill temps are adjusted with airflow. Combustion works and changes due to a fire’s access to oxygen. You can fine-tune even a charcoal or wood fire by adjusting how much air it’s able to process by using the vents on the top and bottom of your grill (or by the leaving the lid off). Invest in a good thermometer that you trust, and learn to dial it in just right.

created at: 10/13/2015

26.  Welders gloves are amazing grilling tools. You know those fabric grilling mitts are hard to use and then eventually catch on fire, so you have to replace them. Stop buying those. Your hands aren’t mitten shaped.

Instead, get yourself a pair of leather welders' gloves that cover the forearm. You can use them for everything while still being able to use your fingers like a proper human being. 

27. Know the difference between indirect and direct heat. Understanding the balance between direct and indirect fire is the key to grilling food with a perfect crust and well-cooked insides. On a charcoal grill, this is achieved by banking coals to one side of the grill, or placing them to the outside with a cool zone in the middle (often with an aluminum pan in the middle). With a gas grill, this means setting the primary burner to high and keeping the others low, or even off. 

28. Never cut into meat or fish as soon as it comes off the grill. You just excited all the juices inside; now let them calm down and redistribute so the flavor stays in the food, and not on the cutting board. Wait five minutes for small cuts like fish and chicken; ten for big cuts of beef, lamb, or pork; and up to twenty-five for whole roasts.

created at: 10/13/2015

29.  Finish your food with good salt. Salt not only adds flavor, but texture. Use kosher salt before cooking, but finish with a coarse salt like Maldon or a flavored herb or chile salt after cooking for an extra burst of flavor and crunch. Sea salt + garden herbs = more than the sum of its parts.

30. You can own a top of the line gas grill… you still need charcoal. It doesn’t have to be big, but you need to know how to cook over a live fire. Small, portable hibachis or kettle grills are inexpensive, and high-quality cuts deserve the flavor of hardwood smoke. 


This post was sponsored by Murphy-Goode Winery. Thanks for supporting the sponsors who support ManMade! 

created at: 06/22/2015


Special thanks to The Big Green Egg Inc, who provided the Large Egg grill used in this article. Learn more about their products here. 

Frank Gehry's Designed His First Yacht and It's Spectacular

$
0
0

Probably the most famous architect to the non-architecturally minded is Frank Lloyd Wright, but I would bet that for a significant majority of the population Frank Gehry would be a close second. As the creative mind behind the Guggenheim Museum, the Walt Disney Concert Hall, and many more, Gehry is considered "the most important architect of our age" who can now extend his numerous credentials from architect to shipwright.   

At 86 years old, Gehry has been an avid sailor for quite a few years and you can see the effect of the ocean's ebb and flow in some of his designs that seem to billow in the wind despite being very physically stable. 

Click here to read more about his newly unveiled yacht (christened "Foggy") in the Town and Country Magazine. 

How to: Make Cheap Bourbon Taste Like a Million Bucks

$
0
0

make cheap bourbon taste better

By simply accenting the varietals in bourbon with similar ingredients you can easily move a bottom shelf brand up a level. All you need is three simple ingredients!

Make your cheap bourbon taste like a million bucksI stumbled across this genius idea over on Food52 where they take a turn at Cook's Illustrated's Kitchen Hacks. All you need are three ingredients you most likely have on hand: vanilla extract (to mimic the vanillin in oak barrels), liquid smoke (to hint the charred barrel) and sherry (to add a more flavorful body). Sound simple enough right? Read the entire piece and see their results after testing it in a few cocktails over at Food52.


The ultimate test will be to see if you can impress/trick your friends when you pull our a decanter and not tell anyone where it came from. What do you think? Would it work?


The Craftsmen of Etsy: 10 Wooden Products We Love

$
0
0

Bike Rack WoodenI've wandered through the Etsy offerings in the past, sometimes for inspiration, sometimes because something interesting has caught my eye. But lately, more and more great ideas are popping up on the handmade-centric site, and they're amazing. Here's a collection of Etsy's wooden offerings that are really worth highlighting.  

Wooden Fenders1. Wooden Cycle Fenders $30 Fenders on a bike aren't just about the looks, they really do keep you clean when riding on wet roads. But when the fenders are a set of sweet bent-wood masterpieces, your bike is going to upgrade from boring to bespoke in a second flat.

Wooden Watch2. Wooden Handmade Watch $80 In a world dominated by shiny, chromed, polished timepieces, there's still a place for the natural, clean, easy feel of a wooden watch. Take a look at the many options to find the wooden watch that catches your eye. They also have Wooden Sunglasses $80 that are just amazing.Wooden Bike Rack3. VeloPolka Bike Wall Rack $75 I've always tried to stash my bike out of sight in my house. But this amazing wall mount turns it into a decoration out of the way but still comfortably within sight. They have a few different options with shelves for helmets or other items.

Wooden Ring4. Stout Woodworks Steel & Koa Ring $125 This small mark on your hand is the perfect symbol that you're grounded enough to be classy without having to be flashy. Integrated Koa polished to reveal the intricate grain of the wood, bordered by a clean strip of stainless steel for strength and style. If Koa isn't your preference, take a look at the other options available.

Wooden Docking Station5. Watch and Eye Dock Station $42 There are a few things I'm always losing or just can't seem to find when I need them. Here's a simple but really clean docking station that will keep it all in one place and on display at the same time.

Wooden Tablet Cover

6. Kovereduk Wooden iPad Case $72 Even though I love technology, there really isn't much amazing about the looks most of the time. I find it's too hard and inorganic. This amazing wooden tablet cover is the perfect type of technological upgrade I can get behind with a natural feel and look that would feel right at home in my hands.

Wooden Toys

7. HC Woodcraft Wooden Toys $25 With kids sticking everything in their mouths, it seems like it's time to switch out cheap plastic toys with something a bit more natural. These make great gifts if you don't have kids of your own.

Wooden Fly Box

8. Engraved Wooden Flybox $15 This amazing little box is perfect for keeping all those fragile flies safe out on the water. Custom engraving makes it the perfect go-to when it's time to go cast a few.

Wooden Tie Clip9. Handmade Wooden Tie-Clips $23 These simple accents bring together your fancy suit with a bit of natural class. Simple and understated, but bold enough to be the perfect centerpiece on you duds.Wooden Coasters

10. Wooden Letter Coasters $18 These coasters bring back memories both wonderful and vexing of games I've had where my voluminous vocabulary seems to disappear without a trace. Great centerpieces, great conversation pieces, great idea.

So go take a look at the massive collection of handcrafted goods that Etsy has brought together for inspiration, or a great gift for just about any occasion.


Frank Gehry Just Designed His First Yacht and It's Spectacular

$
0
0

Probably the most famous architect to the non-architecturally minded is Frank Lloyd Wright, but I would bet that for a significant majority of the population Frank Gehry would be a close second. As the creative mind behind the Guggenheim Museum, the Walt Disney Concert Hall, and many more, Gehry is considered "the most important architect of our age" who can now extend his numerous credentials from architect to shipwright.   

At 86 years old, Gehry has been an avid sailor for quite a few years and you can see the effect of the ocean's ebb and flow in some of his designs that seem to billow in the wind despite being very physically stable. 

Click here to read more about his newly unveiled yacht (christened "Foggy") in the Town and Country Magazine. 

How to: Build an Rustic and Inviting Coat Rack w/ Storage and Message Station

$
0
0

First impressions count, and the first few moments someone spends in your doorway do too. You want the entrance to be welcoming and efficient for coats, shoes, etc., while also giving a sense of the rest of the house to come. And if your friends are of the Minnesota Goodbye persuasion, you inevitably spend a good deal of time chatting at the door before anyone leaves.   

FPSXGames designed this farmhouse style coat rack with a chalkboard and cubbies from reclaimed pallet wood on Instructables.com, and I think it sets a great tone for the entrance to a manly apartment. Keep the cubbies empty to hold everyday carrying items (or place a dish for keys, wallet, etc.), or display some welcoming decor items. The chalkboard is always handy for keeping track of errands you need to run or for playfully welcoming guests at your next dinner party

Never Buy It Again: Three Ways to Make Your Own Killer Ginger Beer

$
0
0

Dark and Stormy Ginger BeerOne of my favorite cocktail mixers is the spicy ginger beer, used for the summer favorite "Moscow Mule", or evening sipper, the "Dark and Stormy." But I've had enough of the spendy, over-sweetened bottles from the supermarket, so I figured: it's time to make our own. Here are three ways to make an extremely tasty version happen at home. With an affinity for making things, it should be no surprise that I love mixed drinks. There are hundreds of combinations that fit just about any palate, from spicy to sweet, and sparkling light to syrupy dark. With just a handful of spirits and a few mixers, everyone in the room can find something they love.Ginger Beer Concentrate

1. Ginger Beer Concentrate - This is by far the easiest way to make your own Ginger Beer at home. This version is reduced to a syrup that is mixed with carbonated water for that zip of ginger without the wait. If you're in need of a batch of ginger beer in a hurry, this can be completed and pouring in about an hour.

Ingredients - (makes about 32oz of concentrate)


  • 1 1/2  cup ginger root
  • 1/2 cup sugar, dissolved in 1/2 cup hot water (simple syrup)
  • 1 cup fresh lime juice
  • 3 cups filtered water
  • 2 tsp aromatic cocktail bitters (floral or spicy)
  • club soda for xixing
  • Flip top glass bottles for storage


Start out by roughly peeling the ginger skin off the fresh roots, then cutting it up into rough chunks. Add the ginger and 1 cup of the water into a food processor or blender and blend for about 2 minutes until fully chopped.Peeled Ginger

Transfer the ginger into a mesh bag or fine sieve and squeeze the pulp over a bowl until most of the water has been squeezed into the bowl. Transfer the ginger pulp back into the processor or blender add 1 cup of water and blend again for about 1 minute. Transfer the ginger again to the mesh and repeat once more until all three cups of the water have been pressed through the ginger pulp, discard the ginger.

Add the simple syrup, lime and bitters and mix well. Transfer the mixture to sealed containers (16oz flip tops) and keep refrigerated for up to a month.

To use, mix 3 oz Ginger Beer Concentrate with 6-7 oz club soda for a great tasting Ginger Beer.Ginger Chunks

2. Cold-Pressed Ginger Beer -Like the above recipe, this one involves pressing water through the ginger pulp for a smooth, sweet taste without much of the over-the-top spice. Using yeast to ferment give the fizz without the aid of club soda/sparkling water, but it takes a bit more time and preparation. Expect this brew to be ready in about 3-4 days.

Ingredients - (makes about 64oz)


  • 1 1/2  cup ginger root
  • 3/4 cup sugar, dissolved in 3/4 cup hot water (simple syrup)
  • 1 cup fresh lemon juice
  • 6 cups filtered water
  • 4 tsp aromatic cocktail bitters (floral or spicy)
  • 2 tsp Cuvee Champagne yeast (available at a brewing supply store)
  • 1x 64oz Mason jar with lid (optional bubbler)
  • 4x 16oz bottles with flip top


Start out by roughly peeling the ginger skin off the fresh roots, then cutting it up into rough chunks. Add the ginger and 1 cup of the water into a food processor or blender and blend for about 2 minutes until fully chopped.Ginger Pulp

Transfer the ginger into a mesh bag or fine sieve and squeeze the pulp over a bowl until most of the water has been squeezed into the bowl. Transfer the ginger pulp back into the processor or blender add 1 cup of water and blend again for about 1 minute. Transfer the ginger again to the mesh and repeat once more until three cups of the water have been pressed through the ginger pulp, discard the ginger.

Meanwhile, warm 1 cup of water to about 75 degrees, and gently sprinkle in the yeast. Set aside and let hydrate for about 5 minutes.

Incorporate the yeast mix, simple syrup, lemon juice, and bitters, then mix well. Add two final cups of water and mix gently before transferring to a large 64oz container. Either have a lid with bubbler attached to relieve the pressure, or "burp" the bottles at least daily to avoid explosion from pressure.Boiling Ginger

After 2 days, transfer the ginger beer to 16oz bottles and store in refrigerator after 6-8 hours at room temperature. This will stop the yeast activity and keep from building up too much pressure. Use within about a month, and use caution when opening.Ginger Pulp

2. Boiling Water Extraction Ginger Beer -Unlike the first two recipes, this method boils the ginger to really extract out the spicy flavors.  Using yeast to ferment give the fizz without the aid of club soda/sparkling water, but it takes a bit more time and preparation. Expect this brew to be ready in about 3-4 days.

Ingredients - (makes about 64oz)


  • 2 cups ginger root
  • 3/4 cup sugar, dissolved in 3/4 cup hot water (simple syrup)
  • 1 cup lemon juice, fresh
  • 6 cups filtered water
  • 4 tsp aromatic cocktail bitters (floral or spicy)
  • 2 tsp Cuvee Champagne yeast (available at a brewing store)
  • 1x 64oz Mason jar with lid (optional bubbler)
  • 4x 16oz bottles with flip top


Start out by roughly peeling the ginger skin off the fresh roots, then cutting it up into rough chunks. Add the ginger and 1 cup of the water into a food processor or blender and blend for about 2 minutes until fully chopped.Ginger Jars

Add the ginger and 4 cups of water to a large saucepan and bring to boil for 5 minutes. Turn the heat to low and add lemon juice and simple syrup. Simmer for 10 minutes, then turn off the heat and let the mixture cool.

Meanwhile, warm 1 cup of water to about 75 degrees, and gently sprinkle in the yeast. Set aside and let hydrate for about 5 minutes.

Once the ginger mixture has cooled below 75 degrees, add the yeast mix, and bitters, then mix well. Add the one final cup of water and mix gently before transferring to a large 64oz container. Either have a lid with bubbler attached to relieve the pressure, or "burp" the bottles at least daily to avoid explosion from pressure.Filling Jars Ginger Beer

After 2 days, transfer the ginger beer to 16oz bottles and store in refrigerator after 6-8 hours at room temperature. This will stop the yeast activity and keep from building up too much pressure. Use within about a month, and use caution when opening.Ginger Beer

With those options on how to make your own ginger beer, there is really no reason you can't do it yourself. So take an afternoon and a bit of ginger and get your home bartending skills bumped up a notch with handcrafted mixers.


Watch a True Craftsman at Work: The Violin Makers

$
0
0

Music makes us feel. Good, bad, energetic, lazy...it's an ethereal experience to experience skill and passion coming together in one fluid moment. It has been said that the tone of a instrument improves over time as the instrument settles in, and the vibrations from playing helps to "open up" the resonance in the wood. 

While this may or may not be fully true, it is definitely true that a quality instrument begins with a master craftsman. Instrument craftsmen are some of the most gifted makers in the world. Not only must they be precise with joints and materials, but in the end the piece must sound as good as it looks. It truly is an art. Here are a few videos highlighted the mastery that it takes to craft a violin:

This is a very long but relaxing process video of the entire process.

So the next time you see an instrument, take a moment to appreciate the extreme commitment of the craftsman, and the music that comes with it.

Viewing all 2425 articles
Browse latest View live


Latest Images