Quantcast
Channel: Man Made DIY Recent Posts
Viewing all 2425 articles
Browse latest View live

Happy Pi Day 2016! Here's Why You Should Love (and Celebrate) π

$
0
0

Happy Pi Day 2016

Say hi to π. It's world’s most well known, most controversial number, and it has been baffling and delighting mathematicians for literally thousands of years. As you probably learned in junior high, pi (or π)  is the mathematical constant used to show the relationship between the radius of a circle and the circle’s circumference, usually abbreviated to 3.14159. But, pi is both an irrational number (meaning it cannot be represented exactly as a fraction) and a transcendental number (meaning it is not the root of any non-zero polynomial having rational coefficients). The fraction 22/7 is used most often for representing pi as it is accurate to 0.04025%.

The craziest thing – to brains of engineering-minded humans – is that pi is an infinite number, meaning we can never be exactly precise when using it. We just have to use our closest approximation. As a result, the number has taken on an almost mystical importance in modern mathematics, and even in pop culture. Pi is featured as a mystical property both in Carl Sagan’s novel "Contact" (in which it holds hidden messages from the creators of humanity) and in Daron Aronofsky’s

Pi features as a mystical property both in Carl Sagan’s novel "Contact" (in which it holds hidden messages from the creators of humanity) and in Daron Aronofsky’s 1998 psychological thriller, "Pi" (pictured above, whose protagonist loses his mind in the quest for unifying answers about the number).


Archimedes of Syracuse was one of the earliest Western devotees of solving the mysteries of the circle by other means, so much so that he didn’t’ realize the city-state of Syracuse had fallen into Roman hands during the Second Punic War. According to numerous sources of likely apocrypha, a Roman soldier burst in on Archimedes study, to which Archimedes replied in Greek, “Don’t touch my circles!” The Roman soldier didn’t speak Greek, and promptly lopped off his head.


A close approximation of pi is found in the Bible, and even the Great Pyramids at Giza seem to encapsulate the number (the height of the pyramid has the same ratio to the perimeter of its base as the radius of a circle would have to its circumference). Around 2000 B.C., Babylonians established the constant circle ratio as 3.125, while ancient Egyptians calculated a slightly more accurate value of 3 1/7 or 3.143. Our earliest written record of pi dates back to the 1650 BCE handiwork of the Egyptian scribe,

Around 2000 B.C., Babylonians established the constant circle ratio as 3.125, while ancient Egyptians calculated a slightly more accurate value of 3 1/7 or 3.143. Our earliest written record of pi dates back to the 1650 BCE handiwork of the Egyptian scribe, Ahmes, in what is now known as the Rhind Mathematical Papyrus. He was off by less than 1% of the modern approximation of pi (3.141592).*


Squaring the circle, a modern day idiom for a problem that's impossible to reconcile, is another method developed to understand pi. It dates back to antiquity, but was attempted by later scholars such as Leonardo da Vinci. John Donne even condemned the pursuit in a poem, writing:

“Eternal God—for whom who ever dare / Seek new expressions, do the circle square, / And thrust into straight corners of poor wit / Thee, who art cornerless and infinite—”


Our current moniker for pi is the Greek letter π (the first letter in the Greek word for “perimeter” or “periphery”), which has only been around for about 250 to 300 years. It was first coined by the Welsh mathematician William Jones and truly popularized in 1736  by Leonhard Euler (seen above appearing to wear a plastic tablecloth on both his head and body).

The act of calculating pi is a standard stress test of sorts for any computing device, somewhat akin to a “digital cardiogram.” A good computer shouldn’t find this too difficult, although I will point out that in the Star Trek episode “Wolf In The Fold,” Spock destroys the malevolent rogue element that has overtaken the Enterprise’s computer by asking it to calculate the final digit of pi.

The current world record for most memorized digits of pi keeps changing hands, although the unofficial champion is Akira Haraguchi, a retired Japanese engineer and previous world record holder (83,431 digits) who uses the kana method to memorize everything.Haraguchi documented himself publicly recited 100,000 digits of pi, although Guinness World Records has yet to authenticate his recitation. He regards his memorization as a spiritual act in the quest for eternal truth, and on Pi Day 2015, claimed that he could recite as many as 111,700 digits. 

Haraguchi documented himself publicly reciting 100,000 digits of pi, although Guinness World Records has yet to authenticate his recitation. He regards his memorization as a spiritual act in the quest for eternal truth, and on Pi Day 2015, claimed that he could recite as many as 111,700 digits. 

Pi is used in the modern era in a number of surprising ways. Electrical engineers use pi to calculate waveforms for alternating-current electricity, statisticians use it to track population dynamics and predict the number of deaths in a given population, biochemists use pi to understand crucial elements of the DNA double-helix. Pi features in GPS navigational systems, pendulum clock design, and in the expanding ripples formed in a liquid body from a drop of water. Speaking of bodies of water, Albert Einstein pointed out that

Pi features in GPS navigational systems, pendulum clock design, and in the expanding ripples formed in a liquid body from a drop of water. Speaking of bodies of water, Albert Einstein pointed out that there seems to be a ratio between the length of a river and its distance as the crow flies from source to mouth. That ratio? Pi. 

So, although π Day is obviously a little contrived, when it comes right down to it, it's every bit as relevant (and probably more so) as some more commonly celebrated holidays. So get out there today and revel in ratio, have a little fun, eat a little pie, or something else circular, like a donut, or a hamburger! Whatever you do, just remember to do it exactly 3.14159265359.... times.

What's your special way to celebrate π Day? Let me know in the comments!


It's Pi Day! The Tastiest, Math-iest Holiday of the Year!

$
0
0

Celebrate Pi day!
Pi is a mathematical constant that ... wait ... are you telling you don't know what π is? Oh, ok, good. I was worried for a second. 

Pi is awesome! It's a number that never ends, whose digits never show a pattern. The digits of π are random, but they're related to all kinds of distinctively non-random stuff, like the circumference of a perfect circle. And more! Like this:

Pi equals four times the sum 1 – 1/3 + 1/5 – 1/7 + 1/9 – 1/11 + ... The appearance of this formula alone is cause for celebration. It connects all odd numbers to pi, thereby also linking number theory to circles and geometry.
Why Pi Matters, The New Yorker


We spent a little time researching everything that's amazing about π. You can click here to read all about it; don't worry, no need to be embarrassed, we won't tell any one. 

So, in honor of Pi day, we teamed up with Yoplait to turn some of their Yoplait Greek 100 yogurt cups into bonafide π-day-mini-pies. Read on to get the delicious recipes (oh, and if you missed our protein-packed yogurt snacks post earlier this year, check it out here).


Key Lime Pi

  • Yoplait Greek 100 Key Lime 

  • Graham cracker sticks, crushed

  • Lime zest

  • Sprinkle of raw sugar for crunch

Key Lime yogurt pie

Key lime pie with Yoplait Greek 100


Pecan Pi

  • Yoplait Greek 100 Vanilla (or Salted Caramel!)

  • Chopped pecans, toasted

  • Dulce de Leche (optional)
  • Granola

  • Tiny little splash of bourbon (¼ teaspoon), optional

  • Sprinkle of ground cinnamon

Pecan pie

Yoplait Pecan pie cup


πππππ

We now interrupt these yogurt pie recipes for a delicious announcement: to memorize Pi to 12 digits (and more), just remember this picture:

Memorize pi!

(That's Friedrich Zietzche, grouchy nihilist philosopher, in case you didn't recognize him)

So, using the Mnemonic Major System, that would be:  

Meter tulip Nietzche whale mailbox

  3.14    159         26          5        359

Simple, right!? Just remember "Meter tulip Nietzche whale mailbox", and you're set! Or you could keep going and memorize Pi to 100,000 digits like this guy. Your call. Ok, back to yogurt pies!

πππππ


Blueberry Pi

  • Yoplait Greek 100 Vanilla

  • Fresh blueberries

  • Lemon juice and lemon zest

  • Sugar

Blueberry pi

  Blueberry pie


New York Cheese Cake (Pi!)

  • Yoplait Greek 100 Vanilla

  • Cherries

  • Squirt of agave nectar

  • Orange zest

  • Chopped almonds

  • Pinch of salt

New York Cheese Cake pie cup 

Chocolate Coconut Creme Pie

  • Yoplait Greek 100 Coconut

  • Cocoa powder

  • Shaved dark chocolate

  • Shaved coconut

Chocolate coconut creme pie


So, now that you're well-fed, and can recite Pi to 12 digits (you can, right?), go forth and celebrate Pi Day!


This post was sponsored byYoplait. All opinions are mine alone. Thanks for supporting the brands that support ManMade!


Take A Virtual Tour Through A Never-Built Frank Lloyd Wright House

$
0
0

Might I interest you in taking a free-roaming tour through a Frank Llyod Wright home that was never built? That's impossible you say? Nonsense. With all of our advances in digital mapping and 3D printing, imagining something is now almost as good as actually building it.   Thanks to team at Archilogic which specializes in turning floorplans into 3D interactive maps, you can now digitally roam through this spacious and circular themed home that combines a sense of futurism with a feeling of antiquity, all couched in Llyod's evocative style. The one of a kind house was originally commissioned by Hollywood costume designer Ralph Jester in 1938 but unfortunately never built for financial reasons. 


Click here to view to the interactive experience on Airows.com. 

Emergency Weekday Meal: Spaghetti Aglio e Olio

$
0
0

ManMade Spaghetti Aglio e Oglio Recipe

Your kid is sick; your wife has a late meeting; the two-hundred dollars in groceries you bought last weekend was ephemeral. Enter: spaghetti aglio e olio. Spaghetti with garlic and olive oil. Sounds almost pointlessly simple, but if you make it right, it's deceptively good. Fast, easy, and you always have the ingredients on hand. Here's how:

ManMade Spaghetti Aglio e Olio

  • 1 lb. dried spaghetti
  • Olive Oil (the better, the better)
  • Garlic (fresh if you can; I always keep a jar of minced garlic around just in case)
  • Chopped Parsley (optional but makes a noticeable difference)
  • Lemon
  • Parmesan cheese
  • Crushed red pepper flakes
  • Salt, pepper

Chopped parsely

Bring a pot of salted water to boil. Meanwhile, heat about three-tablespoons of olive oil over low heat in a skillet. Once it's warm (not smoking), add a sprinkle of crushed red pepper (to taste) and about two tablespoons of minced garlic. You want at least equal parts garlic and olive oil.

Keep the garlic going over low heat; it should eventually turn straw-brown and get foamy. Don't let it burn, as that will ruin the flavor. You want to cook it slow to bring out the sweetness. Around 10-15 minutes.

Sauteed garlic

Cook your spaghetti (you can use any pasta you like) according to the directions (usually around 10 minutes for al dente). Strain and rinse with cold water briefly. In a large bowl, toss the spaghetti with a little more olive oil (1-2 tbs.) and sprinkle with chopped parsley.

Sprinkle with chopped parsely

When your garlic is done (it should be sweet and smoky, not bitter or tangy), toss that in. Then squeeze in the juice of half a lemon, and cover with parmesan (lots, if you're me). Season with salt and pepper to taste*. That's it! 

Squeeze that lemon!

I often do this with a side of sauteed brussel sprouts, which are also really easy, but I'll leave that for another blog post.


*Recipes tell you to season with salt and pepper to taste for a reason! Don't skip that part! Learn to taste your cooking and know what flavors are missing/wrong, and fix them.

Make This: DIY Saw Blade Storage Box

$
0
0

Saw Blade HolderHere’s a quick shop project that will give you a simple and dedicated way to protect your blades in the workshop. So keep them close but out of the way for a cleaner, more organized place to work with this multi-use storage box.Like many people with a collection of tools. I have steadily collected blades to go with them. This stack of sharp and fragile edges get beat up pretty regularly thanks to the weight and pointed corners. I have tried to stack them with cardboard, tape, and even just strategically stacked them a few times, but I always end up rummaging through them to find the one I need. This means I tear up a hand or precious cutting edges much more often than I should. This simple box can help to keep all your blades easy to find, out of harm’s way, and within reach when you need them. Here are the plans and some simple instructions to easily walk you through the build. Partial Plans

Follow the link above for the full plan.

Here's a quick article we did on tuning up those blades before you stash them away in this box. Every shop will have a different place to mount the storage box, but keep that in mind when figuring out the dimensions, and how the box will work when reaching down to get your blades. There's always another version with small drawers that looks a bit better here, but it makes it a bit harder to get to the blades with that design. One thing I like about this project, is the ability to have a dedicated place to collect all the blades, wrenches, and other accessories needed to make blade changes fast and much less of a process so we can get back to making sawdust and finishing projects.

Are you planning on building this box? We'd love to see how you customize it for your shop!

Lifelike Animals formed with Wood Shavings

$
0
0

I don’t know about you, but that pile of sawdust and shavings that end up on the floor when I’m in the shop isn’t much of a source of inspiration. But for this craftsman, the shavings are the art, and he creates some very impressive works with what we’d normally call waste materials.   Shavings AnimalThis high school teacher creates wood based works that are more akin to sculptures, meticulously trimming, slicing, and shredding wood into textures that look uncannily like real feathers, fur, even whiskers. Take a look at more of his incredible works here. Shavings Sculpture

While it’s a stretch to see your sawdust can as a source of personal inspiration, just keep in mind that somewhere there is someone who can make an otter from the materials you toss out.

Makes you think a bit different about that scrap bin, doesn’t it?Shavings Eagle

The History of The Space Pen

$
0
0

Back when I wanted to be an astronaut (just kidding NASA take me now I'll do anything), my mom gave me a space penthat somebody had given her and it was SO cool. Besides being able to write upside down, I loved the design of the sleek little guy and the connection I felt with my gravity-defying heroes. The history of their design is quite the little story, recently featured by Cool Material.   

In a world in which computerized note-taking hadn't yet claimed preeminence, the ability to write with a pen was of crucial importance to the success of NASA's missions. Unfortunately the firm NASA hired was only able to produce working writing utensils at a whopping $129.89 per pencil. That is, until Paul Fisher came along and introduced the prototype that eventually took off by utilizing pressurized nitrogen capsules.  


Side note: if not space pens, what are some of your favorite pens? I used to be a Uniball guy but I've been a pretty regular Pilot G2 guy for awhile now.


Make This: DIY Cold Brew Coffee with Your Aeropress

$
0
0

Aeropress ColdbrewWe've talked before about how much we love the Aeropress for making a great cup of coffee. Make a great cold brew with the same equipment and just a bit more time. Here's how.   I was given an Aeropress as a gift a few years ago, and was extremely skeptical of the plastic materials and simple design. Then I brewed a cup and immediately changed my mind. While I don't use it every day, I still brew with the system regularly and have given a few as gifts along the way. Here's a simple DIY write-up on using the same Aeropress to brew up a cold-brewed cup of amazing goodness. While it's rudimentary, sometimes simple is just better. So grab your Aeropress, and some beans and take a look at how it's done here.Aeropress Coldbrew

I usually brew up a bigger batch and keep it in the refrigerator for a quick afternoon pick-me-up. Do you have any DIY ideas on how you make your cold brew? We'd love to hear your thoughts!  


How to: Open A Wine Bottle With A Key

$
0
0

created at: 03/13/2016 Every man should own a corkscrew, but admitedly there some times in life when everything is going right in terms of wine acquisition and there's just no corkscrew to be had. Never fear. As long as you've got a key on your person, you'll be ok...   Just watch the video below from Dave Hax as he shows you how to insert a key into the cork at an angle and then apply a little torque to work it out of the bottle. So far it looks like the trick only works for sure on synthetic corks, but if you know that going in, you may be able to work it to your advantage in a wine emergency.

An Edible History of the Hamburger

$
0
0

created at: 03/26/2015

The world loves American hamburgers. Because, of course they do. They're the world's most perfect food. (Sorry, bananas). But few really know where and how they began...   

ApicusRecipes featuring the beginnings of what later came to be the modern hamburger date back as early as the 4th century with the Roman Apicius cookbook (pictured above) which records the isicia omentata: a baked beef patty mixed with pine kernels, black and green peppercorns and white wine. Centuries later, Genghis Khan's calvary had a way of wrapping slices of meat and placing them under their saddles so that the meat was both ground and eventually cooked (take that for what you will), and this recipe for ground meat patties eventually spread through the Mongol Empire. 

The term hamburger itself comes from a condensation of hamburger steak, a type of ground beef steak originating in Hamburg, Germany that gained popularity in New York in the latter half of the 19th century. Minced meat suddenly became a cheap feature of the everyman's diet with the rise of meat grinders in American in the 1840's, yet of none of the dishes were yet served between bread. 

History has yet to reconcile the conflicting claims of the hamburger's origin. What's definite is that the hamburger was invented in America sometime between 1880 and 1895, and popularized during the 1904 World Fair in St. Louis. 

Louis LunchAccording to the Library of Congress, the first hamburger was created by Danish immigrant, Louis Lassen (pictured above), who fashioned the original delicacy for a hurried customer in 1895 from his small lunch wagon, known as Louis' Lunch. Louis Lunch flame broils their hamburgers "the original way" in antique cast iron stoves that cook the patties vertically and date back to 1898. You can find Louis Lunch operating to this day in New Haven, CT (pictured below), where they still serve burgers with a slice of tomato on toast. I've been there and they're incredible. A word of caution however: they are famous for throwing customers out who ask for ketchup or mustard on their burger.Louis Lunch

Another claim to hamburger's origin lay in the hands of a fifteen year old street vendor named Charlie Nagreen in Seymour, Wisconsin. Charlie began selling meatballs and Hamburg steaks from a street stall at the annual Outagamie County Fair, before noticing that people were less than enthused about having to eat their food by the stand instead of being free to roam about the fair. In response, "Hamburger Charlie" (as he later became known) decided to flatten the patties between two slices of bread and found he had a hit. The fair continued to sell Charlie's burgers until his death in 1951. His statue however, remains.Hamburger Charlie

The list goes on with a couple lesser known stories that follow a similar narrative, however the invention story that has been given greatest prominence in recent years by hamburger historians (yes it's a thing) is the story of what for years was an unknown street vendor who only in the last few decades was identified as Fletcher Davis of Athens, Texas. "Old Dave" has a similar tale of desiring to serve customers who were in a hurry and placing ground steak between two pieces of Texas Toast. He and his wife began serving their popular (and yet-unnamed) item as early as 1880. The only documentation for this (and all documentation regarding these stories is sketchy) is from an article by a Texan journalist who mentions a Old Dave as a street vendor who served hamburgers in a cafe at 115 Tyler Street in Athens. Old Dave then brought this invention to the 1904 World's Fair in St. Louis which is when the hamburger's existence was suddenly documented in earnest. 

The cheap price of the minced meat and the versatility of the sandwich design took off with the rise of industrialization and America hasn't looked back since. If anything, we've just kept coming up with better and better burger recipes, such as the Jucy Lucyor this oddly specific recipe from Ernest Hemingway.


To make 'em great, check out our ManMade guide to the best burgers at home: 

The Best Affordable Irish Whiskey: 5 Bottles to Try Under $30

$
0
0

created at: 03/13/2014

Do me a favor this St. Patrick's Day: skip the green beer. Please. But, while you're not drinking that silliness, do try some Irish Whiskey. Often overlook by bourbon and Scotch drinkers, the Irish whiskey tradition is as old as it is varied. In fact, they kinda invented it.    

Irish whiskeys are made from both malted and unmalted barley, which contributes to its unique flavor profile. They're often distilled three times, giving the whiskey a lighter flavor compared to Scotch, and the styles are varied: "single pot still", "single malt", "single grain", "blended", etc. 

Like with most spirits, you can spend a fortune, but you don't have to. With that in mind, here are five favorites under $30. Of course, you can opt for the most popular Irish whiskey - Jameson - and there's nothing wrong with it. It's kinda like Jack Daniels or Budweiser or Glenlivet - they're well known for a reason. These picks are intended to stretch your palette a bit without breaking the bank. Sláinte!


1. Bushmills Black Bush - $28.99 - This blend only costs about $6.00 more than the standard Bushmills, and I think it's worth the upgrade, especially if you're drinking it neat with a small splash of water to open it up. Mostly malt and aged in sherry casks. Very good. 


2. Kilbeggan Traditional Irish Whiskey - $23.99 - Another solid blend. Very smooth and sweet, with a grain flavor that's a great introduction to the flavor of pot still whiskey. Kilbeggan is the oldest licensed distillery in Ireland.


3. Tyrconnell Single Malt - $29.99 - A great option for trying an Irish Single Malt at an affordable price. Tyrconnell was a legendary racing horse who won at 100:1 odds. Also distilled at Kilbeggan. 


4. Tullamore Dew - $21.00 - An excellent value at just over a Jackson. Its green label reads "the Legendary Irish Whiskey" and features the signature of Daniel E. Williams, the master distiller in the late 19th century who perfected the recipe. A great option to bring to share with friends.

5. Powers Gold Label - $23.00 - This is the one I'd order if I were at a bar. More character than Jameson, and likely costs a few dollars less. Would work will as the shot half of a Boilermaker, and would complement bitter or yeasty beers well. 


Do you have a favorite Irish whiskey? Share your thoughts in the comments.


Also, check out the ManMade roundup of affordable favorites of all styles of whiskey:

The Best Affordable Whiskey: 6 Top Shelf Bottles Under $40


 This post was originally published on March 13th, 2014.

A Second Chance for Secondhand: A Guide to Giving Used Furniture a Complete Makeover (with Help from Valspar)

$
0
0

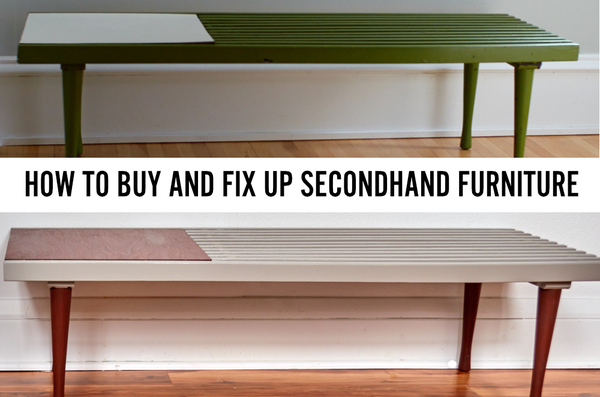
How to buy and fix up secondhand furniture
Buying used furniture is a bit of an art. It takes a practiced eye to know what's well-built, has good lines, or simply isn't worth your time and money. But it feels pretty awesome to find a diamond in the rough and turn it into a polished gem. 

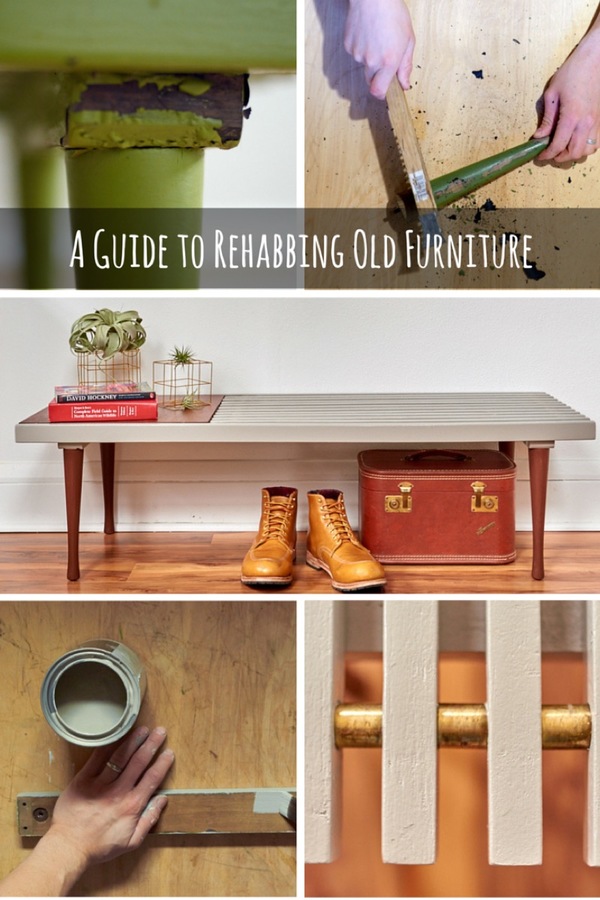
This month we got inspired by Ace Hardware's 31 Days of Color and decided to bring you our Total Newbie's Getting-Started Guide to Fixing Up Old Furniture. We'll tell you what to look for in a used piece, how to spot something with great potential, and even walk you through the basics of a furniture makeover (including help choosing the right color).

About 31 Days of Color: 

This March, Ace Hardware is encouraging homeowners to discover a new love for color through a month-long interactive paint experience called 31 Days of Color. Every day in March, Ace is unveiling a new “Color of the Day” selected from their exclusive Valspar and Clark + Kensington paint lines. 

  • Visit ThePaintStudio.com every day in March to uncover the Color of the Day from Ace’s exclusive Valspar® paint line, along with expert tips and inspiration. 
  • Plus, enter the 31 Days of Color Sweepstakes daily for a chance to win a $10,000 paint makeover and daily gift cards ranging up to $1000. NO PURCHASE NECESSARY. Ends 3/31/16. Official Rules.

Over and over again, we've found that a simple color change can drastically transform a room or piece of furniture. To show you what we mean; we went looking for a secondhand bench that just needed a fresh coat of carefully applied paint.

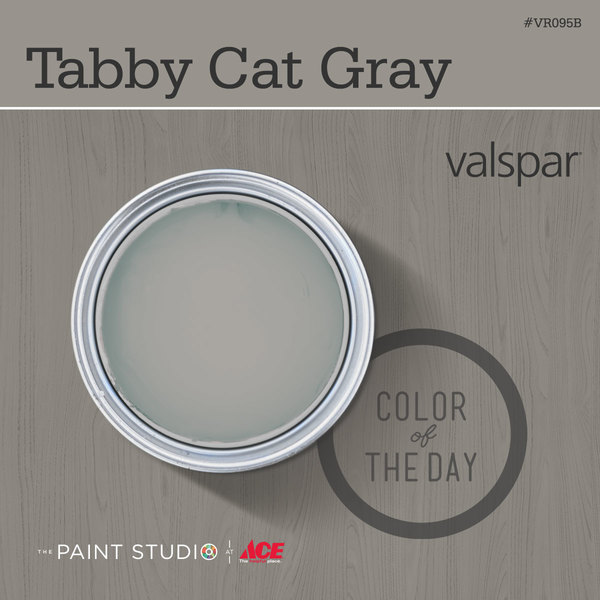
Our inspiration for this project was today’s Valspar color: Tabby Cat Gray. It's a calm, subtle hue that we thought would bring a clean, modern touch to an old piece of neglected furniture. 

Tabby Cat Gray from Valspar


What To Look For When Buying Secondhand Furniture

So, how do you know whether a piece of furniture is worth a bringing home? Use your five senses to assess the piece:

  • Sight: First of, look at the color! Color is the most obvious characteristic, but it's also an easy one to change. Sometimes a great piece will be hiding behind a really ugly color. Think about how a color change might affect the whole look (you can play around with color palette ideas at Valspar's Paint Color Explorer)

    Next, look at the condition of the surfaces. Are they deeply damaged, or just worn? Are there any details about who made it, and when? Look at the unfinished surfaces - undersides, backs, behind the drawers - to see if you can identify the manufacturer and year the piece was made. 

  • Touch: Assess the surfaces. What is the overall condition? If it's beat up, can you determine what happened? Did a pet scratch the legs? Years of leaving glasses on the surface without coasters? Run your hands along the flat surfaces to discover any deep gouges, scratches, ripple patterns, etc. 

    Most importantly, what is the piece made of? Is it solid wood? Is it plywood? Is it real wood veneer over a substrate? If so, you can sand, paint, or refinish each of those. But if it's a wood laminate, you probably want to skip it unless it's a super good deal and looks really sharp. Those pieces won't respond well to gluing, screwing, or painting. 

  • Hearing: Listening to the piece is one of the best ways to assess its condition. Grab the legs or the sides and put some force on the joints. Does it creak? Move or rack? Make a fist and pound the hard, flat surfaces with the side of your hand. Does it sounds like solid wood, or does it sound like particle board? Does it echo or reverberate?

  • Smell: Seriously. This is going to go in your home, and that funky odor isn't going to go away with a little sandpaper. Does it smell like stale smoke? Mildew or must? Cats? Can you live with bringing that smell in your house?

  • Taste: Don't lick it! But do think about how this piece will match your overall taste. Do you like it in the context where it is, or do you want it in your house? Can you simply appreciate the design, or do you also want to make it yours? Is it the right height for your style of furniture? Modern sofas and chairs tend to be much lower to the ground than traditional pieces. It's it the right scale to fit with the pieces it will complement? If it's a coffee table, is it both shorter than your couch cushions and less wide than your sofa? If it's a dining table, will your chairs fit underneath?


How Much Should I Pay?

First, don't approach buying practical furniture for your house like it's an investment. Furniture, like most used things, is only worth what someone is will to pay for it at any given time. Unless you're a collector and really know what you're talking about, presume that what you're paying for is its current place and usefulness to you, not resale value. Especially if you plan to refinish, restore, or paint the piece. Perhaps you'll get something out of it when it's time to move on, or perhaps you won't. What you're buying is something you're going to use every day, not something that will appreciate in value.
 
With that in mind, it's about how much it costs and how much its style, form, and functionality are worth to you. Let's say you're looking at coffee table. It works for your current house, and you desperately need it. The asking price is $50, and you'll need $30 for paint and materials and an afternoon of your time. If you plan to keep the piece for five years, is it worth $16 a year to have a place to set your drink and popcorn bowl while you watch movies?
 
Just remember - with the original manufacturer out of the picture with secondhand furniture sales, no price is set in stone. Whether you're dealing with a Craigslist seller, a flea market, a used furniture store, all of these systems are set up for haggling. If you want to do it well, check out A Modern Man's Guide to Bargaining: How to Haggle and Get the Best Price ... without Acting Like A Jerk


A Slat Bench Salvage

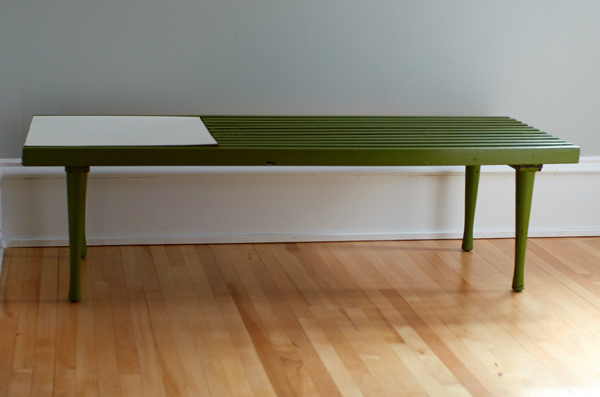
Vintage bench before

When I saw this mid-century inspired slat bench on Craigslist, I immediately knew it had potential. It has clean, simple lines (no weird frilly details or unnecessary pieces), but it's obviously NOT a valuable, vintage piece. That's good! I wasn't looking for a priceless heirloom, just a nice-looking, easy-to-work-with piece of furniture that is in need of some TLC. 

At $65, it was a decent price (if I hadn't needed it for this blog post, I would've tried to talk them down to $40-ish, but in this case I didn't want haggle). And the vintage shop selling it was just 15 minutes from my house, so I went to check it out. It was perfect; nasty green spray paint was literally crumbling off the thing. A nice candidate for a thoughtful re-do.

Doesn't look that bad, right? Wrong:

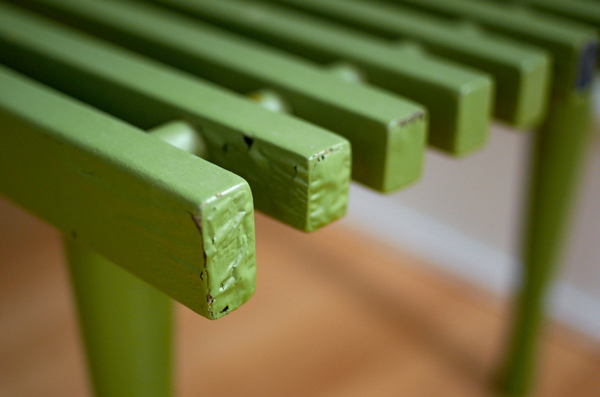
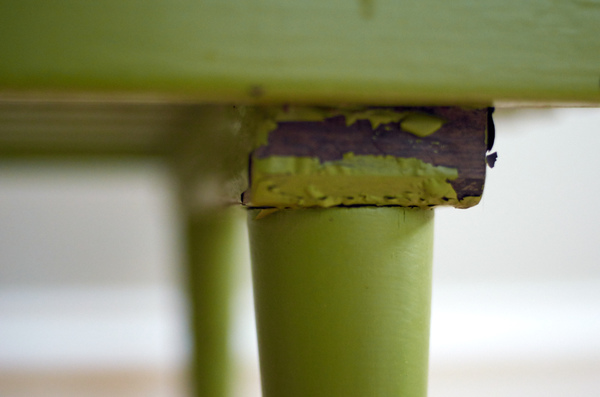
Peeling paint

Whoever painted this thing green didn't do a very good job; most likely they just took a can of spray paint and went nuts. But we can fix that!

Peeling paint underneath a vintage bench

But someone else's green disaster is a great opportunity for me! Behind that ugly, hastily-applied coat of green there's a pretty nice bench just waiting to come out. I chose Valspar's Tabby Cat Gray for the job because I thought it would feel masculine, modern and understated, allowing the cool vintage lines of the bench to come alive.

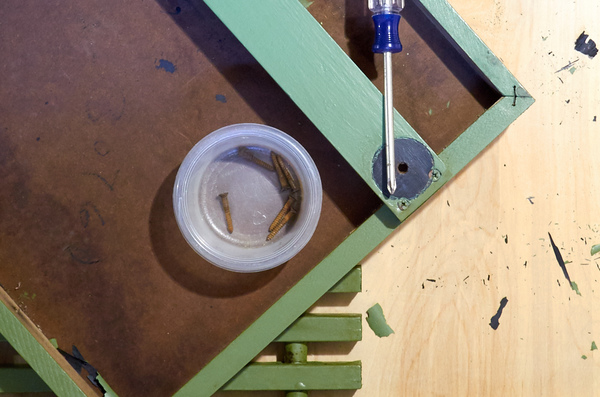
I started by disassembling the whole thing. Anything that could come apart, I took apart. Off with the legs, the side rail, that white square thingy. All of it. 

When taking apart old furniture, use care. Don't use a drill to unscrew things, always use a screwdriver. Old stuff is old! It's fragile; screws will strip, wood will crack. Use a light touch.

Also: put those little screws and random parts in a dish. It's tempting to think "Oh, I'll just replace them with new hardware if I lose some," but it's not always that easy. Be smart, save time, and keep track of everything you take apart.

Save all hardware 

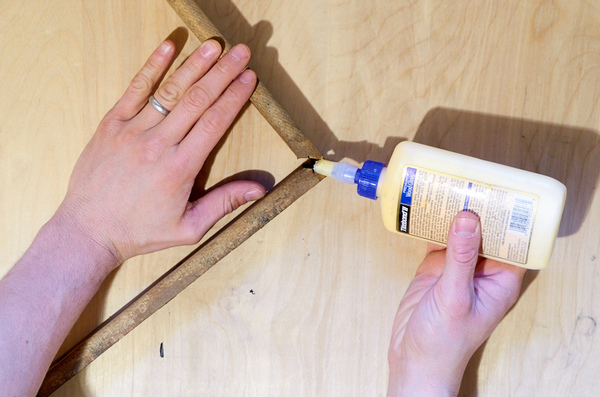
Once the piece is in pieces, you can attend to any damage. Hopefully, you chose something that was in pretty good structural shape. My piece had one miter joint that needed re-glueing.  

Glueing a broken miter joint

Then I continued by scraping all the loose paint off with an old 2-inch spatula (a paint scraper works great too). A wire brush can also help to get the old residue loose. Use whatever tool seems to work best, but try to be careful not to gouge or damage the wood; that'll be hard to hide later.

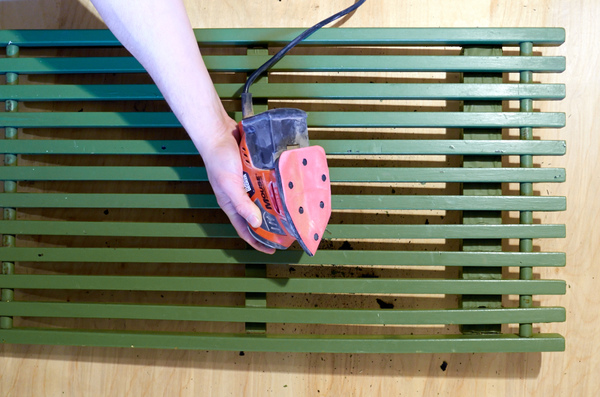
Ok, so I'm not gonna lie: stripping an old piece of furniture down to the wood ain't easy. If you have time and patience, you'll need both. But in most cases you can just get the loose stuff off and rough up the surface a little bit with a medium-grit sandpaper (hint: an orbital hand hander is pivotal here). 

Use a power sander to get the old paint off

I went a little nutso with mine, and got almost all the paint off. I also stripped the little brass ring dowel-covers that are between each slat, 'cause I thought they'd look awesome. Just making more work for myself, I know, but hey ...

Choosing a high quality paint

Here's where choosing a really high-quality paint comes in; the better the paint, the more pigments and resin it contains, which means it covers better and adheres more easily to the surface. It'll also last a lot longer under constant wear, which, for a bench, is pretty important. 

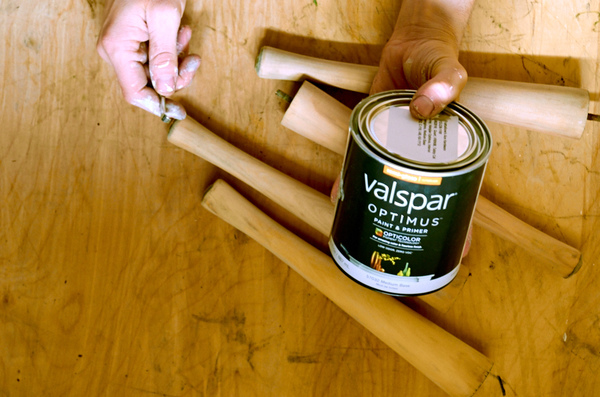
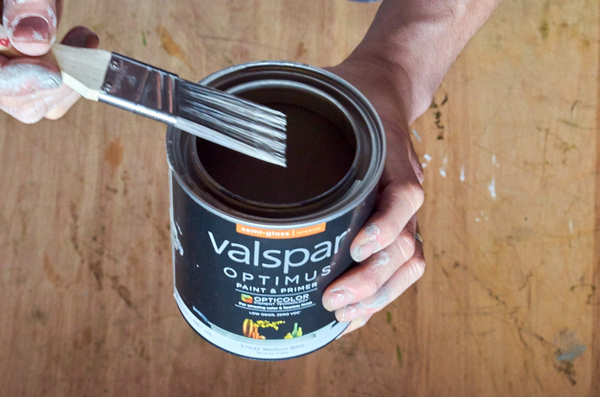
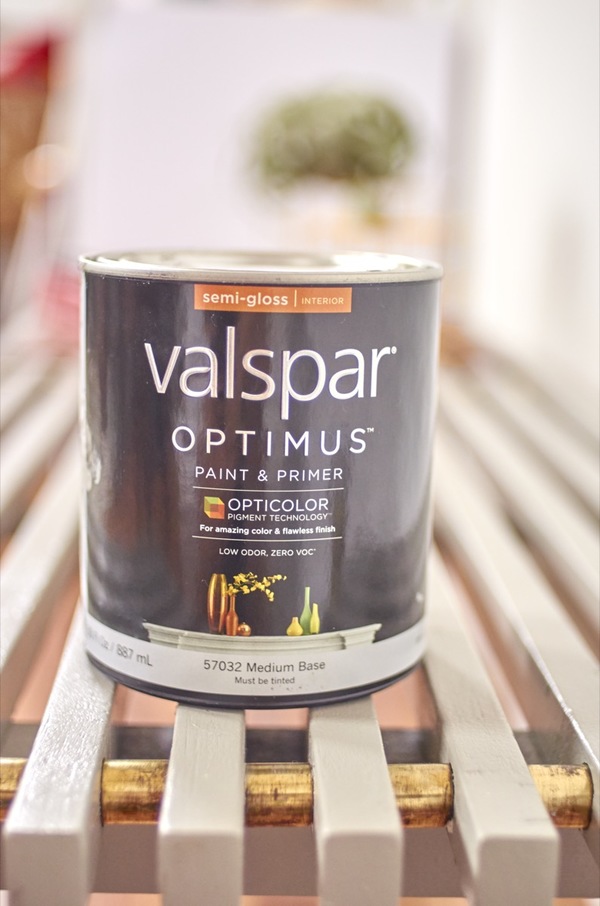
Optimus paint in Tabby Cat grey.

I went with Valspar's Optimus Paint + Primer, available at Ace Hardware. It's their best line of paint, and the built-in primer means one less step for me to worry about. It's also zero VOC (volatile organic compounds), which is nice since I was painting this thing indoors.


Did you know? 
Valspar is the only paint brand in the U.S. that guarantees you’ll love your color. With the Valspar Color Guarantee, if you don’t love your color, you can have another free.


Painting the bench

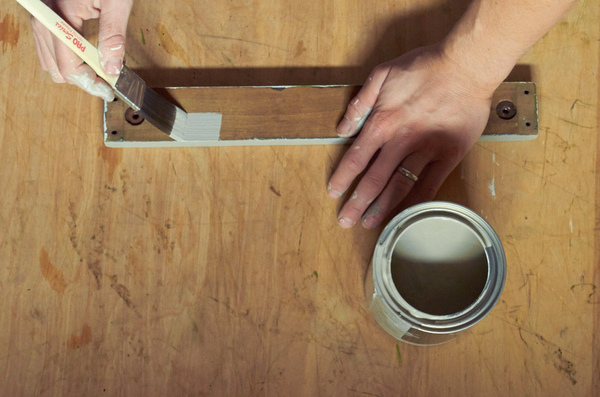
I used a brush to paint the pieces of the bench that were simple and flat. When brushing, you always want to try to keep a wet edge and work in long overlapping strokes. A latex paint extender can help increase the drying time of your paint, which makes it easier to even out brush strokes and avoid streaking. Also: don't opt for the cheapest brush; get a high-quality brush and take care of it, and it'll last forever and give you great results.

For the main, slatted area of my bench, I resorted to using a paint sprayer. I just happen to own one, but most people would have to look into renting. They're usually available for about $30 per day, and once you get the hang of using one, they will drastically speed up your project. The other benefit of a paint sprayer is that, when used correctly, it yields a smoother, more even finish.

I let my bench pieces dry fully overnight before reassembling everything. Here's how it looks now:

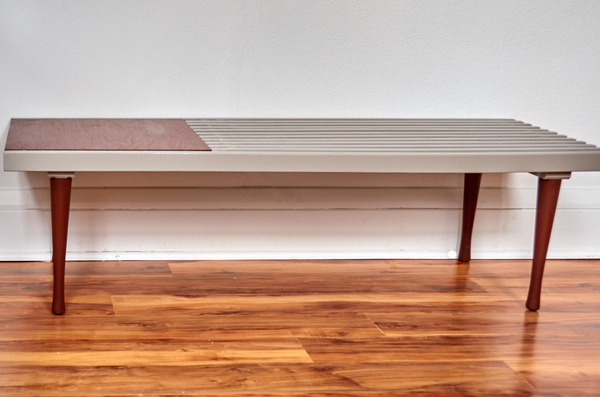
Completed bench makeover

 Remember where we started?

Bench before

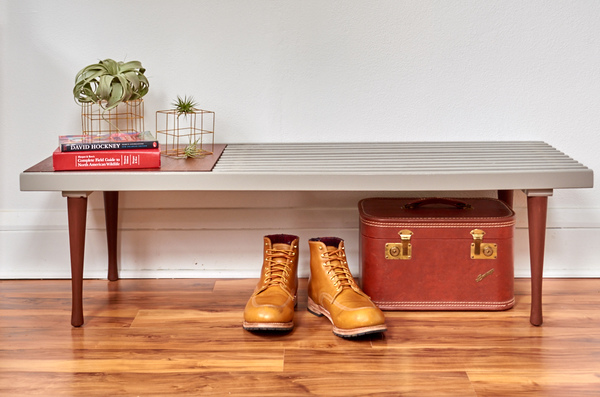
And now:Bench after

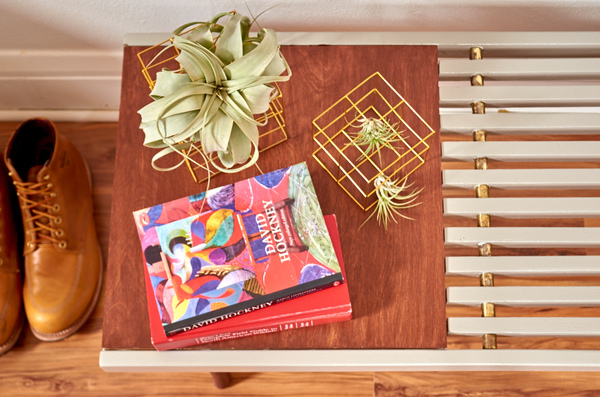
(I decided to do a contrasting stain for the legs and the plywood panel on the left)

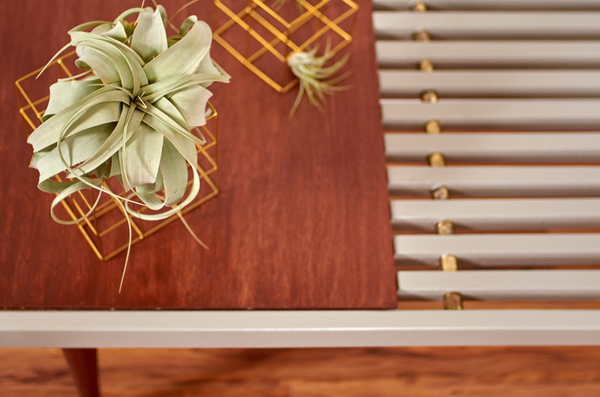
Slat wood bench makeover detail

What a difference color makes!

 The brass dividers turned out cool. They're a little 'rough', but I kind of like the patina.

created at: 03/10/2016

 Valspar color month project

 Bench makeover finished project


See? Good lines and solid construction, along with an afternoon of work and great materials, can help give a secondhand piece of furniture new life. Have you ever painted or updated a piece of furniture? Let us know how it turned out in the comments below. 


If you liked this post, you can help us by sharing it on Pinterest!

A complete guide to buying and fixing up secondhand furniture


Valspar 31 Days of Color

This post was sponsored by Valspar. All opinions are mine alone. Thanks for supporting the brands that support ManMade. 

How to: Make a $10 DIY One-Hour Upcycled Fire Pit

$
0
0

Yep, that's a lot of adjectives, and every single one of them gets me jazzed to make one: DIY  (check), upcycled (check), one hour (double check), and only ten dollars? Done!   Joe and Sarah came up with this great technique for a safe, contained outdoor fire pit, without spending bunches. This is the perfect project for urban dwellers who like to get outside to relax and entertain (though be sure to know your local open flame laws.)


The project is built from - you got it - an upcycled washing machine drum, which the couple cleaned up with a grinder and painted with high-temp black spray paint. (Hooray for making sparks!)

They added some custom legs since they're experienced with welding, which you could ask a local fabricator to make for you, or just skip it all together. 

I've never seen a washing machine drum out and about, but then again, I've never looked either, so I'll be keep my eyes open. Are there any other cool projects you can think to make with one of these guys?

$10 DIY One Hour Upcycled Firepit [House & Fig]


How to: Make Easy and Stylish DIY Concrete Coasters

$
0
0

created at: 06/11/2013

So...if you're anything like me, you'll often see cool items in stores, you'll say to yourself, "I could totally make that." Which I do, all the time, and nine times out of ten, I'm totally wrong.  But when I saw a set of concrete coasters in a cool little boutique, I knew it was worth a try. So, I gave it a shot. And? it was beyond easy to do.  Here's how:   

created at: 06/11/2013

Tools and Materials

  • rapid set concrete (you can get a whole box at a home improvement store for like $10)
  • plastic cups – one for each coaster and a couple for mixing
  • Coarse and fine sandpaper
  • a utility knife (I ended up not needing it, but I thought I might need to cut the cups off the coasters)
  • presto felt (it's felt with an adhesive backing. you could also use felt and craft glue, but presto is WAY easier)

Here's What You Do:

created at: 06/11/2013

1. Mix your concrete in one of your cups. You want to use four parts concrete to 1 part water. The cool thing about this stuff is that you don't have to be exact.  You want the concrete to be like melted peanut butter.... It should pour from your mixing cup easily! 


created at: 06/11/2013

2. Fill each of the cups with about 1/4" of concrete, or however thick you'd like your coasters. Tap the bottoms of each cup against your work surface to help them level and get rid of any bubbles. I chose to make six coasters (hoping four would turn out well). Allow to dry for 60–90 minutes.


created at: 06/11/2013

3. After your coasters are dry, turn each of the cups over and give them a good whack against your work surface. It wouldn't hurt to put a towel down first, just to be safe.


created at: 06/11/2013

4. Let your coasters dry for another 30 minutes. After that, clean up the edges and any other imperfections with sandpaper. Use a damp cloth to clean any concrete dust off of the coaster. Let dry overnight.

created at: 06/11/2013

5. The next day, traces circles on the bottom of the presto felt to fit the bottom side of my coasters. Surprisingly, all six of mine turned out well, so I cut felt to finish all of them. I was able to use the little raised area from the cup as divot into which I could place the felt. Peel off the felt backing and apply to the bottoms of your coaster. Make sure you rub the felt onto the coaster really well. 

created at: 06/11/2013

And...you're done. Next time I try this, I'll make my coasters just a little thinner for a more sleek look. But, the technique is super easy, and they're quite durable, and will last me for a-many cocktail to come.

Cheers!

Make This: Wooden Magazine Rack from a Single Board

$
0
0

There are those pieces of furniture that make a statement. Those around which you build entire rooms, those that define a space. Those pieces are essential.

But, sometimes, you just need a quick and easy way to store your stuff that looks plenty sharp. If your taste leans towards the warm, the rustic, and the stylish, check out this super simple x-shaped magazine and book rack.   

This is a solid "woodworking light" project that requires a single piece of dimensional lumber from the home center and a jigsaw (or any saw, really) to help cut out the joinery. You can knock this whole thing together and have it next to your sofa loaded with magazines in less than 30 minutes. Not shabby at all. 

Get the full how-to at Homedit: DIY Wooden Magazine Holder


How to: The Simple Trick for Making a Perfect Fried Egg

$
0
0

It's the most important meal of the day, and as far as the perfect breakfast, it's hard to beat an egg. If you ask many of the world's greatest chefs what the ultimate mark of someone who knows how to cook, they'll say, "have them make me an egg."   

created at: 07/02/2013
See, on the one hand, eggs are simple: there's the white, there's the yolk, you heat it, and you eat it. But on the other hand, an egg's unique two-part structure means there's a lot going on, and plenty to mess up.   

But we say a perfectly cooked egg is a skill worth figuring out. They've become synonymous with breakfast for a reason: it's good to eat protein and a little fat in the morning; it helps you feel full, and gives you more zip than carbohydrates like cereal or a muffin alone. And though we all need to watch our cholesterol, eating whole eggs are important. The yolk contains lots of nutrients, including those all-important antioxidants and omega-3s. As long as you don't eat more than two yolks a day, most healthy men will be okay. (I usually do one whole egg and one white).

And, of course, the luxury: there's nothing better to swipe up with a piece of toast, or mix in with the rest of your plate. So, we're taking the position that making the perfect fried, sunny-side up is a skill we think every guy should have, and here's the easy trick to do it:

Use the oven. The hard part about a sunny-side up egg, or any runny presentation, is cooking the whites until set without breaking or overcooking the yolk. Traditional wisdom says use a lid on your skillet, but I find that doesn't really help the whites to set much better. Others say baste them in butter, which I'm sure will work, but that's a little rich for an average weekday breakfast that already includes egg yolks. So? The oven.

How to: Cook a Perfect Sunny-Side Up Egg

My very favorite thing about this method is it requires little-to-no work once the egg is in the pan. Just heat the skillet, crack the shell, and let the oven do the work while you make your morning coffee or tea. 

Step One: Preheat the oven to 350° F. Place an oven-proof skillet on the range over medium heat to pre-heat the bottom of the pan, without heating the sides or handle. (Most skillets, even non-stick, are oven safe at this temperature, but check to be sure. Or, go the ManMade route and use a cast iron skillet, which is guaranteed to work.) 

Step Two: Once your oven and pan are heated, place a little oil or butter in the pan (spray is fine), and carefully crack or lower your egg(s) in the skillet. Use a spatula to contain the flow, making a little wall of cooked white to control the spread.

Step Three: Place the skillet in the oven, and allow to cook until the whites are set. The gentle convection of oven will cook the top of the egg, while the conduction of the pre-heated skillet cook the bottom of the egg, creating the little flavorful crispy bits. Season and enjoy.

created at: 07/02/2013

So, the actual work involved here is, like, 30 seconds. The trick to learn is how long you oven takes to preheat to 350°, and when you need to place your skillet the heat. You could pre-heat the skillet in the oven, but I find that the direct heat of the burner gets the skillet perfectly hot to set the white so it doesn't run all around the pan when you add the egg. It works for me; experiment with the best routine for your kitchen.

If you like your yolks a little more done, this method works equally well. Just leave the pan in a little longer until the yolk has thickened, and the bottom has started to coagulate. If you like your eggs well done and completely cooked, you can use this method as well, but it may help to flip your egg once (over well) to make sure the yolk is cooked through. Setting the yolk this way will prevent it from breaking on the flip.

Give it a shot, and let us know how it goes in the comments below. Good morning!


This ManMade post was originally published in July 2013. We're sharing it again today because it's spring!

Inspired Journey: There and Back Again

$
0
0

JourneyI love to travel. It's such an incredible experience to see another part of this massive world, and meet plenty of others along the way. Well, if you're heart is longing for a bit of wandering, take a look at this incredible video.   I love the way the camera looks at the world through the eyes of the traveler, and you get to see the incredibly varied landscape and experiences of a great adventure.

There and Back: Colombia from The Whitelist Collective on Vimeo.

Now that you've seen the world on your screen, start dreaming about taking a journey yourself. It's always a good time to move out and explore your own corner of the world. What is your next trip on the horizon?

Five Sriracha Sauce Recipes to Make This Week

$
0
0

Sriracha fans can be manic in their devotion to the sauce in ways that few other condiments can inspire. If you're a card-carrying sriracha fan, or just looking to branch out in your saucery, take a look at these five recipes from creamy to smoked to green. There's something for every sriracha fan here.    

Click here for all the recipes from Cool Material here.

And click here for a personal favorite of mine, a (slightly less) homemade sriracha mayo. 

5 Men's Style Staples to Help You Transition from Winter to Spring

$
0
0

created at: 03/06/2015

The winter to spring is a time of contrasts: the days can be bright and sunny, but the air and wind still cool and bitter. Or the air warms up, but the fog and drizzle moves in, so that it feels like early summer but the trees are all still barren branches. 

So, it's the still the season of layers, but lighter ones; flexible systems that breathe, look sharp, and still keep you warm and dry during days that span lions and lambs and showers and flowers and those sorts of things. Here are five staples to invest in now (or pull out from the back of your closet) that will still be useful as the season develops, and you can snatch again come fall.    


created at: 03/05/2015

1. Dark Denim: A dark, even "raw", pair of jeans can work better than chinos this time of year for one simple reason: you can wear them with anything. As spring happens, most of us might pull a little more and brighter colors into our wardrobe, and a dark denim goes with everything. You can dress it up if need be, and it'll match, in texture, color, and formality, anything that goes on your torso. 

Just be sure to wear dark socks.
Pictured: J. Crew 1040 Jean


created at: 03/05/2015

2. Field Jacket: These are inspired by classic European farming jackets with a little bit of a militant silhouette, made of breathable waxed cotton or light wool. They're much lighter than a heavy snow jacket, but still weather resistant. Something rugged, without the bulk, that'll still cut wind and keep out moisture. Buy the right one now, and you can wear it every spring for the rest of your life. 

Pictured: Orvis Woodside Meadow Jacket

created at: 03/05/2015

3. Chukka or Desert Boots: These are lightweight, ankle-height boots that will still keep your feet dry in spring puddles or melting snow without the heft. Their origins are unclear (some say Northern African military [hence: dessert], some say British polo players), but these low-on-laces boots are a staple that can work any time of year, and especially well during these transitional seasons. 

Pictured: Clarks Desert Boot


created at: 03/05/2015

4. Heavy Duty Cotton Oxford Button Down: The tartan flannels of fall and big plaids of winter give way to simple, sportier shirts. These aren't the fine white pinpoint linens that you wear under a suit, but thick, button-color shirts made for layering. White is classic, blue has a collegiate vibe, and light gray is for getting dirty. 

Pictured: Gap Modern Oxford 

created at: 03/23/2016

5. Crew neck pullover: This one's to help you get away from the earth tones of winter but avoid those Easter egg colored v-necks, which its either not time for yet, or you, like me, can't pull those off anyway. This can be a fine merino or a casual jersey knit;  over a collar-shirt, it's great for a coffee date or casual meeting, and with a basic white t-shirt, they just look like what a guy should wear on a spring Saturday. 

Pictured: Banana Republic Heritage Long-Sleeve Crew


[At top: J. Crew Mechanics Field Jacket] Originally published March 5, 2015

The Masculine Home: 5 Ideas to Create Simple Vignettes

$
0
0

Kuu Lamps

image

A vignette is a visual focus point that identifies the character of a room. These intentional areas are often the shots you'll see published in magazines, and you can achieve 'em at home, using mostly items you already have. Here are 5 ideas to get you started.

Use these tips to to make the most out of your space, using what you already own to great effect and keeping it cool and masculine. It can be done, and it's easier than you expect.

1. Sticking to a colour palette (above): first, you gotta choose your colour palette; a couple main colours plus a complementary tone. Above you can see black and white are the main stars of the show, the complimentary colour (tanned) is perfect and adds a touch of masculine to the whole space. The cleaner you keep your paletter the less cluttered and busy it'll look. So yes, get rid of those clashing ikea knick-knacks from college!


clean interiors

2. Make it quirky: adding a touch of playfulness makes a room that much more interesting. In the example above the clean space works great with those empty picture frames combines with one photo. The trick is not to overdo it or it'll look like a storage room. Stick to odd numbers and subtle pieces. Go to the thrift shop and look for unique objects that go with your palette. (image)


space fillers - adding greenery

3. Use space fillers: got a huge empty space? Don't know what to place it in? Add some fillers! Space fillers can be anything from a single HUGE painting to a couple of oversized planters like the ones above. This is the easiest way to get rid of those "dead spaces" in your home that can drive you nuts. No need to spend endless hours trying to select an intricate and cohesive poster collection. (image)


clean interiors

4. Use everyday objects: incorporate objects you use on a daily basis. The bike in the image above is the perfect example: it's clean, it matches the decor, and also doubles as decor. Are you a hat lover? Use a simple rack and display them in your entrance. Got lots of cooking books? Place them arranged by size on your coffee table. You see what I mean now? Oh and keep dirty shoes and nasty laundry hidden away, those never work as decor ;)  (image)


add colour to your room

5. Use color to your advantage: if you absolutely positively do not want to get another piece of furniture, another picture frame, or plant - then use colour as your ally. In the example above the bright yellow on the heater works almost as a statement piece, no need to add anything else! Use this same principle around your home to create simple yet stunning vignettes. Another great example is to paint a door of one bright colour - boom! instant decor. (image)

See, that wasn't so hard. It may be hard to get used to see bare spaces in your home, but trust us, once you get the hang of it and you see how awesome it is to live clutter free, you'll totally love it. Have fun!


Viewing all 2425 articles
Browse latest View live


Latest Images