Quantcast
Channel: Man Made DIY Recent Posts
Viewing all 2425 articles
Browse latest View live

How to: Make a DIY Leather and Wood Paper Towel Holder

$
0
0

There are a couple standard household items where their never seems to be a reasonably attractive option. Tissue boxes are a big one; there, it's always about choosing the least of the evils. I'd also throw paper towel roll holders in that category. Head into any big box or discount store, and you'll be hard pressed to find anything that matches a style other than "I buy all my home decor items at big box discount stores."

So, in that case: you should make one instead. It might seem a little overboard, but, truthfully, its the little details like this that really contribute to a space's overall sense of style.

This tutorial comes from the team at MarthaStewart.com, and it uses some pre-cut leather straps and a 1" dowel rod. Loops are riveted to hold the dowel, then attached to the wall. The slack in the leather allows the paper towels to move relative to the thickness of the roll, so it'll always rest against the wall. Pretty clever.

Get the simple, but classy, tutorial: Leather Paper Towel Holder [MarthaStewart.com]


When I Make Something For You, I Am Offering You My Humanity

$
0
0

Earlier this year, I agreed to complete a woodworking project for my wife. Actually, I offered and volunteered myself to do it. She has a particular storage need in her office, and because of the weird layout, access issues, scale, etc, it's not something that exists anywhere. It has to be custom built, and installed in the space.

The truth is, I've been avoiding it. It's a big project, and it was easy to move to the bottom of the project list when it was the height of summer. We had houseguests coming in and out of our home, and the days were long and full of activity. 

But now, that season is over, and it's time to start building. I realized this week why I've been putting it off: I'm afraid. It's beyond my skill level, and requires a lot of moving parts that need to line up, just so. In any other situation, this wouldn't be something I'd agree to do, because it's too big of a leap; I need to learn to do too many new skills inside the same project.  

But, all those things get thrown out the window when it's your partner who does the asking. She asked me to do it because she believes in me. She doesn't know why it's so hard to pull off, and it doesn't matter. She thinks I'm great, and talented, and knows there's a bunch of tools in that workshop she agreed I could build in our home, and it's exactly the kind of thing I should be able to make for her.

I am afraid because I know I'm going to make mistakes. Mistakes that use up materials, mistakes that use up a lot of time, and mistakes that, worse of all, will question my confidence. I wouldn't care if I were making this for me, or for someone I've never met, but for some reason, when it's the love of your life, the threat of error has left me paralyzed. 

But she, of course, is right, and I am wrong. Because my mistakes are not her problem, they're mine. She is not asking for perfection. She is asking for me to help her with a project. She won't see the errors, I will. She won't care if I have to go back to the lumberyard to buy more materials. She will be on my side in whatever needs to happen, not because it's a project that she wants completed, but because we're partners, and partners support each other in situations exactly like this one. 


This morning, while cleaning the kitchen, I was listening to an old episode of Shop Talk Live, the podcast from Fine Woodworking magazine. It featured an interview with Laura Mays, an instructor and program director at The College of the Redwoods. 

She was exploring the idea of value in a handmade object vs. a machine-made one, and wonders if it's actually the imperfections of handwork that makes a piece really valuable. She says, 

It's an interesting contradiction that as a craftsperson, one keeps trying to make things perfect; say, easing an edge, easing a corner over, trying to make it really even, really consistent. And yet it's not going to be really consistent, because your body moves in a certain way that consistency isn't the same as what a machine would achieve.

One's trying to be perfect...and yet in a way it's the imperfection that's valuable. So it's this kind bizarre contradiction [where you try] to make it perfect, and it's the imperfection that matters. I think that kind of tension is interesting. 

I am offering you my humanity, my imperfection. 

It's interesting how people coming to the [College of the Redwoods] program do it for self value rather than the value of the objects they're going to make. There does seem to be an element of transformation...in woodworking in general. It's as much for the maker than the person who interacts with the object in the future. 


That touched me. Hard. 

In this project for my wife, the transformation will have to be my willingness to give her something that isn't perfect. It will embracing the idea that it's better for me to spend my time actually making those mistakes, rather than sitting around anticipating what they might be. It will be understanding that you don't get to be an expert at something you've never tried before. That's easy to stay in my head, but my heart struggles. 

I did start the build this weekend. The photo at top shows some of the tools and shavings on my bench. The truly hard, technical work is still ahead, but I've moved past step one, which, as cliché as it sounds, was actually the most difficult part. 

This is what I'll keep telling myself in the process: when you make something for somebody, you offer them your imperfect humanity. You share yourself with them. Like the crafted piece itself, you are giving a perfectly functional, but ultimately flawed object. And they won't focus on the errors, just the good stuff. And it will be enough. 


How to: Build a Bike Repair Stand for $30 in Hardware Store Parts

$
0
0

Bikes have moving parts...it's precisely what they're designed to do. And things with moving parts need maintenance to keep them moving smoothly. And since a bike's very design is to move forward as its parts move, you either need to a) get your bikes wheels off the ground while maintaining access to gear shifts and break levers and b) grow two more arms and hands.   

The first option sounds actually sounds like a little less work (but can you imagine the possibilities?!), so you gotta get that frame up into a repair stand to let the wheels spin, the drive train move, the crank arms rotate, and the headset move freely. Commercial options are great, but can be pretty expensive. So, instead, hit up the home improvement center and build one for about $30 in parts. Which is sweet, because while you can fill up your tires and lubricate your chain and adjust your brakes with it on the ground, once you've done it in the air, it's kinda hard to go back.

The DIY stand is put together like this: some vertical 1" galvanized pipe is attached to a square of plywood to provide support. A 1" to 3/4" reducer elbow makes an arm, to which you attach a 3/4" Pony pipe clamp hardware, outfitted with custom jaws.

You could, in theory, attach the upright to a work bench for more support, but then you couldn't take your bike stand outside to work on during those nice days in the summer. And where's the fun in that?

This project comes from Jim Langley's e-book, Your Home Bicycle Workshop, and is available, in full, at Bicycling.com: Your $30 Hardware Store Stand

How to: Make DIY Rustic Masculine Candles

$
0
0

How to make a reusable rustic candle. Photos: Gabriel Cabrera

Can't get into the floral smells and garish artwork of storebought candles? Nope, us either. So  we came up with our very own DIY version to make a reusable rustic candle that any guy can be proud to burn in his home. (Or log cabin?)

Scented candles can be quite expensive and usually super fragrant... which is totally fine if you're relaxing at the spa with cucumbers over your eyes. (We're not judging...) So, we suggest making your own affordable candles in a reusable container that can be filled up over and over. Light it up. 

How To Make a Reusable Rustic Candle

How to make a reusable homemade candle. Photos: Gabriel Cabrera

 
Materials:

  • Rustic mug or container (try an enamel mug designed for camping, or an old cup from the secondhand store)
  • A penny
  • Essential oil of your choice. We recommend: cinnamon, pine, cedar, or citronella (acts a mosquito repellent too!). NOTE: It's very important that you check that the oil is suitable for candle making as some oils can only be used for low-temp projects (e.g. soaps).
  • 1/2 a pound-ish of wax - For this project we used 24 candles from the dollar store. *See more details below.
  • Candle wick (you can buy one at your local craft store or you can use one from the melted candles).
  • A chopstick or wooden skewer
  • A bowl and a saucepan to make a double boiler.

* You can purchase wax at your local craft store, but it can be a bit pricey, at around $20 or more per pack. Instead, we went to the dollar store and bought a few packs of "emergency candles." For the amount needed for this project we spent around $4.00 USD.

How to make a reusable rustic candle


Make it:

1: Make a double boiler by placing a bowl over a pot with water (make sure the water's not touching the bowl). Bring water to a boil and reduce heat so it simmers.

2: Add wax/candles and let them melt. Add a few drops of the essential oil. Stir with a chopstick. 

3: While everything is melting - "glue" the penny to the candle wick by using a few drops of wax. Place the penny right in the center of the cup and tie a knot around the chopstick to keep it from moving.

How to make a reusable rustic candle

 
4: *Carefully* start pouring the hot, scented wax into the cup. Save a a bit of wax for any touch ups.

5: The wax will contract a bit while it cools down. If it shrinks too much around the edges, use the left over wax to fill up any holes.

6: Cut the excess wick and light it up!

How to make a rustic candle

 
TIPS:

  • Got wax on your clothing? No worries, just place a piece of newspaper on top of it and iron it on high heat. Once you get rid of it, rinse the spot in hot water.
  • Don't want to use a double boiler? Then buy microwaveable soy wax at the craft store. Nuke it and follow the same steps above.
  • NEVER heat the wax directly on the stove as it could ignite. Yikes!

And...that's it. Once the candle is consumed, refill it with more wax. That's another brand new candle for just a few bucks. Use it at home while reading, in the kitchen to get rid of strong smells, or to light your camp in the backcountry. 


This post was originally published in June 2013. We're sharing it again because it's camping season! 

8 Things I'm Totally Obsessed with This Month (September 2017 Edition)

$
0
0

These are thoughts, the artwork, the news stories, the tools, the food, the conversations, and whatever else we just can't get out of our heads this month.         


1. The Night Out: Watching Films the Way They Were Intended to be Seen, aka Support Your Local Revival House Theaters

I have started 2001: A Space Odyssey at least seven times. I rented it on VHS in high school from the local video/tanning bed place. I borrowed it from my university's film center as an undergrad. And I have checked it out on DVD from the public library every other year or so for the last ten. Once, a friend even loaned me his Blu-ray for a solid eighteen months.

But, I have never finished 2001: A Space Odyssey. In fact, I never got much past the first thirty minutes most times. (Once I did make it to the jogging in a circle part, and I had seen HAL's iconic red eye on screen before.) And then, over the weekend, because of the fact that I struggled to find the time to finish it for the last fifteen years, I purchased advanced tickets to watch a screening in 70mm at our local nonprofit, historic film theater. 

Today, 2001 is in my top five favorite movies ever. I have only had such an intense filmgoing experience a few times in my life, and I can't stop thinking about it, reading articles and reviews, and digesting its history. It is nearly two hours and forty-five minutes long, and I still found myself wanting more.

The reason lies in its projection. This movie was not made to be viewed via a banged up copy in a living room, surrounded by all the distractions of your home, waiting for the dialog to start. (Hint: it won't.) This is a film was made to be seen exactly as I did on Sunday, in 70mm projection, surrounded by a crowd, smelling like popcorn, and sitting next to someone you care about. 

So, the next time you wonder whether or not it's worth spending a bunch of money and time for two tickets for something you could essentially watch for free at home, the answer is most certainly yes. I'm hooked. 


2. The Celebrity Profile: St. Vincent's Cheeky, Sexy Rock in the New Yorker

I've been a major fan of Annie Clark since 2009's "Actor," so I'm primed to care about this rather long exploration by Nick Paumgarten. But the truth is, it's also really, really good music writing, and avoids, at most levels, the pitfalls of the female celebrity profile written by a man. Clark is not explored as a "woman in music," and - the truth is-  she's no longer a struggling touring musician. She's a success, and very well may be the only true rock star we have left. 


3. The Book: Commonwealth by Ann Patchett 

This was my vacation book this year, so I read it in a particularly good mood. But, regardless of my own head space, it's one of the most interesting, generous books about family I've ever read. There are no villains, and endless sympathy for the characters, even for those who make hurtful decisions. Because that how family actually works: people screw up, and yet, you have to spend so much time together that even the obvious, page-turning developments don't completely ruin relationships. In fact, another person reading this would probably sympathize with an entirely different set of heroes, and disagree who the "bad guy" really is. 


4. The Personal Essay: Finding God in a Hot Slice of Pizza

Spoiler alert: Tova Mirvis' Modern Love column entry isn't really about God, or pizza.  


5. The Streaming Documentary: Barbecue on Netflix 

This film is a low-and-slow look at open flame cooking around the world. It's meditative, inspiring, and guaranteed to make you super hungry. 

6. The YouTube Video: "What Makes John Bonham Such a Good Drummer?"

To the surprise of literallyeveryone I've ever admitted this to, I don't love Led Zeppelin. It's not that I dislike it. I think I probably do like it.  But I never actually want to listen to it, and it has never struck me as all that special. They sound like old blues songs played by technically proficient musicians.  (I get that that's the whole point, and it must just not be for me.)

This video deconstruction helps me understand why this band is so beloved. I'm a musician, and I finally kind of understand why it's moved so many other rock and rollers for the last fifty years. And I actually might put some on sometime. 


7. The Album: The War on Drugs - A Deeper Understanding

Everyone is talking about this record this month, and I am too. The entire listening experience feels like you're sitting in this guy's house, obsessing over every knob twirl and tiny bit of ear candy. As a process nerd, it's a lovely place to lose yourself. 


8. Waking Up 30 Minutes Earlier

When you're feeling compressed, remember: there can never be more hours in a day. The only way to claim more of your time as your own is to find it from something only you are responsible for. Sleep is maleable, and waking up early gives you more of your time. Trust me, it's worth it. After my body makes this a rule, I'll add another thirty minutes and see where that gets me.

How to Make a Stylish Standing Desk Riser

$
0
0

This post is sponsored by the DIYZ® app.

When my friend Bruno hurt his back a few years ago, he started preaching about the value of standing while you're at work. Having made a bicycle-mounted laptop stand way back in 2010!, I'm not new to this game, but the more I tried it, the more I liked it. Not only is standing good for your posture (and thus your back), but for certain kinds of tasks, I find it really increases my productivity. 

Here's how to make a simple desk riser so you can stand and work on your laptop at just about any desk. It's built out of copper pipe and plywood, two of the easiest materials around to work with. Nothing fancy here just clean materials put together in a way that makes sense, works well and looks nice.

DIYZ is THE DIY app for getting detailed step-by-step project instructions and how-to videos that can help you complete your home repair or renovation without having to hire a professional handyman or contractor!
To learn more about how DIYZ can help you get your home improvement projects done with minimal screw-ups, download the appcheck out their web site, or follow them on Facebook or Instagram.

Tools and Materials

  • Copper pipe cutter and reamer tool
  • Cordless drill or screwdriver
  • ¾” copper pipe in the following lengths (three 8’ lengths): 
  • ¾” 90° copper elbow joints (8)
  • ¾” copper T-joints (14)
  • ¾” copper pipe straps (6)
  • Combination square. 
  • Two-part epoxy adhesive
  • ½” panhead wood screws (12)
  • ¾” baltic plywood, MDF, or other material (22”x15”, or your desired size)
  • 100 and 200 grit sandpaper

Step 1: Cut the copper pipe

Begin by using your pipe cutter to cut your pieces to the following lengths: 

  • 5 pieces at 16 1/2” (A)

  • 8 pieces at 1 1/2” (B)

  • 4 pieces at 4 ⅜” (C)

  • 4 pieces at 5 1/4” (D) for the horizontals

  • 8 pieces at 6” (E) for the verticals

Step 2: Prepare the surface for adhering

In order to give the epoxy something to grip onto, use 100-grit sandpaper to scuff 1/2" or so on both ends of each pipe length. Make sure you wear safety glasses and gloves, and wipe away any metal filings or dust before proceeding. 


Step 3: Dry fit each side

Next, test everything by assembling for a dry fit. Begin with one of the bottom pieces, and place a T-joint on each end.

Put a 1 1/2" connector onto each side of the T-joint, then a 90° elbow, and repeat for the other side. Add an 8" (B) vertical piece, a T-joint, and another vertical piece to each 90º elbow. 

Do the same process to complete the other side. 

Step 4: Connect the sides

Now, use the 16 1/2" crossbars to connect the two sides. 

Step 5: Epoxy the joints

If you're happy with your design, mix up the two-part epoxy and begin to secure each joint. The epoxy will set rather fast, so only combine a little at a time. We used four batches for the entire project. Use a combination square to ensure the right fit at each joint. 

Step 6: Prep the desktop

While the epoxy cures, prep your desktop by sanding with 220 grit paper and adding a coat of Danish Oil. Once everything is dry, lay the top right side down on a flat surface, and place the copper base on top. With everything properly centered, secure it with 3/4" pipe straps, spaced evenly with the top rails. Drill a pilot hole into the top, using the strap holes as a guide, then secure with 1/2" long panhead screws.

Turn it over, place atop your desk, and get to work!


Thanks to DIYZ for sponsoring this content. All opinions are mine alone. Our partnerships with brands like DIYZ make possible all the free content we provide here on ManMade, so thanks for reading!


Amazingly Cool Vintage Railroad Logos

$
0
0

Web and graphic designer Christian Annyas has collected and dissected 100 logos from U.S. and Canadian railroad companies. He provides a fascinating overview of the evolution of the logos from 1845 to 2000.  

He says, "The first North American railroads were built 50 years before the first logo was trademarked (Bass Brewery, 1876). Stationery was created by printers, not designers. That’s the reason why the images above – from three different companies – look so similar. They were made with existing wood type fonts and if you look closely you’ll notice they all use the same ‘stock image’ of a locomotive."

He continues, "The early designs all have a certain handmade quality. Most of them are simple, bold, black and white. And timeless. Some of them can still be seen on box cars and locomotives; they still remain powerful."

Cool, right? Seem them all and learn more at Annyas.com: Railroad Company Logo Design Evolution


The No Bullshit Way to Bake Your Own Bread

$
0
0

Simple no-knead sourdough bread

Gluten is my homeboy. I don't care what the fad-diets say (and apologies to those of you who are truly gluten-intolerant). Paleo-be-damned, I'm grateful our ancestors developed agriculture, so we could stop foraging and eat mostly bread (and also develop science, art, culture, etc.). 

Great bread is easy to make. Here's how I do it:    

1. Get a sourdough starter from a friend (or make your own, or order one online).

2. In a plastic bin with an airtight lid (I use this one), mix until just combined:

  • 11 ounces of all purpose flour
  • 8 ounces of sourdough starter
  • 10 ounces of room-temperature water
  • 1 tsp salt (more or less, to taste)

3. Cover tightly and let the dough sit at room temp for twelve-ish hours. Then put it in the fridge for a while (a few hours, overnight, several days, doesn't really matter).

4. When you're ready to bake, turn your oven to 450 degrees (convection on if you have it), and put an enameled cast-iron pot (dutch oven) inside, with the lid on. If you don't have one, try any heavy-bottomed cookware (something that will retain a lot of heat).

Forming the sourdough boule

5. While the pot is heating up (30-45 minutes), pour your dough onto a well-floured countertop. Love your dough. Be gentle with your dough. Don't pound, knead, or stretch it. With flour-y hands (or a bench scraper), quickly fold the dough over once,  rotate 90 degrees, and fold over again. Now (Gently! Lovingly! Sensually? No, just gently is fine) work the sides of the dough down underneath it, rotating as you go, until it becomes a boule. You should be gradually stretching the top of the boule down underneath until you have a nice, smooth, round hunk of dough.

6. Take out the dutch oven and put the boule in. Use plenty of flour (on your hands, and dusted all over the dough) to make this easier. Should you burn your hands on the extremely hot cast iron? No! You should avoid that. Once it's in, make four quick slashes in the dough using a very sharp knife (or razor blade, or katana sword). Cover and return to the oven.

Slashed boule in the pot

7. 30-or-so minutes later, check your bread. It should be mostly done springing up. Now you can remove the lid from the dutch oven, and rotate the pot for more even baking, and leave it in the oven another 30-ish minutes. Note the vague time indications; bread is done when it looks, smells, and sounds (and tastes) done. A timer is a crutch.

(Below: oven spring is done, this one is ready to bake uncovered)

Oven spring

8. Wait for the bread to look and sound done (knock on the bottom, it should sound delicious and hollow but not dried out). Better to over-bake than under-bake it (if you're unsure). I wait for some of the wispy parts to start turning almost black/charred. 

sourdough bread is done

9. Take it out and let cool on a cooling rack, fending off your hungry children/spouse with the katana sword, saying 'Back! Back savages! Can't you see it's resting!?' Defend your beloved loaf of bread.

Yum. Easy no knead sourdough

That's it. Slice it nice and thick, spraying crispy crust crumbs all over the place. If you manage not to eat it all in one sitting, store it out on a cutting board, sliced side down, or in a paper bag.

Ours never lasts more than 24 hours. 


Troubleshooting

1. Ask someone else - I'm not an expert baker.

2. If your dough is way too sticky/wet to work with when you take it out of the fridge, try a little less water (I use 9oz. instead of ten).

3. Dough is too dense? Make sure you're handling it gently during shaping. Once it's out of the fridge, you want to keep as much air in it as possible.

4. Not enough initial spring? Make sure your oven is hot (at least 450, ovens vary a lot, even if the dial says 450) and that your pot has had enough time to really heat up.  

5. Doughy/undercooked in the middle? I'm not totally sure why this happens, but I think it because the crust starts to set before the boule has had time to finish springing up. Also could be because the dough is too dry/tight, so it can't expand. Hit Command-Z a few times, or toss that loaf and try again.

Are you an expert dough-slinger, or a beginning glutenphile? Let me know how your bread turns out, or what I'm doing wrong!  Posting a bread picture in the comments is totally not dorky. 


Okay, Let's Talk: What's Your Favorite Stephen King Novel?

$
0
0

So... I realized something over the weekend. I was listening to a podcast that had intended to have a conversation the new Dark Tower movie, but since it was, apparently, completely boring and not worth discussing, they decided to chat about their favorite Stephen King books, movie adaptations, mini-series, etc. And it hit me:    

I have never actually read a Stephen King book.     

I started a few when I was too young for them. They were in our house (my dad always had a trade paperback in tow when we were on vacation), and I snuck a couple of them into my room. "Christine" was the first, and there was one about an unborn twin that was born attached to the other dude's brain. (If you recognize this one, please share.)

I was too young for both of them, so I stopped before page 100, and then... I dunno, I just never got around to reading one  for the next twenty years.

But, it's fall, and coming up on October, and it seems like as good of a time as any to dig into one. We have a few on our shelves already, but I aim to hit the used bookstore and the public library as well. So I ask you, ManMakers: 

What's your favorite Stephen King novel? How about film adaptations? Short stories?

Richard Bachman, etc, all apply. I'm hoping we can generate a solid list for both new fans and those who've dipped in a bit over the years, so please share your thoughts in the comments below. Cool? Cool. 

THANKS.


How to: Make a Simple Wooden Smartphone Speaker

$
0
0

Happy Monday, ManMakers! Today, I'm super excited to share an exclusive project with you. It's an excerpt from the new book Build Stuff with Wood, which is all about making cool woodworking projects with the most basic of tools.

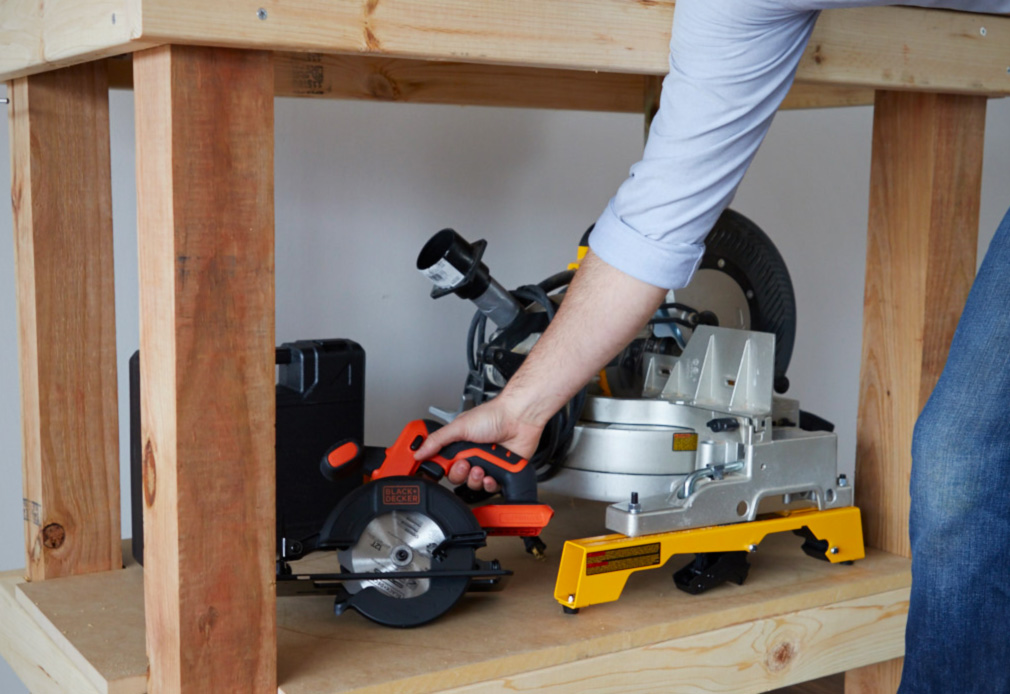
The book is written by Asa Christiana, the former editor of Fine Woodworking magazine, and, I'm proud to say, a close friend of mine and all-around good guy. It features a variety of everyday objects you can make armed only with a cordless drill, a circular saw, and a jigsaw, plus a small palm router on one or two. There's a section on setting up a workspace, building a basic tool kit, and how to get great furniture-quality results from construction-grade tools. (Plus, a nice section on shop safety featuring a few photos of yours truly.)  Plus, the intro is written by Nick Offerman, so...enough said!


Asa is sharing a complete project from the book: this cool passive speaker that amplifies your phone's audio without any electricity. It's cool, it works, and looks great. So! Follow along with the tutorial below, check out the book, and keep building stuff! 


The science behind a passive speaker is simple. If you’ve ever stuck your phone in the bottom of a cup or glass to hear the music better, you know how it works: The sound bounces around the bottom, expanding and growing as it moves up and out. Store-bought versions are more sophisticated but work on the same principle.

As soon as someone discovered the glass trick, DIYers started making their own passive speakers, often from wood. These range from not so great looking to nice but not so easy to build, so I went searching for the sweet spot between. The solution was layers.

A sound sandwich

A passive speaker has three jobs: It needs to hold your device, direct its sound down a small channel, and send it into a big opening that broadcasts outward. So how to work with the tools in this book and create those three openings, with one of then being completely hidden?

On one of my many trips to the home center, I found something called "project boards," available in various thicknesses. These let me visualize a sandwich, with a thicker back and front, and a thin layer in the middle that could both hold the phone and create the small channel.

With the right sequence of cutting and gluing, I would end up with all the nooks and crannies I needed.

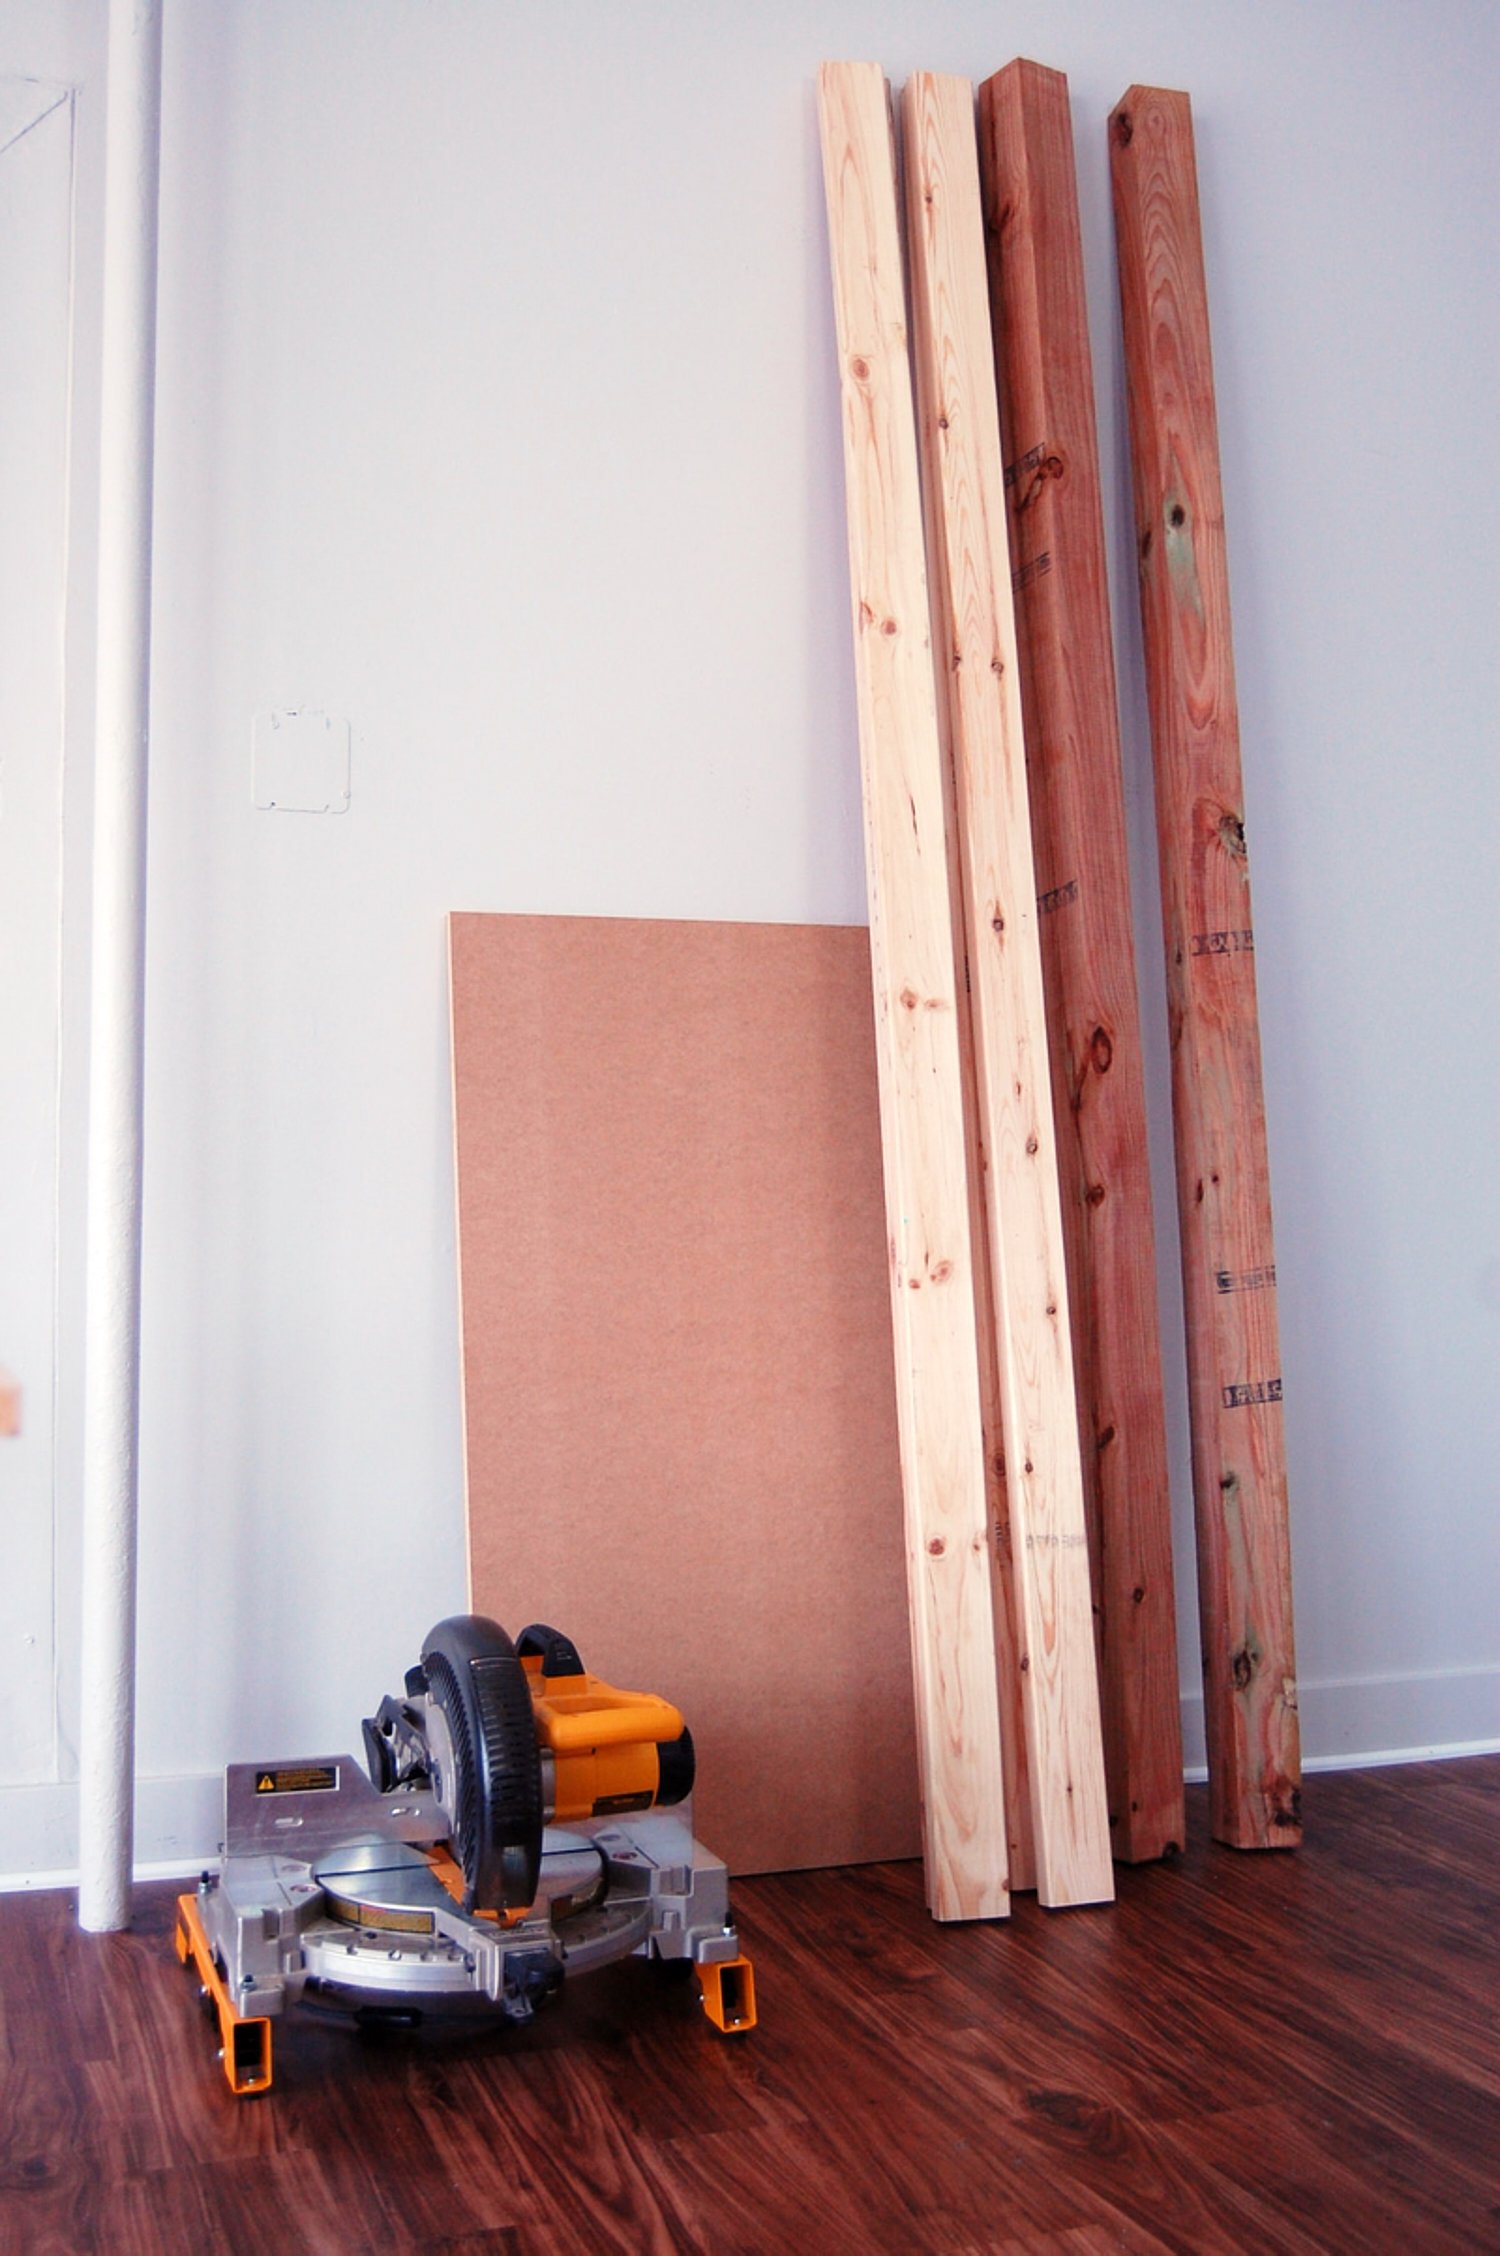
The “project boards" also came in a convenient 5-1/2-in. width, perfect for this project. The only downside is limited wood selection. I had to choose between red oak and poplar (I chose the latter). But if you have a friend with a thickness planer, you could use any wood you like for your three layers.


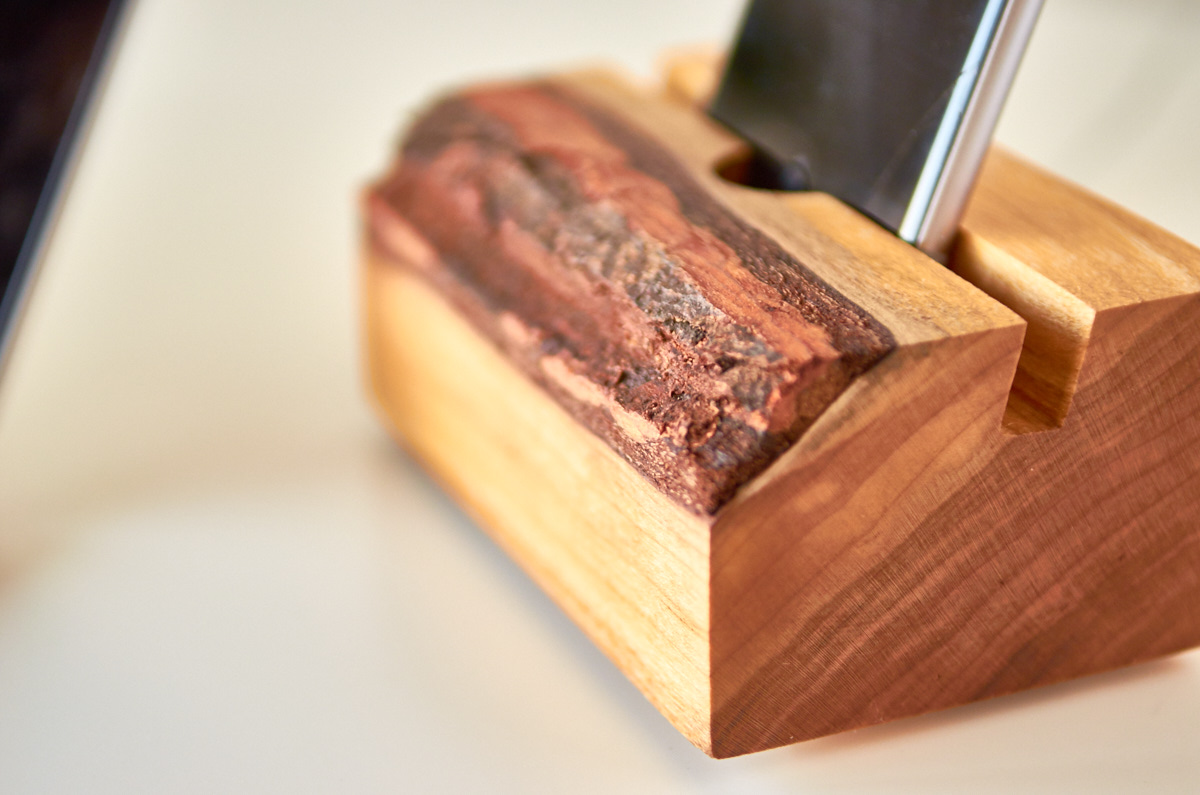
This compact block, inspired by old-time radios, will hold your phone and amplify its sound, without a power cord in sight. You can customize it to fit almost any device, including a tablet. The layered design lets you divide and conquer the construction.


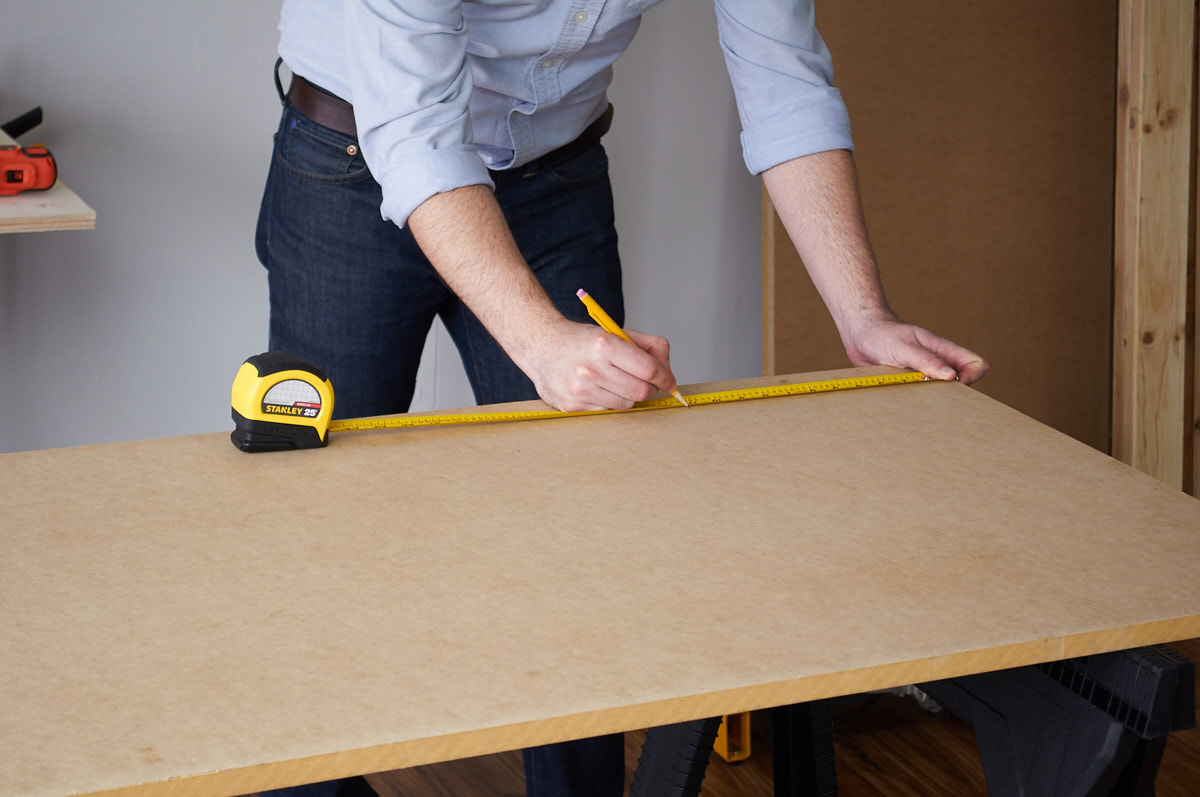
1. Lay out the middle layer

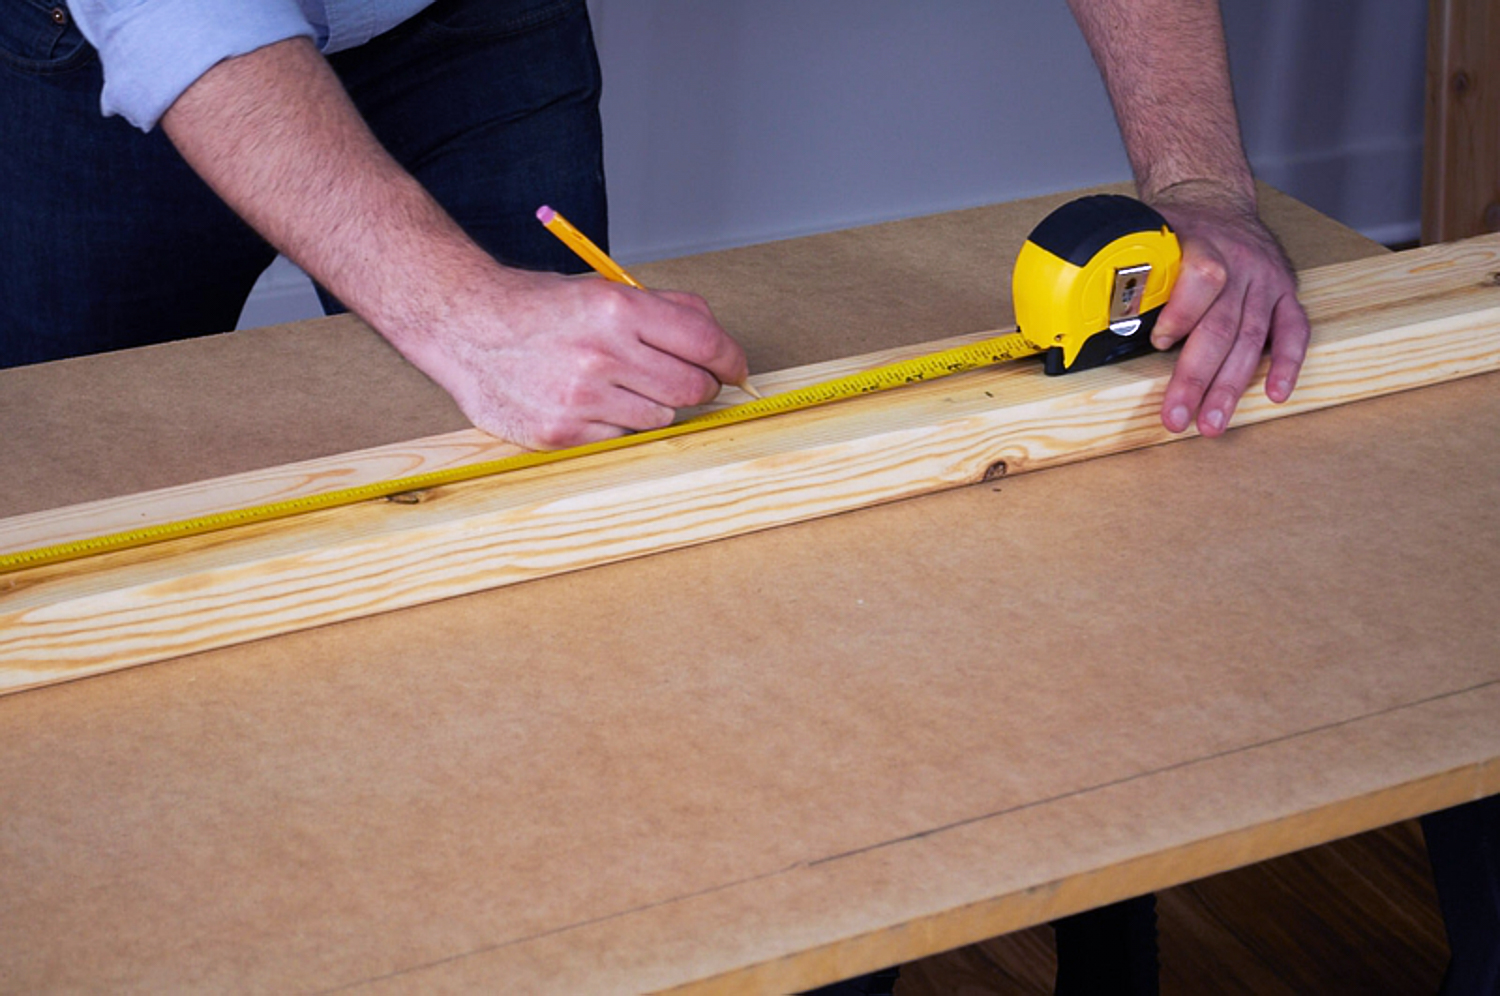
All of the layers start out 18 in. long. The project gets chopped to final length only after the layers are glued together. Start by laying out the middle layer, which is the thinnest. After laying out the ends of the final block, find the center of the speaker hole, set your compass, and pencil in the big circle.

 Draw a line 1 in. away from the edge and set the phone there, ensuring it is square to the block. Move it up until the volume controls are above the top edge and accessible (LOC). Then trace around the phone (LOC). After tracing, add 1/16 in. or so on each side so the phone will slide in easily.

Now, lay out the channel. Mark the edges of the speaker, sliding the phone side to side in its pocket to make sure none of the speaker holes will be covered. Then draw the two different arcs that create the channel.


Lay out the top layer

Use the middle layer to help lay out the top one, which is a thicker 3/4 in. After laying out the end lines, make this speaker hole the same as the last one. Use the pocket in the middle layer to lay out this one, moving the lines in by 1/4 in. on the sides (LOC). Use the square to finish the layout, remembering to leave the bottom of the pocket shorter too (LOC), and draw a roughly 1/4-in. radius at each bottom corner.


Cut the middle layer

This layer needs its pocket and channel cut out. Save the speaker hole for later.


Sand it smooth. Use 120-grit paper to remove the saw marks in the channel, creating a smooth path for the sound. A piece of a rubber mat makes a good backer for smoother sanding.


Cut the pocket in the top layer

This will also get a big speaker hole, but only after being glued to the middle layer.


Sand the sides. Start with 120-grit paper and work up to 150 grit. Sand the sides with your normal block. Then, sand the bottom. It helps to clamp the board on edge Use a 1/2-in. dowel to form smooth curves at the bottom edges and then a narrow block to flatten the bottom edge.


Laminate two layers

Lamination is the technical word for gluing wide things together, like the top and middle layers of this project.I use little 1/2-in.-long brads to keep the layers from sliding out of alignment as they are glued and clamped. Drive in the brads, keeping them away from future saw cuts. And then clip off their heads, leaving a short, sharp point sticking up.


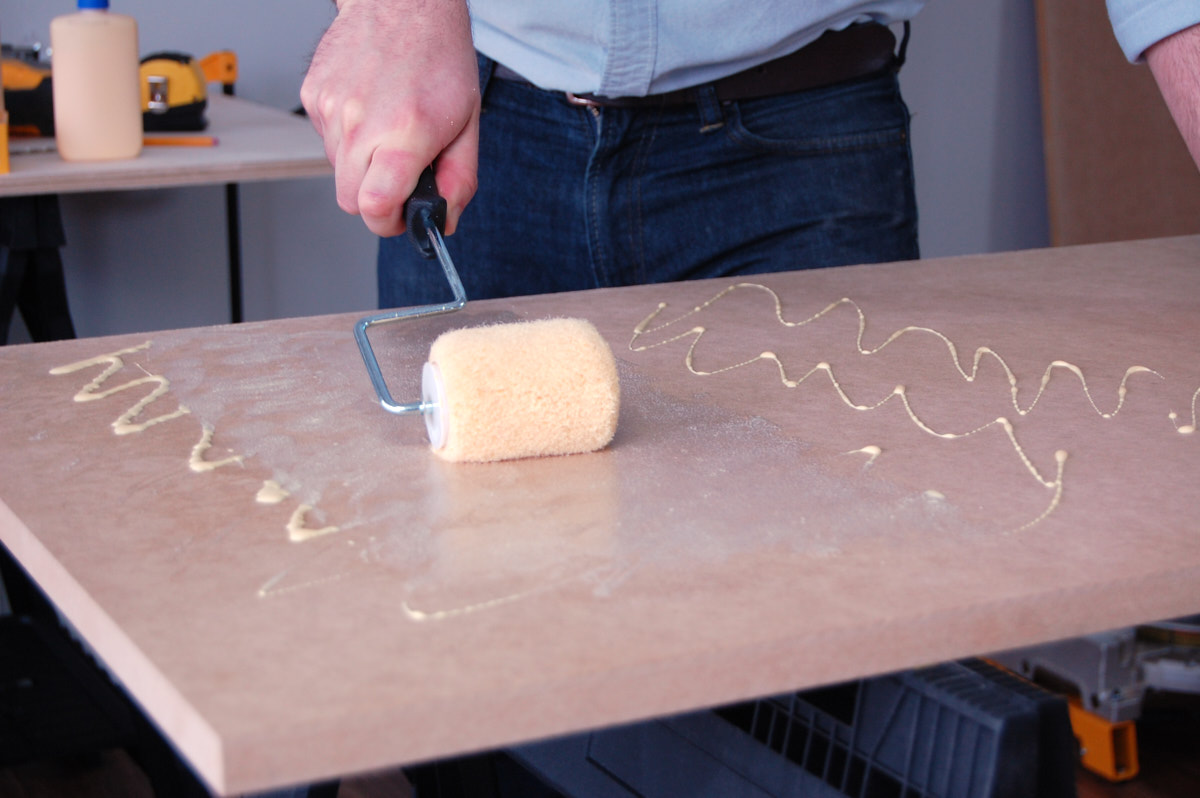
0714: Careful gluing. Put on plenty of glue, but keep it light near the edges of the pocket and channel, so you don’t get a lot of squeezeout that needs to be fussed with after the fact. Use a brush to spread it. Bring the top layer down on the middle one, using your fingertips to make sure they are aligned. Check the pencil lines for side-to-side alignment too. Use a couple of clamps to press the layers together, making sure they stay aligned. The tiny brads will let you make slight shifts. Then put clamps everywhere you can fit them to make sure there are no gaps between the layers. But don’t bother clamping outside the end lines.


Cut the speaker holes

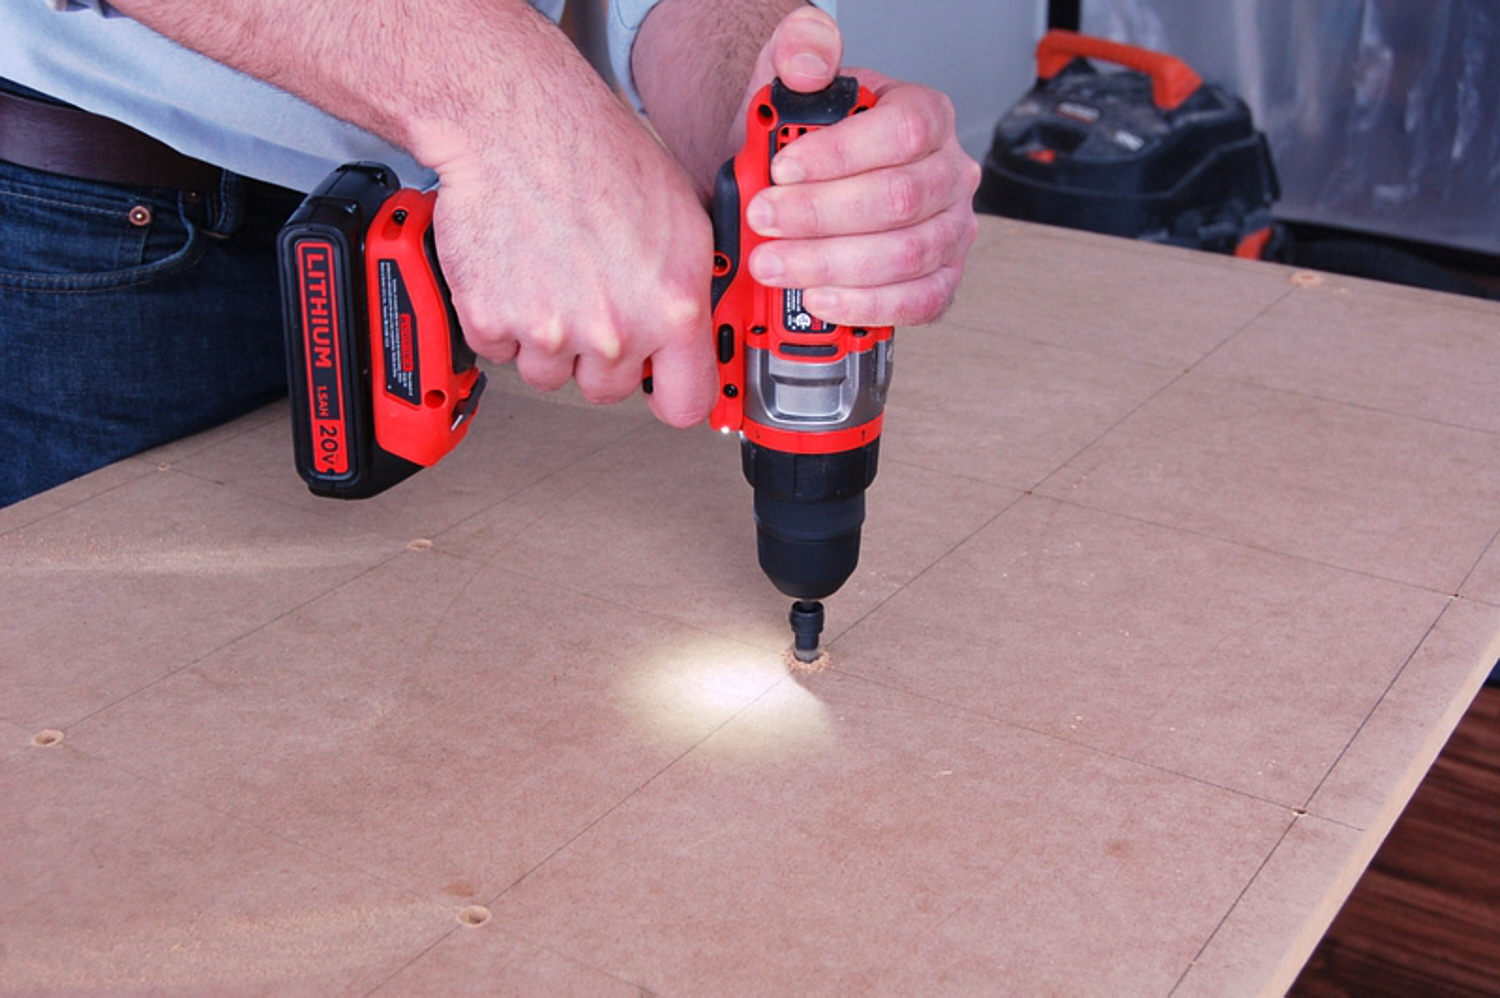
I used a 1/2-in. drill here to make a big hole for the jigsaw blade. You’ll need to overlap the layout line at the edge in order to get the blade into position to cut, but try to minimize that overlap, as it will show at the edge of the finished speaker hole.

[To make a perfect circle for the speaker hole, you can craft a simple jig to guide you.] You need a small piece of thin plywood, a tight-fitting nail hole in both the plywood and center of the circle, and a hole where the blade will drop in, in this case 1-3/4 in. from the nail hole. I drew some extra guidelines to help me here. Then I attached double-stick tape to the jigsaw base.

Line up the jigsaw on the little plywood piece, square to the edge, with the blade passing through it. Then hit the trigger and let the jigsaw work its way around the circle. If you notice the blade starting to flex left or right, the tape will let you steer the saw a little bit to correct its course. Pull the saw away when you are done, remove the big wood plug from the center nail, and admire your work.


Finish off the block

The back layer is just a blank slab of 3/4-in.-thick wood. Once it’s on, you can chop the block to size. Use more clipped brads, and once again keep the glue away from the inside corners where squeezeout will be hard to remove.

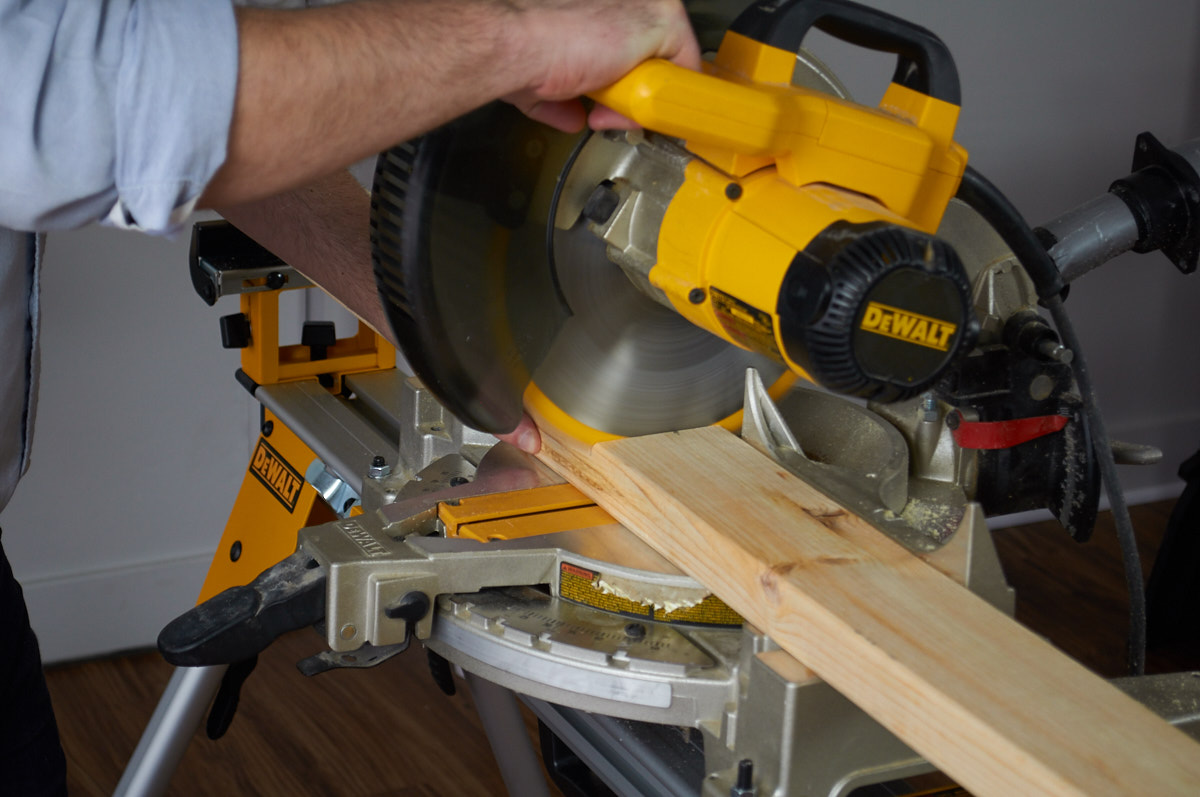
After waiting an hour or two, saw off the block at your layout lines, scrape away any glue squeezeout, and rough-sand the edges flat. The speaker will work great right now (give it a spin!), but let’s make it look even better.


Roundover the edges. This simple router table is nothing more than a piece of MDF, clamped to your workstation. We’ll start by rounding the edges of the speaker hole.

Start with the big hole. Drop the hole down over the spinning bit, without touching it, and then move the block until you feel the bearing riding the edge of the hole. Start moving the block right away, in a clockwise direction, against the rotation of the bit. Keep it moving steadily until you have gone around the circle a couple of times, and you should get a nice clean result.


Then, move onto  the phone pocket. Start on the right side of the pocket, as shown. Press steadily against the bearing as you run the bit down one edge, along the bottom, and back out the other side. Keep the block moving steadily and you’ll minimize the burn marks.


Done in minutes. After rounding the edges, the sleek look is complete.

Finishing touches

This project is small and the finish is just a few coats of oil, so you’ll be done in no time. Once again the oil finish is Minwax Tung Oil, which is easy to apply and brings the beauty out of the wood.


Use a sanding block to do the flat areas, working up through the grits from 120 to 220 (LOC). On the roundovers, a flexible backer is the ticket. The rubber backer works in the tight curves, too, getting rid of the last few burn marks and smoothing all the transitions from round to flat.


Simple oil finish. Start in the openings, pouring in a small puddle of finish and spreading it into all the tight corners. Then do the flat surfaces, front and back. Wipe off the excess and let each coat dry for a few hours before sanding it lightly with 220-grit paper, folded and held in your hand. Then wipe off the dust and apply the next coat. Repeat until you are happy with the look.


Build Stuff with Wood: Make Awesome Projects with Basic Tools by Asa Christiana is available in bookstores now. Thanks to Asa and his publisher, Taunton Press, for sharing this project with ManMade. 


How to Clean Your Entire House in 45 Minutes: A Modern Man's Guide

$
0
0

Your bachelor pad. Your family home. That apartment with all the architectural detail and the amazing view. Wherever you live, houses get messy. And they stay that way, until you clean them. When your plans to let someone inside ends up happening before your hopes of getting your home back to normal, then it's time to clean it. Quickly. 

created at: 09/02/2015

You don't have the time to deep clean and scrub, so make the little bit you have count. If you're smart and focused, you can pull it off in the running time of your favorite record.    

45:00 - Pick a music album (or playlist) you know and love.  Not Ramones-length short, but no double LPs here either. An average 12-14 song album that you can sing along to and not focus on. Your house will be clean by the time the secret bonus track comes on. 

44:00 - Fill up the sink with hot soapy water. Or, if you have a dishwasher, make sure it's empty with the racks pulled out. You're gonna need somewhere to place all the  dirty plates and coffee mugs lying around all over the house. 

created at: 09/02/2015

42:00 - Start in the Bedroom. 

  • Pick up all your laundry and put it in the hamper. Don't worry about emptying pockets or removing belts or turning socks right side out - just get it off the floor. If your hampers are overflowing, place items in laundry baskets and put them in the most hidden corner of your room. 
  • Pick up any books and magazines and stack them neatly. Clean off dressers and side tables. Close all dresser drawers, making sure there's no little pieces of sock or t-shirt sticking out of the closure. 
  • Make your bed like you mean it. Arrange pillows neatly. 

38:00 - Begin the bathroom and kitchen. You can't make the whole thing spotless, so focus on the areas that need the most help. Use time and the power of the cleaners to your advantage. 

  • Put your toiletries and daily use items away and where they belong. Hang up towels.
  • Then spray the hard surfaces with bathroom cleaner. Get the sink, faucet, outside of the toilet, and the bottom of the tub or shower. You can use the shower curtain or doors to your advantage. Just clean the outside. (Unless you know someone will be using it. Then spray away.)
  • Fill the toilet bowl with toilet cleaner, getting as high up as possible (that's where the real crud lives). 
  • Spray cleanser on the kitchen surfaces: stovetop, counters, and any sticky spots on the floor. 

32:00 - Tackle the Living Room. 

  • Deal with the surfaces: clean off the coffee table, entertainment cabinet, side tables etc. Stack books and magazines and place remote on top. 
  • Fold blankets, then smooth cushions and neatly arrange pillows. It sounds fussy, but it's amazing what a difference it will make.
  • Roll up any cables or cords, close and store your laptop, and turn on all lamps. 
  • Embrace the stack. If you don't have time to put things where they belong, place them on top of each other from largest to smallest. It might not look like an display of objets d'art, but it'll look like you intentionally put them there. Which you did. 

25:00 - Finish the bathroom. 

  • Wipe down all the surfaces that have been soaking.
  • Clean the toilet insides with a toilet brush. You cannot scrub too hard.
  • Use an antibacterial wipe to clean the outside of the toilet and the area around the bowl. Don't get that stuff on your good sponge.
  • Use a wet paper towel to clean the floor, wiping up all the hairs and beard trimmings and other goodies that end up in cracks and crevasses. 
  • Replace the hand towel your guest will use, and light a candle if you have one. 
  • Essential #1: Empty the bathroom trash so no one sees your dirty q-tips and other unmentionables.
  • Essential #2: Clean the mirror with glass cleaner and a paper towel. YOU MAY NOT SKIP THIS. It takes 90 seconds, and getting all those toothpaste splashes and water drops off the mirror is the single most important thing you can do to make your bathroom look clean. 
  • Use the glass-cleaner towel to polish the sink, faucets, or other metal fixtures. It's the sparkle that counts.

17:30 - Kitchen It Up. 

  • You're still singing along right? This is what keeps you sane.
  • Wipe down all the surfaces you sprayed before, including counters and cooktops. Get all the crumbs and coffee grounds and salt and stuff out of the corners and edges.
  • Wipe off the front of microwaves, toaster ovens, refrigerators, etc. If you have stainless steel appliances, use those little wipes intended for the stainless. Those things are &#*%ing magical. 
  • Deal with the dishes. Like faster than you've ever dealt with dishes before. Food-encrusted plates and dirty glasses are what makes your house look gross. Figure it out. Don't get obsessive, just get it done. 
  • Finish by wiping out the sink and polishing the faucet. See: bathroom. 

created at: 09/02/2015

5:00 - Sweep the [floor], Johnny. 

  • Bust out the vacuum and do all carpets and rugs. If you don't have much time left, focus on the paths from the door to the sofa, bed, and the bathroom. Those not only will be the dirtiest, but are the places your guests will see.
  • If your vacuum can handle it, use the hard floor setting to do the kitchen, baths, or any tile/wood floors. If not, bust out the broom and work quick. Make several little piles and then come around with the dustpan at the end to finish up.
  • You probably don't have time to mop, so use an antibacterial wipe or two to scrub up grimy or sticky spots and remove built-up crud. A wet Swiffer thing will also get it done fast. 
  • Use any extra time to dust hard surfaces in the living and bedroom. 

Done.


These are the Best Bottles of Whiskey Under $20

$
0
0

There are times for spending on an investment bottle, but there are even more times for enjoying something perfectly good that cost less than an Andrew Jackson. None of them are going to blow your mind, but you know that already. But - seriously - if you're having fun and it's more about the conversation than what's in the glass, twelves drinks of anything palatable for less than twenty bucks is money well spent.     

1. Kentucky Bourbon: Evan Williams Black Label – $14

Evan Williams is the second best selling Bourbon in the world, and, to our palate, is in a completely different class than the first, Jim Beam. It's pretty mild, which means it's smooth enough to drink neat. But it really starts to shine when mixed with ice and/or soda, and it holds its own with a simple mixer such as ginger ale. Once chilled and diluted, it almost becomes too drinkable. It goes down fast and easy, so be careful.


2. Kentucky Bourbon: Kentucky Tavern Bourbon – $10 

At the same price as a lunch plate at your local food truck, it's hard not to give this one a shot. The truth is: it's different, but it's really not that bad. Sipping it has a pleasant, oily texture and gives you a grain-forward flavor that reminds me a lot of Four Roses, one of my favorite distilleries. It's not too sweet, so it works well with cocktails with sugar added, like an Old Fashioned. 

3. Kentucky Rye Whiskey: Old Overholt – $18

In practice, I tend to prefer the spicier, more challenging whiskeys to corn-forward Bourbons, and I believe these show better in the less expensive bottles. Old Overholt is a damn good whiskey for the price, and if you're mixing up Manhattans or Sazeracs at home, there's not much reason to spend more. If I ever mixed a whiskey with cola, this would be the one I'd choose. 

4. Tennessee Rye Whiskey: George Dickel - $19

This is not as interesting as Old Overholt, in that it's not as challenging. But, for the price, it tastes pretty great. If you pretend it's not a rye and just a solid American blend, it's worth sampling at least once. This is what I think that other super popular and well-known Tennessee whiskey with the black & white label should actually taste like. 


5.  Irish Blended Whiskey: Kilbeggan - $18

From the oldest licensed distillery in Ireland comes a solid entry into the world of pot still whiskey. It's flavor is very grain forward, but still sweet and smooth. If were going to sip one whiskey on this list neat, this would be the one I'd choose. 

6. Canadian Whisky: Black Velvet Reserve - $12

The age statement on the bottle says it "contains whiskies age eight years," which likely means they blend a tiny bit of the old stuff with a whole bunch of brand new corn whiskey. That said, there is a fair bit of barrel flavor in this guy: some smoke, fresh fruit, and fall spices. It's not "smooth," but it's a bottle I'd take to a party or use in a bowl of punch or pitcher cocktail. At its price, is not much more of a risk than a six pack of craft beer, and it'll work with lemon-lime soda or juice or whatever else ends up on the make-your-own-drink table. 


7. Blended Scotch Whisky: Chivas Regal - $19

There are no single malt Scotches worth drinking under $20. There are barely any worth drinking under $40. 

But, I like the flavor of malted barley whiskeys, and I think Chivas Regal is a perfectly fine way to get there when you don't want to spend $50 on a bottle. (Or when you know someone is going to fill their glass with ice and club soda and you just can't bear to share the good stuff). This is likely the Scotch your grandfather drank, and it'll do the trick in between your investment bottles, or after your palate has been burned out by the Islay peat bombs. 


What are your favorite second-from-the-bottom-shelf whiskies? Please share in the comments below. 


How to: The Easy Way to Remove Pencil Marks from Your Woodworking Projects

$
0
0

Saws are exciting, and chisels and hand planes look really great on top of your workbench. But if you ask me, the number one most-important, guaranteed tool I use on every single project is: the No. 2 pencil.

created at: 07/19/2016

It's essential for everything from sketching to measuring to layout and marking parts, and its "easy to remove" nature makes it perfect for seeing now, disappearing later. Except, have you ever actually tried to remove pencil from wood before applying a finish?   

Erasers did not get the memo that they should work on wood. Using sandpaper is time consuming and results in creating dents and valleys, potentially ruining veneer on something like plywood. I've heard that nail polish remover (acetone) works, but I've never had much success with it. What actually works as a liquid eraser is...

created at: 07/19/2016

Denatured alcohol. Sold in hardware stores and home centers with the paint and wood stains, it's only about $6-8 a can. As long as you keep the top on it to prevent it from evaporating, it will last forever.

created at: 07/19/2016

To use it to remove pencil marks, simply place some on clean rag, and apply it to the wood. It's not a simple wipe-away process; you'll have to rub a bit and create some friction. So, just concentrate on one small area at a time. 

created at: 07/19/2016

But, in a couple of seconds, the pencil marks will disappear, and after a minute or so, the alcohol will evaporate. If you do have a little ghosting left, then you can take a couple swipes with some 220-grit sandpaper to clean everything up.

created at: 07/19/2016

Done. Moving on to the next step in your project...


How to Drill a Perfectly Straight and Square Hole without a Drill Press

$
0
0

Sure, every once in a while, you want to intentionally drill a hole an at angle. Sometimes, compound joinery demands it, or you're going for a stylish, contemporary look on a project.

But most of the holes we drill - I'd hazard to say a good 99% of them - are intended to be drilled straight on, perfectly perpendicular to the surface. You can do this precisely with a drill press, but many makers don't have one, and they require specific set up and work that's small enough to be placed on the table. 

So that leaves the cordless drill. A tool that, when balanced on the tip of a drill bit, can be easily canted and slanted off square in every single direction, especially when you're putting force behind it. But the task is not impossible.

Yes, DIYers, you can drill a perfectly 90° hole with a cordless drill. Here's how it's done.     

First, Set Yourself Up for Success.

When you need to drill a perfect, 90° hole, you need to concern yourself with the angle of the drill and bit and nothing else. So, to make it easier, always make sure you create a small starting divot with an awl so your drill bit has a place to land. This way, you bit placement is set, and you can worry about the other moving parts.


The Commercial Option

The Milescraft DrillBlockis a simple and super handy aid made for exactly this task. It only costs $8, and it helps you create perfectly square holes in 1/16" increments from 1/8 – 1/2". It's a seriously good value, and if you use a cordless drill more than a couple times a year, it's a no brainer. Get one. 

You just place it over your drill bit, set the bit on your mark, secure it with your hand or a clamp, and drill. It's a seriously good value, and if you use a cordless drill more than a couple times a year, it's a no brainer. Get one.


Bonus:  the DrillBlock has a v-groove on the bottom, allowing you to drill 45° holes into corners and edges with ease. 


The DIY Option

Okay, but let's say it's 10:00 p.m. on a Saturday, and you need to keep going with your project. Or, perhaps you need a hole that's not in increments of 1/16". Or any other of the dozen reasons you might need to drill a straight hole without the aid of the commercial guide. Well, then, my friend, you make your own.

It's deceptively simple. Start with some wood scrap, about 1 1/2" wide and 10" long.  Cut off 2" from one end, ensuring the cut is perfectly square. 

Spread a little wood glue on the cut off, then place it on the longer piece 1" from the end. Use a square to make sure the two pieces are aligned.

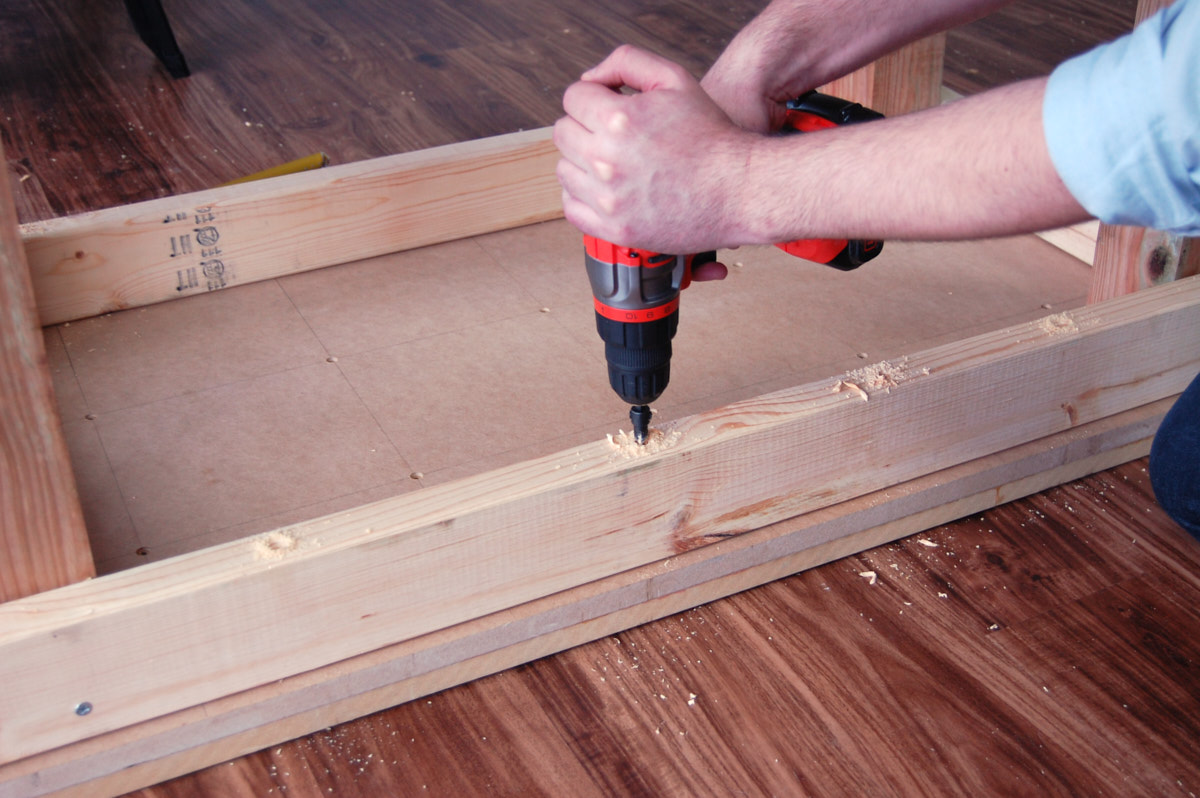
Clamp the pieces together while the glue sets up.  (If you're in a hurry, you can set the alignment with screws and get on with your project.)


To use it, simple line up the drill bit with the corner created by the guide. Use your hand or a clamp to secure it to the work, line up, and go. You'll bore hundreds of spot-on holes of any size. Eventually it'll wear out, any you can just slap two pieces of scrap together and make another one. 


The Reusable Jig

If you need to drill a lot of hole of the same size, you can modify the DIY jig for even more consistency. Go to the brass and aluminum rod sections of the hardware store or hobby shop, and look for a tube with an internal diameter than matches your drill bit. This won't be the number on the label, so take your drill bit or a pair of calipers with you to measure. Cut a 1 1/2"-ish piece off the end.

Then, use some hot melt glue to secure it to one of the sides of your drill guide. You've essentially made a collet to guide the bit, which uses the same principle at the DrillBlock above.


Now... let's check our work.

Nailed it!


How to Build a Sturdy Workbench in a Single Day

$
0
0

This post is sponsored by the DIYZ® app.

A good sturdy workbench is one of the simplest, most useful projects any woodworker can embark upon. In fact, it's probably the first project every woodworker should embark up. And yet it tends to go by the wayside. You see people building remarkably complicated pieces on rickety, unimpressive workbenches. 

There's a saying about the cobbler's shoes that goes here but I can't figure out if it works or not. Anyway, the point is, having a rock-solid work surface on which to build other things is really important. And you can make a great workbench without spending too much money or much time. Read on to find out how.

The DIYZ® app is THE DIY app for getting detailed step-by-step project instructions and how-to videos that can help you complete your home repair or renovation without having to hire a professional handyman or contractor! The DIYZ app includes hundreds of instructional videos covering almost every aspect of home improvement and DIY, with clear directions so you can get your project done right. And if you run into trouble, you can reach out to get help from a real, live professional, right from your phone!

Check out the first project we did in partnership with DIYZ; its a rustic phone charging station made from a gorgeous slab of hardwood:

Hardwood slab iphone charger station


Tools & Materials

Tools: 

  • Miter saw or crosscut saw
  • Jigsaw or hand saw
  • Clamps
  • Cordless Drill/Driver
  • #8 Countersink bit
  • 1/8” and 3/16” drill bits
  • Safety glasses and hearing protection

Materials: 

  • Three 2x4’ plywood or MDF panels, ¾” thick
  • (Five) 8-foot long 2x4s
  • (Two) 8-foot long 4x4s
  • Wood glue
  • #8 wood screws, 3 1/2” long
  • #8 wood screws, 1 ¼” long
  • #10 wood screws, 4” long
  • 3” foam paint roller 
  • 220 grit sandpaper

Step 1: Prepare the bench top

First, let's create the bench top. Then, while the glue sets up, we'll start to build the base. 

You can create your top from a double layer of 3/4" plywood or MDF to create a nice, beefy work surface. Glue or laminate the two pieces together, and use screws to hold them together while they dry.

So begin by laying out a grid on one piece of plywood. Start 1" in from the edge, and make a mark every eight inches. Repeat by making several rows and columns all over the face of the panel. 

Drill a 3/16" clearance hole at each intersecting point on the grid, then countersink each hole. Flip the panel over and sand away any imperfections to create a clean, flat surface. 


Step 2: Glue up the pieces

 Grab a second piece of plywood, and cover its entire surface with a thin layer of wood glue. A 3" paint roller is a great tool to get it spread in an even layer. Then, place the drilled piece of plywood on top, making sure the countersinks are facing up. Line up all edges.

Clamp it in place, and attach a 1 1/4" screw in all four corners to lock in the alignment. Insert and attach screws into each clearance hole. 

Set the top aside to dry according to the directions on the glue bottle. 

Step 3: Begin building the base

Now, let's build the base. Most workbenches are 30 - 36" inches high. One way to determine your desired height is to stand up straight with your arms at your side, and have a friend measure the distance from your wrist to the floor. 

Once you have that number (ours is 33"), subtract 1 1/2" for the top. In our case, that's 31 1/2". Then cut four 4x4s to this length to create the legs. 

Step 4: Cut the crossmembers

Cut all your crossmembers from 2x4s. You'll want four at 44" long for the front and backs, and four at 20" long. 

Step 5: Assemble the shelf

We'll begin to assemble the base by creating the lower shelf. This adds extra storage as well as plenty of rigid structural support. Make a mark 7" from the bottom on all four legs. Place a 20" 2x4 on top of this mark on two legs to make an H-shape. Attach the side rail to legs with four 3" screws. Repeat to make the other side. 

Bring the two sides together by placing one 44" 2x4 across the front, and attach it with two screws into the leg, and two into the end-grain of the side rail. Repeat for all four sides.


Step 6: Notch the shelf

It's essential to add the shelf before the top is attached, otherwise, you'll never fit it in there. So, with the base still exposed, grab the third 2x4' piece of plywood, and notch out the corners with a jigsaw or hand saw, making sure there's enough space to fit the 4x4 leg.

Place the shelf into the base, and screw it in from the bottom using pre-drilled pilot holes and 4" screws.

Step 7: Attach the top rails

Now, attach the top rails using the same technique you used in step 5. Make sure each crossmember is flush with the top of the legs, and use a square to ensure everything is lined up properly. 

Step 8: Attach the base to the top

Lastly, attach the base to the benchtop. If you like, you can remove the screws used to glue the benchtop together. Place the top on the ground with the countersink holes facing up, and flip the base upside down onto the top. Double check your placement, then drill pilot holes and attach the top using 4" screws.


Have a friend or two help you flip the assembled bench back upright, and you're done! Get to work making something amazing. 


Thanks to DIYZ for teaming up with us for this post and a series of others. We love working with sponsors who understand the power of a good DIY project. All opinions are my own, and thanks for supporting the brands that make ManMade possible.


Minimalist DIY: Finishing Up My 30-Day Workshop Purge

$
0
0

It's finally done. My first major step on my journey to have less stuff is complete. My shop was cluttered, inefficient, and completely out of hand; and now I'm back in control of my space. Well, mostly. Here's what I've learned from the first 30 days of purging my shop.    


If you haven't read my last few pieces on the 30-day shop purge, feel free to check them out here and here. It's been a process, but I'm really glad I took it on. The shelves were full of half-finished projects: "someday I'll fix these," and "these have potential" pieces. There were boxes of trinkets and tools, and so. many. extra. screws. I had collected so much scrap wood that needed to be milled that entire shelves were sagging under the load. While purging it all, I learned a bit about myself, and the tendency to collect things to the point that they took over my space.

1. I need to embrace some reality - I don't know about you, but I have more projects than hours in the day. My to-do list grows at an alarming rate and soon enough the almost finished projects begin to stack up. Being aware of things I want to do someday shouldn't be an excuse to start collecting pieces for it now. What I mean by that is if I think I'm going to get into knife making within the next few years, collecting bits of metal, or files, or even a small forge right now would be unrealistic. But I did. I had parts for projects I want to do someday stashed all over the shop, and they just became more noise in a crowded space. Be brutally realistic about what you're doing now, there will be plenty of scrap and tools available for you whne you're actually ready to do it.

2. Finish what you start - Most of us are good at starting things, and getting them about 95% finished. Those last few screws, or a simple little fitting, or just an adjustment can push out for months while we start in on the next project. That means a small piece has to be stashed away until it's time to really get it finished. Multiply that by a hundred projects and I had small pieces stashed all over that I knew needed to be finished off. That's a lot of space for things that just need to be done. I took a few afternoons and finished about a dozen at a time and finally tossed the last few pieces that I no longer needed.

3. A trip to the store is ok - When I was a kid, my grandfather's shop was a mini hardware store. Small trays and bolt jars lined the shelves, extra blades and tools filled the drawers. If you needed it, chances were it was in there somewhere. But you know what? We still headed to the store a few times a day during the projects around the farm. The problem was with so much in there, it was really hard to find that one thing you needed.  Bolts, rubber washers, and random screws cluttered my shop and I felt horrible putting them into the "give away" coffee can. But once they were out of the shop, it made everything left much easier to find. (I still kept the standard screw and bolt collection, but just capped it at a more manageable size).

4. Embrace quality - I know it's hard to hear, but I recommend buying fewer tools (gasp). We all start out on a shoestring budget in the shop. Collecting all the essentials takes a lot of time, and money. So, I get the tendency to load up on the cheap stuff, and the helpful gadgets like flexible paint can funnels or spray paint triggers (yep, found a few of those). The problem with all of these little plastic gadgets, or sub-par tools is that they don't last. A few years down the road they will be trash and you will be buying it all over again. It was painful to purge my cheap chisels and screwdrivers, but they were just horrible to work with. That's why you need to save up a bit more and buy tools that will last. They will be more enjoyable to work with, and the stretch to get better things will stave off the tendency to clutter up your space.

With my shop organized, clean, and easy to navigate I think I'll be spending a lot more time out there. It's amazing how much faster I can do things without the clutter. As far as the purge, I'd call it a full success and there are a few more spaces in the house that I have my eye on next. This minimalist thing is a bit hard to ease into, but I'm starting to see everything from a different perspective. I'm tired of being the protector and caretaker for stuff, and if living with less means I can live a bit more free, I'm definitely up for that.


Why a Backyard Meat Smoker Just Might Change Your Life

$
0
0

Editor's note: From time to time, we like to feature the voices of ManMade readers on the site. We love hearing what you're up to, what you're making, and how you stay creative. When ManMade reader Scott Huntington wrote in to share how he hadn't fired up his grill once for the entire summer and it revolutionized his cooking, I asked him to share his experience. 

My life changed forever this summer. It was the summer I didn’t grill a single time. It was also the summer I made the best meats I’ve ever had, all because of a simple backyard ssmoker. It took my cooking level from “yeah I’ll eat that” to “I need to share this with the world.” And it couldn’t be easier.       


Why I Fell in Love with an Electric Smoker

Electric smokers are ideal when cooking outdoors. With a digital timer and temperature controls, as well as a separate area to add your wood for flavoring, the electric smoker has about the difficulty level of a crockpot. You simply turn on it let it work, adding extra woodchips occasionally. 
While most cooks view grilling as an art form to master over time, the smoker lets you get creative in the preparation, and leaves less to worry about when doing the actual cooking. There are also fewer inherent dangers when cooking with electricity when compared to propane, charcoal or wood. 


Here are a few reasons why I’ve ditched the grill and gone straight to the smoker: 

  • Cooking on a traditional grill takes a lot of your time and attention. Burgers, steaks, chops, vegetables, and sausages all need to be checked and moved about flipped to ensure consistency.  Smokers, on the other hand, do not require constant monitoring. In some cases, you can even prepare your dinner the night before and let it smoke overnight. Just add woodchips every so often, or even better, get the slow-smoker attachment that can last 6 hours without you touching a thing. 
  • Grills are messy. Not only does the metal grill itself require cleaning, but the process of grilling leaves residue in its immediate area. Although electric smokers still produce a little residue —  depending on how much wood you use to flavor the meat — the device itself is easier to clean than the typical grill. 
  • It’s so easy to look like an expert chef. Due to the low temperature of smoking food, it’s impossible to burn your food. So far everything I’ve made has been fall-off-the-bone tender, with incredible flavor. All of a sudden, I’m the “chef” of the family, despite having no experience with this just six months ago. 

The options are endless. I started with the basics: wings, pulled pork, chops, whole chickens, ribs, and salmon. Then I got into non-meats, like corn-on-the-cob, mac-and-cheese, potatoes, and even pizza. And now I’m started to work on cold-smoking, which means I can do cheeses, nuts, olives, and spices. And I still haven’t even hit some of the big ones, like brisket, whole turkeys, and jerky. I can’t stress enough just how phenomenal each thing has turned out, too. 
The grill does beat the smoker for classic burgers and dogs, I’ll give it that. And it’s a lot quicker, too. But I can honestly say that this summer I haven’t missed the grill one bit. 


Making the Switch to Electric

If you want to embrace a simpler way of cooking without sacrificing flavor, taste or variety, it’s hard to beat a modern electric smoker. With so many affordable options on the market today— some of which include numerous bells and whistles that make your cooking life a little bit easier — your taste buds will thank you. 


Scott Huntington is a writer and blogger from Harrisburg, PA. He is also quite obviously obsessed with his new hobby of smoking meats and other food. Follow him on Twitter @SMHuntington


Okay, Let's Talk: How Do You ACTUALLY Make Your Coffee Each Morning?

$
0
0

Over the years, we've shared some of our favorite techniques for crafting the ultimate cup of coffee, the importance of coffee-making as a morning ritual, and how to spike it into an enjoyable, boozey/bitter treat.  

But today, it's not about how to make the ideal coffee.     

Instead, we want to know how you actually enjoy it. Specifically - how do you make it each morning? Do you drink it black, with cream and/or sugar? Are you on board with the bulletproof coffee trend? Do you pour into a traditional mug? A spill-proof travel mug? A thermos? How important is it to keep it warm?

If were fancier, maybe I'd embed a survey, but let's just keep in simple and use the comments below. Please tell us:

  • What brewing method do you use to make your coffee?

  • How do you take it? Black? Cream and sugar?

  • From what do you sip it? 

I'll start: I own two coffee brewing devices: a French press and a Chemex. I use the French press 90% of the time, and bust out the Chemex if we have guests in the house or if I'm making coffee for a larger group of people. I grind my beans just before in Bodum Bistro burr grinder, which is fantastic. (I technically also own an Aeropress, but I haven't really figured it out yet.

I drink my coffee black, and I like to keep it as hot as possible for as long as possible, so I use a Contigo travel mug. Another fun fact: I don't make my coffee first thing in the morning. I usually don't start the kettle until around 9:30 or 10:00 am, and then I sip it slowly until lunchtime. The Contigo mug keeps it warm as long as it lasts. 

Please share your everyday routine in the comments below. Thanks!


Fact: This Early 20th Century Swedish Tool Chest is Super Cool

$
0
0

Get ready to grab a bucket for all that drool...   This Swedish tool chest from the early 1900s just recently sold at auction for a healthy sum. The lack of rust and the quality of the edges on the cutting tools seems to indicate most of the hand tools had been used regularly until recently. (Or, I guess, the sellers really knew what they were doing...)

What's most interesting about the chest, besides its attractive layout and the very cool wood burl that makes up the tool handles, is the way the chest's carcass itself is put together. 


Christopher Schwarz notes on his Popular Woodworking blog, 

The way the box is put together with screws and beadboard [is fascinating]. The ends of the chest are framed – perhaps with mortise-and-tenon joints. But the majority of the chest is built by layering pieces on top of one another and screwing them together. Also clever is the lid with the hinged doors. After studying the photos it looks like the left door is shut first and locked in place with sliding locks. Then you close the right door (there’s a dust seal on its front) and lock that to the other door with a wooden catch. 


Check out all of Chris's comments and find a link to the original auction at: Boarded Scandinavian Tool Chest – Too Cool  [PopularWoodworking.com] 


Wool and the Art of Sweater Maintenance: 5 Tips to Care for and Make Your Sweaters Last

$
0
0

created at: 12/14/2012

The cooler months bring boots, jackets, and best of all: sweaters. Worn well, they echo the classic men of yesterday. Investing in one or two quality pieces made from 100% wool is preferable than several from acrylics or blended fabric, as they'll stick around for many falls and winters to come, and look better in the process. (Not to mention keep you warmer.) If you take care of them well, they'll last until your beard goes gray, and you can pull off the weathered fisherman with a warm heart look of Mr. Hemingway here.

1. Don't dryclean or machine wash.  Not only does hand washing keep your wool clean, it'll actually make your sweater softer over time. Wash in cold water, inside out if possible. That way, you'll be able to target the dirtiest spots - those next to your body. 

2. Fold sweaters, never hang. Gravity, in this case, is not your friend. It pulls on the sweater, distorting its shape. Plus, hangers can often create dimples at the shoulder and stretch the neckline. If you don't trust your ability to fold one without creases, snag a folding board from the home store ($5-10). They work wonders.

3. De-pill, de-pill, de-pill. While lower-quality sweaters will pill faster, eventually, you'll end up with those little balls...which my brother-in-law calls gniffs (hard g pronounced.) Weird. You want to remove these as soon as they show. Some say you can shave them off with a face razor, but I recommend investing in a sweater stone. It'll last forever, and you can control the amount of force, unlike the battery powered machines. Or, cut them off individually with a pair of small scissors.


created at: 11/02/2015

4. Dry flat and reshape. The "never hang" rule applies to just-washed sweaters even more than dry. Wet wool can take days to dry fully, and the water adds extra weight, stretching and distorting the shape even more. When you're done washing, don't wring the sweater out, just shake it until you can remove as much water as you can. Then, lay it out on a towel, and reshape it as it dries. 

5. Sink the snags. If your sweater snags on the outside, use a needle or pin to push the yarn back into the weave, or at least to the inside of the sweater. Bury the loose thread as best you can, tying it if possible.


Overall, if you can handle the folding and flat storage part but would rather not wash them at home, just take them to the dry cleaners every season or two to get them back in shape.  More costly, but effective. 

Do you have any favorite sweater maintenance tips? Please share them in the comments below.


This ManMade post was originally published in December 2012. We're resharing now cause it's officially sweater season. 

Viewing all 2425 articles
Browse latest View live


Latest Images