![]()
Your kitchen stove is a recent development in human cultural evolution. For millenia, all cooking was live fire cooking. From traveling groups building a bed of coals in the wilderness, to stone and earth homes centered around the hearth, the use of wood as fuel for flame represented what it meant to be human for tens of thousands of years.
These days, cooking over an open flame makes a meal an event. Live fire cooking is portable, sure, but more importantly, it adds flavor and ambience your electric oven can never achieve. Whether grilling over glowing hardwood or slow roasting in a cast iron pan, cooking with real fire makes the meal the point of the evening.
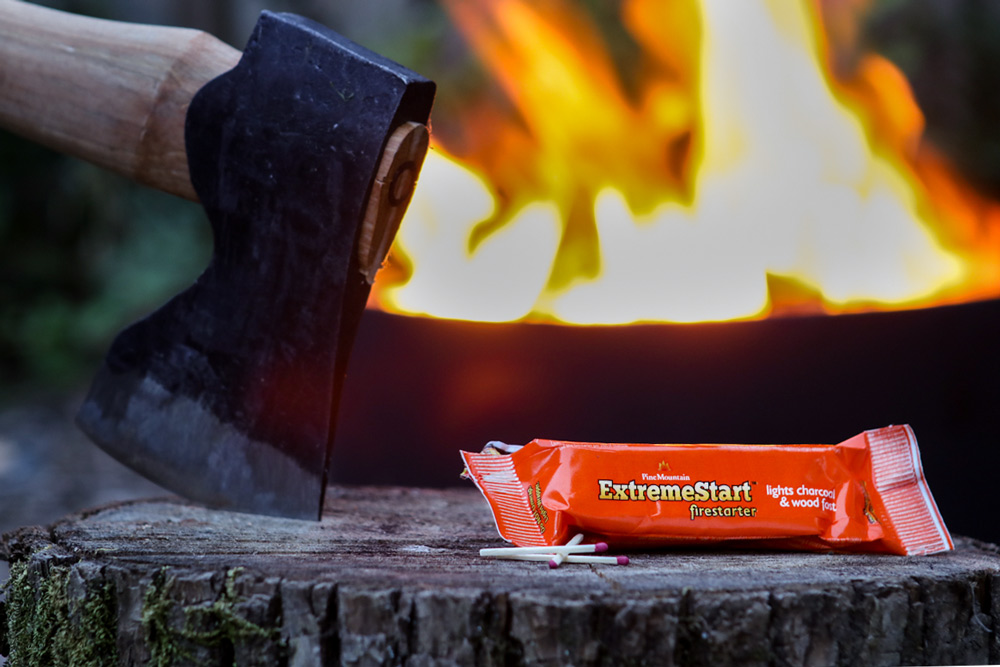
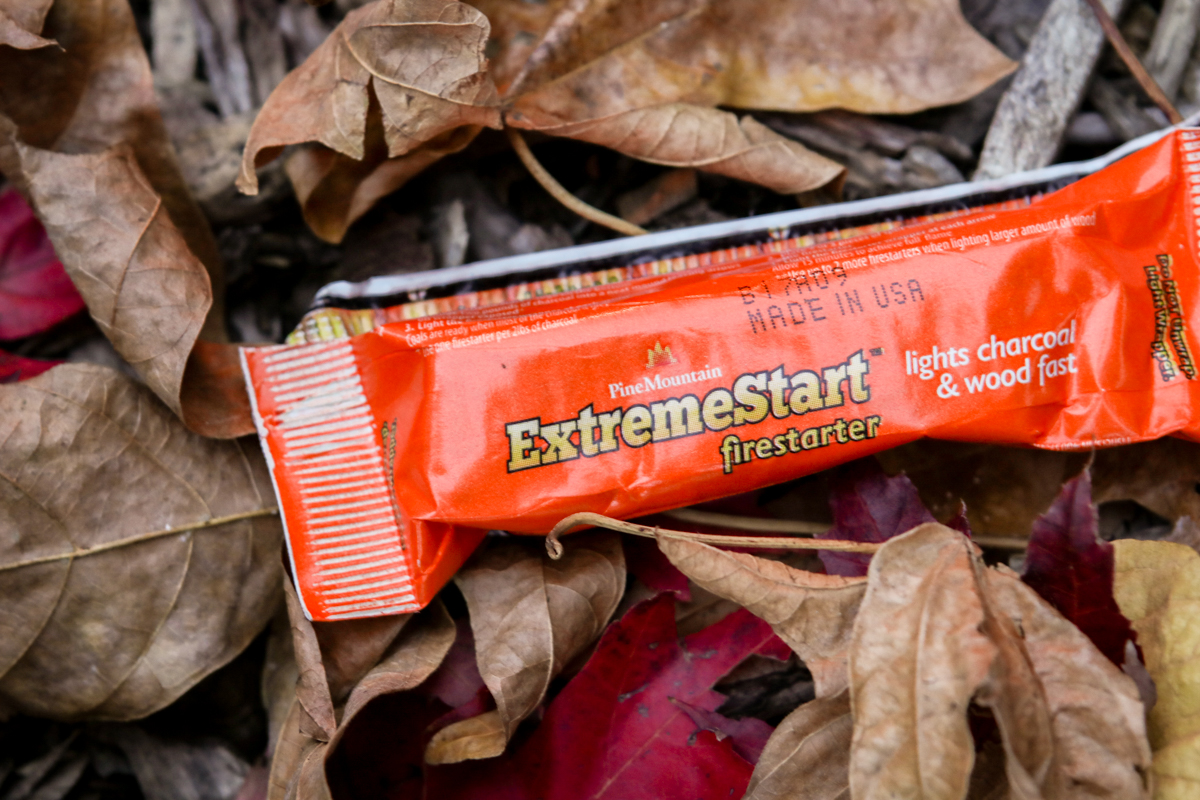
So, to bring you more smoke flavor into your life, we teamed up with Pine Mountain, makers of the ExtremeStart Firestarter. Each one is made right here in the USA, and eliminates all the guesswork of starting the fire. They work indoors or out, in fireplaces, fire pits, charcoal grills, wood barbeque grills, smokers, or brick ovens.
![]()
Just strike a single match, add a bit of kindling and fuel, and you get to focus your attention on getting your meal prepped. By the time the logs have burned down into those lovely, lovely coals, you'll be ready to cook.
![]()
Building a Fire for Cooking
Unlike a consistent gas flame or an electric burner, each live fire has its own personality and character. This is good thing, as it allows you to use the diversity inside the fire to control the cooking process.
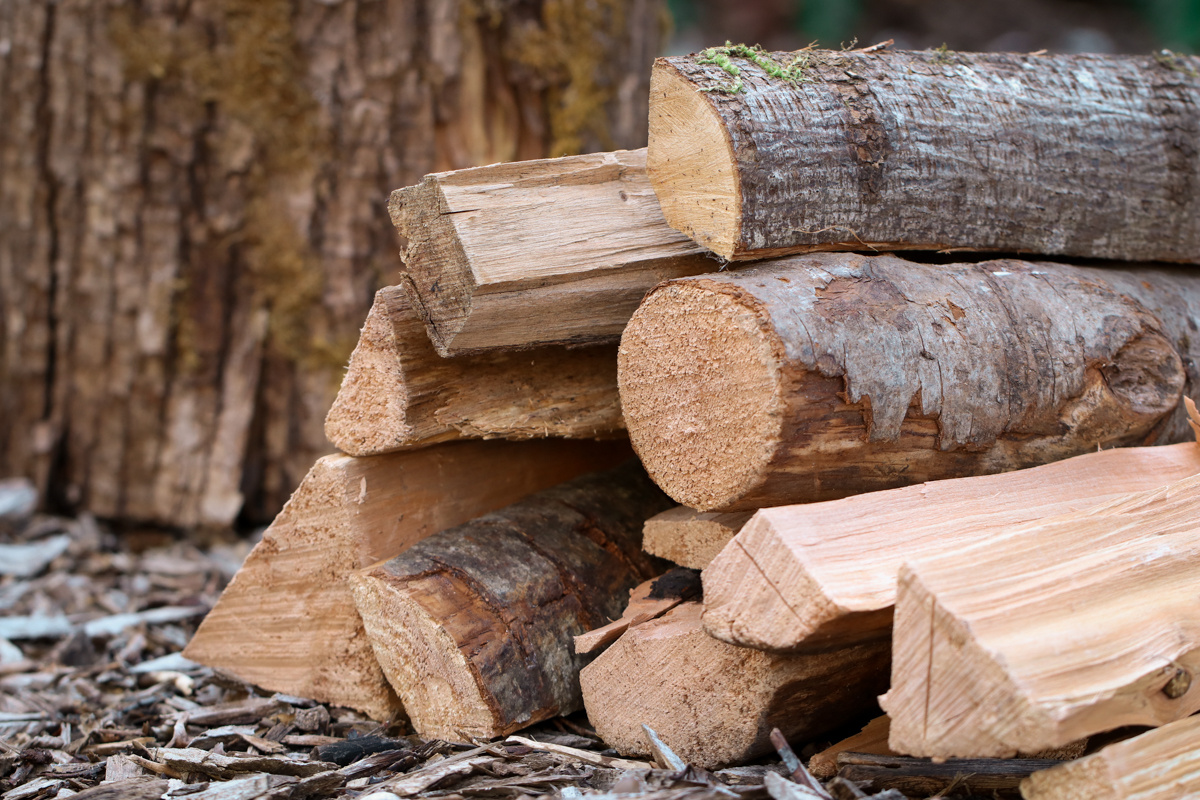
![]() Selecting Wood for Cooking. If you're just looking for maximum flames for an outdoor bonfire, you can burn anything that's non-toxic, including pine, fir, and other softwoods. Fuel for a cooking fire is a little bit different, especially if your burning in an indoor fireplace. You want domestic hardwood, species like oak, ash, hickory, maple, cherry, and birch. And of course, never use treated lumber, plywood, or old shipping pallets that have added chemicals.
Selecting Wood for Cooking. If you're just looking for maximum flames for an outdoor bonfire, you can burn anything that's non-toxic, including pine, fir, and other softwoods. Fuel for a cooking fire is a little bit different, especially if your burning in an indoor fireplace. You want domestic hardwood, species like oak, ash, hickory, maple, cherry, and birch. And of course, never use treated lumber, plywood, or old shipping pallets that have added chemicals.
![]()
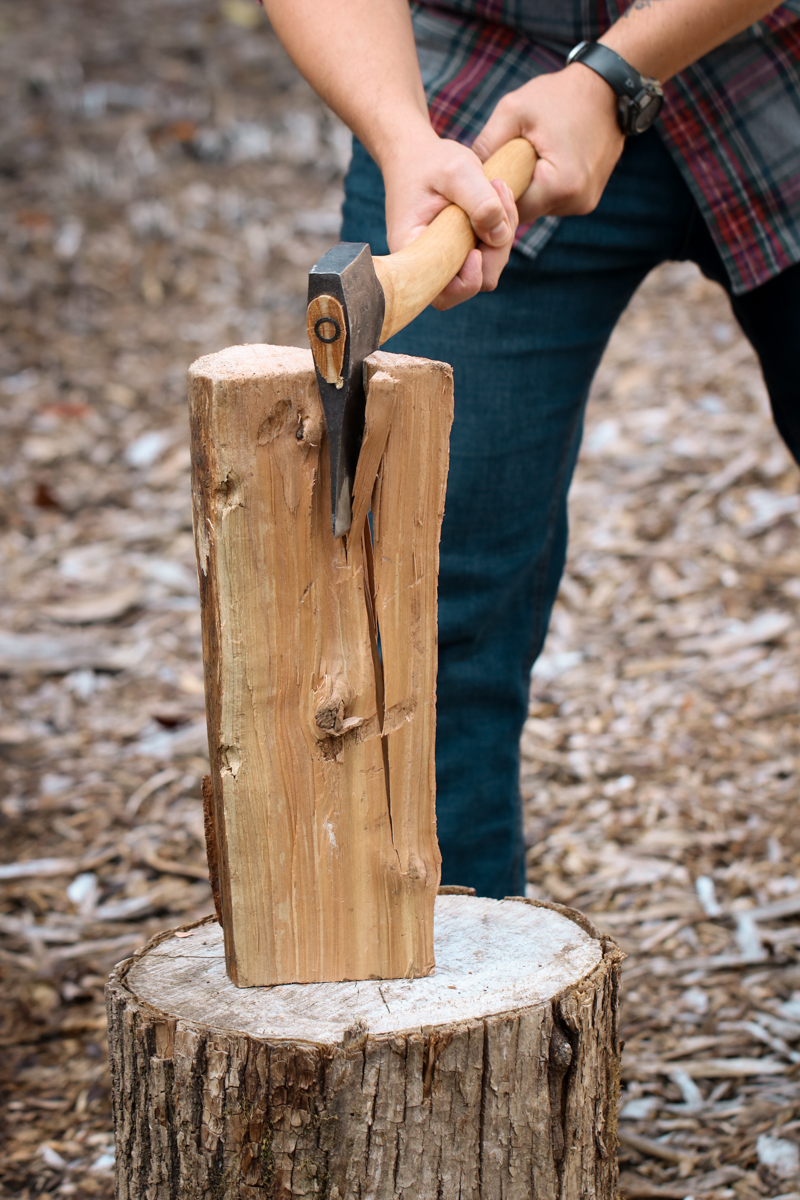
Preparing Your Fire. Using the ExtremeStart Firestarter eliminates the need for tinder, as it burns for a solid twenty minutes, which is more than enough to get your fuel logs going. But before you strike your match, it's best to have your wood ready to go.
![]()
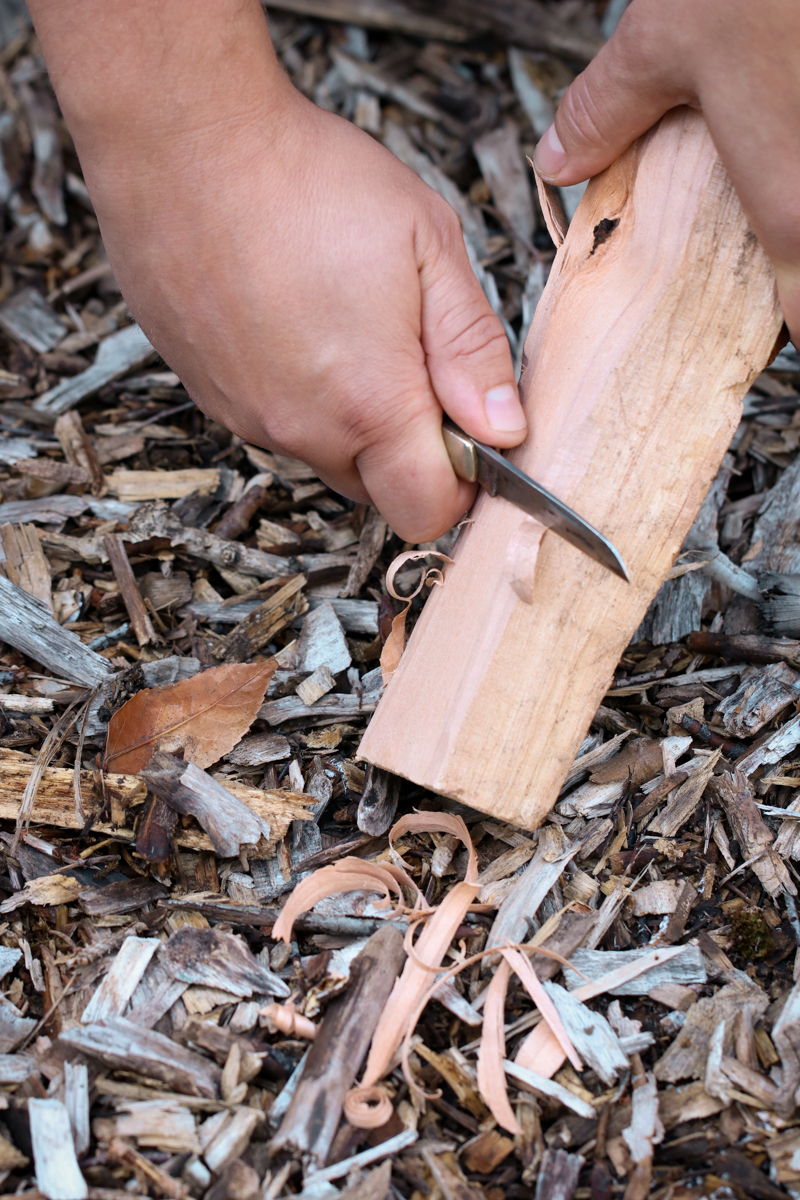
Kindling - these small pieces of wood, from the size of a pencil to as thick as your wrist, help to generate the heat that helps larger logs catch fire. The easiest way to start is just to use a pocket knife or small ax to rive the wood along its grain to create smaller pieces that will easily burn .
Fuel - The dry, seasoned wood that will produce the heat. While a huge log is awesome for producing flames, the goal of a cooking fire is about getting to coals as quickly as possible. A large pile of small wood will produce a coal bed much quicker than a small pile of large wood. So, bust out that ax.
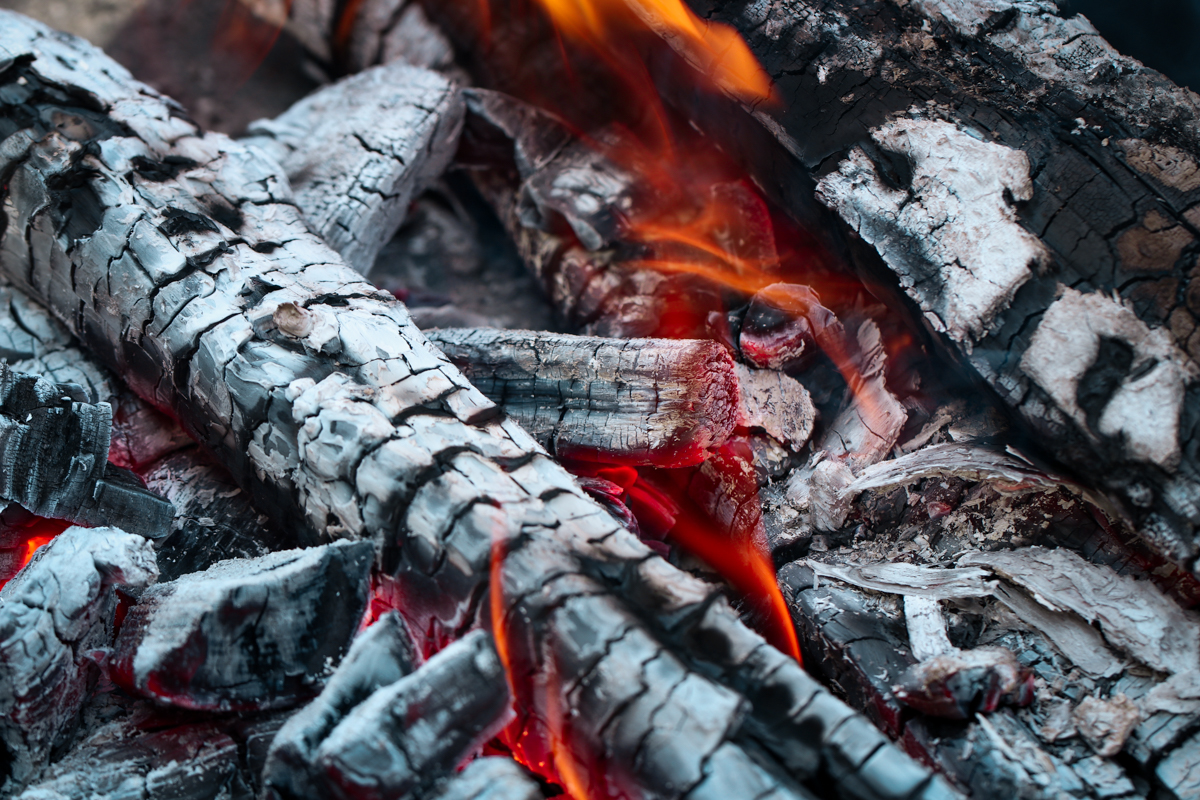
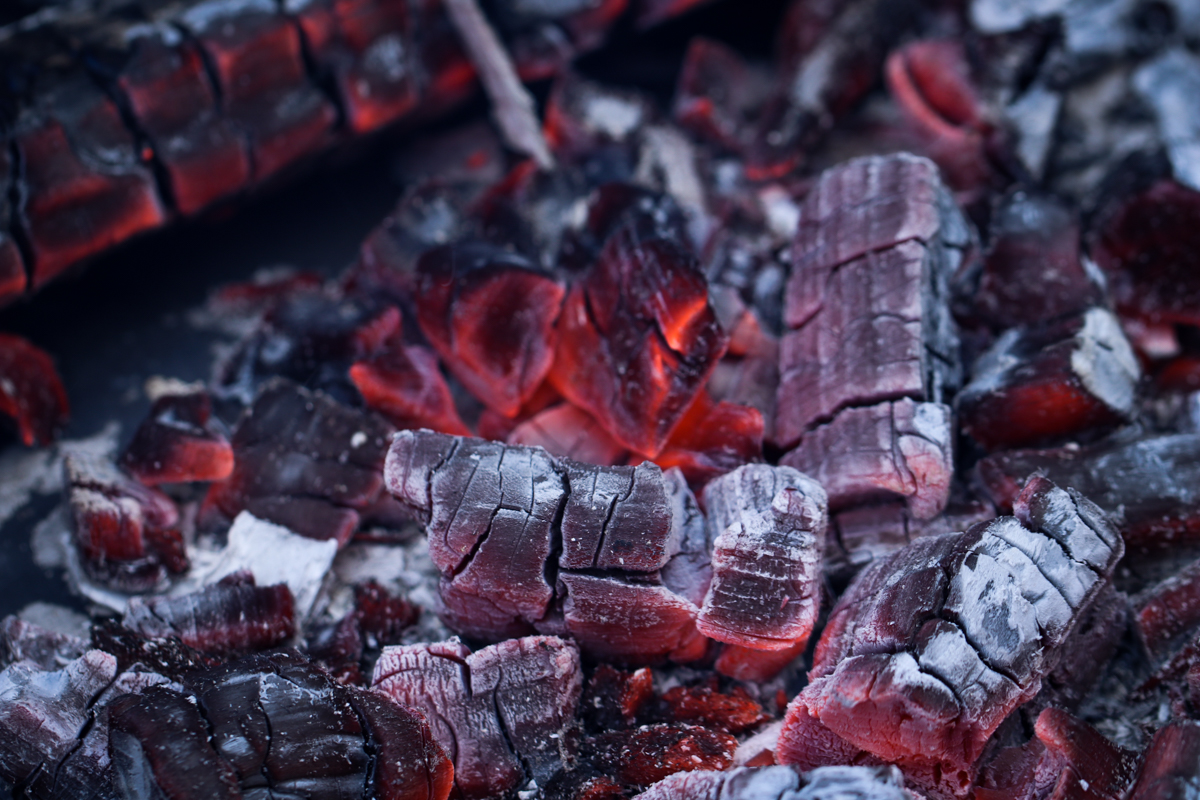
Never Cook Over Flames. Only Coals. As fun as roasting something on a stick in a bright orange flame can seem, cooking should happen over glowing red coals. They're more consistent, and won't produce the acrid smoke that can give the food harsh, off-tasting flavors. You'll control the heat by adding or removing coals.
![]()
A Multilevel Fire Works for Almost Everything. By arranging your coals with a variety of heat zones, you can make sure your food gets as browned as you want it (and not a bit more), while guaranteeing the inside is cooked through. This is especially important when cooking over a long period of time, such as stewing, braising, or baking. You don't need to build the fire to account for this, but once your coals are established, move them around to create hot, medium, and low zones.
Methods of Cooking Over a Open Fire
A wood fire is an extremely versatile way to cook almost any food and actualized it to its most delicious self. Searing a steak, braising a pot of beans, and baking biscuits all require a different type and intensity of heat. Thankfully, with the right tools, you can create whatever environment works best.
![]()
The cast iron skillet is a campfire's best friend. It can be placed directly on coals or on a grill grate and heats evenly for searing, sauteeing, and pan-roasting and frying. In this way, the fire is most like using a skillet on your range for direct heat cooking.
The dutch oven is best for moist cooking methods like boiling, braising, stewing, simmering, and some baking. It retains heat very well, and the lid can be used to control evaporation and condensation. The handle also makes it great for suspending over the flames, cowboy-style, for controlling heat levels.
A camp oven is variation on the dutch oven with two important features: it has been cast with three legs to raise the bottom of the pot off of the direct heat. It also features a flat, rimmed lid that allows you to place coals on top of the cooker as well. Together, this create an even source of convection for baking and slow roasting.
Many dishes can be prepared in either form of oven, but a flat-bottomed dutch oven can be set on any surface, such as a burner, indoor oven rack, etc, so it's a more versatile investment.
![]()
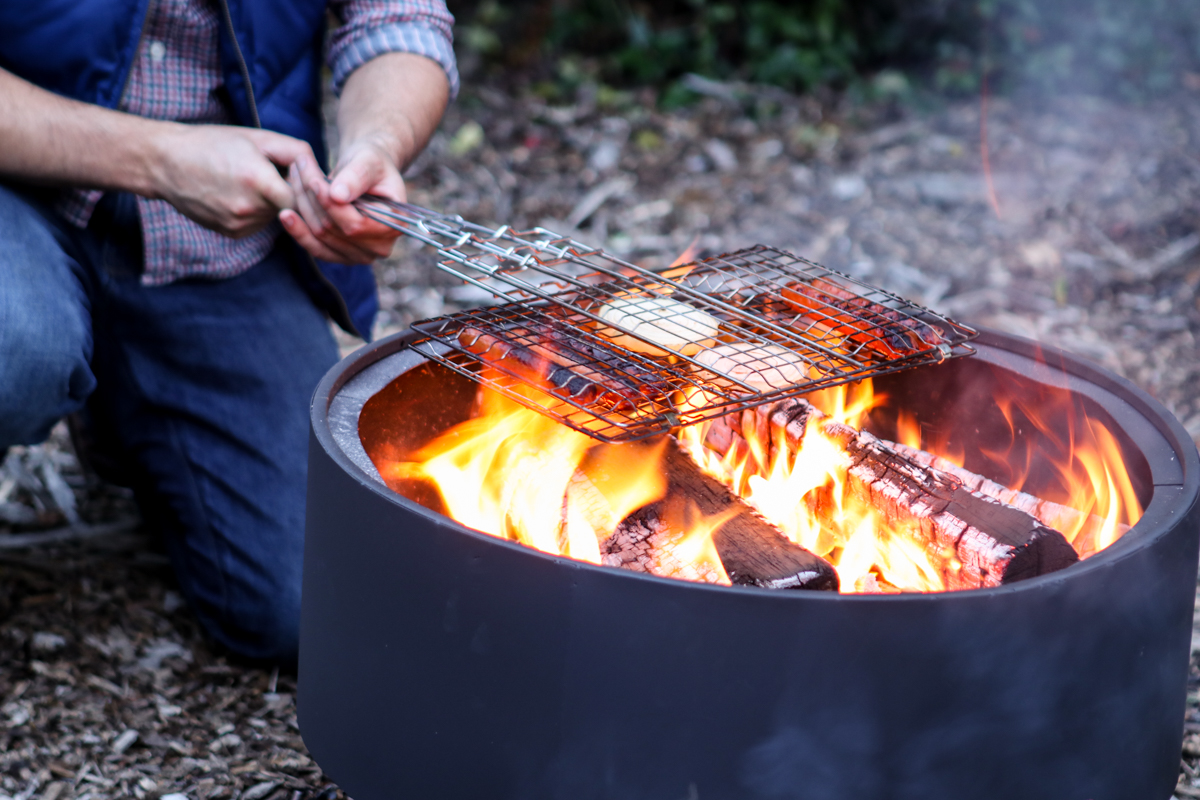
A grilling basket is an excellent way to cook solid, flat foods like hamburgers, hot dogs, fish, and vegetables. The long handle can be held by hand or rested on the fire ring, and its double sided design secures the food, guaranteeing you won't have to sacrifice anything to the flames.
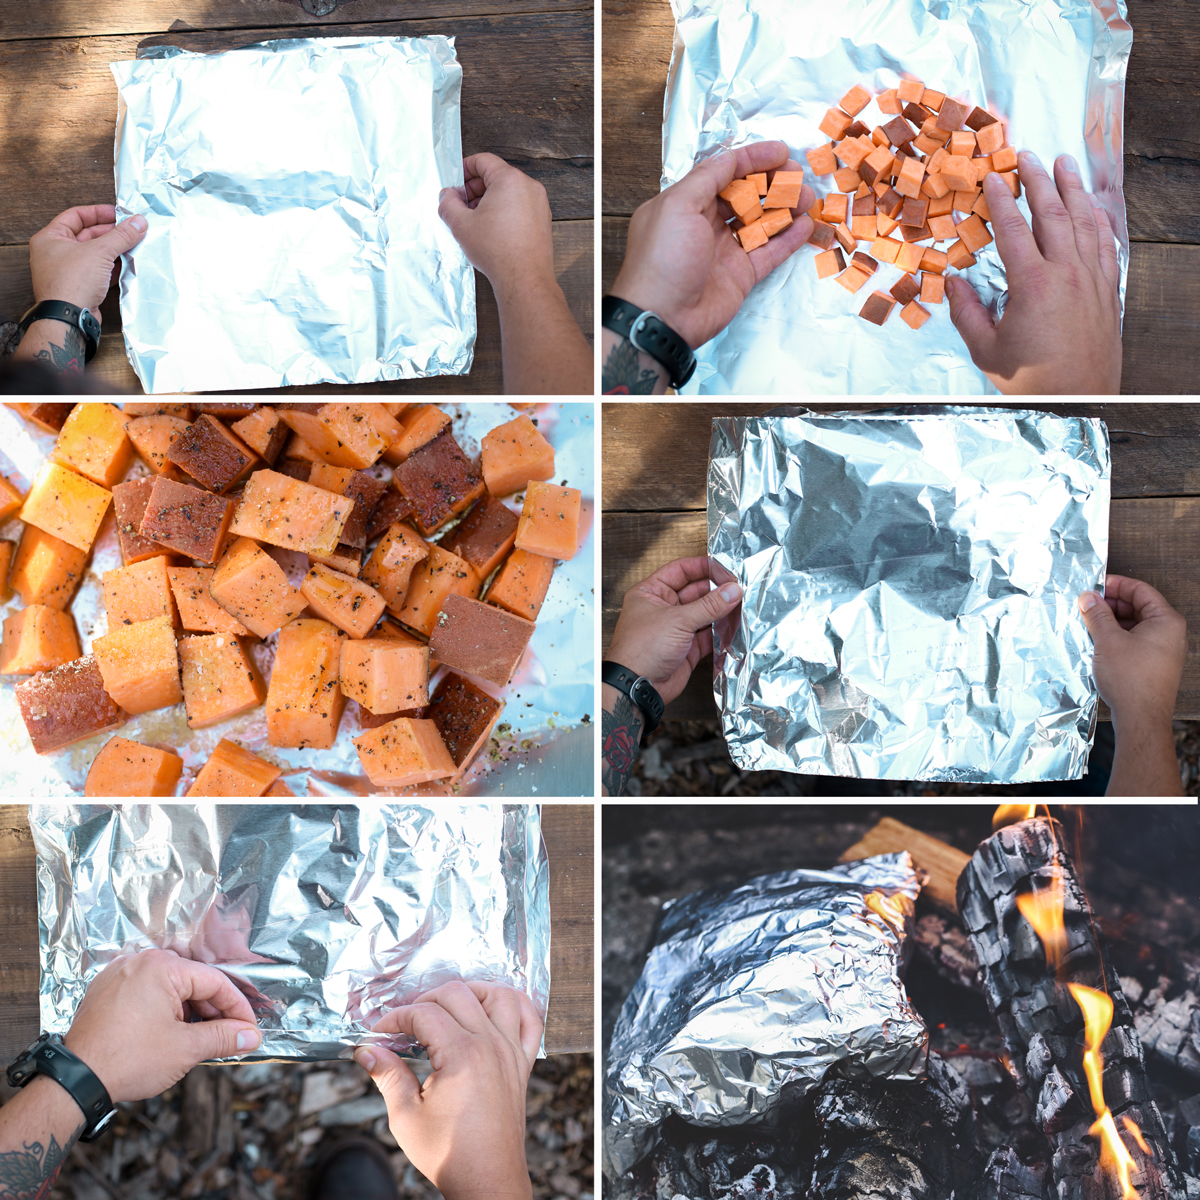
The hobopack method of cooking involves create a packet of aluminum foil that can be placed on the outside of a fire for indirect, high heat cooking. The food inside is cooked via steam roasting, and it's the perfect way to cook vegetables and sides with little attention while you focus on the main event.
![]()
To make one, place a double layer of heavy-duty aluminum foil on your surface. Place the food in the center, and add a bit of oil and season with salt and pepper. Then, place a second double layer of foil on top of the packet, and fold and crimp in the edges to make an air/liquid tight environment. Place it on the edge of your fire, flipping frequently with tongs.
![]()
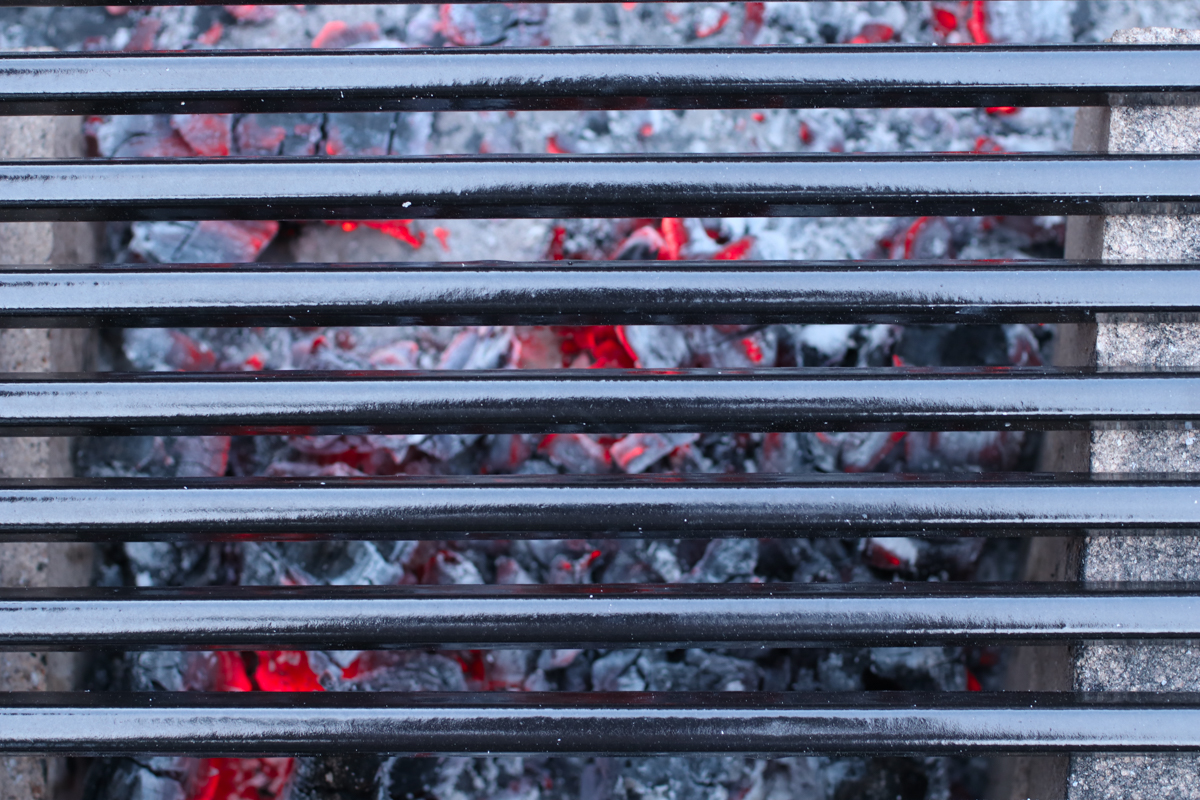
Building a Grill for Wood Fire Cooking
You can buy an adjustable grill for your fire pit or indoor fireplace. Known as a Tuscan grill, these featured handled grates that sit on a tiered rack to allow you to choose a specific height for intensity of heat. They're great, but they're expensive, and take up a lot of space to store and transport.
![]()
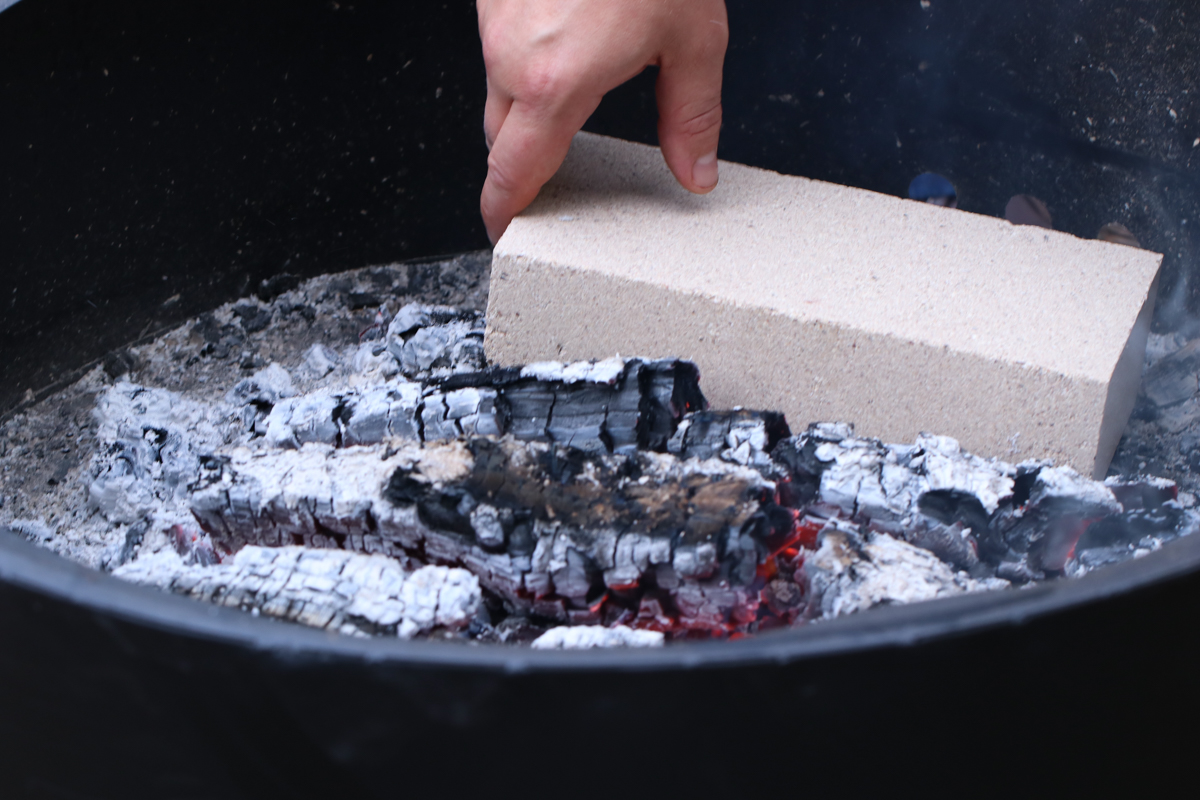
A more simple solution is to build your own grill using a replacement grill grate from the hardware store and a collection of firebricks. These cost less than $2.00 a piece, and can be stacked and turned on either side to create the perfect height. They're also useful for a variety of grilling and smoking tasks, and can be cut with a circular saw and specialty blade. I bought ten of these from a masonry supply store years ago, and I use them all the time.
![]()
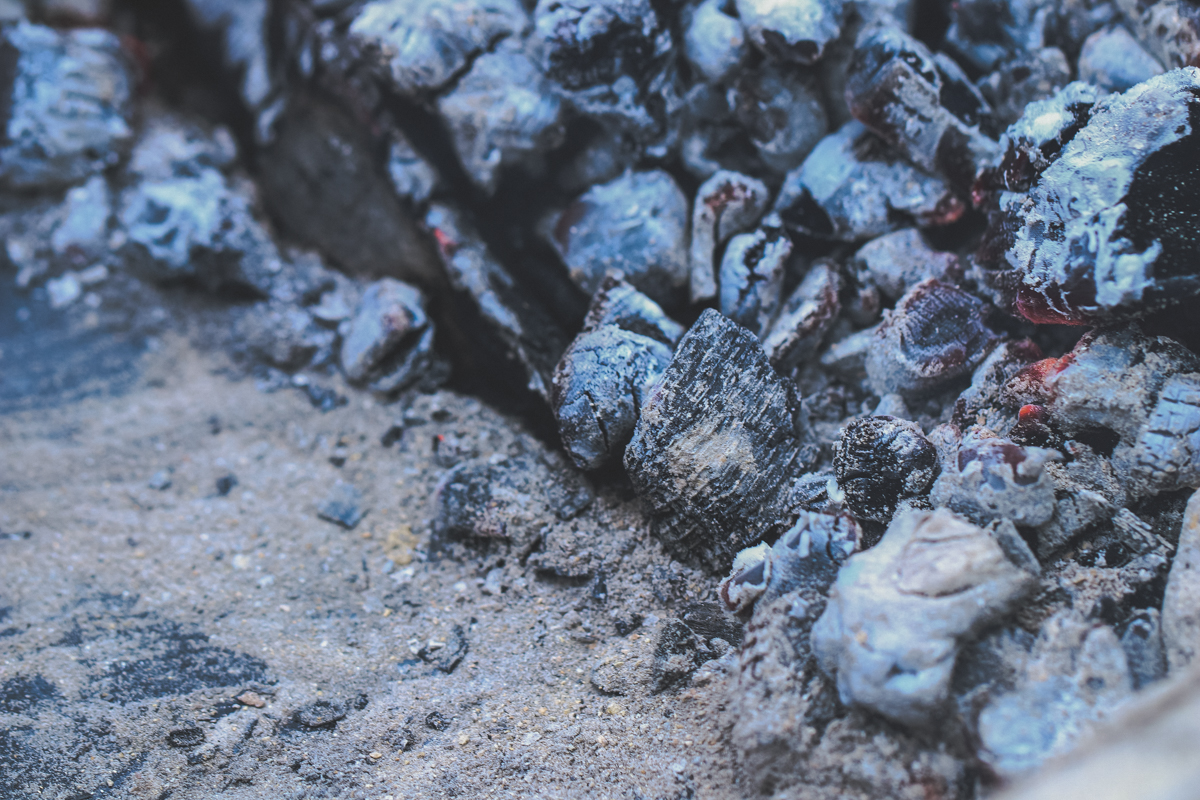
Ash is Essential
Ash is by-product of burning wood, and it's also an essential component in maintaining your fire. Once your coal bed is established, surround it with a layer of ash around the outside. This restricts combustion, reducing the likelihood of flames, and protects your coals from burning out too fast. Seriously, try it. Your coals will last nearly twice as long.
![]()
Intentional Leftovers: Don't Let All That Flavor Go to Waste
A fire has a long life. Once the high heat has burned out a bit and you've cooked your meal, it's time to use the remainder of the fire to live its second life as a leftover maker. It has to cool down anyway, so you might as well use that smokey goodness to make tomorrow's dinner taste extra awesome.
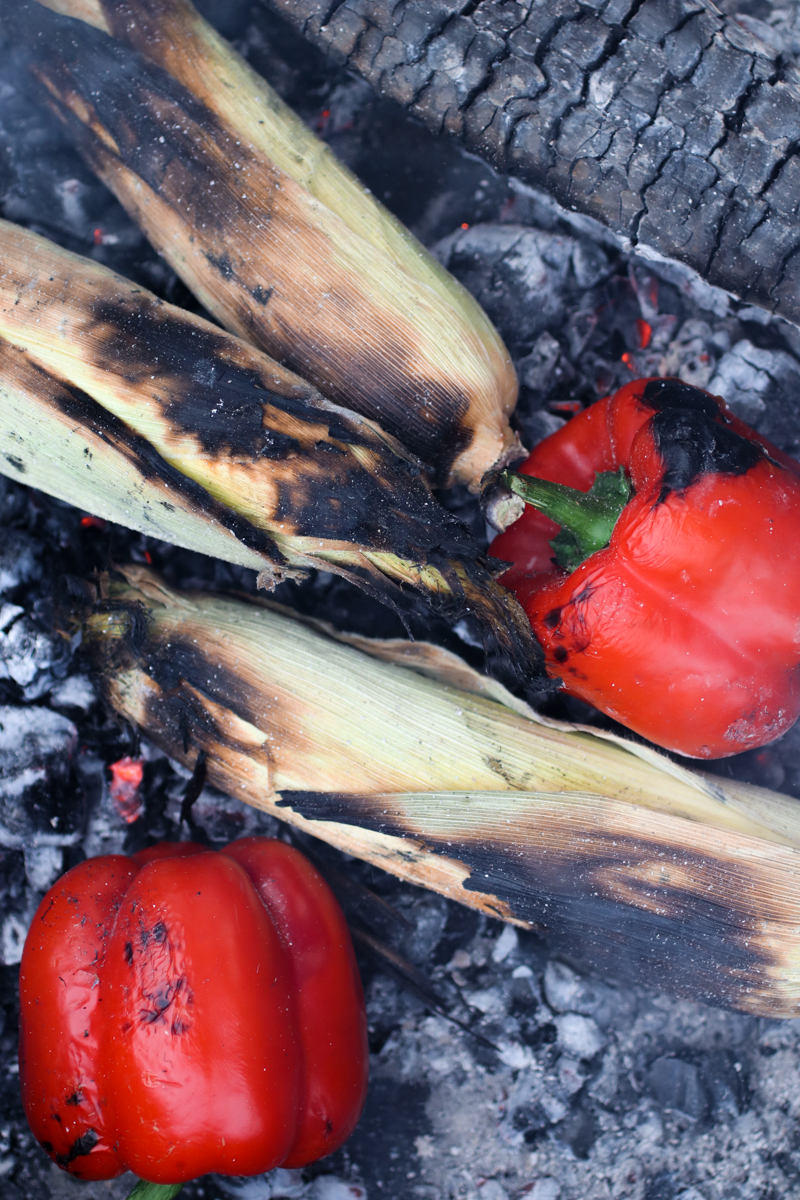
The obvious choice here is vegetables, which don't need to be cooked all the way through to be safe to eat. (You can finish them via indoor cooking methods if you run out of BTUs.) Plus, most vegetables have a protective outer layer built-in that allows them to be placed directly in the coals.
![]()
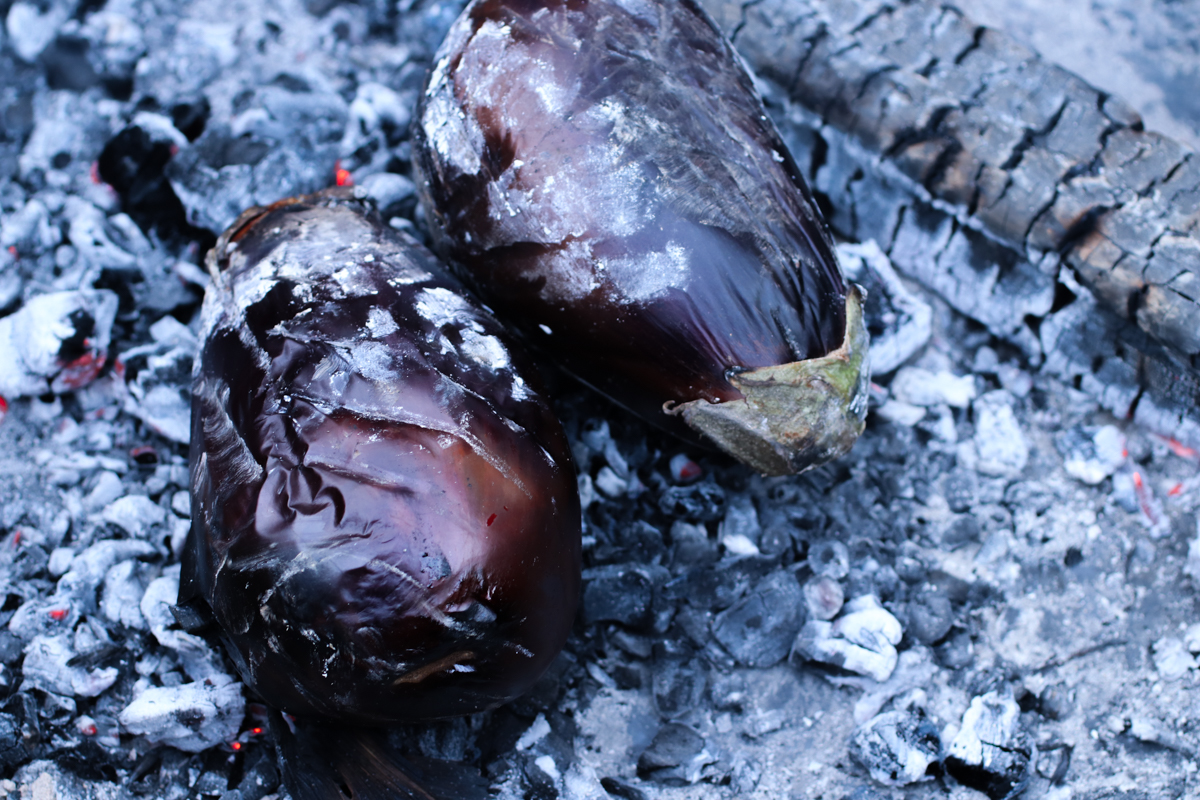
I never let a fire (or charcoal grill) cool down without throwing two things in the coals: whatever onions and shallots I have on hand, and whole eggplant. Once you've had charred eggplant cooked until the bitterness is gone and it collapses on itself, you'll never want it another way again. (And if you think you don't like eggplant, this method will actually convince you). The results are super flavorful smoke paste, and its amazingly versatile stuff: spread it on flatbread, mix with garlic and tahini to make baba ghanoush, extend some leftover cooked meat to make an amazing (and healthier) taco filling, or mix it in with your scrambled eggs in the morning.
Also awesome cooked directly in coals: ears of sweet corn, butternut and acorn squash, bell peppers, potatoes and sweet potatoes, and whole heads of garlic. Mushrooms are amazing as well, and a grilling basket will keep the ash off the surface.
Campfire Cooking Tool Kit:
- Long handled, heavy-duty spring loaded tongs. Two sets are even better, and there's no reason to buy anything other than Oxo.
- Instant Read Thermometer. A simple digital one works fast and helps you monitor cooking speed for the perfect outside crust and spot-on internal temp.
- Your beverage of choice. Coffee in the morning, beer anytime after noon.
- High heat gloves. Those made for welders are surprisingly useful for cooking.
- Long handle spatula. Turn, turn, turn, and keep your hands away from the flames.
- Heavy-duty aluminum foil & disposable aluminum roasting pans. The second most important cooking vessel after a cast iron skillet.
- Some way to rake the coals. An ash shovel from your fireplace tools works great, as well as a handheld steel garden hoe.
- Fire Bricks. Create custom cooking surface and insulation & heat-retention all in one go
The Recipes: Let's Cook Something.
Okay, now that you have you coal bed bright red and glowing, it's time to eat.
![]()
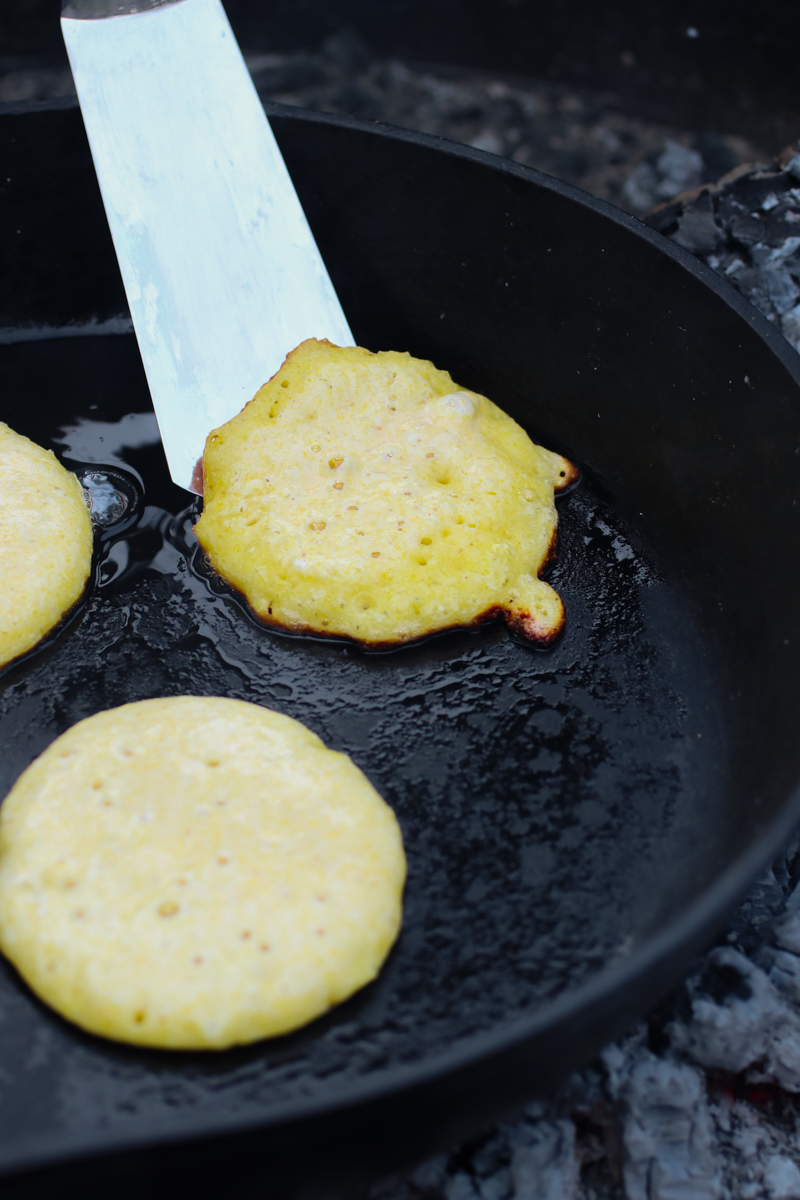
Cornbread Johnny Cakes
Cooking technique: Direct heat, pan-frying
Cooking vessel: Cast iron skillet
Except for fried chicken, there's no better expression of what a cast iron skillet can do than a pan of cornbread. Baking over the open fire is possible, but an advanced technique, so our vote: make it easy on yourself, and just cook up your cornbread batter as johnny cakes. These savory bites of deliciousness were originally known as hoe cakes, as workers would cook them in the field on an actual hoe, holding the irons of their farming tools over a fire.
The cornbread recipe is the same no matter how it's cooked, and if you wanted to make it easier with a box of Jiffy mixed up, no one here would judge you.
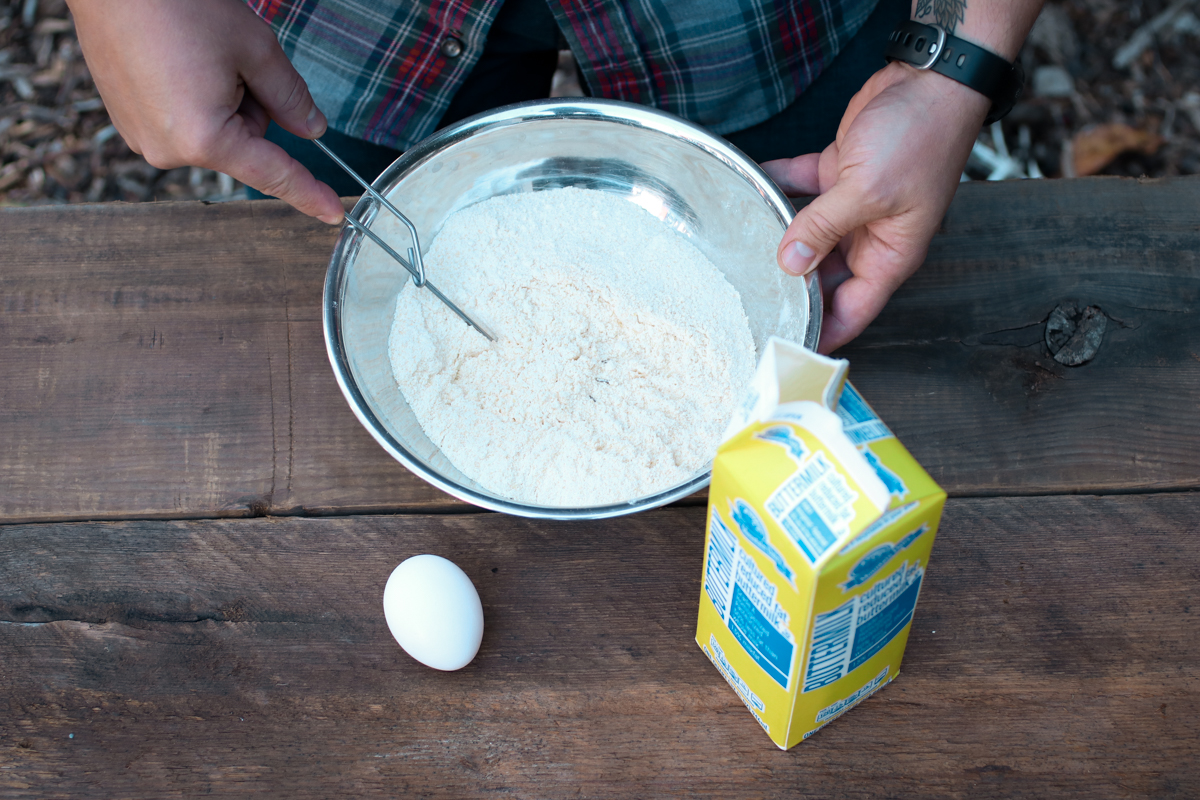
Ingredients:
- 1 cup yellow corn meal
- 1/2 cup all-purpose flour
- 1/2 teaspoon kosher salt
- 1 tablespoon white sugar
- 1/4 teaspoon baking power
- 1/4 teaspoon baking soda
- 3 tablespoons butter, or equal parts butter and bacon drippings
- 1 egg
- 1 cup milk or buttermilk
![]()
Instructions:
Mix all the dry ingredients together. If camping, place them a sealed container and mix in the wet ingredients just before cooking.
Place the cast iron skillet over a medium fire to heat up. Warm the butter and bacon fat in the pan, and then add to the dry ingredients. Mix in the egg and milk and stir to combine.
![]()
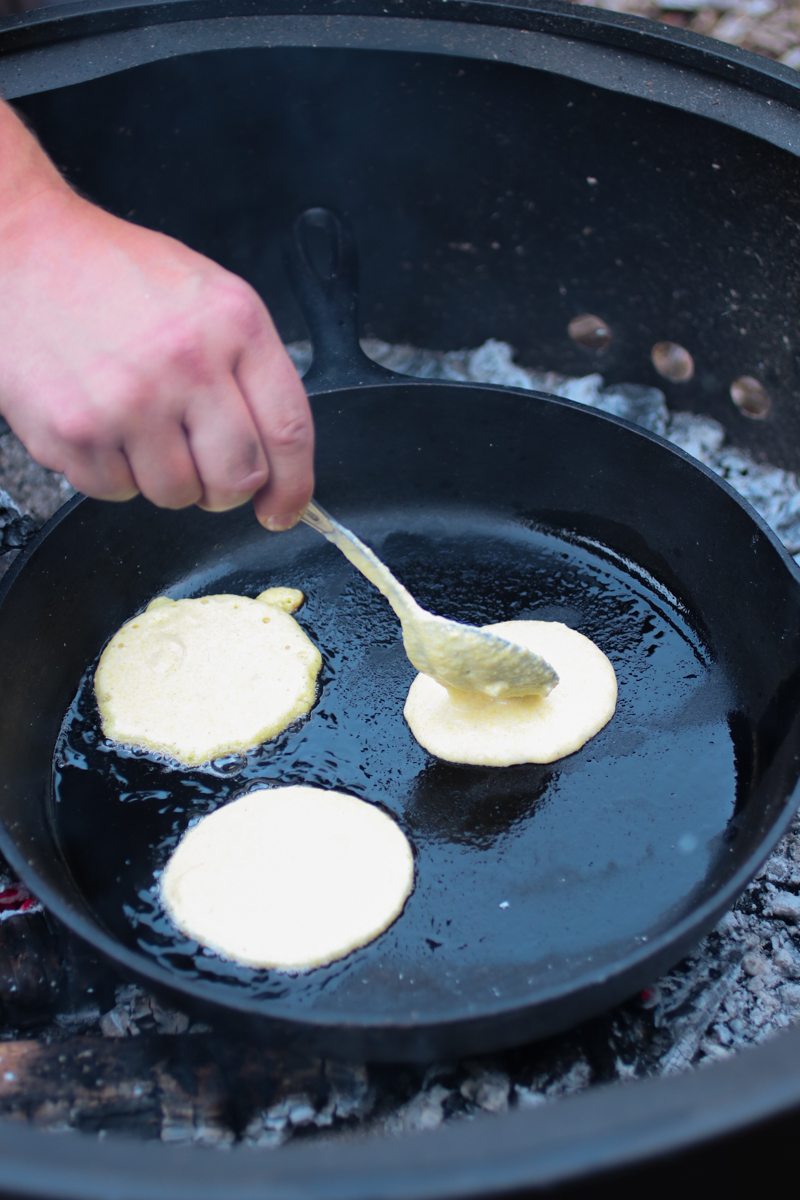
Once the cast iron skillet is heated through, add a bit of oil or more butter, and spoon about 1/4 cup mixture onto the surface to make a johnny cake about 2 1/2" wide. Cook on the first side until you see the bubbles from the chemical leaveners start to pop up all over the surface, about 2-3 minutes. Flip, and cook the second side for 1-2 minutes until cooked through.
![]()
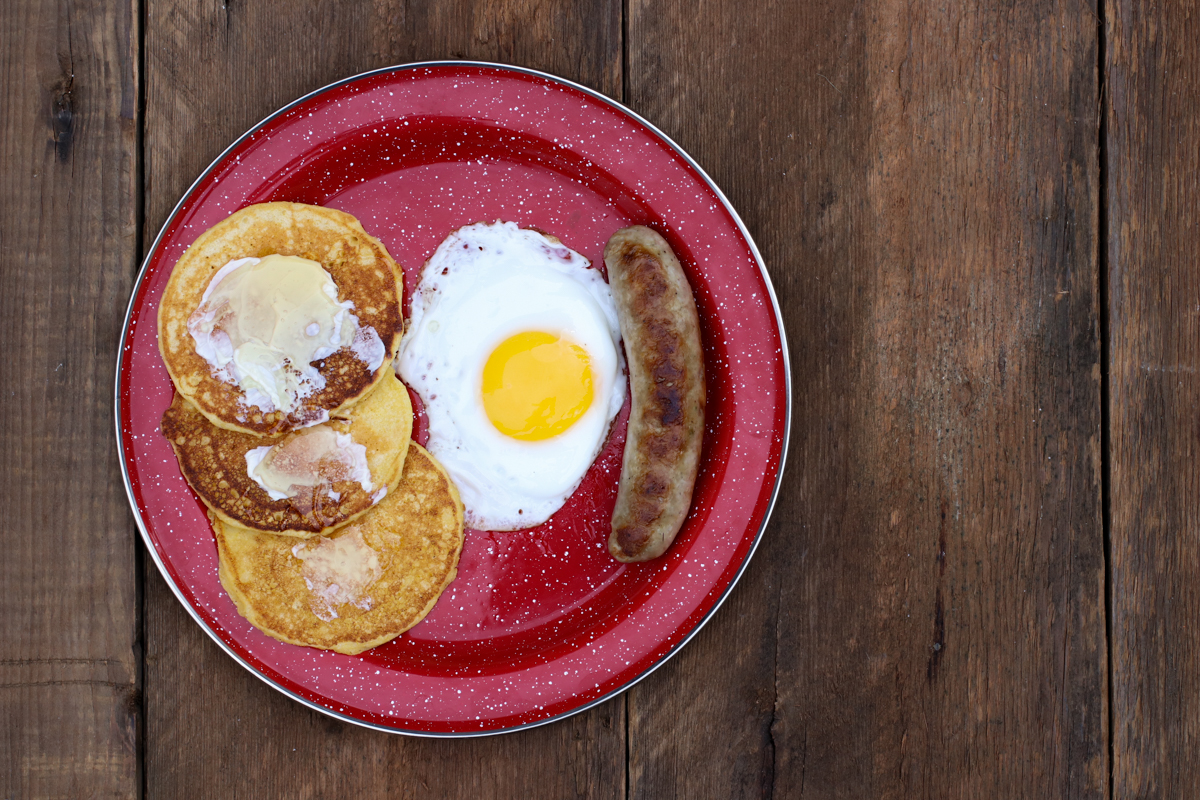
Top the hot cakes with butter and syrup/honey/molasses/sorghum, and serve with sausage or bacon (or both), some fried eggs, or last night's leftovers.
![]()
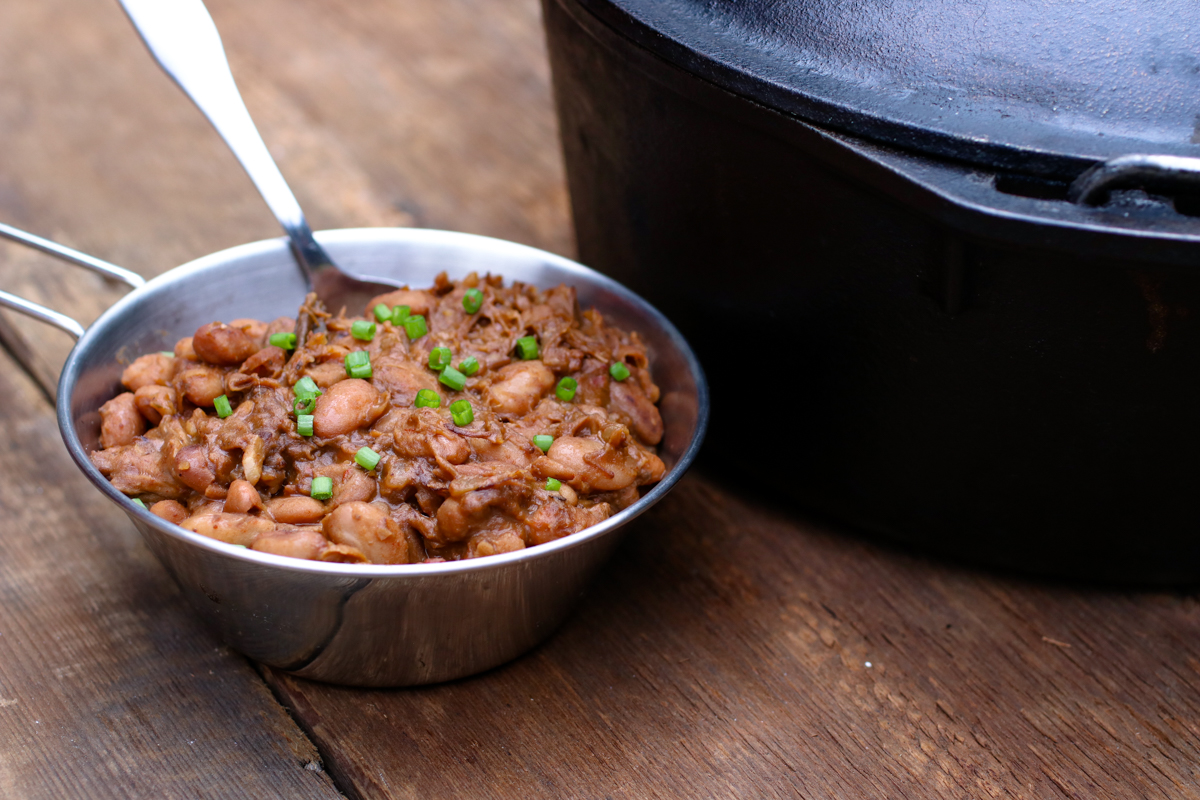
Braised Beef with Cowboy Beans and Chiles
Cooking technique: Low and slow
Cooking vessel: Dutch oven
This is my favorite way to prepare a pot of beans. It has lots of savory, baked bean-like flavor without the extra sweetness, while using beef instead of pork also recalls a tasty bowl of chili. Cooked low and slow, it's immensely satisfying, and tastes amazing with leftover johnny cakes from breakfast.
Ingredients:
- 2-3 pound beef chuck roast, cut into 1 1/2" strips
- 3 cups diced yellow onion, diced (about one and half large)
- 6 garlic cloves, minced
- 2 whole dried ancho chiles or 3 dried New Mexico chiles --OR-- 2 tablespoons ground Ancho chile powder
- 1 1/2 tablespoons ground cumin
- 1 tablespoon dried Mexican oregano
- 1 tablespoon smoked paprika
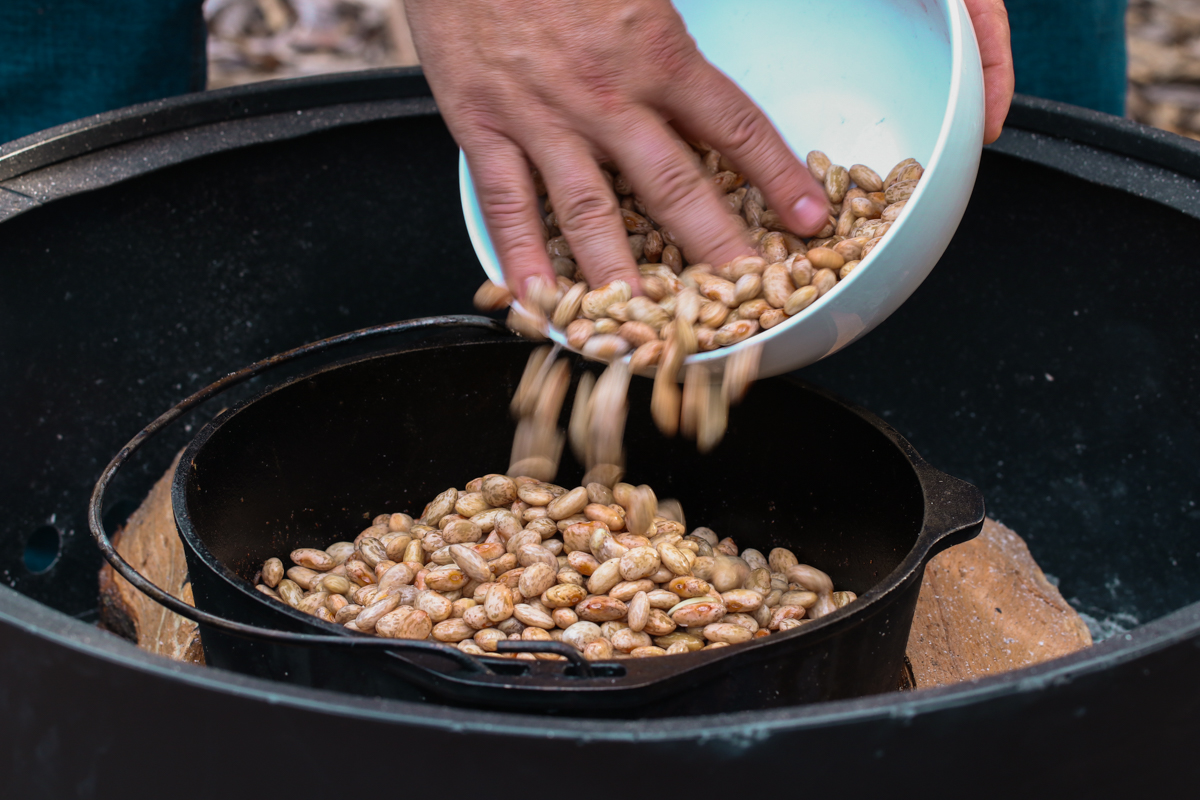
- 1 lb pinto beans, soaked overnight
- 1/2 cup barbecue sauce, plus more to taste
- 1/4 cup ketchup
- Water, salt, and pepper
- Soy sauce or fish sauce (optional)
Instructions:
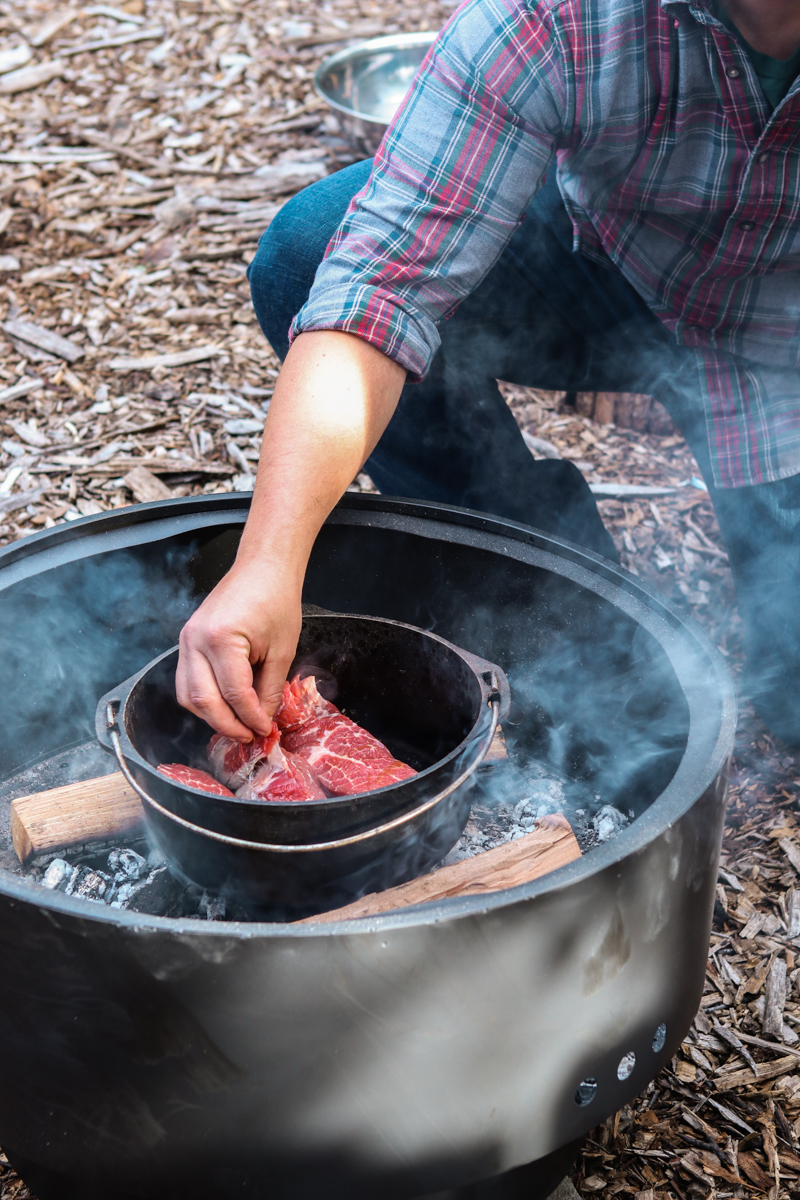
Pile your coals into a pile producing a medium-high heat. (You can hold your hand above it for about two-three seconds.) Place the dutch oven on the coals to heat. Season the strips of chuck with salt and pepper on all sides. Once the cast iron is hot, add a glug of oil, and sear the beef hard until its nice and brown. Flip and repeat on all four sides.
![]()
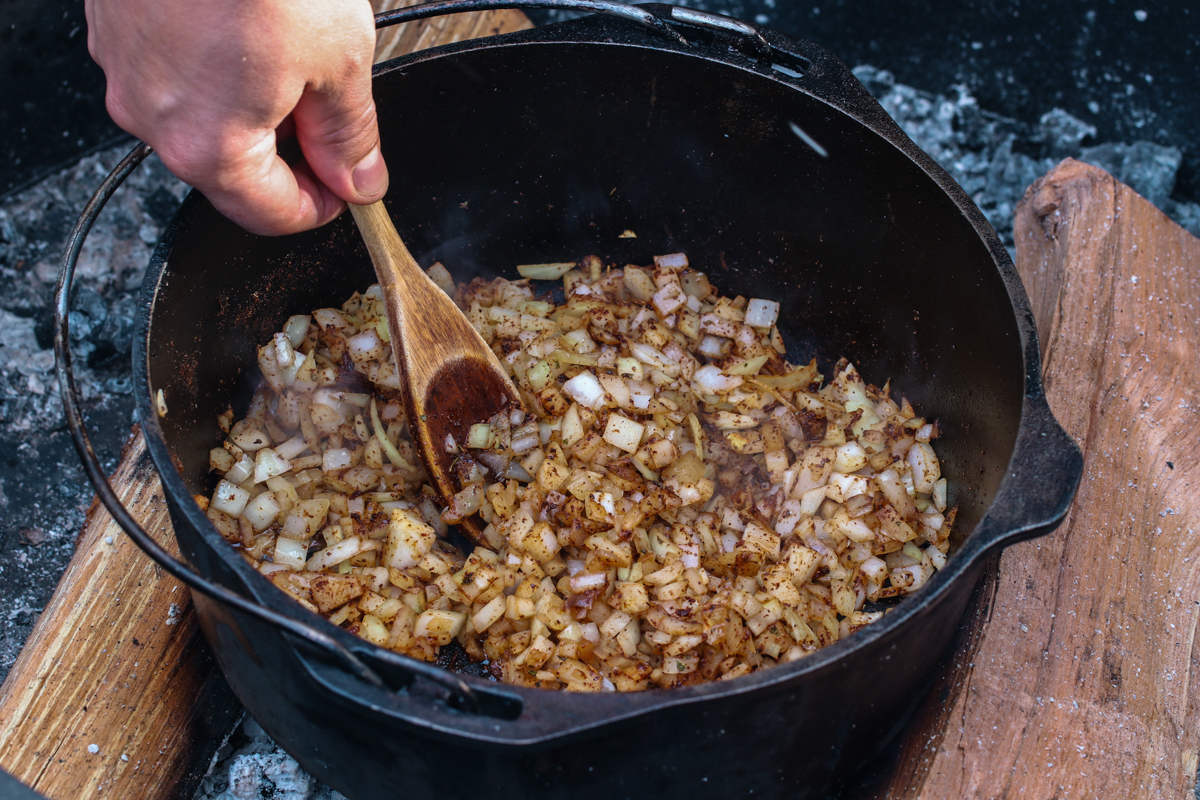
Remove the beef to a plate, and saute the onions in the drippings until translucent. After two minutes or so, add the dried spices and chile powder if using. When the onions are almost done, scoop in the minced garlic, stirring occasionally.
Place the beef back in the pot, and if using whole chiles, toast them briefly by holding them in tongs over the fire until they get bubbly and pliable, about 15 seconds per side. Put the chiles in the pot and add enough water to cover the surface of the beans.
![]()
Spread out your coals with a barrier of ash around the side to maintain a slow simmer - small bubbles every second or so. Put the lid on and cook for two hours.
About an hour before you think everything is done, add the barbecue sauce and ketchup. If the solution is very wet, take the lid off and allow the water to boil away. Cook until the beans are tender and the meat shreds up.
![]()
Removed the chile stems, and season to taste - if you're at home, a splash of soy or fish sauce will lend some extra umami. If you're in the backcountry, salt will do just fine.
![]()
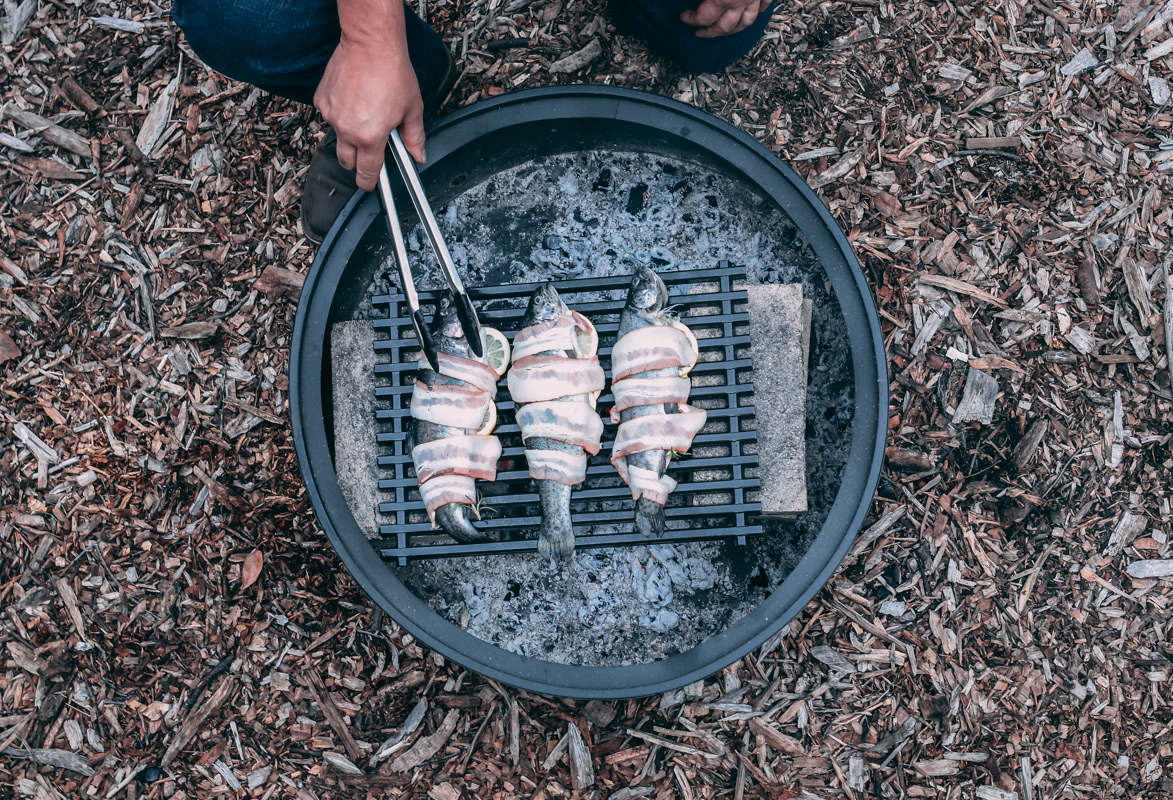
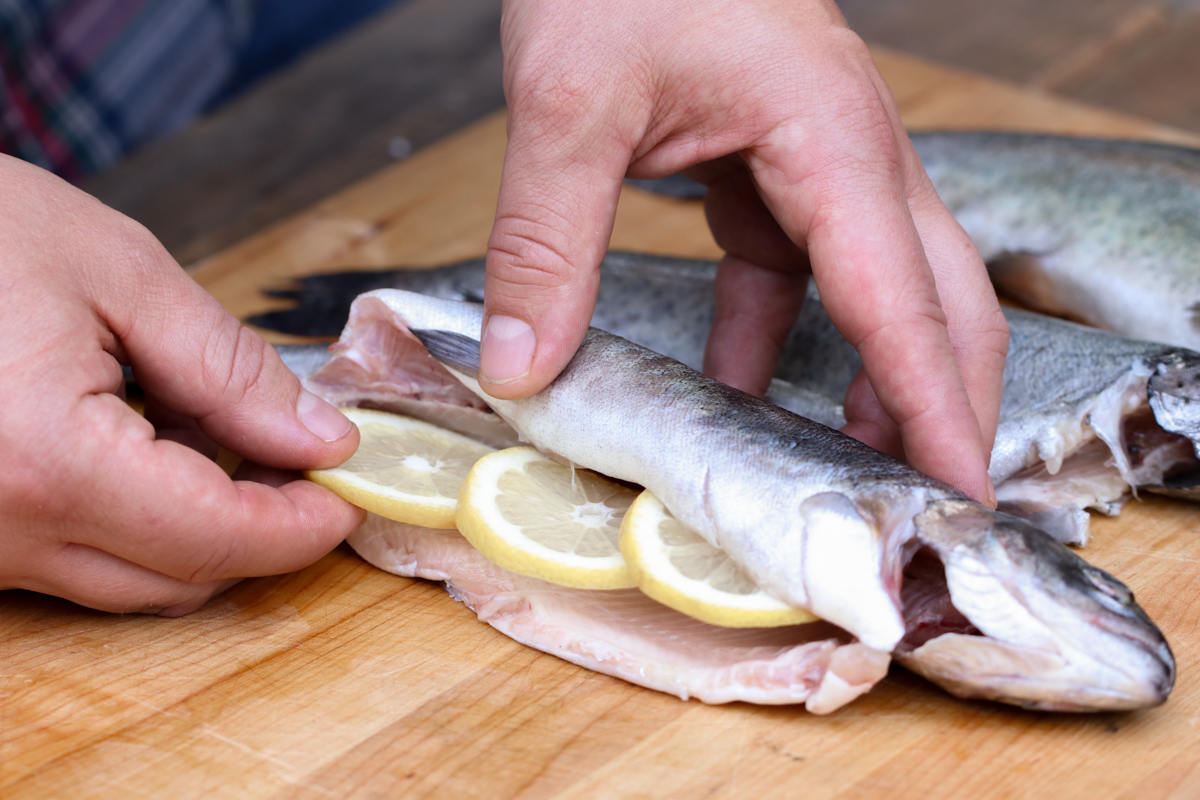
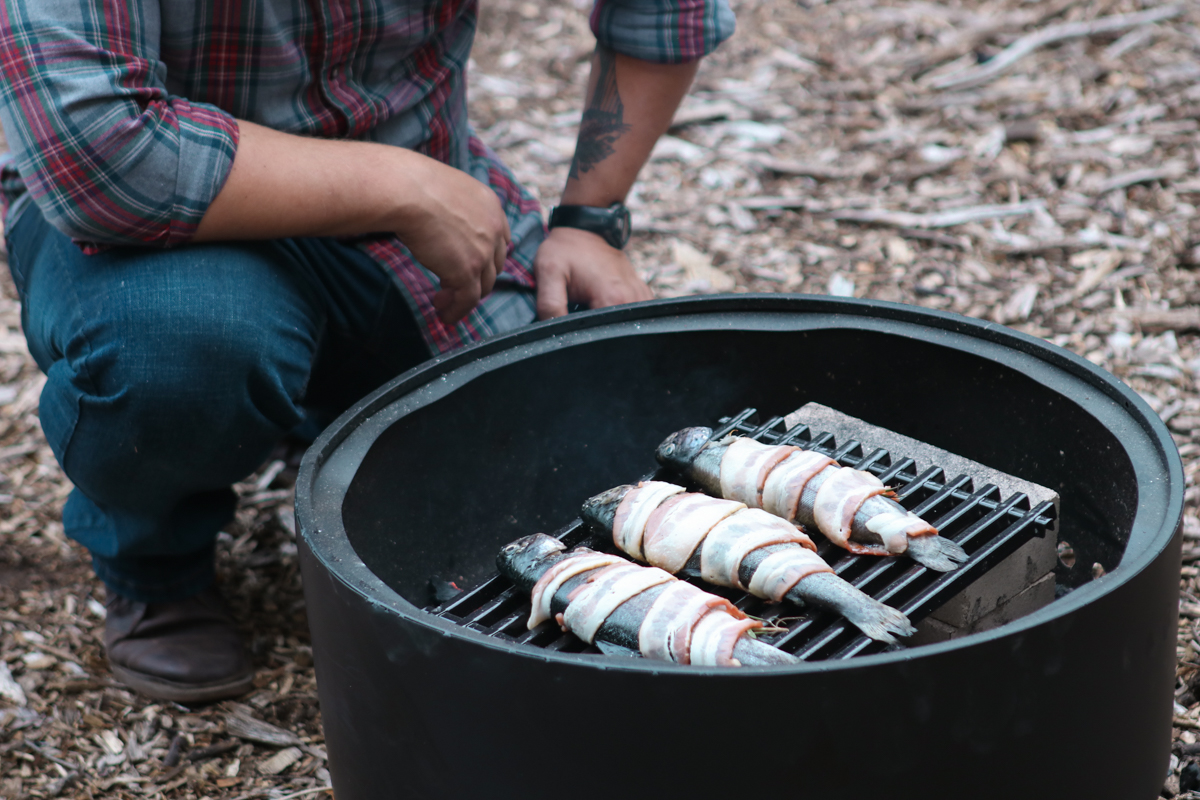
Grilled Whole Trout with Bacon and Herbs
Cooking technique: High heat grilling
Cooking vessel: Grilling grate and fire bricks, or steel grilling basket
If you're lucky enough to have caught your own fish earlier in the day, this is the best way to make them shine. But you can find cleaned and boned whole rainbow or brook trout at fish markets or a well-stocked grocery store.
Ingredients:
- One whole trout per person, cleaned, scaled, and deboned if you know what you're doing
- Two strips thin-cut bacon per trout
- Thin sliced lemon rounds
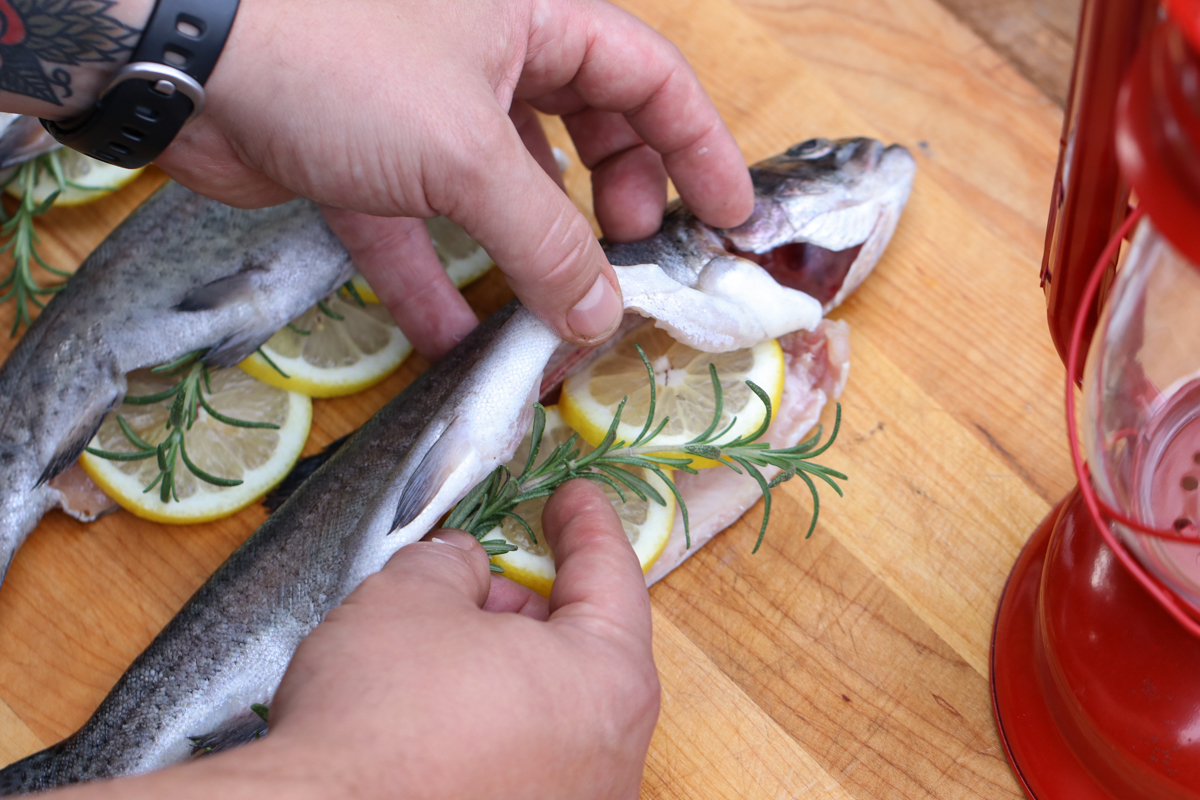
- Whole springs of woody herbs such as rosemary and thyme
![]()
Instructions:
Season the fish with salt inside and out. Place three lemons slices in each belly.
Top the lemon slices with the herbs.
![]()
Then, wrap two slices of bacon around each whole fish, pulling it tight to secure the whole thing into a nice compact package.
Build a hot fire and set up the grill about 6" from the coals. Allow it to heat up, then oil the grates, and lay the fish over direct heat. Cook, without moving, until the bacon starts to crisp along the edges and smells amazing, about five minutes. Carefully flip, and cook four-five minutes more until the bacon is finished cooking.
![]()
Place on a plate, and remove the herb stems and lemon slices. Pick every bit of meat off with your fingers, saving the shoulder and collar for last. (This is the best part). Marvel at how lucky we are to live in a world where nature just makes food like this and we figured out how to catch it.
![]()
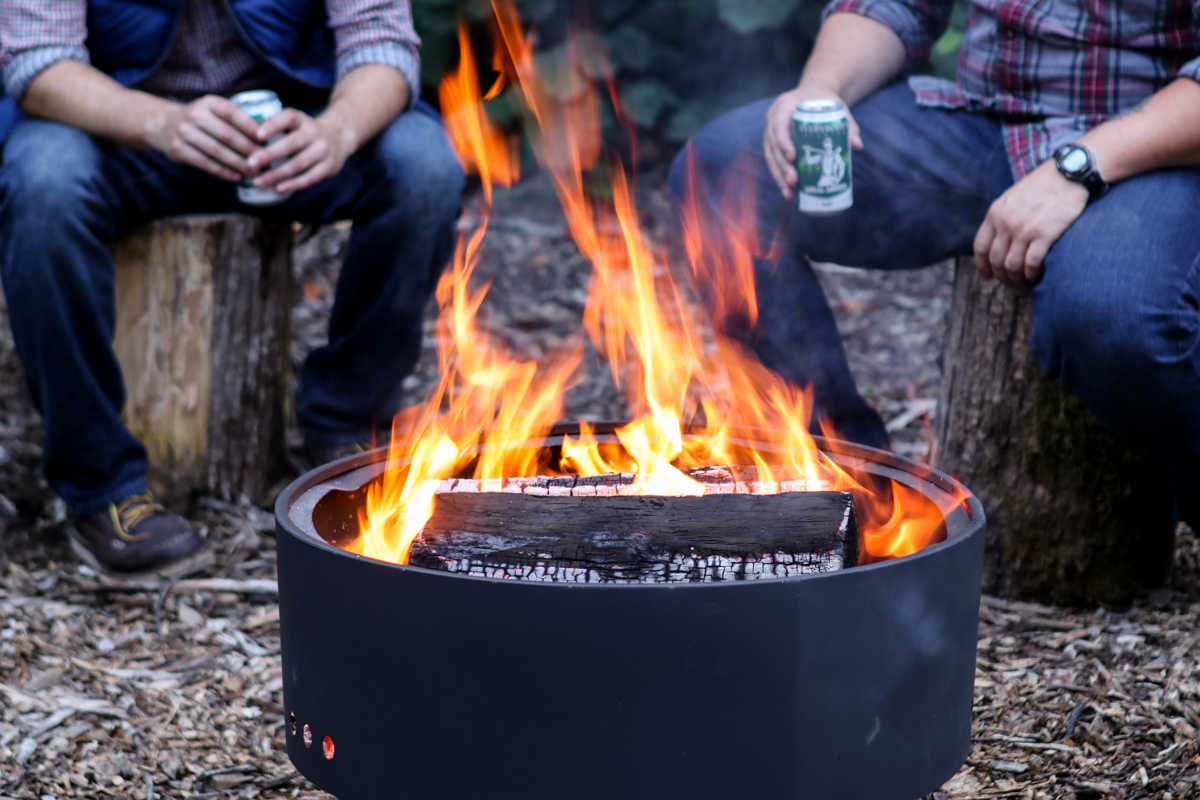
The Final Embers
Whether your camping, cooking in the backyard, or your own fireplace, cooking with wood and flame makes simple ingredients into something seriously special. It turns dinner cooking into hang out time, and if you're having friends over for dinner, it's much less awkward to have everyone sit around the fire than awkwardly stand around in your kitchen while you saute stuff.
![]()
A fire is the source of many things: heat for food, warmth for people, something to stare at an think about life's big questions, and a non-ending supply of cheer. Well, at least until the woodpile runs out.
![]()
This ManMade post was sponsored by Pine Mountain. Thanks for supporting the brands the support ManMade. Learn more about Pine Mountains products on their web site and Facebook page.


 Using a table saw or circular saw, cut your boards to an equal length. I cut each of my boards 15" long. I'm making two cubes, so I cut 8 boards in all.
 Once you've cut your boards, set them aside and grab your angle aluminum.


 Finished! Now, do it all over again until you have enough to handle your entire record collection.


.jpg)


 I've wandered through the Etsy offerings in the past, sometimes for inspiration, sometimes because something interesting has caught my eye. But lately, more and more great ideas are popping up on the handmade-centric site, and they're amazing. Here's a collection of Etsy's wooden offerings that are really worth highlighting.
  1.
1. 
 3.
3. 
 5.
5. 


 9.
9. 


 What's most fascinating to me as a novice leatherworker is seeing how the whole thing is assembled. The design work is clever, and exploring the insides makes me appreciate it even more. The main body is constructed out of a single piece, and the front flap cover tucks inside to support the inner pockets and create the slim back pocket.

 If there was one thing I could change, I wish the assembly was just a half inch wider. While my 15" MacBook Pro fits, it does so just barely, and there isn't any additional room for a protective sleeve. My computer is a few years old, and I know more current models are much thinner and less wide. Also,


 Selecting Wood for Cooking. If you're just looking for maximum flames for an outdoor bonfire, you can burn anything that's non-toxic, including pine, fir, and other softwoods. Fuel for a cooking fire is a little bit different, especially if your burning in an indoor fireplace. You want domestic hardwood, species like oak, ash, hickory, maple, cherry, and birch. And of course, never use treated lumber, plywood, or old shipping pallets that have added chemicals.
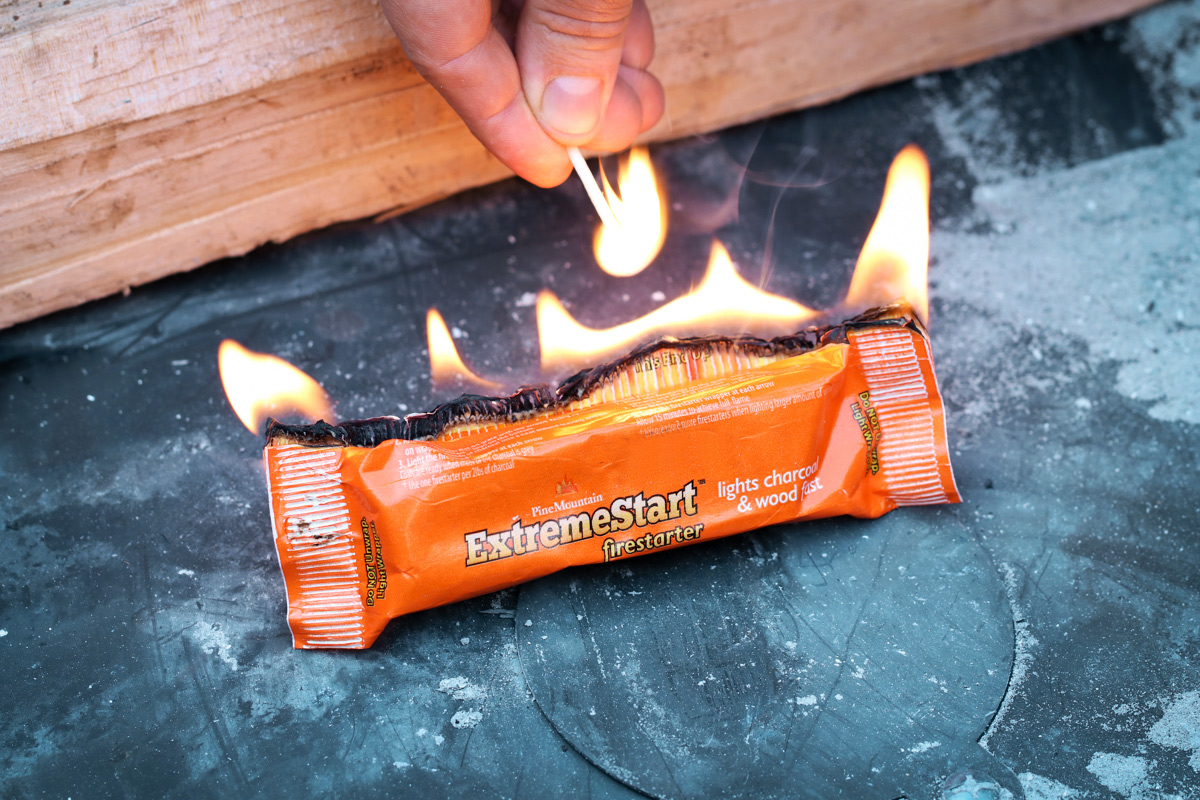


/http://s3.amazonaws.com/manmadediy-uploads-production/photos/22757/shopBottleImage_large.png)


